I am fighting to get time to paint! Last week I was unable to anything for about 10 days because of the dreaded flu. After that it was trying to catch up with assignment marking and the Iris picture.
The only thing that you the reader will be interested in, is the Iris and how that is progressing. My last blog showed you some of my preparation sketches and my planned drawing. After that it was a question of tracing all the sketches that I decided to actually use in the picture. I traced them onto my final art paper using the the technique you will find on this page:gaynorsflora.com/my-tutorials/ The video is called ‘How to trace an image to art paper’. The reason I do it this way is to remove any risk of creating any indentation in the art paper. An indentation tends to collect pigment when using watercolour, or leave a white line if using coloured pencil We don’t want either of these results.
I used the old Fabriano extra white HP, 640 gsm. I am in the lucky in that I have enough old stock to last me!
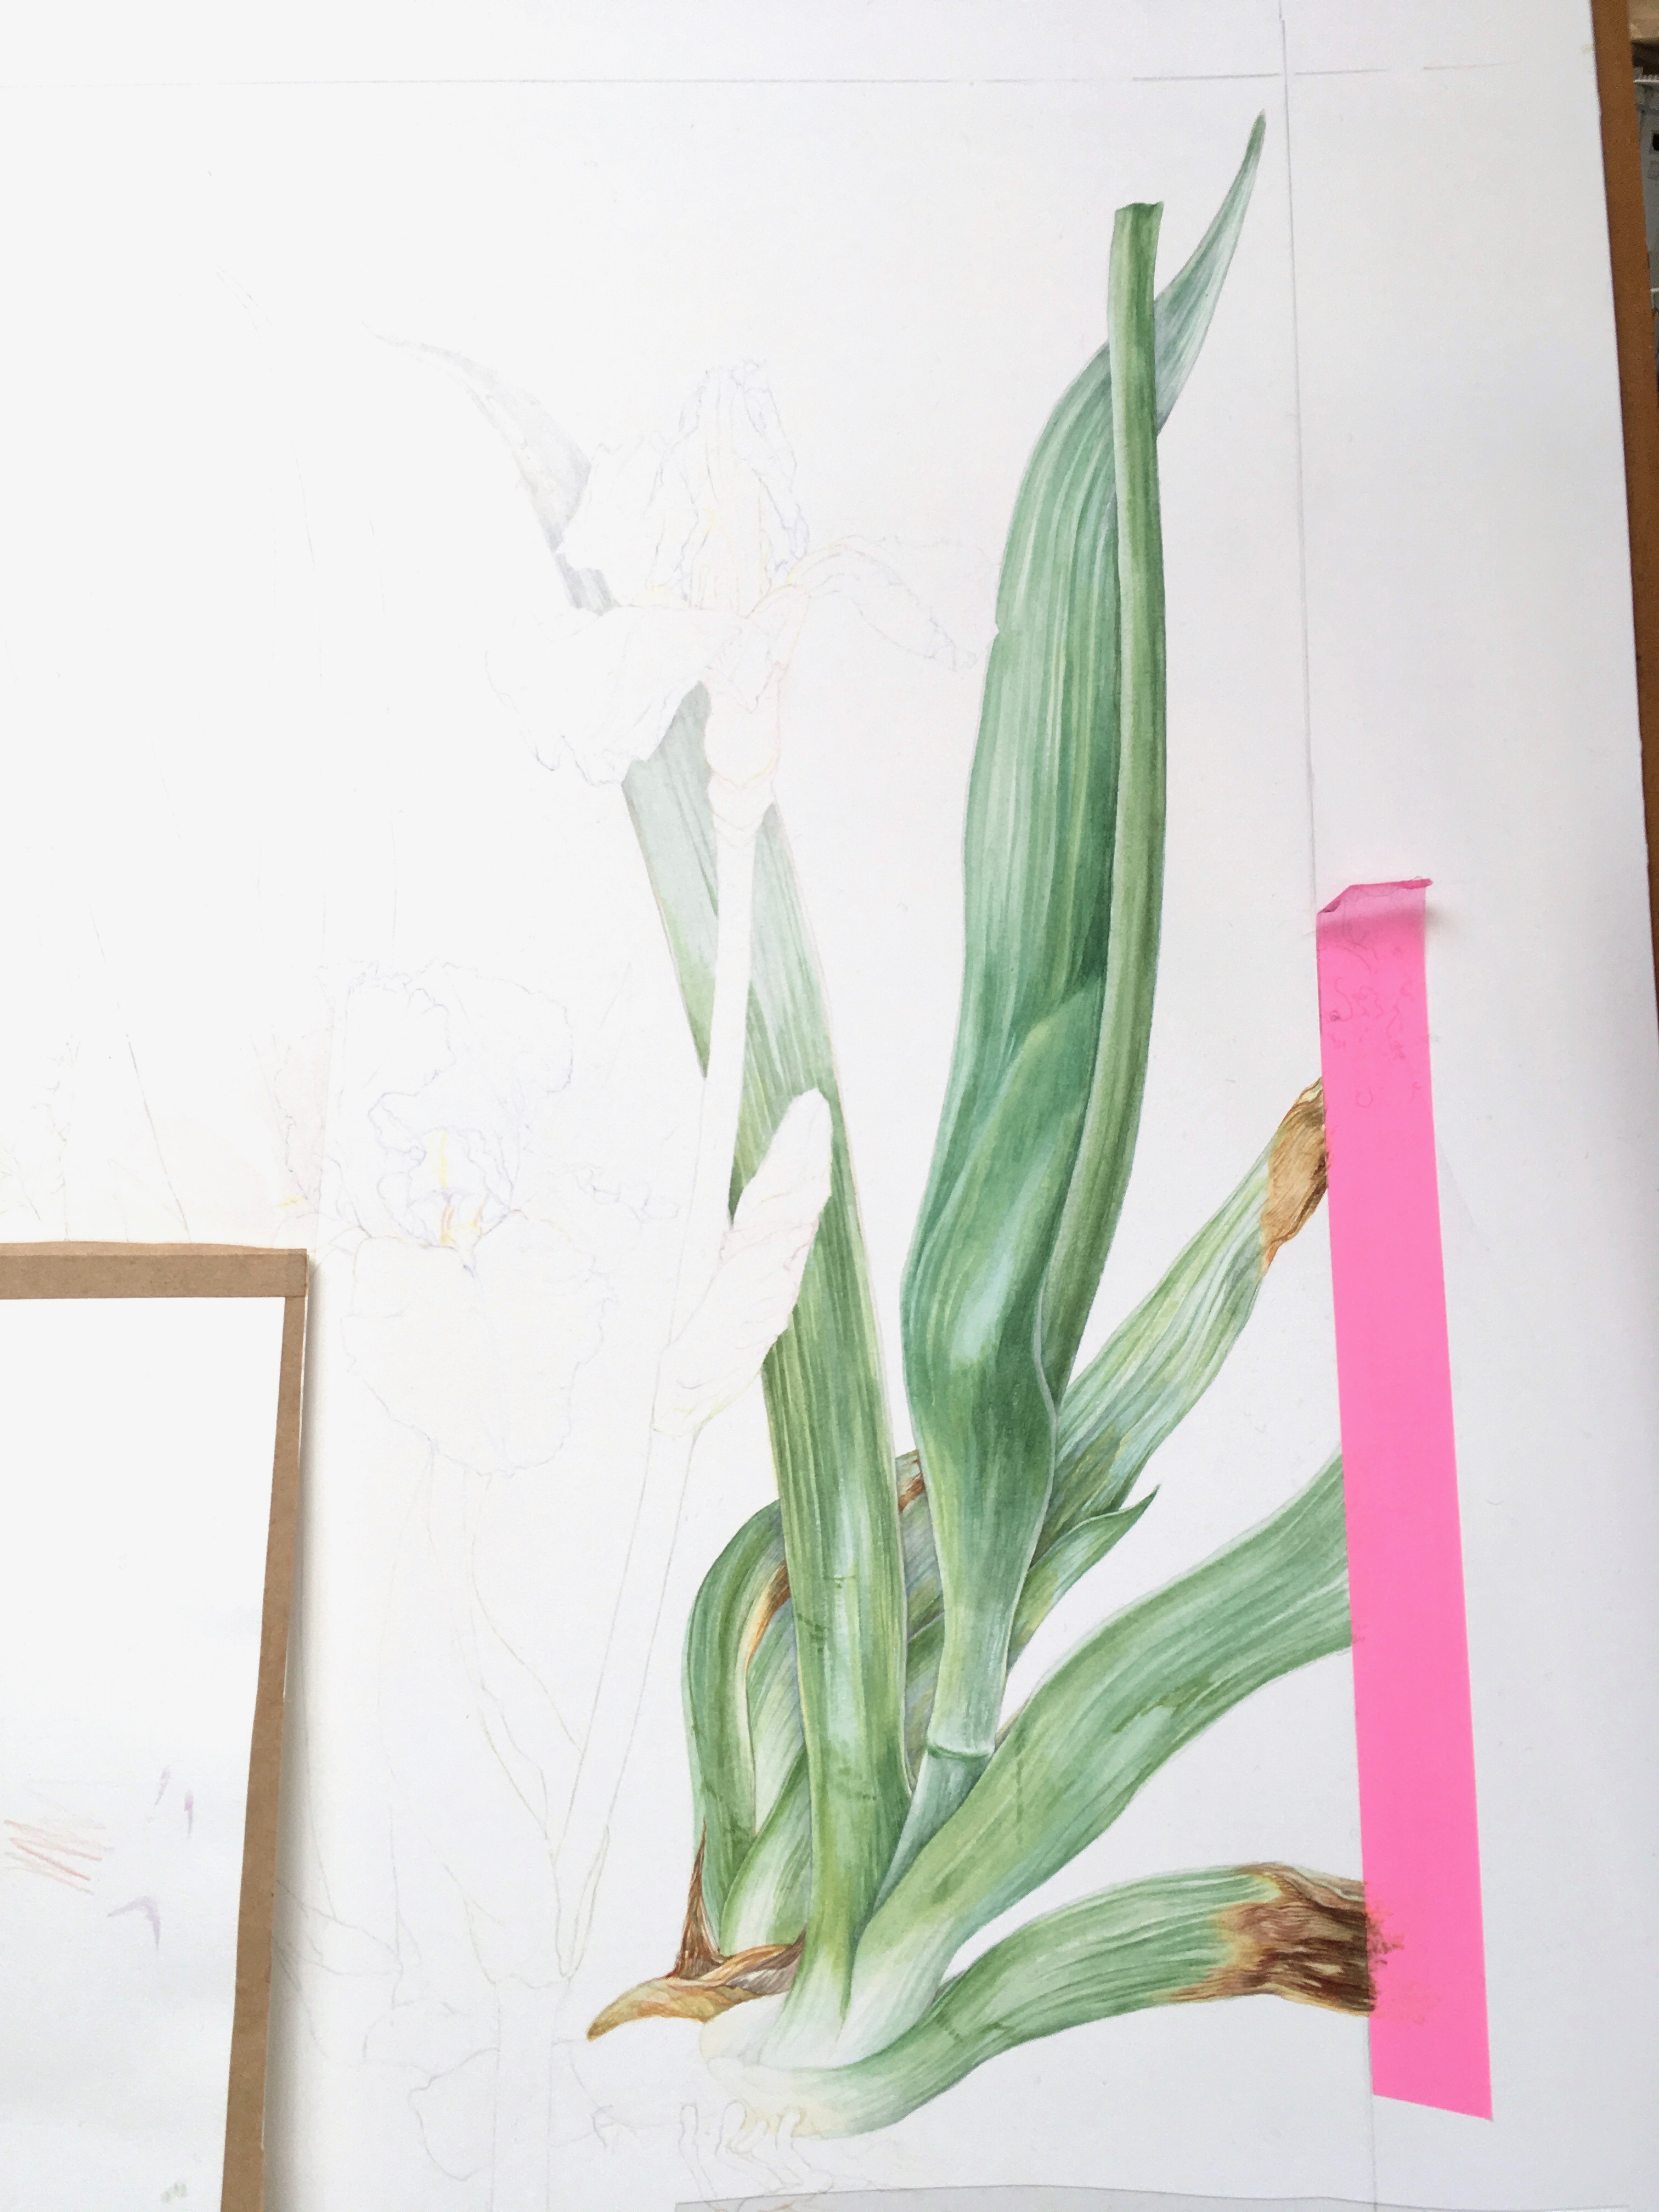
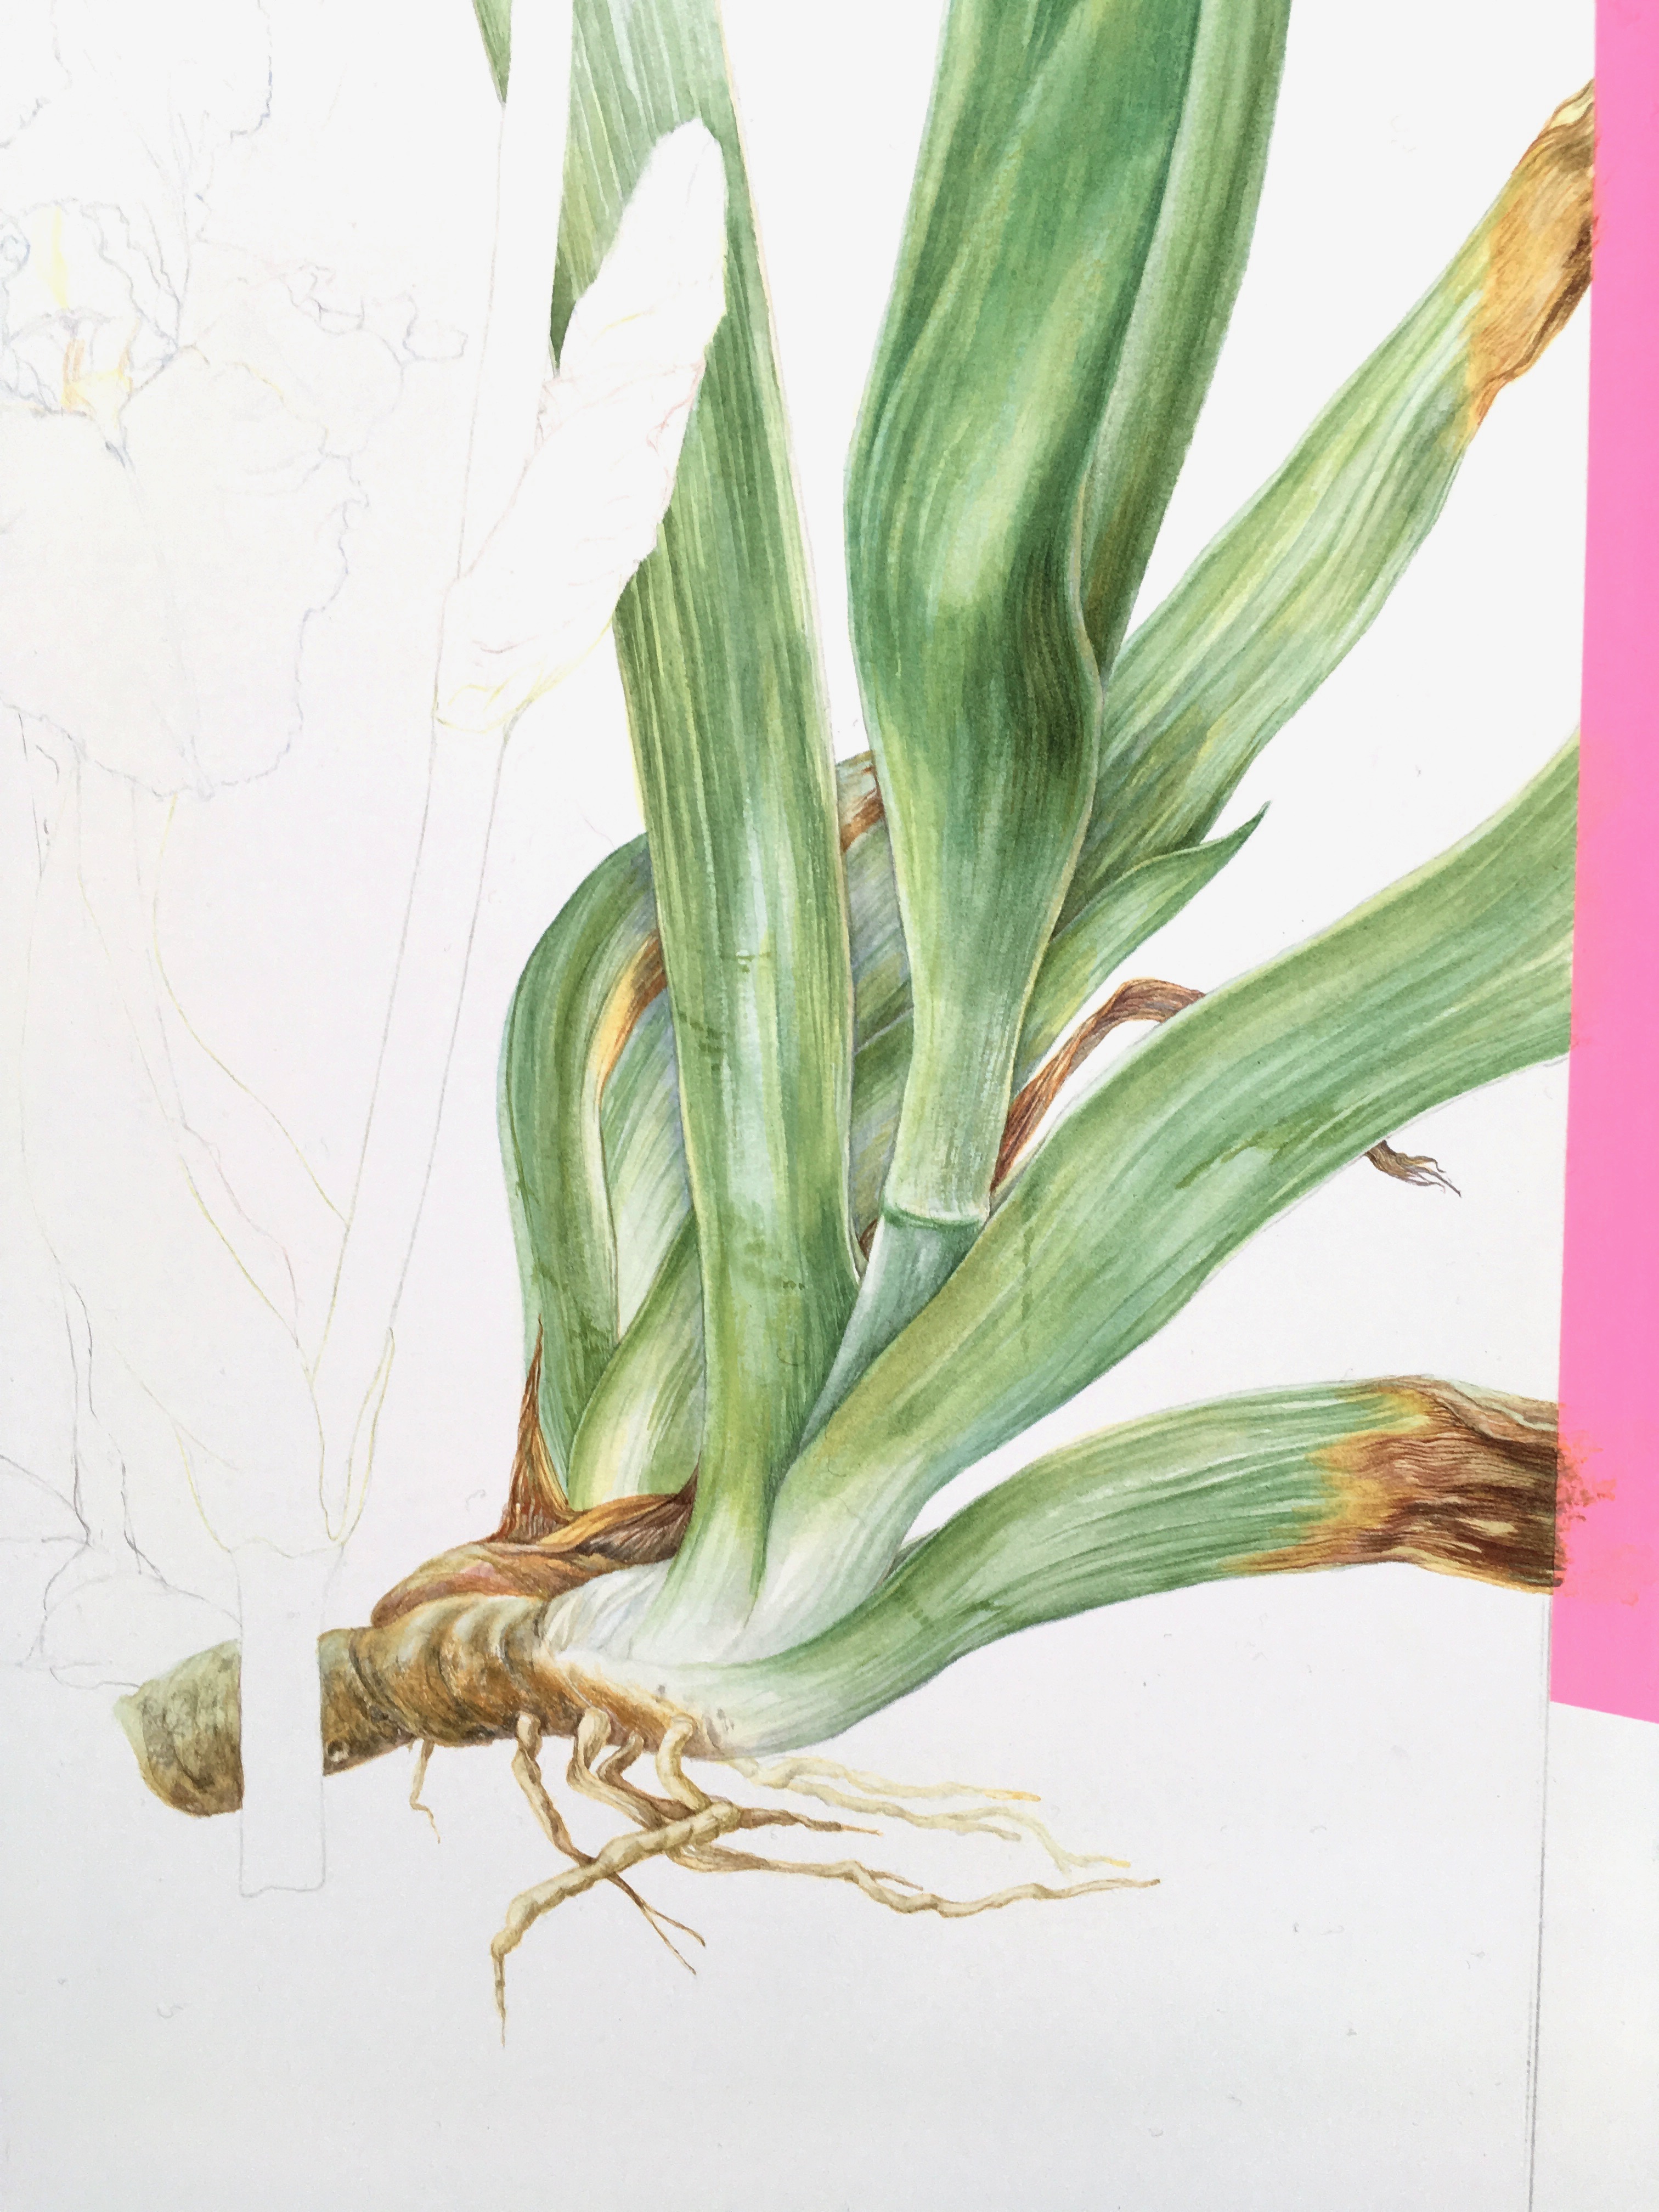
The main colours that I am using in my greens are Maimeri Cyan, which is a Phthalocyanin PB15 pigment. This is one of my favourite colours as a base for greens, although if needing to go very dark I might use Idanthrene Blue. The yellow is Quin Gold with a touch of Transparent Yellow. For warming the colour, greying it down or even creating a grey I use Perylene Violet. Therefore I use mostly these colours to create my greens and browns.
Although I have loads of sketches and colour swatches, I have also taken a plant into the house and luckily the leaves have started growing. This confirms the colours that I have chosen to use.
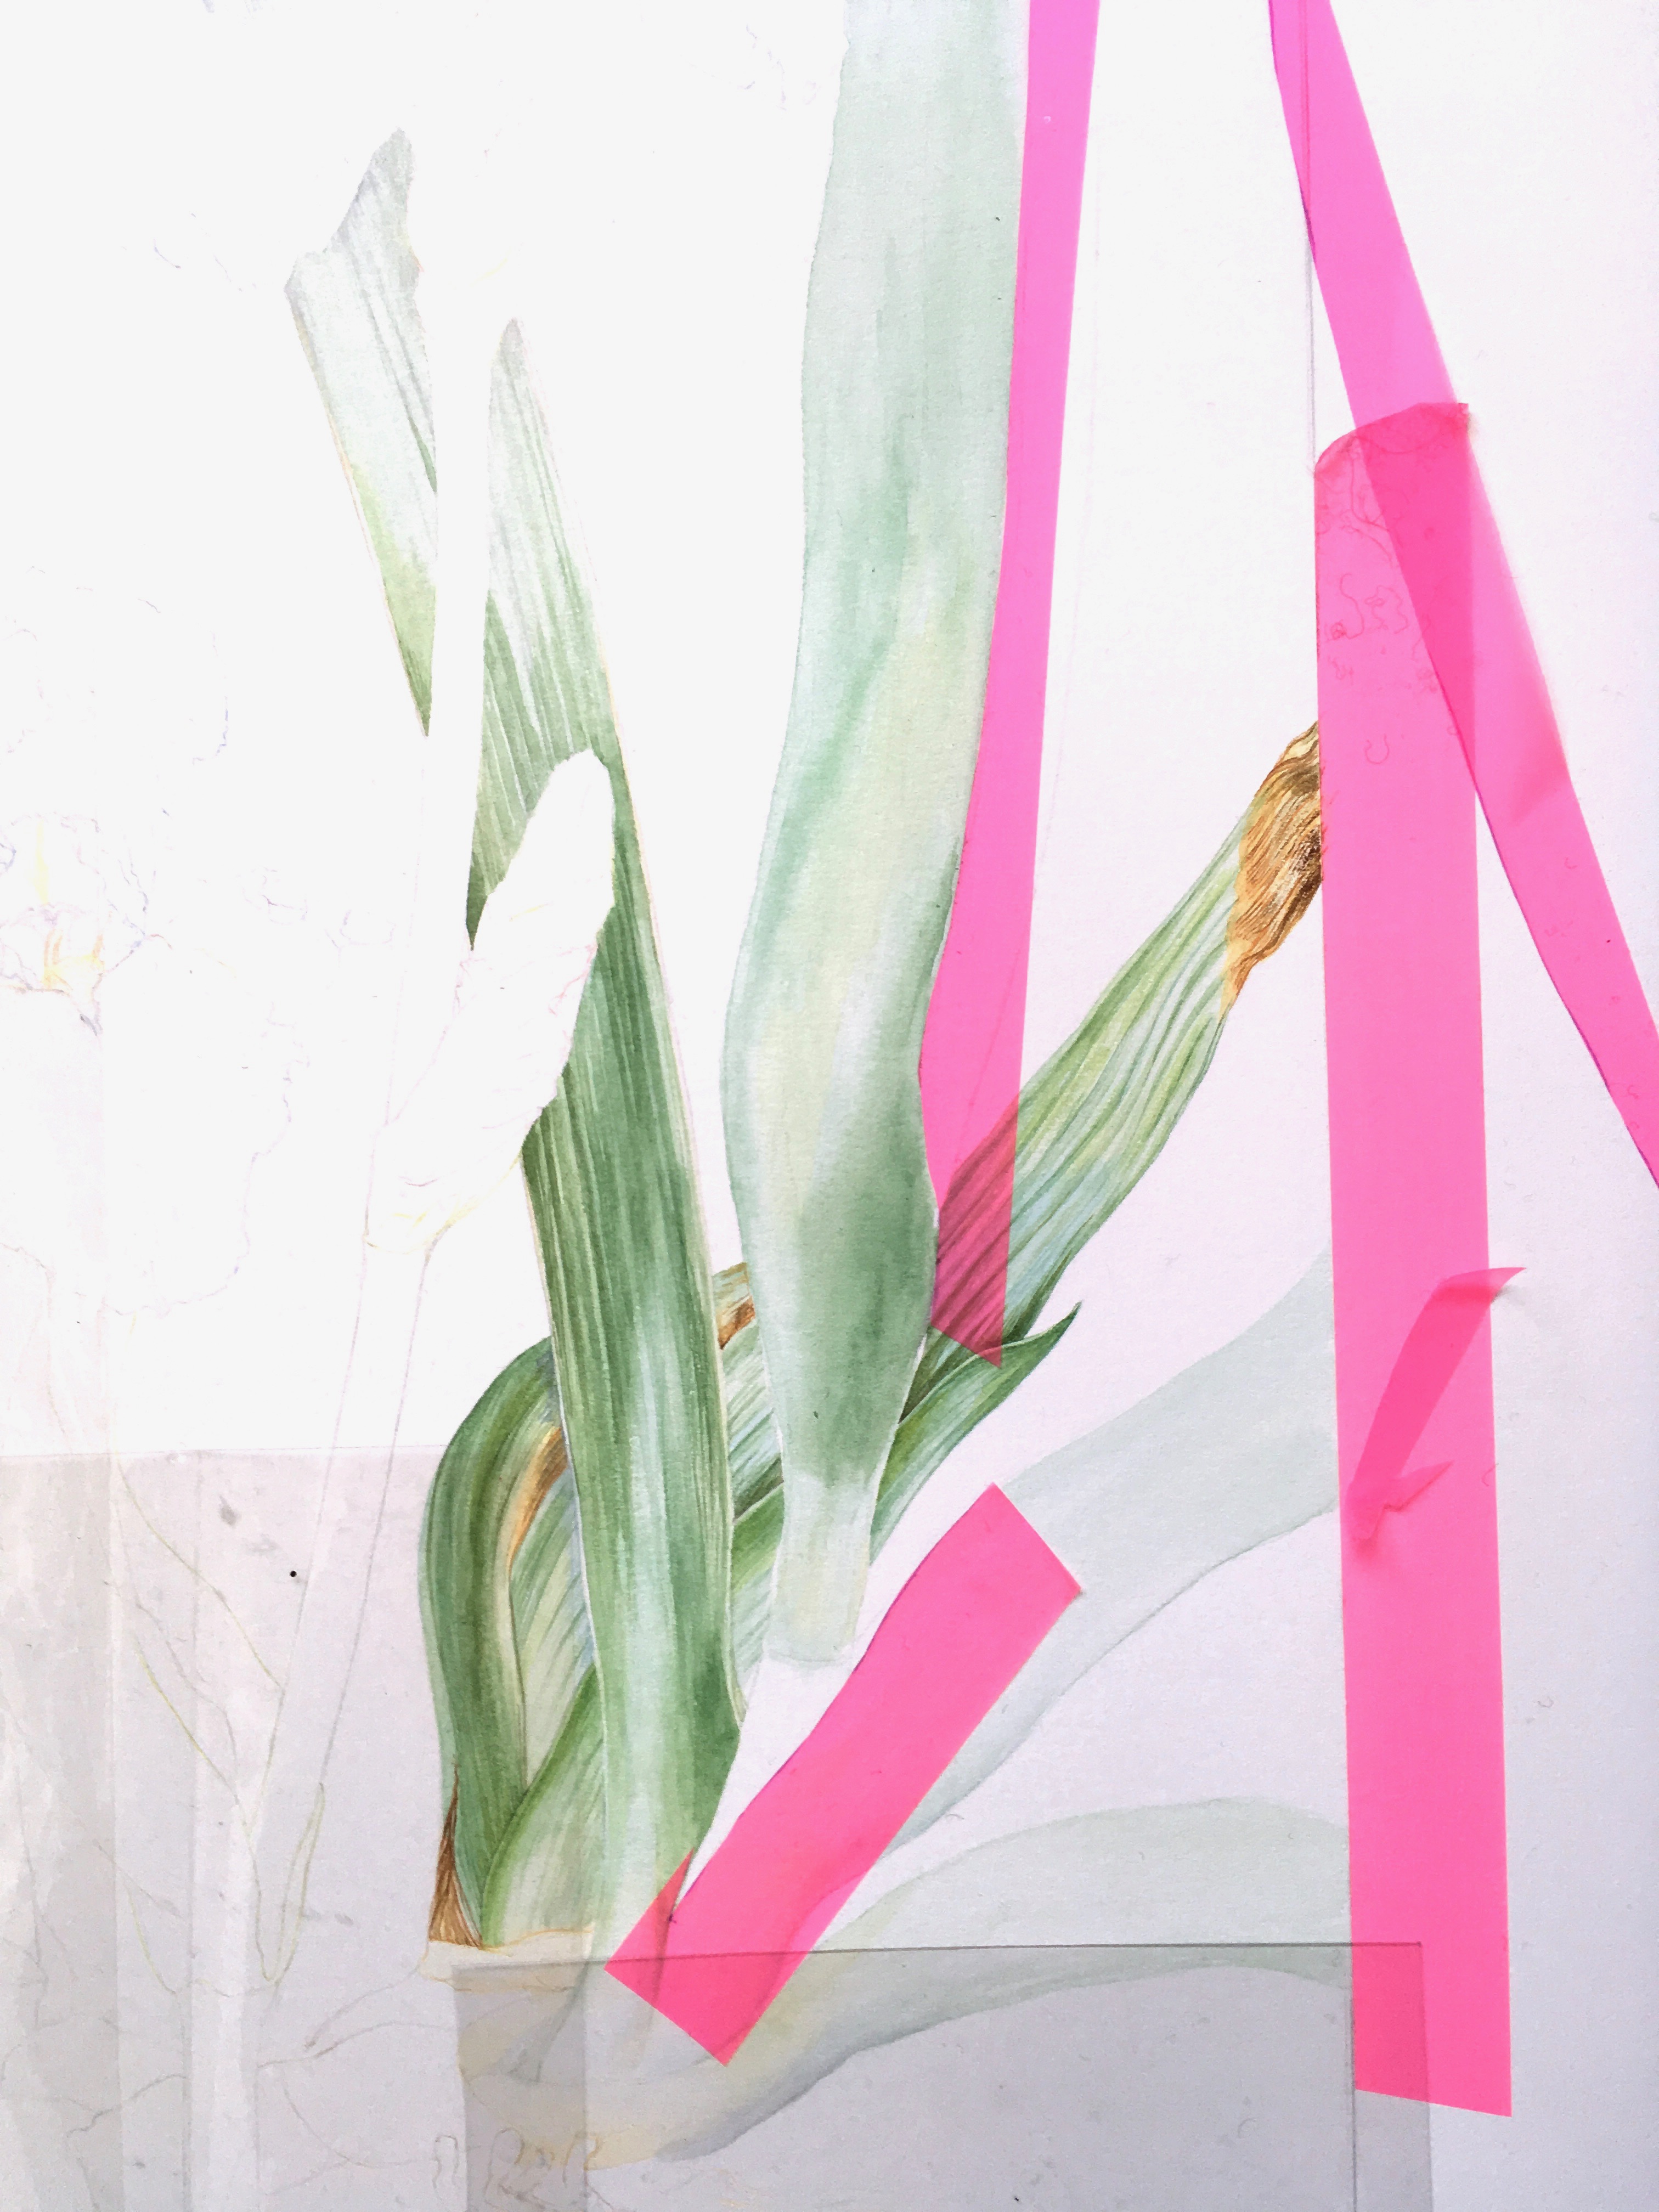
You will notice that I have the whole length of the stem cut in two on the right side of the picture. In botanical art, when the height of the plant is rather tall as in this instance, one needs to actually show its whole length. This is done by cutting it and showing the two matching end pieces in the design. Here I have cut the upper portion away, leaving the bottom of the stem attached and growing from the leaves. The upper section will include the open flowers and developing buds.
So what was my big mistake? I decided to mask out the stem and do the leaves behind it. But I needed to cut the edge of the tape. I tried to mark the tape with a pencil, but it didn’t work, so used a pen! I know stupid, stupid! As you might expect, when I applied water the ink ran onto the paper, even though I thought I had cut it away.
Also, the cut edge was not close enough, so I ended up with either a gap or an extra wide stem. Artistic license is all very well, but not in botanical art when you need to show the plant as it is.
I won’t go into so much of the detail in the stages I will show you today. But notice that the leaf going off to the left is grey. This is graphite. I don’t want to do heavy painted leaves for the whole design or I am afraid the delicacy of the flower will be lost. I could be wrong, but we will see how it goes.
I hope it won’t be too long before I can do some more work on this. However, the Worldwide Botanical Art Exhibition is now at a crucial point. Just before Christmas we in The Association of British Botanical Artists (ABBA) had the first stage of jury selection which was done digitally. Those successful artists have been getting their work framed over Christmas and are now delivering it, mostly to me, for the final stage in the juried selection due to take place up at Kew next week. We will then start the process of uploading the final forty successful paintings into a slideshow which will be included in the Worldwide slideshow with Forty native plants illustrated from each of 23 countries.
It will be a magnificent exhibition in each of the countries participating.
