4th part of Blackberry on Vellum story.

I am so enjoying painting this picture. To me, there are some parts that have been less than perfect and it might mean that talking about these will be an additional separate blog. I will see! But, as I have a deadline, I have a good excuse to work on it almost every and all day!

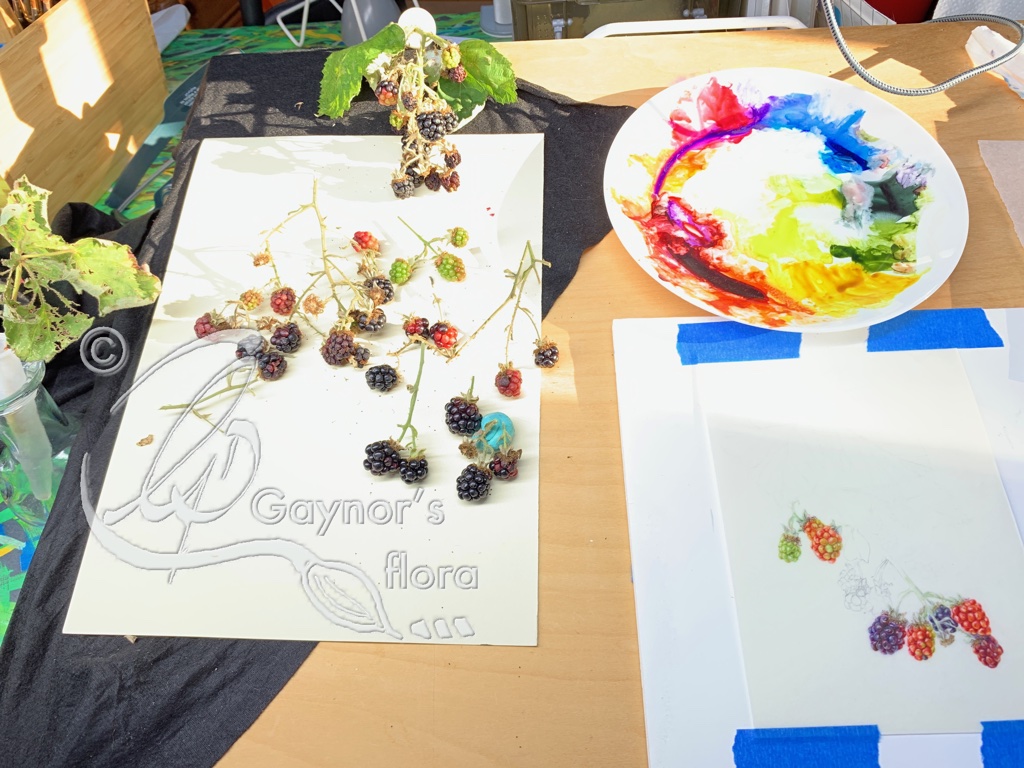
This blog is all about finishing off the black blackberries on the left hand side and some new green ones on the right.

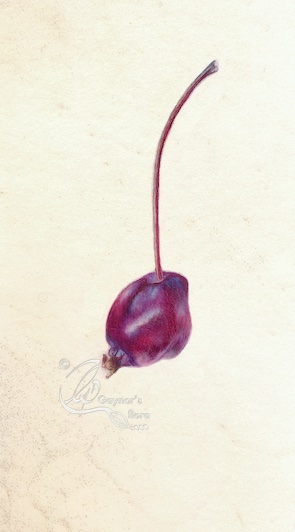
Although I know that many of you are watching the sections as they change so that you know roughly what colours I am using, it is worth mentioning the difference in the colours used with the black, blackberries. Of the three on the left, the nearest is the freshest ripe one and therefore has more remnants of the unripe red in it. The other two are even more ripe and additionally are affected in colour by how far back they are in the picture.

Of course the latter is called atmospheric perspective and affects tone and colour. Typically more distant objects show less detail, colour and contrast. In relation to colour, they are clearer, brighter and warmer when seen close to. As objects get farther away the colours become duller, get colder, paler and eventually turn blue grey.

So what on earth do you do when the ‘native’ colour of your subject is warm, but it is further away? You need to dull the colour as it moves away and hopefully you will see this occur in my light greens and reds. If not, you can smack me over the fingers when you see me!

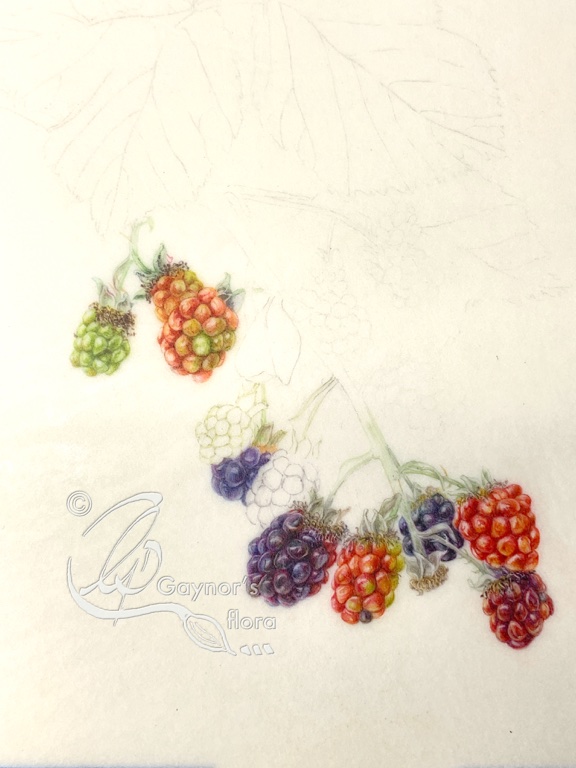
This is an example of what I am talking about, except, that I don’t think you will actually see it fully until you see the finished painting. As I finish off a painting I will generally check over this sort of thing.

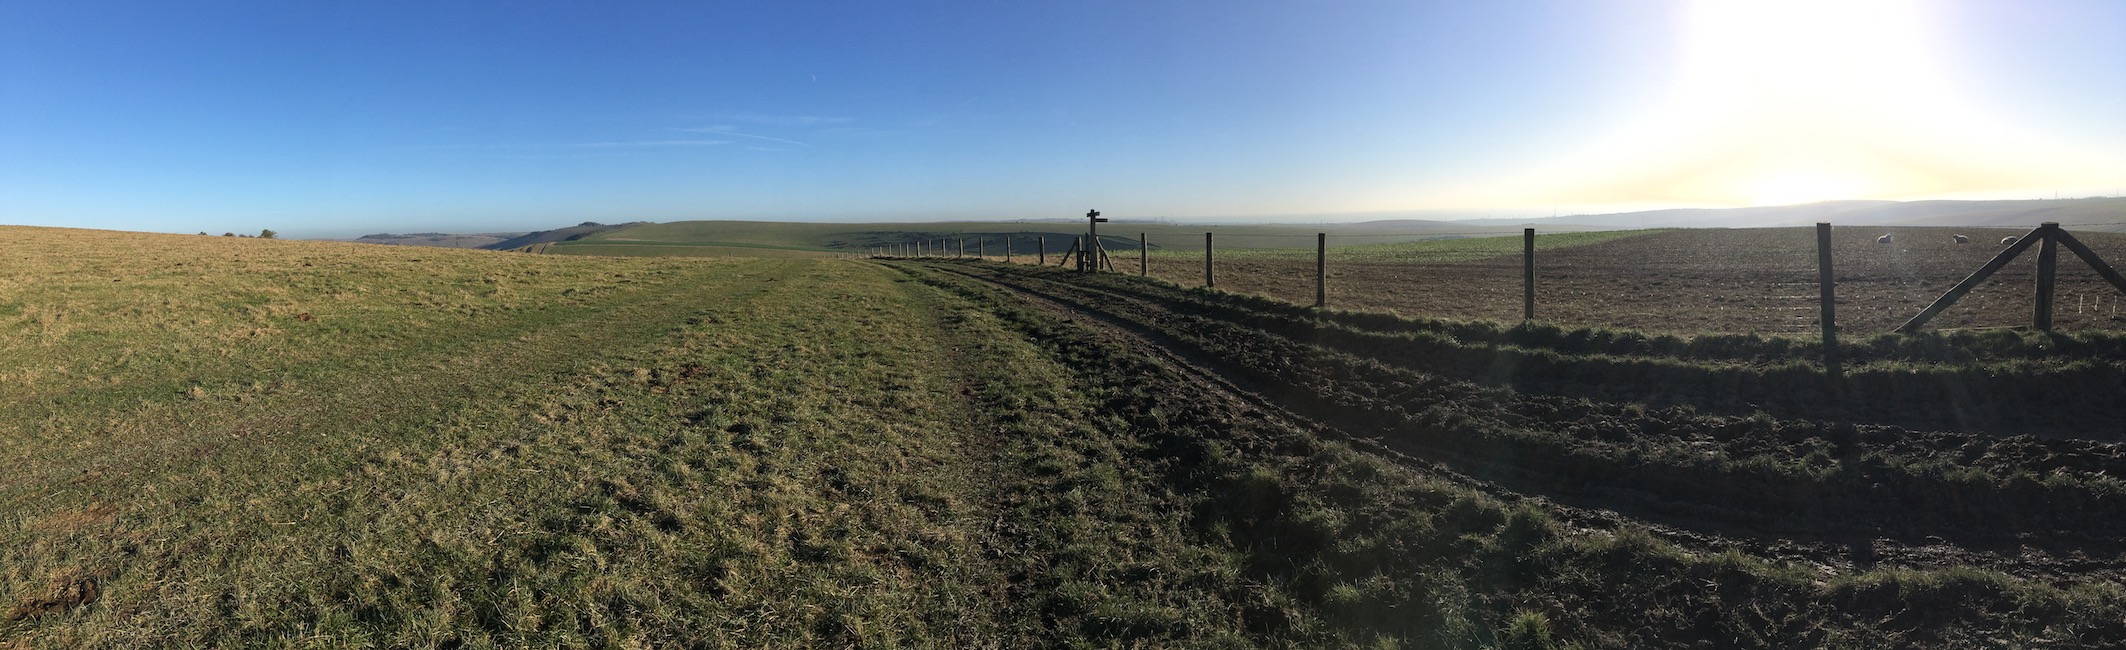
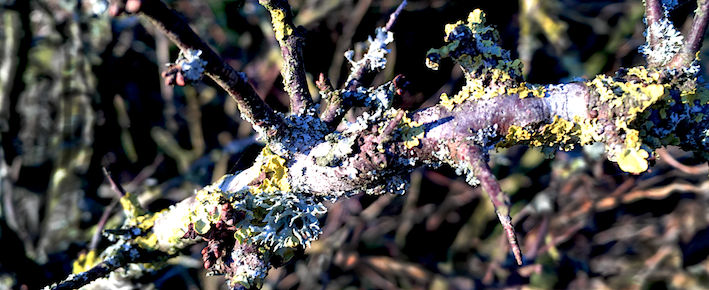
In a couple of weeks I have my next workshop in Bosham; Hedgerow colour. I think that this picture is a good example of the general subject

. I still have one or two spaces on it and it will be the last one before coming back from teaching at the ASBA (American Society of Botanical Artists) conference in Pittsburgh. But the dates for the Hedgerow colour workshop are 27-28 September. Do get in touch if you want one of those spaces. Workshops in 2019

This slideshow requires JavaScript.

3rd part of Blackberry on vellum story – and more.

Last Friday and Saturday I had a workshop called Fruit and Veg ; or Strawberries and cream. It is a very popular workshop has happened for several years running. I don’t know if it is the Strawberries and cream that tempts, or the painting. Unfortunately, I didn’t take into account that it was a bank holiday weekend this year, but those who signed up were pleased to have more of my attention..

One student was working on vellum and decided to paint a short branch from our Malus ‘Royal Beauty’ crab apple tree. It has very dark berries and I thought the best way to demonstrate was by doing one of the berries myself. Of course doing it properly also takes time, so as soon as the workshop was finished the first day I went down into the shed and started the berry so that I could demonstrate on it the following day. That was one long day!

But it was a useful exercise and the student got a clearer understanding of how to get depth and darker colours on vellum without laying it in thick layers.

The other students unusually all worked with watercolour this time.

I finished off my Royal Beauty crab apple later on.

My 5 x 7 inch picture of a Blackberry branch on Kelmscott vellum is progressing in-between teaching and demos.

My last blog finished off when I had completed the bottom-most berries on my branch; you could see a ripe blackberry under the stem. In this blog I will show you the layers needed for the berries on the left of the stem. The nearest one is almost fully ripe as you can see by the residual redness of the drupelets. Then there are two more fully ripe ones behind this; I therefore have to take this into consideration when choosing my colours. The slideshow of photos taken at regular intervals is at the bottom of this page.

I promised a picture of my art table as it was in my last blog, but bear in mind that since the very hot weather my subject is deteriorating quite fast.

In this picture the sprig is still fairly OK giving me an idea of the colours of the berries, although I have to get fresh samples to paint from; as you can see, these are scattered on the surface beside me.

Finally and unusually, I have two vacancies in my weekly botanical art class in Bosham. It is Wednesday mornings between 10:00-12:00, starting up again Wednesday 4th September. Get in touch using the contact form below if you want to know more about it or sign up. Before you ask, it is for watercolour and colour pencil artists, including those who want to learn. The class is kept even smaller than the workshops so everyone can develop at their own speed.


This slideshow requires JavaScript.


My Perpetual journal

I have to be honest, but this idea is not mine. I came across it when researching different types of journal. I hope that Lara Gastinger won’t mind me taking her name in vain, but I saw that she had been doing this for years.

Many people try to do a drawing a day, but knowing how I get involved in what I do, I thought I would never get anything else done. My aim was to be quicker with what I do – but that is what everyone wants to be. Many of my students want to paint faster, and I remember I wanted to do so when I first started painting botanical subjects. But I get slower and slower because I increase the detail and complexity of my paintings.

Because each picture takes so long to finish, I am doing very little ordinary quick sketches. I wanted to increase my output and thus increase my ability to make quick sketch notes. How was I going to do it?

I now have an A5 Stillman & Birn Zeta sketchbook and have set off a double page to do one sketch a week, and next year I will go back again to the same page to do another one. I have done this since March this year, but missed three weeks whilst I was sketching and colour matching mountain plants in Norway.

Why does this help me? Well, I have decided to minimise the graphite help marks I draw so that I go straight into it with pen, then do colour washes.

23-24 August this year I am having my annual Fruit & veg workshop (places still available)and I thought some preparation sketches for this would be ideal in my Perpetual diary. This is what I have done today. I took several photos so that you can see the stages. If you want to learn about this – and more, get in touch and sign up as soon as you can.

This slideshow requires JavaScript.


Nearly there with the Benton Iris ‘Farewell’

Hopefully, through this series of paintings with the Benton Iris ‘Farewell’ you will have understood how important it is to plan and prepare a painting from the initial composition , through tonal sketches, practicing techniques to finally the painting.

Because i believe that good preparation is the basis for getting a result in botanical art that I am happy with, I planned this year’s workshops to help others with this process. The next one is 23 -24 March and is all about developing the careful line drawing and using it as a basis for the rough tonal drawing. There are still places, so do get in touch.

But back to the Benton Iris. Actually as the painting has developed I have felt some sadness that there isn’t too much left. Obviously I also learn from doing it and this painting has been rather different to ones I have done before. It has been quite a large painting, it is on 640 gsm which doesn’t feel quite as smooth as 300 gsm paper. I used quite a bit of graphite so that the picture would not be heavy and doing this on the 640 gsm was not so easy. It was important to show all the intricacies of the plant, to get them absolutely right and to make it an attractive picture as well.

Some of the things that I had to include in the flower were:

  • The view showing the Stigmatic lip. This is the view into the flower showing the sexual organs. look very closely inside the back of the flower and you will see a slight transverse ridge; that is the Stigmatic lip. The Stamen – male organ, is vertical, deep inside the flower and just below the transverse ridge. The pollinator climbs over the beard to try and reach the nectar deep inside the throat of the flower, gets pollen on its back and rubs it off on the stigmatic lip, fertilising the plant. You will see this view in more detail in the last blog.
  • The view with the emphasis on the Standard and Fall petals (this blog),
  • Buds developing
  • The height of the flower spike.
  • The height of the leaves particularly related to the spike.
  • The top part of the rhizome.
  • The growth habit (the fan of leaves)

This time my pictures show the development of one of the falls.


This slideshow requires JavaScript.


This is the final stage of the top flower. I will show you the complete painting in the next blog, so that you can judge whether or not the painting is successful. It is the viewer that determines this. 


A little more of my Benton Iris ‘Farewell’

Trying to paint more with the Benton Iris – work that I love doing, has been complicated by all the adjustments in relation to the botanical art exhibition ‘ In Ruskin’s Footsteps’. But you can now see the updated website in relation to the new improved venue (still at Lancaster University) and adjustment to the dates. I will give you the link at the end of this blog.

In my last blog I showed you my progression in relation to the large fan-like leaves of this majestic plant. I chose to include only colour for those on the right hand side of the artwork and graphite on the remaining leaves. This was so that the picture would not be overwhelmingly heavy with green leaves. 

I finished off last time with the bud spike on the left hand side of the artwork. Now I will show you the start of the main flower spike, which needed to be divided in two because of the height of it.


This is customary in botanical art when painting correctly.


It is important to give an indication of the habit of the plant if painting life-size and the plant is very tall; try to include as much of it as possible in the same painting. I have divided the flower spike in two and have shown the cut ends with the same profile at the cut edge.

On this stem you can clearly see the flowers and buds spiralling off.

I have started off with a pale wash for the bud leading up to the main flower before completing the detail with a dry brush technique.

Now the start of the top flower and he developing bud just underneath. This was actually quite difficult to get right.


All my sketches were done outside in the garden last year and if you don’t keep your head still while drawing, the detail visible will change.

If you are enjoying following the stages in the development of the Benton Iris ‘Farewell’, you might like to come to my next workshop March 23-24th, where this time we will be concentrating on a line drawing and tonal sketch. Normal, good preparation for any botanical art painting. Get in touch with me via the contact form below if you would like to join us. The details are on the Workshop page of my website.

Look at the last blog of 2017 to remind you about how I started off this Iris. https://gaynorsflora.com/2017/12/30/last-gaynors-flora-blog-of-2017/.

Although botanical art is fairly strict in what is ideally included in a picture, it is quite wide ranging and much wider than for pure botanical illustration. But it is important to remember that what I show you in my blog is my style of working. There are many different styles and none are wrong; It is the result that counts!


Last but not least the link to the Association of British Botanical Art website: www.britishbotanicalartists.com/2018exhibition

Where to find daffodils and global warming!

At the weekend I had a two-day workshop with the title of ‘Daffodils – Herald of Spring’.

Looking into most gardens on the south coast of England, the daffodils were long gone, so how did I decide to teach this subject at this time of the year.

When planning my botanical art workshops, I look back at the photos I have taken of daffodils over the years and note the dates. Before my introduction into the digital age, I remembered that for my 49th birthday (21 years ago), we had snow (in the UK) and the daffodils were just coming out.

Working from then until last year, I expected that there would still be some in the garden. If you remember last year the daffodils were extremely early and we thought that was that. But then we had a new flowering and rather than just a few odd ones, there was an almighty crop. Not so this year!

Robin and I went trailing around Chichester and surrounding areas buying up what we could find. It was an interesting exercise.

As you can see, in the end we found the remains of some tiny ‘Tête á Tête” bulbs still flowering, but also some Narcissi. Therefore the workshop was saved.

As a note here, all my workshop titles where specific plants are mentioned, are just suggestions for subjects to paint. My workshops are not based on a step-by-step approach, but on individual support to improve your own technique.

Here are several pictures from the workshop including a preparation page, a very rough sketch and a ‘before and after’ picture showing the importance of cleaning up around the image as a last task.

I will let the pictures speak for themselves, but once again I met with some lovely, hard working botanical artists and I believe a good time was had by all.

Now to prepare for the next two weekends, which is the Chichester Open  Studio art trail. In addition to my usual exhibition space where my workshops are held, I will be doing some  work towards pictures I will need to have finished before the end of the year. Robin will be looking after the exhibition and you will find me tucked away in the shed at the bottom of the garden. Do come and visit me at Venue 35 in Bosham. For more details visit page: https://gaynorsflora.com/exhibitions/.

This slideshow requires JavaScript.


Magnolia x soulangeana soon in bloom

Magnolia x soulangeana: Ripe fruit and seeds. Watercolour on hot pressed paper.

In 2011 I had finished three years work on a series of paintings showing a year in the life of the Magnolia x soulangeana. The series was exhibited at the RHS that year and I won a Silver medal – my first RHS medal. One of the paintings was chosen by the Hunt Institute for Botanical documentation in Pittsburgh, USA and it was first exhibited there in 2013. Since then it has had a three-year tour around the USA with the rest of that exhibition, but is now back in their archives in Pittsburgh.

© Magnolia x soulangeana: Maturing Blooms

I was super lucky to have some huge fruit on the tree the years I was doing the paintings and they were featured. But since then tree from which all the paintings were done, has not produced much fruit at all; in fact nothing until last year when it had a couple of small ones. I think the tree knew that I was painting it’s portrait and wanted to show itself at its most beautiful.

© Magnolia x soulangeana: Ripe fruit and seeds

I am hoping that the tree is building itself up to another magnificent display later on this month. At the moment there are masses of terminal buds in which the blooms develop and you can almost see them growing a little more for each day.

It is obvious that the Magnolia tree means quite a lot to me after having studied it so closely for those three years. I learnt such a lot about it, how it is fertilised and why it is a particular type of bug that  is responsible.

If you want to know more about Magnolia x soulangeana, and you are interested in botanical art as an artist, do book to come to my workshop Friday to Sunday 31 March to 2 April. I still have a few places available.

This is the first time that I have had a workshop on this subject – and you can probably guess why. But now I would love to help others who would like to paint the blooms in watercolour or coloured pencil (dry), or even draw them in graphite.

Get in touch with me as soon as you can so that you don’t lose this opportunity.


I am sooo-o chuffed after this weekend’s workshop!

Yesterday and today was the first botanical art workshop of the year in Bosham. What do you paint in the wintery months? There are loads of interesting subjects in the hedgerows. The title of this workshop was textures and as usual I tried to make suggestions as to what these may be.

My workshops have a limited number of participants so that everyone gets help where they need it. This time people brought catkins, bark, ash keys, pine cones, algae and magnolia buds. I also brought in some lambs ears (leaves) and sticky buds (horse chestnut).  There was an ample supply of everything and people worked in coloured pencil, or watercolour, or graphite.

My workshops always begin with a little about composition; a subject everyone seems to be scared of, and drawing. Everyone always wants to jump straight into the painting, but of course the final painting is never better than the planning that has gone into it.

This time, as I knew everyone from previous workshops (normally there is at least one new person), they felt it was OK for me to concentrate more than usual on the compositional aspect of botanical art.  They duly did their thumbnails and decided which one they would focus on to create their line drawing. I am going to show you the progress of one student from thumbnails to where she got to today.

Magnolia soulageant buds

Version 2

We talked a lot about the Golden section, rule of thirds, diagonals and ignoring the lot!

Of course we mustn’t forget that the workshop was also about textures, so I demonstrated different techniques in all three media. Of course they found that the furry buds were the most difficult, but everyone persevered and got some amazing results.

This slideshow requires JavaScript.

So finally, why am I so chuffed? Well, those who chose to do the Magnolia buds in watercolour, actually mastered the dry-ish brush technique that I use. Many do give up on this because the issue is the water/pigment mix, and taking care of brushes and picture at the same time. But I think the part giving me the biggest thrill were the compositions. I have superimposed two of the pictures with the three-by-three golden section divisions that help to find where the focal point is best placed. The eye was drawn in particular to these two pictures in main because of their composition, but also their fluffy buds. Remember they are half finished, but they just show how a well planned composition can have a good effect on completing a picture. Do you agree?

Magnolia x soulageana terminal buds in graphite.
Magnolia x soulageana terminal buds in watercolour.

Textures and the South Downs

South Downs Way with reflection from the sea.
South Downs Way with reflection from the sea. 5 January 2017

Now what on earth do ‘textures’ and the South Downs Way have in common? Nothing, other than that my next botanical art workshop has very few places available and we have been picking up some specimens for it on our long weekly hike today; this time along the South Downs Way.

Happy New Year. For some 2016 was a good year, but for some it was filled with sadness or difficulties. For most of us, it will have been a combination of both.

We are now at the beginning of 2017 with all the possibilities it has in store for us. The days have already started to be slightly longer and apparently we got an extra second on 31 December! Some days are beautifully sunny – like today, and as was one day last week when the Hawthorne branch picture was taken. But other days, like yesterday for us in the south of England, it was wet, grey and gloomy. But everything is already waking up.

I hope that you enjoyed your Christmas festivities or relaxation and that you are now raring to go with what is on offer in the way of botanical art workshops.

I have only a couple of vacancies left on the next workshop, ‘Textures’ with bark and moss as examples. But if we think laterally about textures we also have furry buds such as the Magnolia and furry leaves such as ‘Lambs ears’. There are useful techniques to be learnt both with watercolour or coloured pencil.

In addition to Magnolia buds and Lambs ears in the garden, we also have Garrya elliptica (the silk tassel bush) with its very attractive silvery catkins; which might be a nice challenge for someone.

Do get in touch as soon as you can to book your place. The workshop is Friday and Saturday 27 -28 January. As usual coffees, teas and lunch are included in the price.

The booking form can be found linked to this page:  Gaynor’s workshops

Hawthorne bench encrusted with lichen
Furry Magnolia x solangeana bud