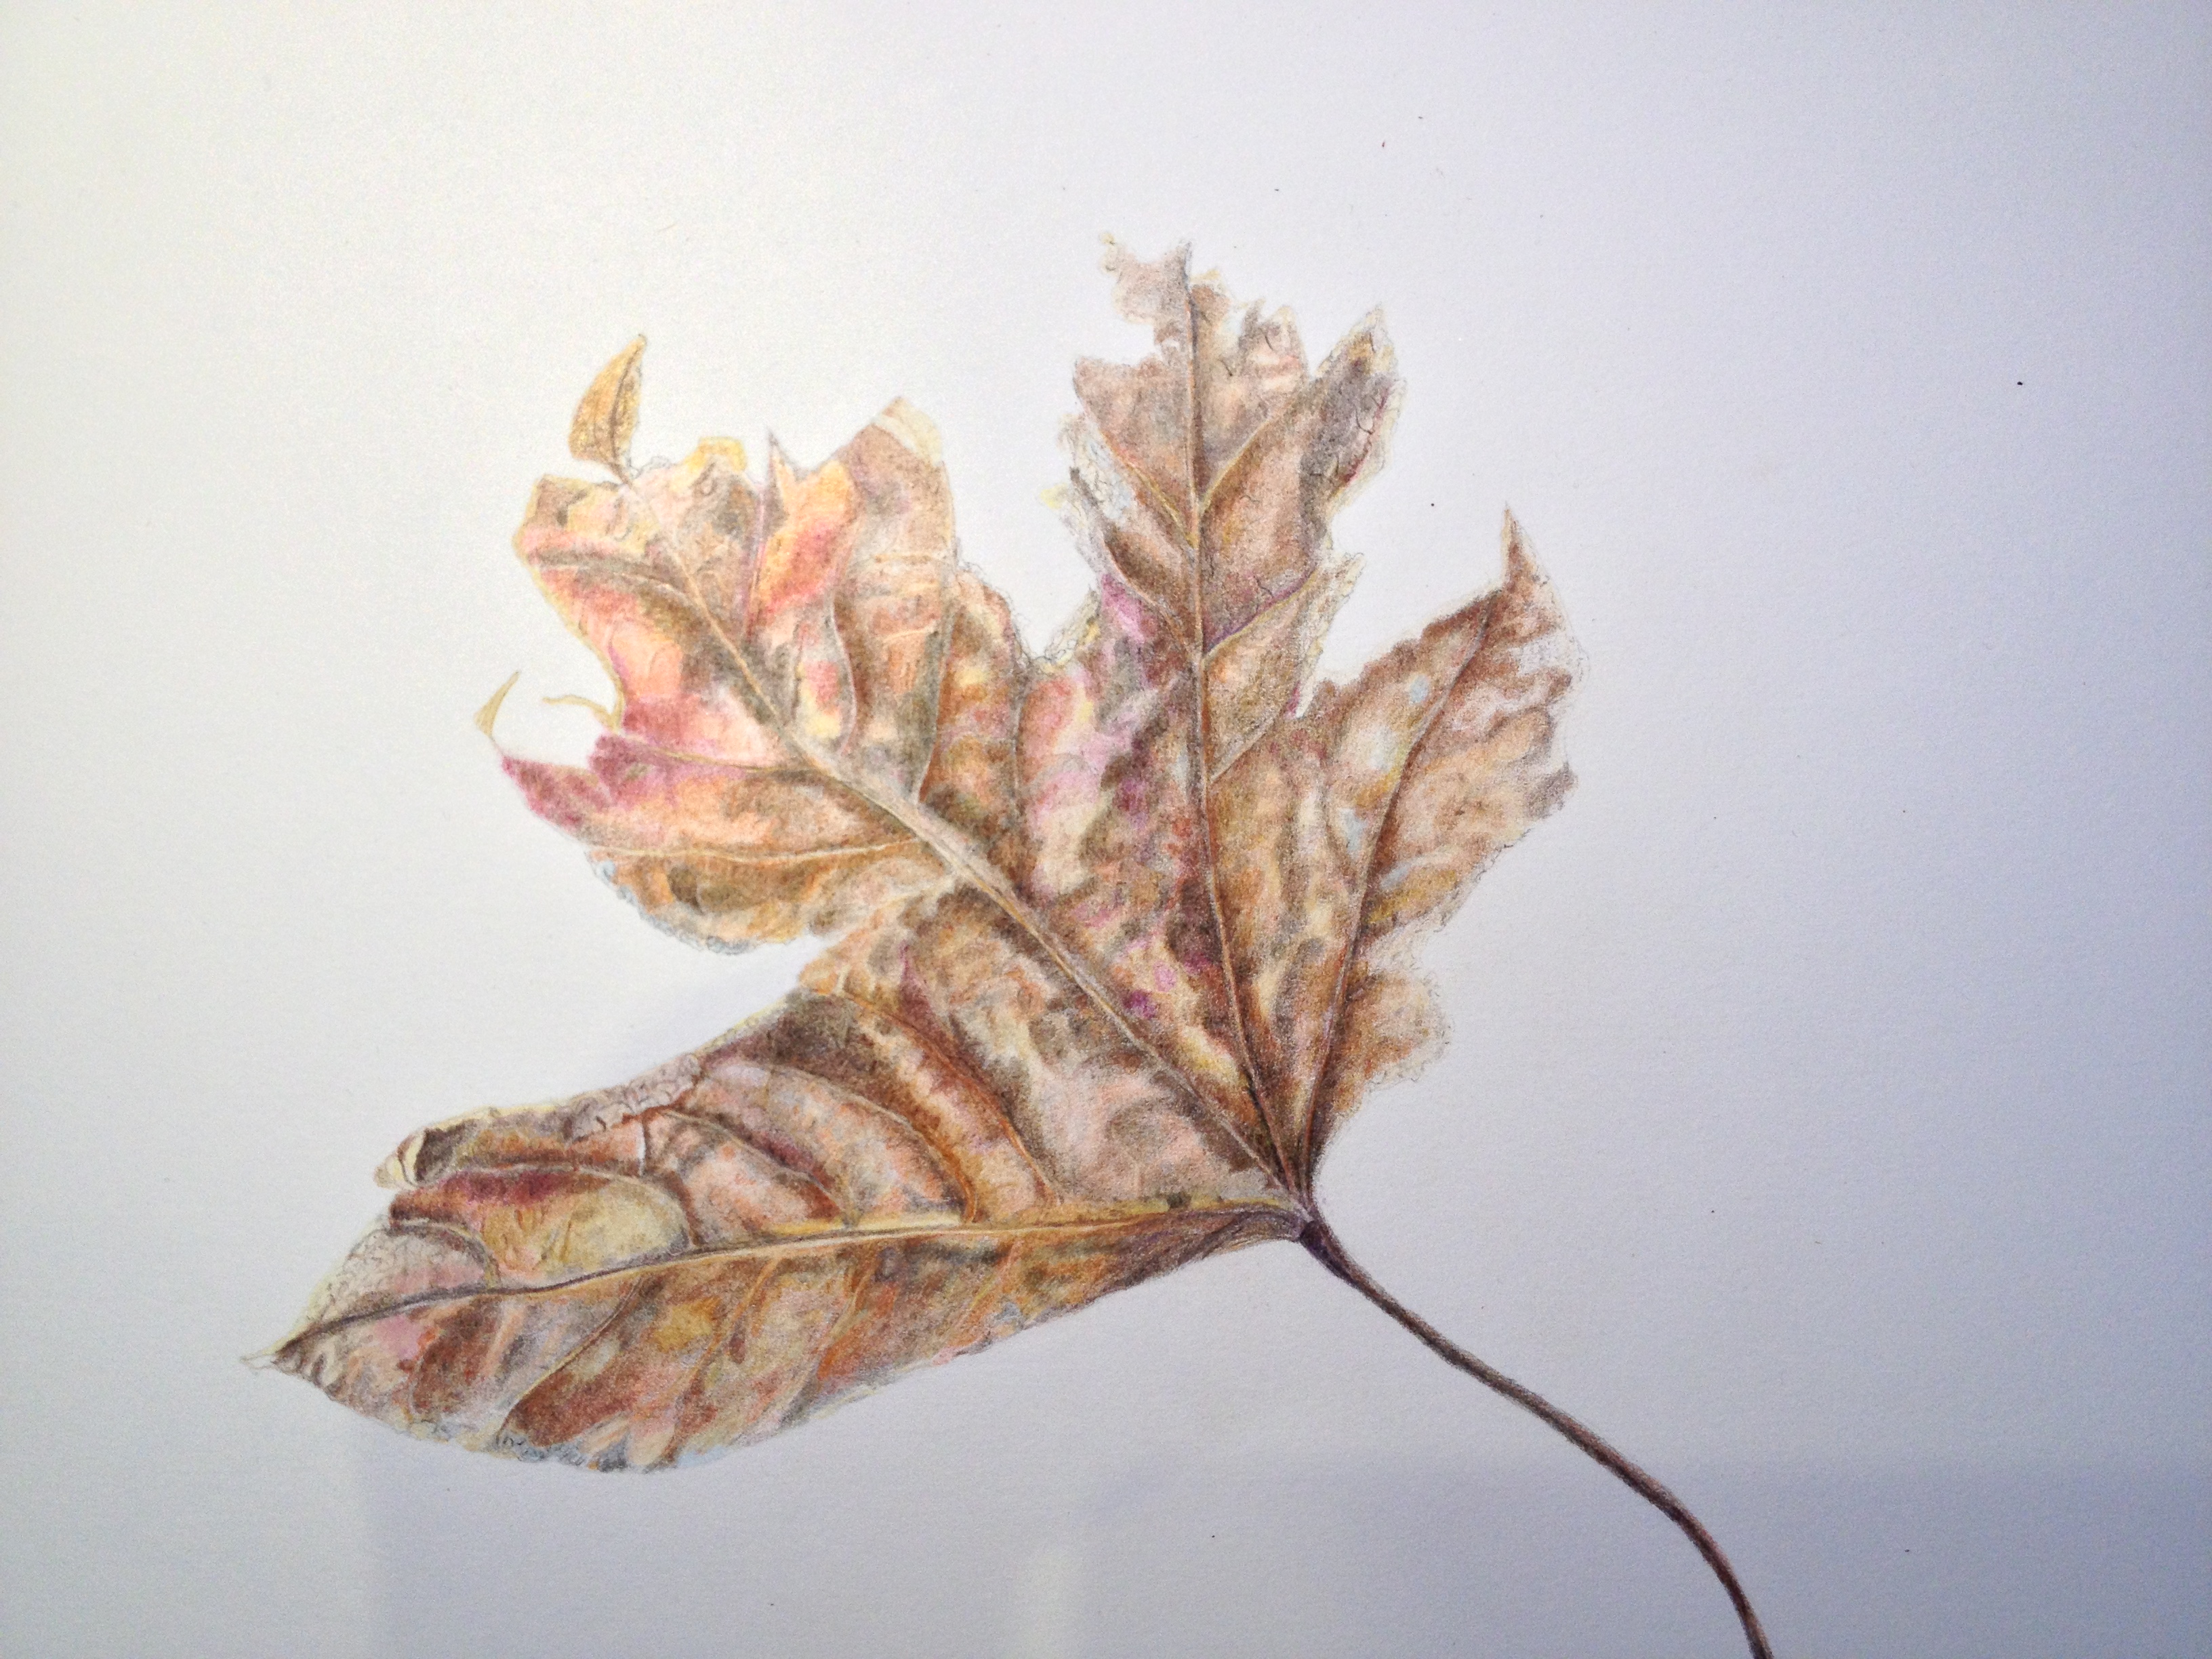
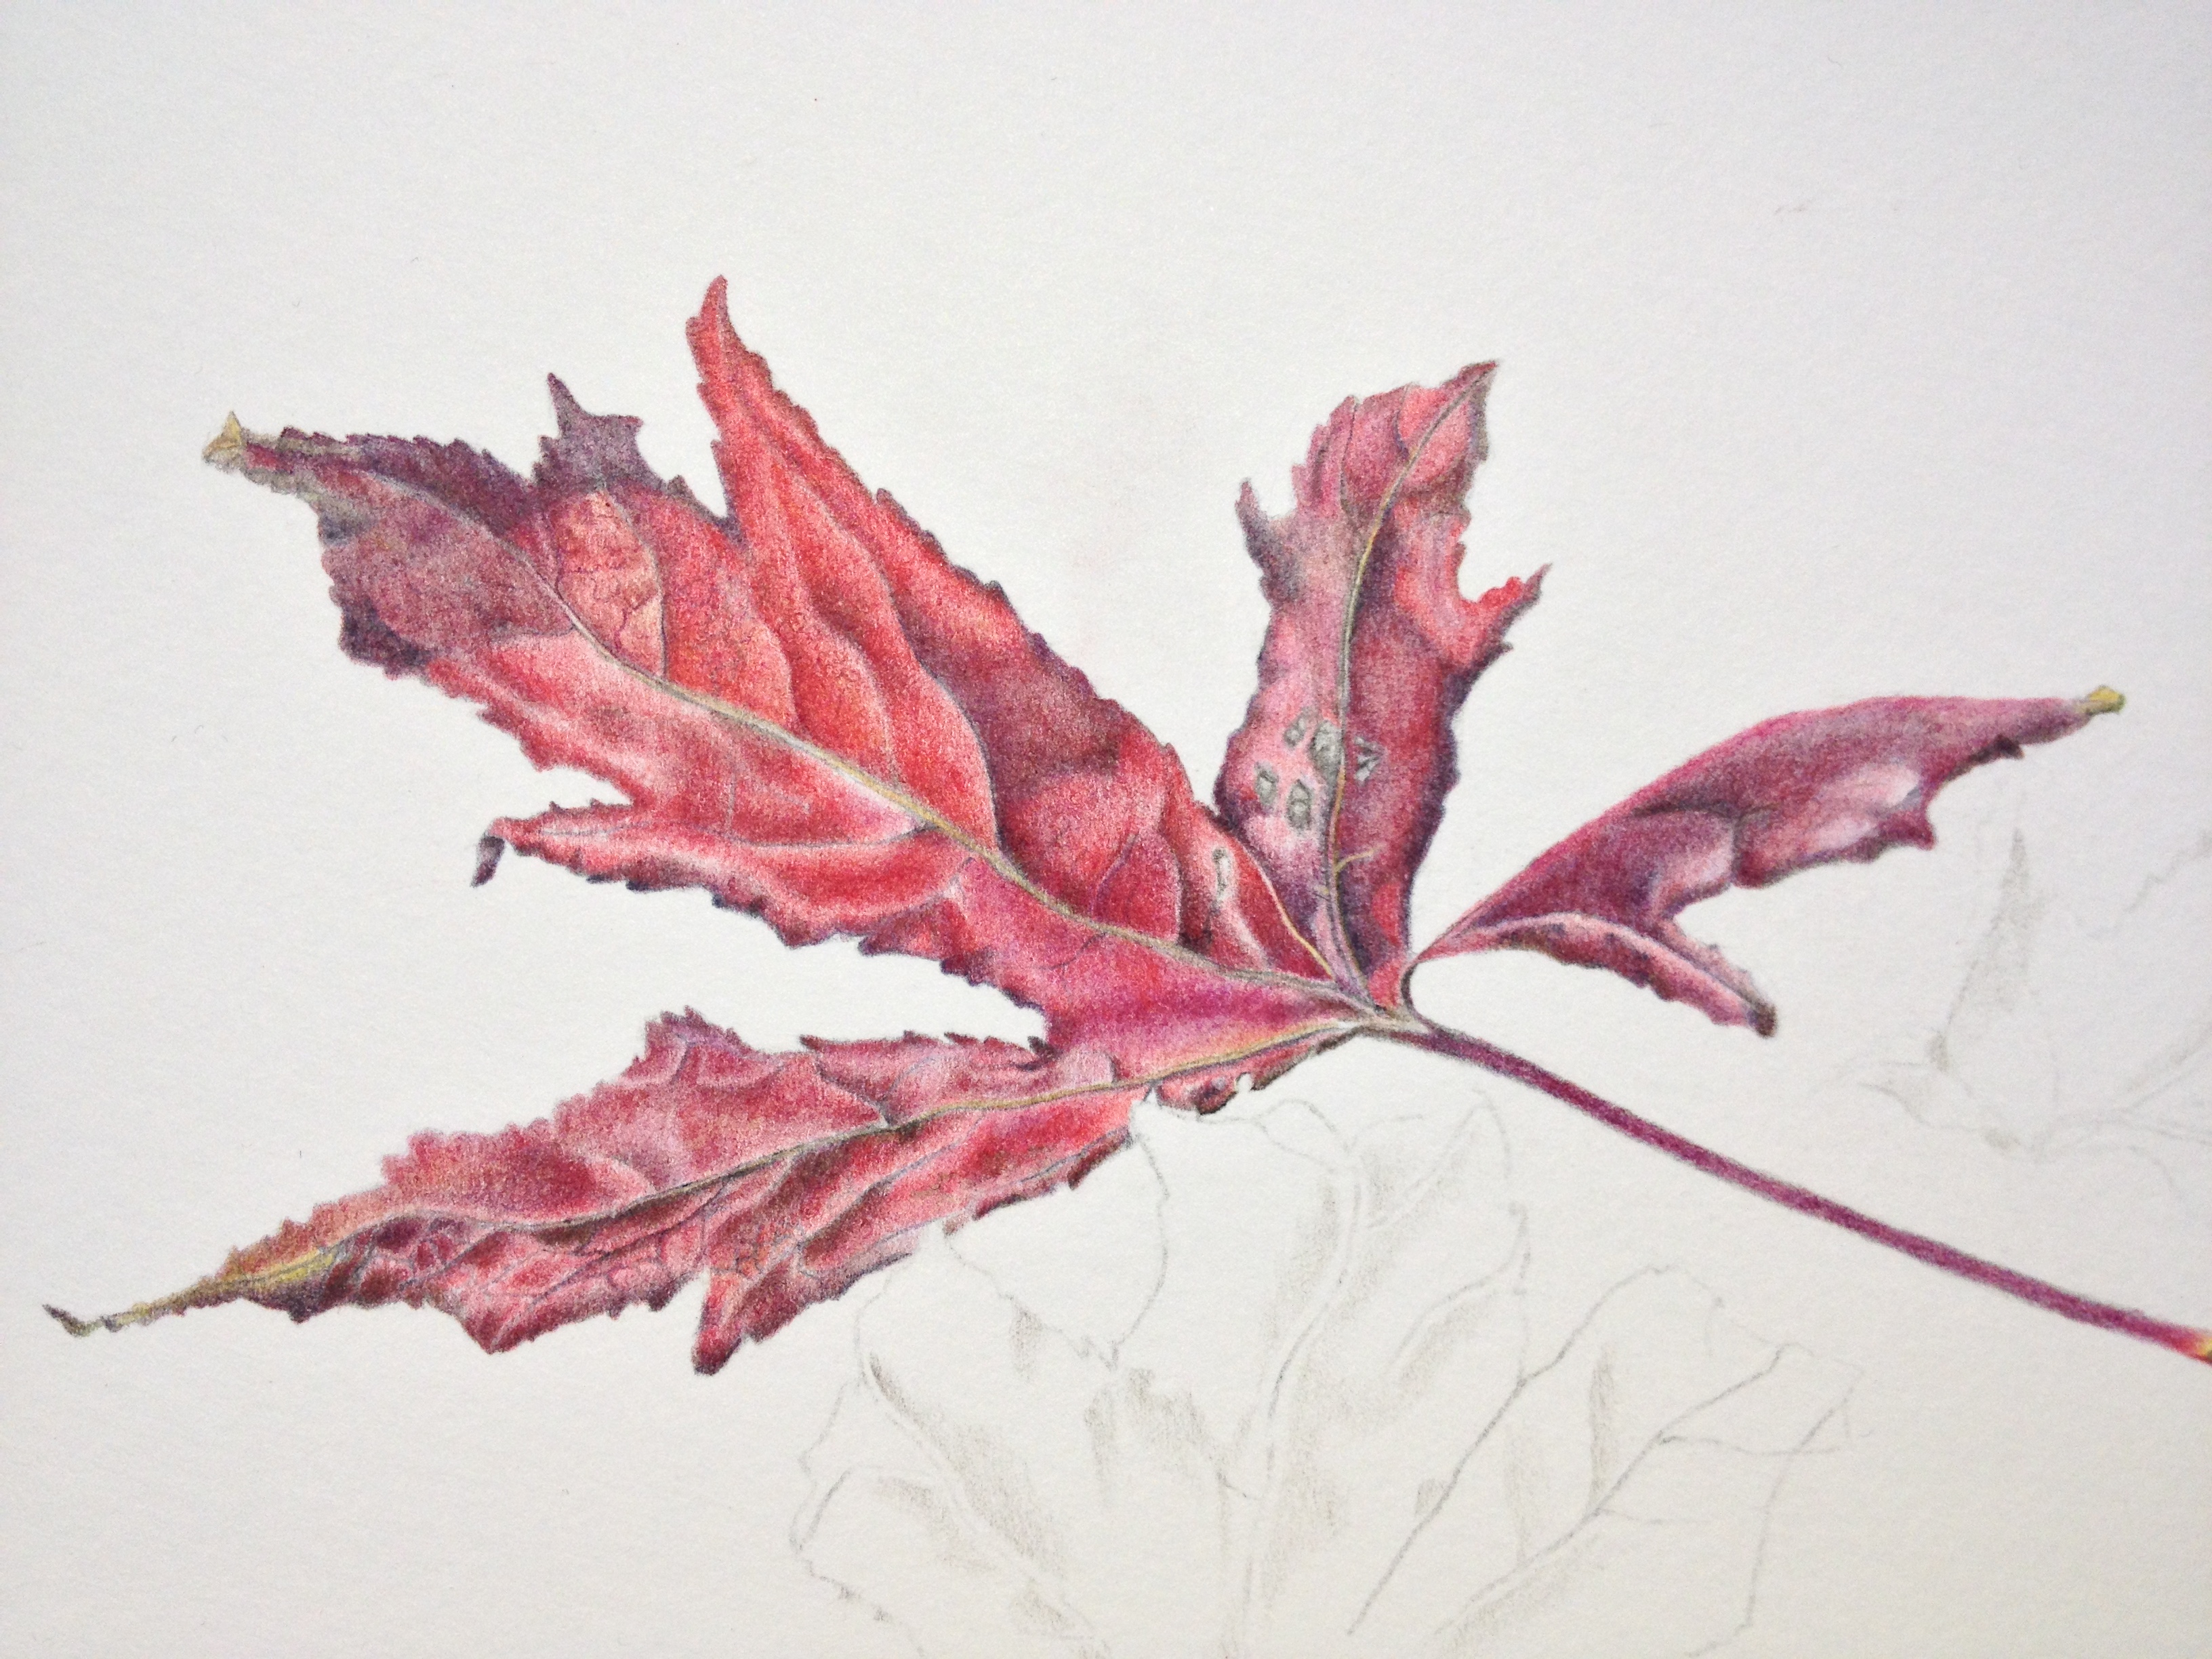
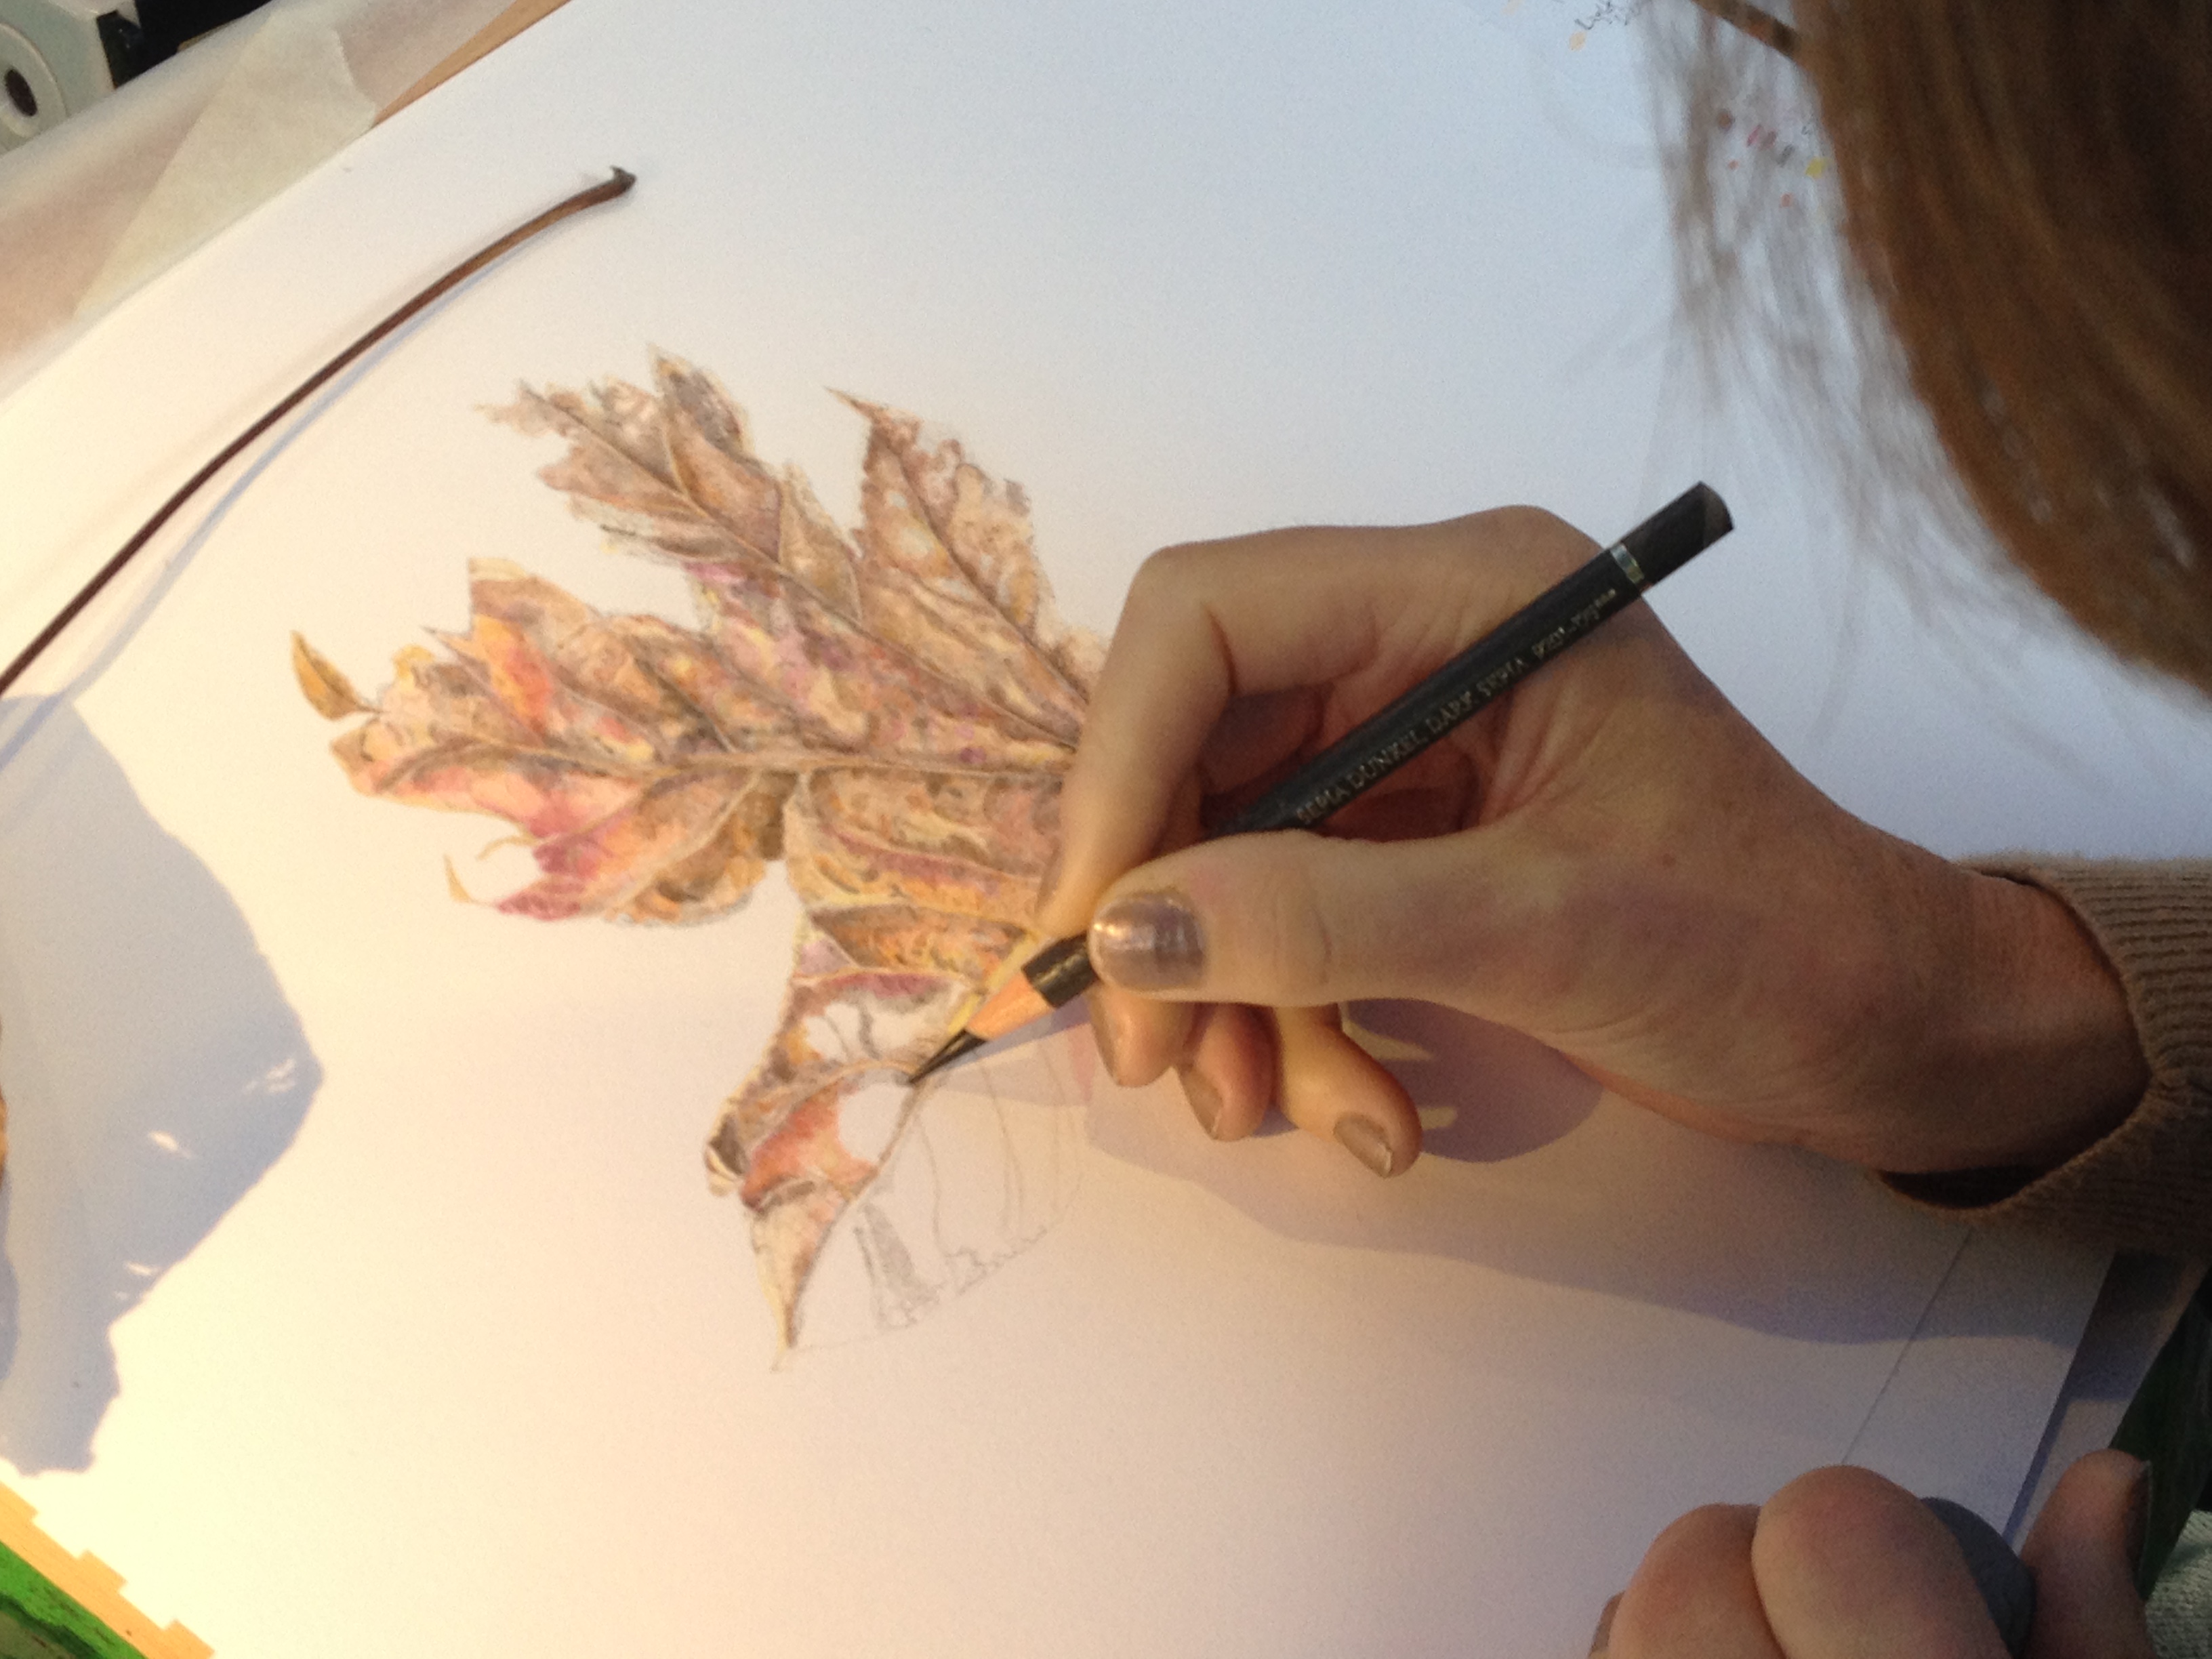
I have a student who started using coloured pencils and botanical art, last summer. As far as I am aware she hasn’t done anything like this before.
Su became enthralled with botanical art and will do it at any time she has a spare minute – even if it’s only five minutes before going to work. Su’s botanical art work has improved so much over such a short time.
What do you think? By the way, it is incomplete, but already very impressive.
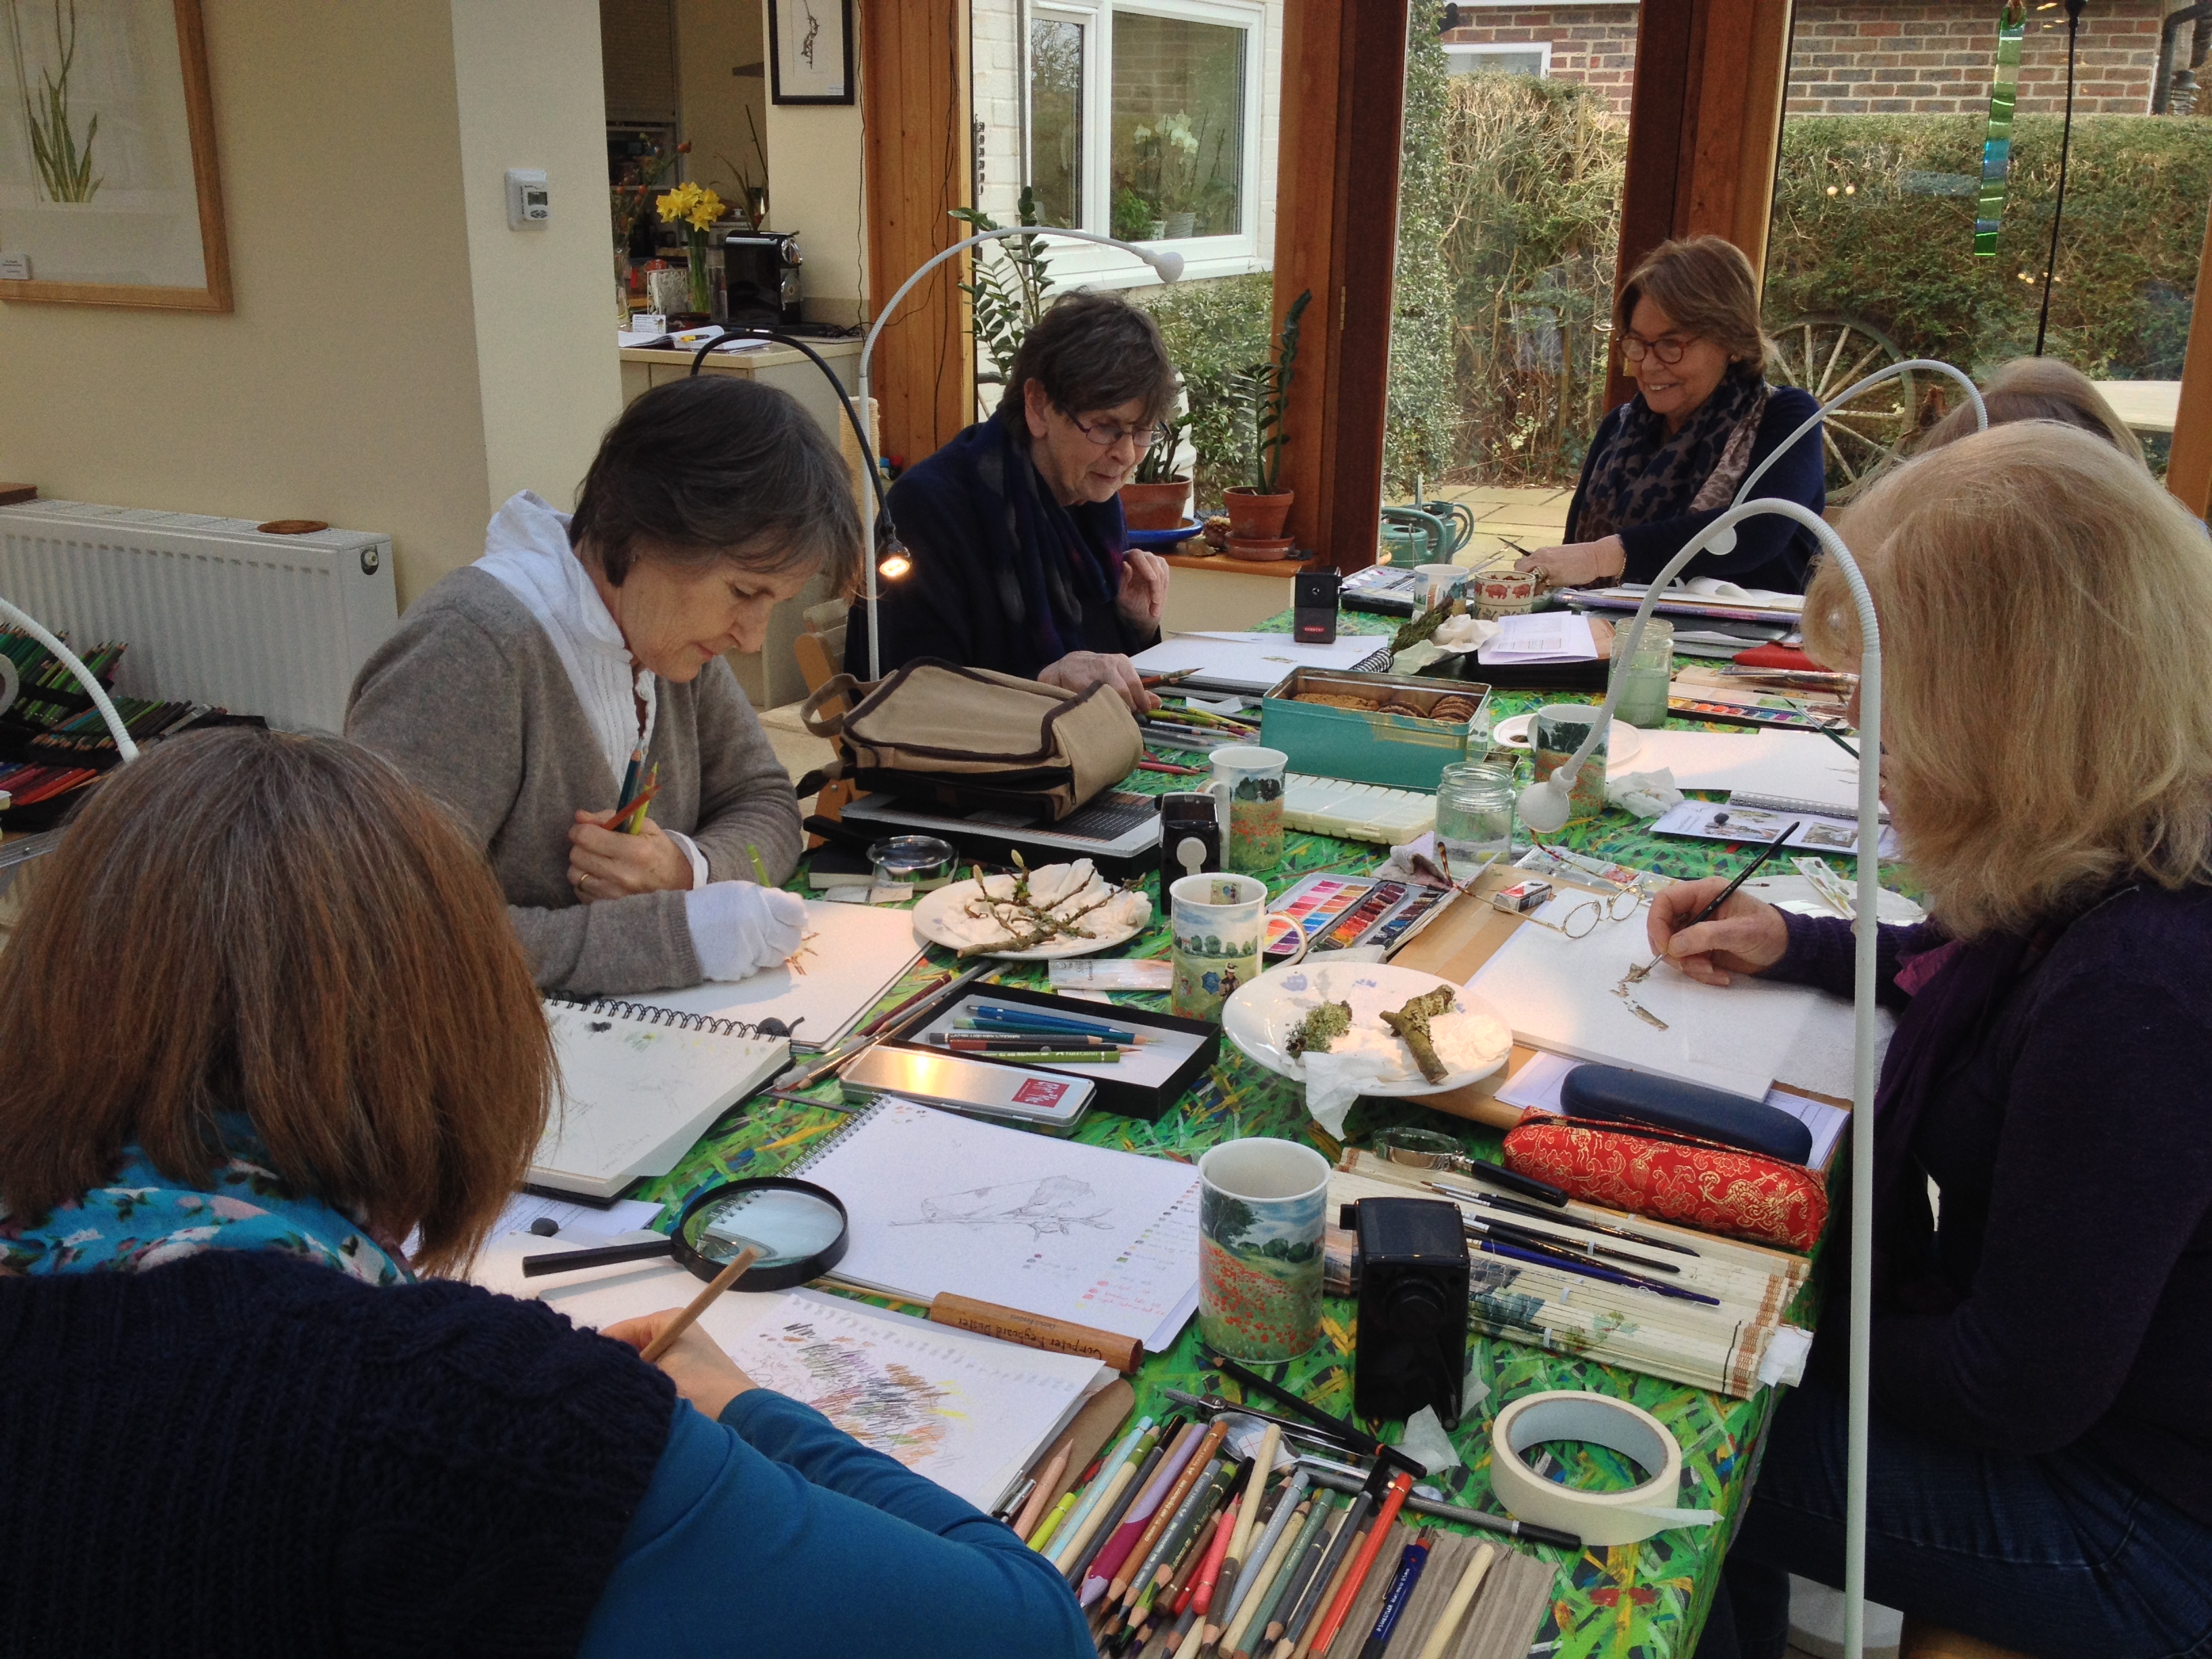
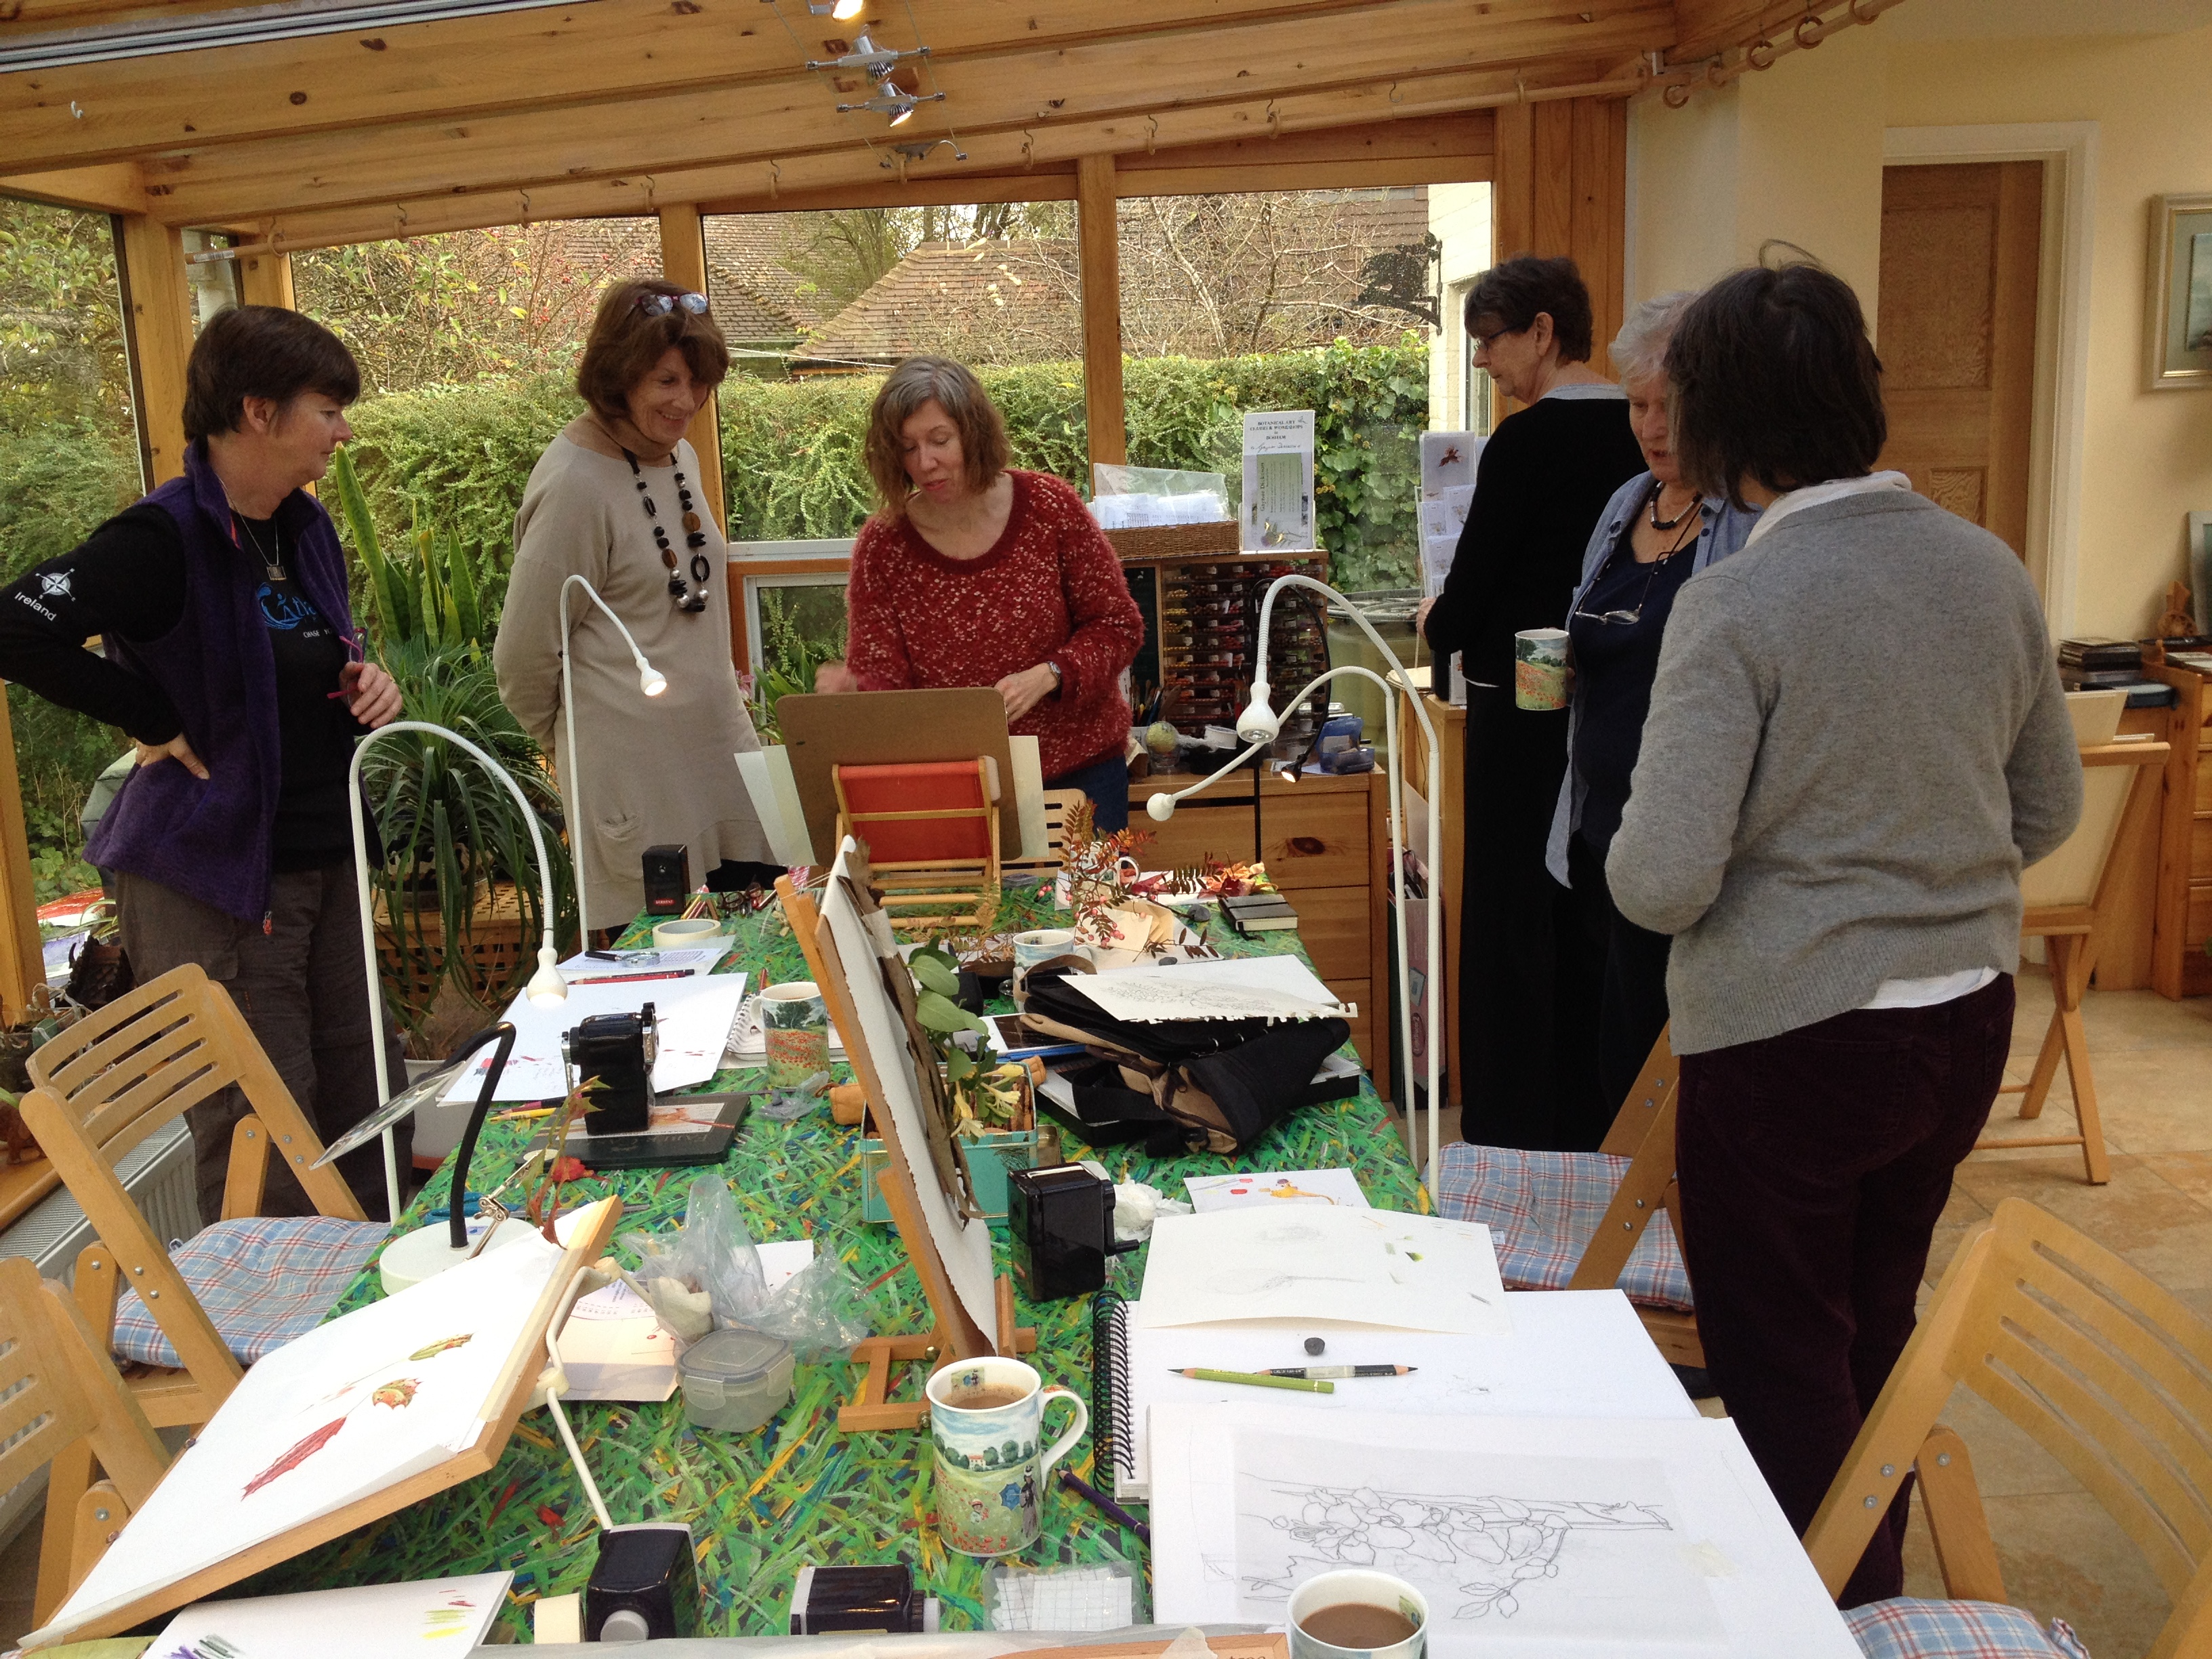
We have just finished the botanical art workshop and I thought I would get the pictures resulting from it, onto the blog before I started marking London Art College assignments.
From my perspective we had a very enjoyable workshop. But then I would say that wouldn’t I? Hopefully someone will confirm or deny this when they read the blog!
When painting a serious botanical subject that has gnarled branches with lichen or moss growing on it, I feel that I can play with the painting of it – as long as I stay true to the form, growth habit and type of lichen etc. I wanted to convey this to the group as well as get them to see the multitude of colours within such a specimen. I had two days to do this. Half of the group worked with watercolour and half with coloured pencil. Therefore it was exciting demonstrating the same topic in each of the media.
On one occasion I showed the group how to paint the furry terminal bud of a Magnolia soulangeana, first in watercolour and then in coloured pencil. It was quite amusing to hear the comments and the competition in assessing which bud looked best and which medium best suited that topic.
I was very glad to see that there were quite a few different types of lovely specimens which excited the group in different ways. There were some lovely colours observed, hidden in nooks and crannies. Red, pink, blues, oranges etc. A touch of some of these fresh colours, lifted a picture without dominating it. Anyway, I hope that you enjoy the following pictures.
The next botanical art workshop is Floating Hellebores (exposed faces), 27 February to 1 March. We already have a lot of Hellebores flowering in the garden, from very pale to very dark. There are available places, so do get in touch and book.
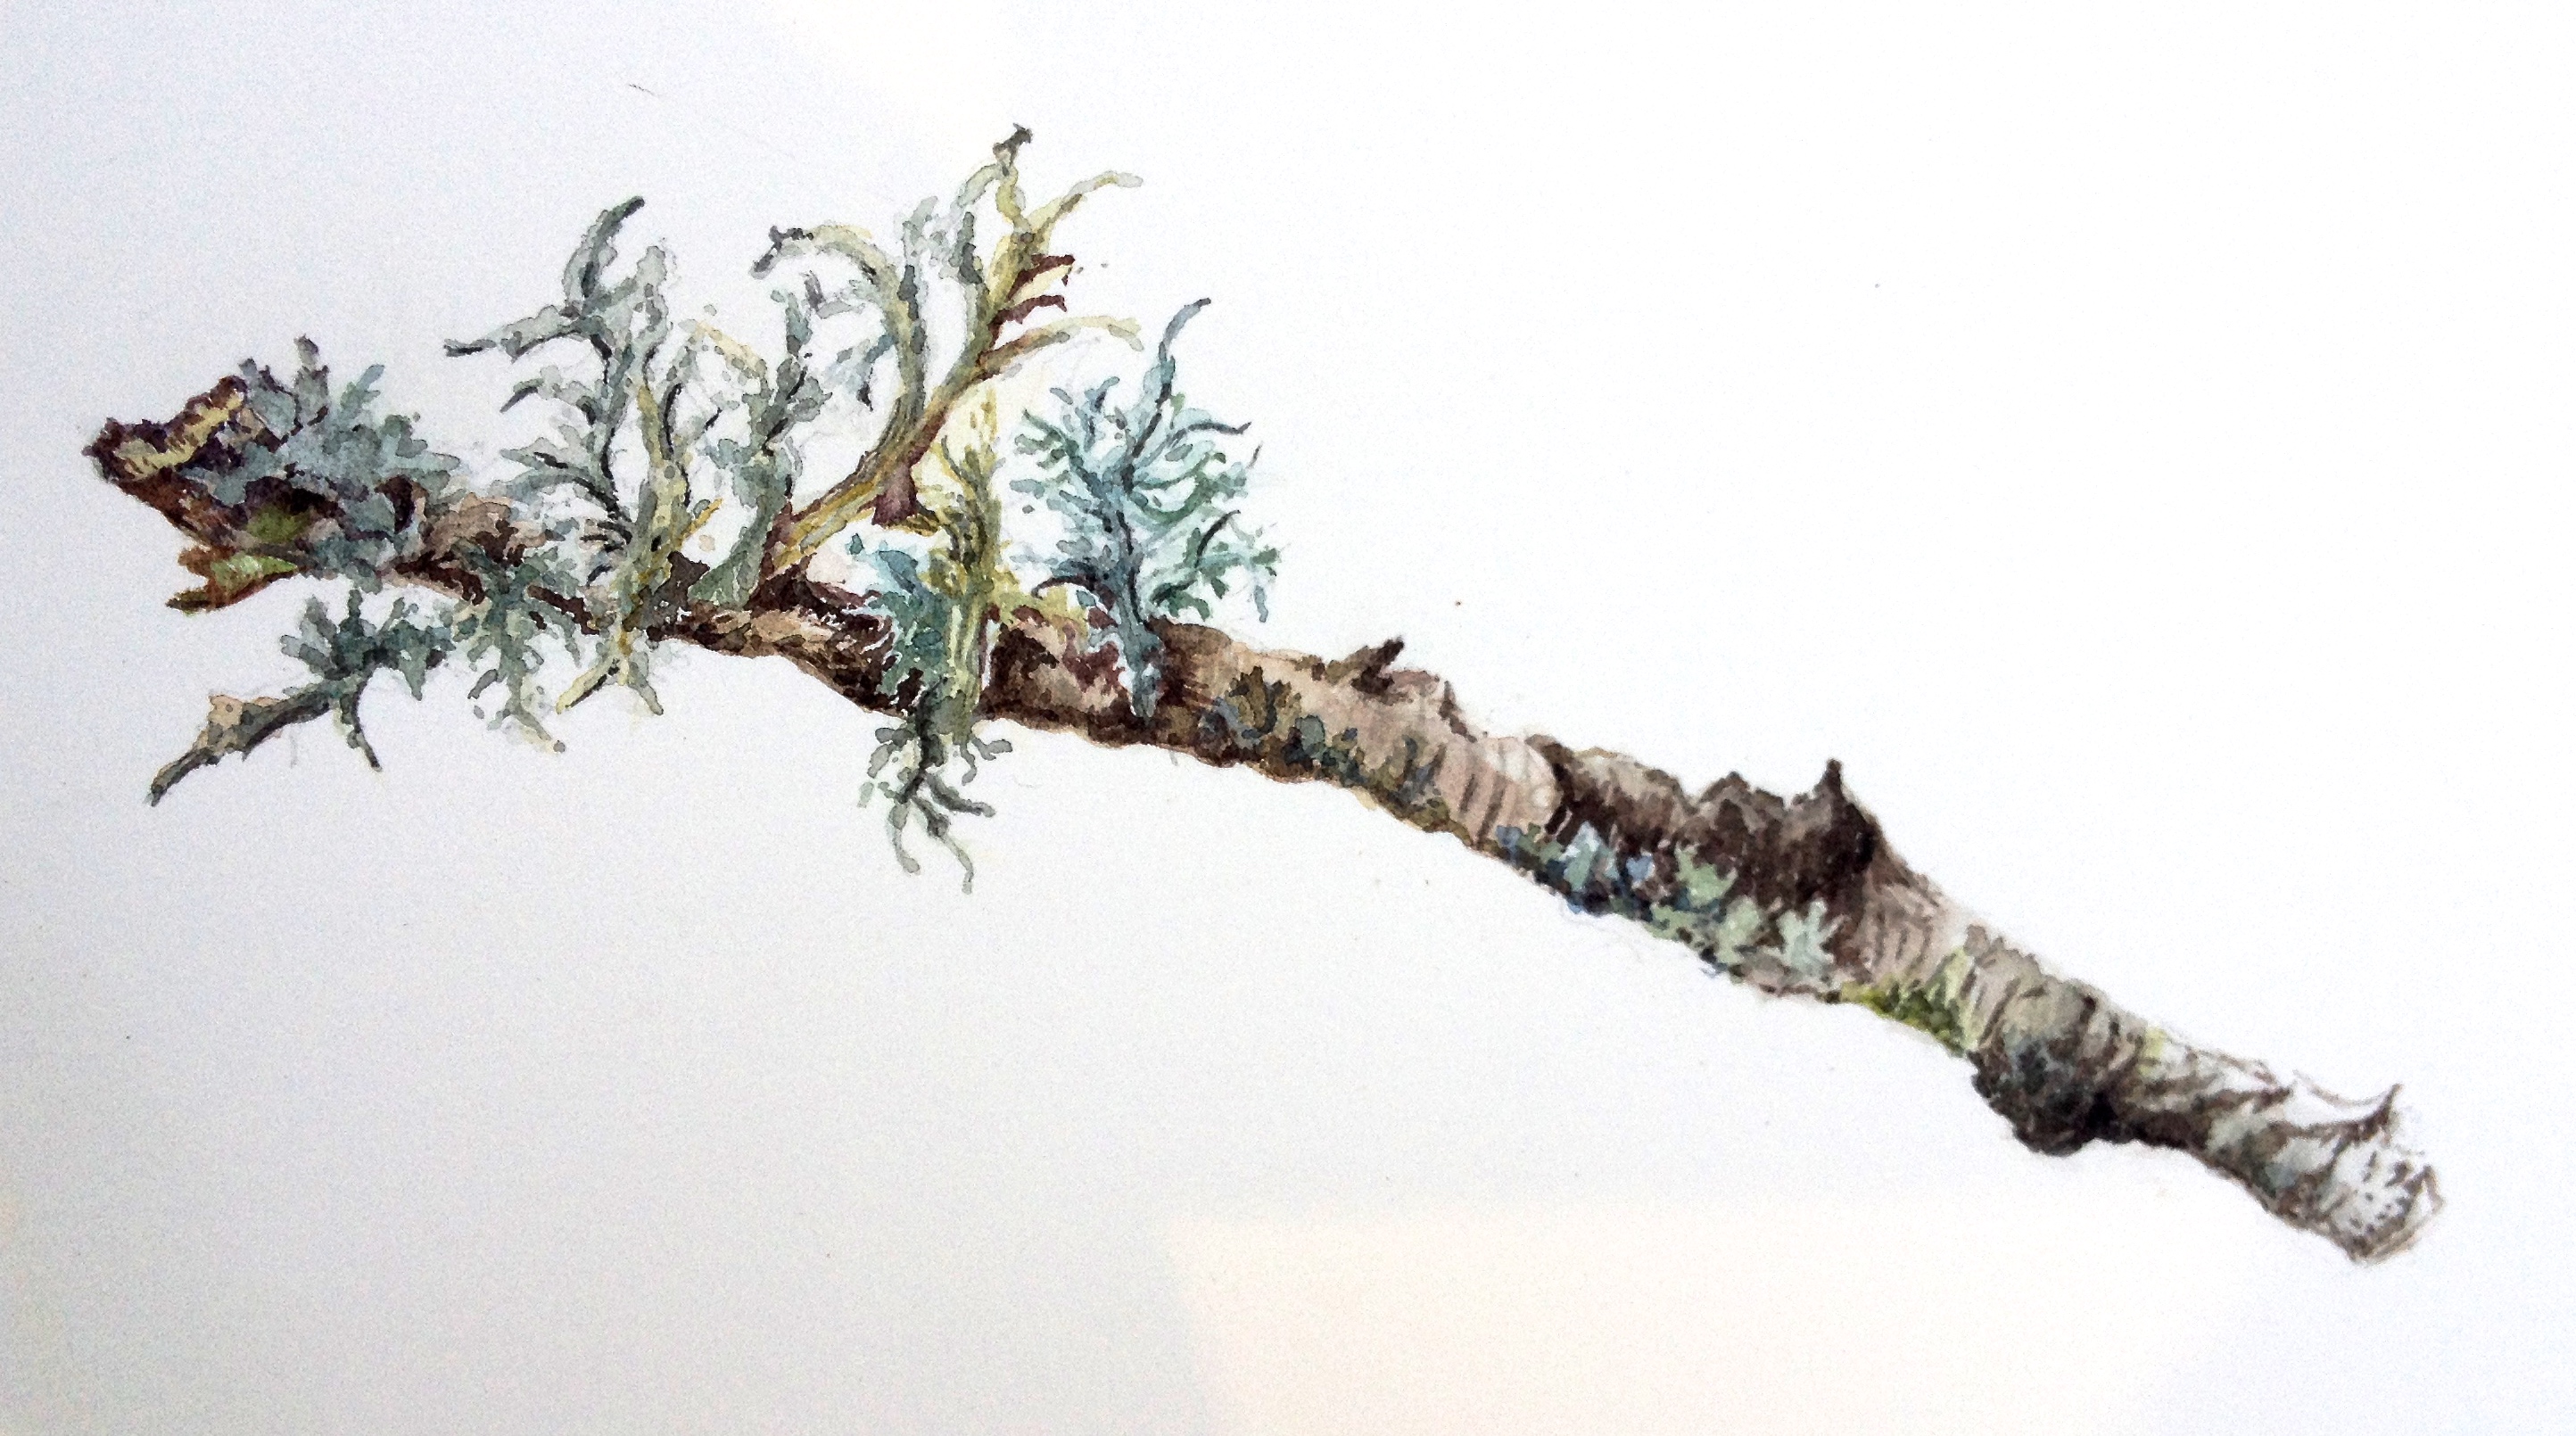
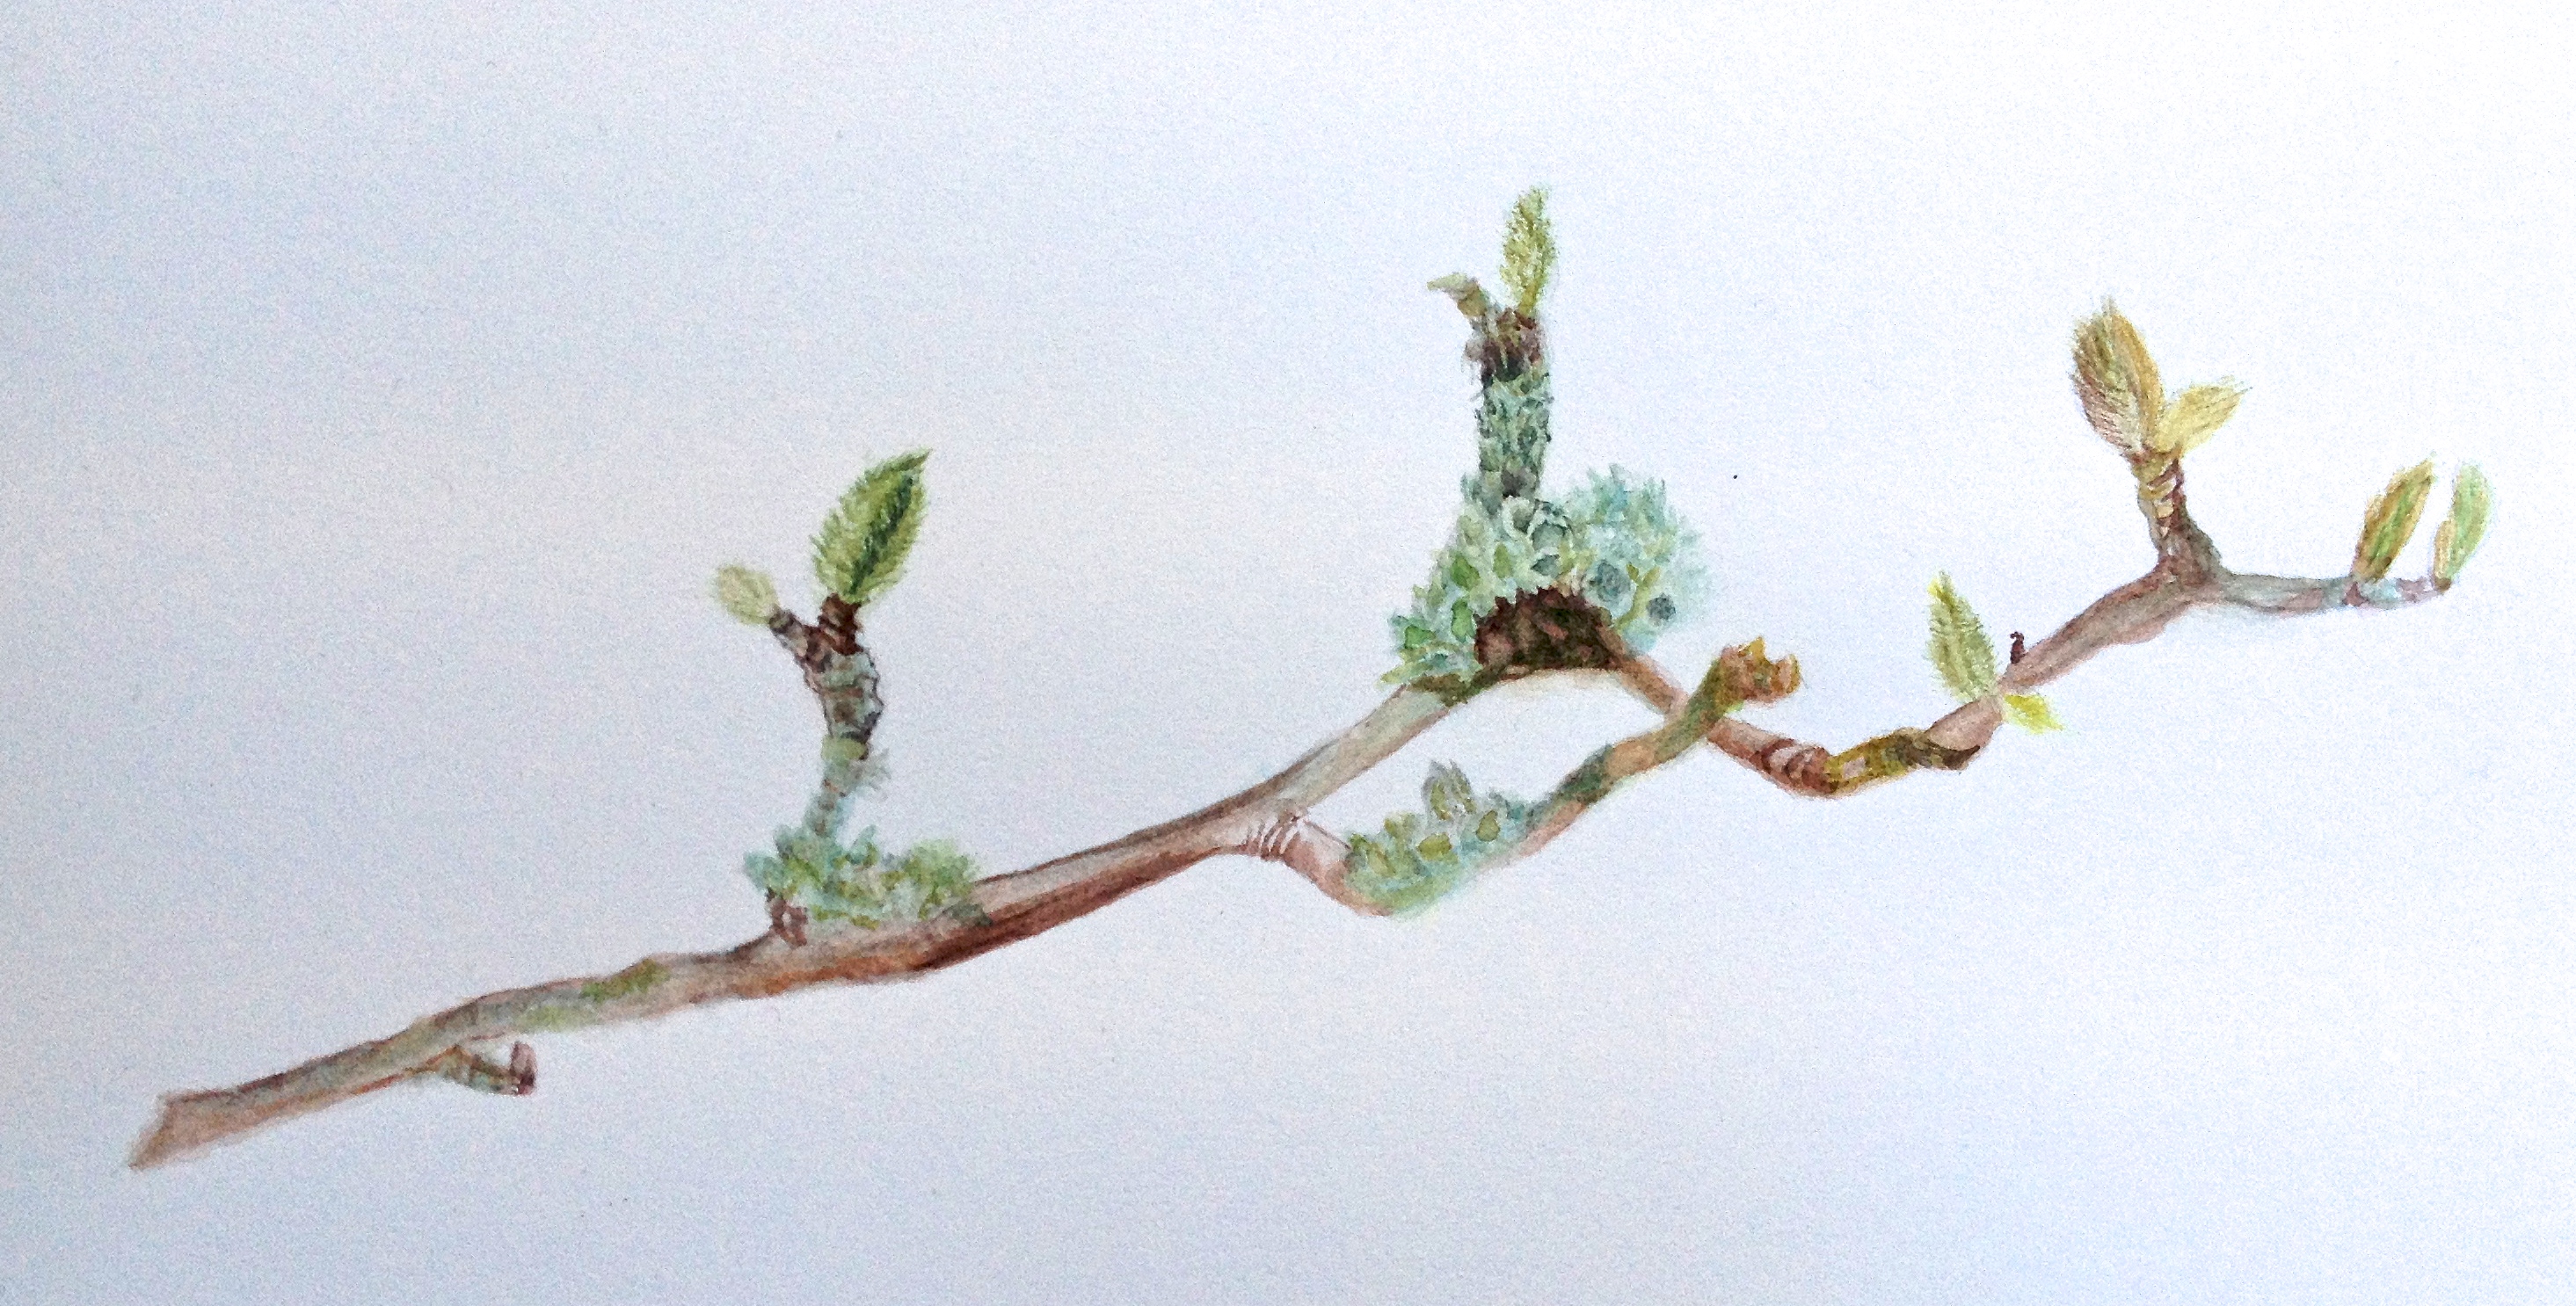
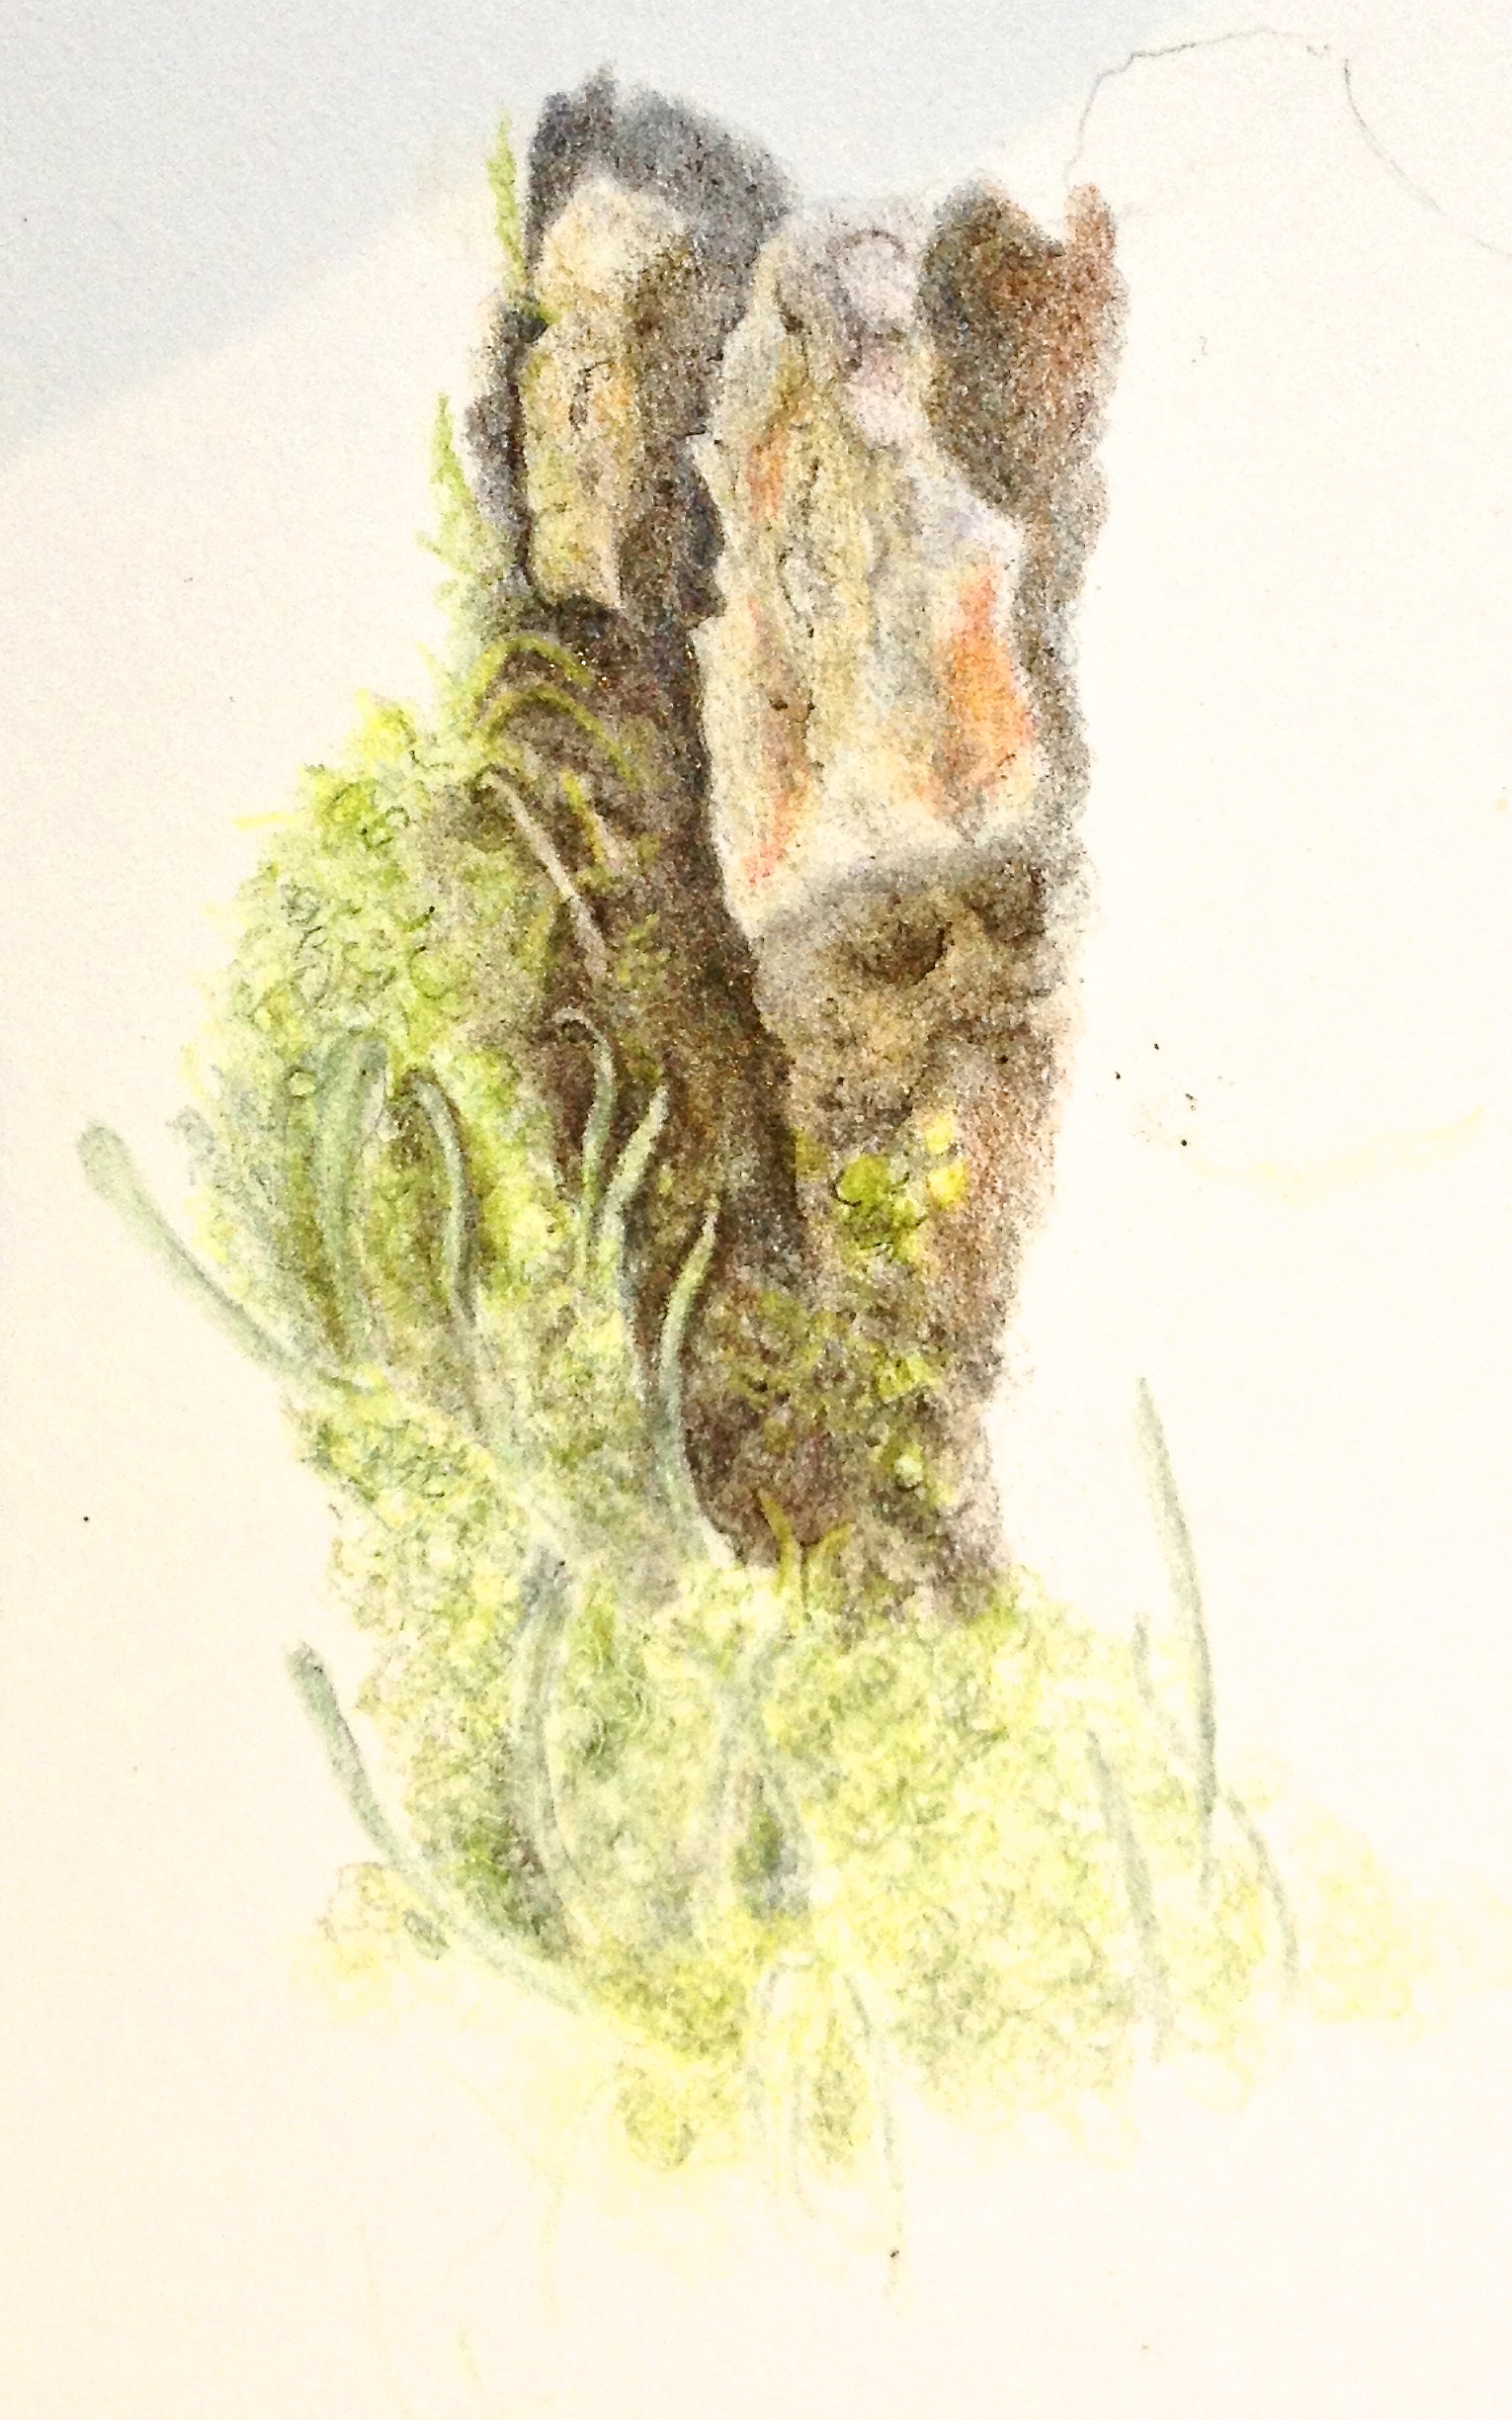
The brave classA piece of bark with several lichen types growing on it. The main one is identified as Cladonia cornuta.At workGnarled birch branch with a variety of lichen forms. Watercolour.A branch of Magnolia stellata in watercolour.A variety of types of licjhen and moss on another branch from a Magnolia stellata tree. Coloured pencil.Start of a very complicated piece of work in Coloured pencil. The difficulty of portraying Cladonia cornuta amongst the other lichen growing on the bark piece. Quite a challenge.Rosehips in WatercolourBoth Birch twig and bark from a tree, with small amounts of lichen growing on it. Coloured pencilBranch with lichen very happily in situ. Watercolour
I was reminded today by a friend that I have been remiss in my blogging. I am sorry for that. Therefore to catch up-
Last Saturday Robin and I were at the Society of Floral Painters(SFP), AGM and lunch. It was a very good meeting and lunch finishing off with an interesting talk by Roy Lancaster. It is the first such meeting I have been to and I gained a lot from it – as well as meeting lots of other botanical and floral painters.
The SFP have their next exhibition in Chichester Oxmarket arts Centre 20 May – 7 June. Look at my website http://www.gaynorsflora.com for details.
But since Saturday I have been continuing with the Pineapple picture – when time has allowed. I am adding a few more pictures at the end of this blog.
Tomorrow I am having a new two-day workshop here in Bosham. The topic is ‘Twigs and things’. It will be very interesting to see what people bring with them. I hope to be able to post some pictures after the workshop.
The next workshop is Friday 27 February – Sunday 1 March and the topic is Hellebores – floating. This means one has the opportunity to paint the flowers face up, showing their beautiful and colourful detail. There are a very few vacant places, so do contact me or look at my website (details above) for more information.
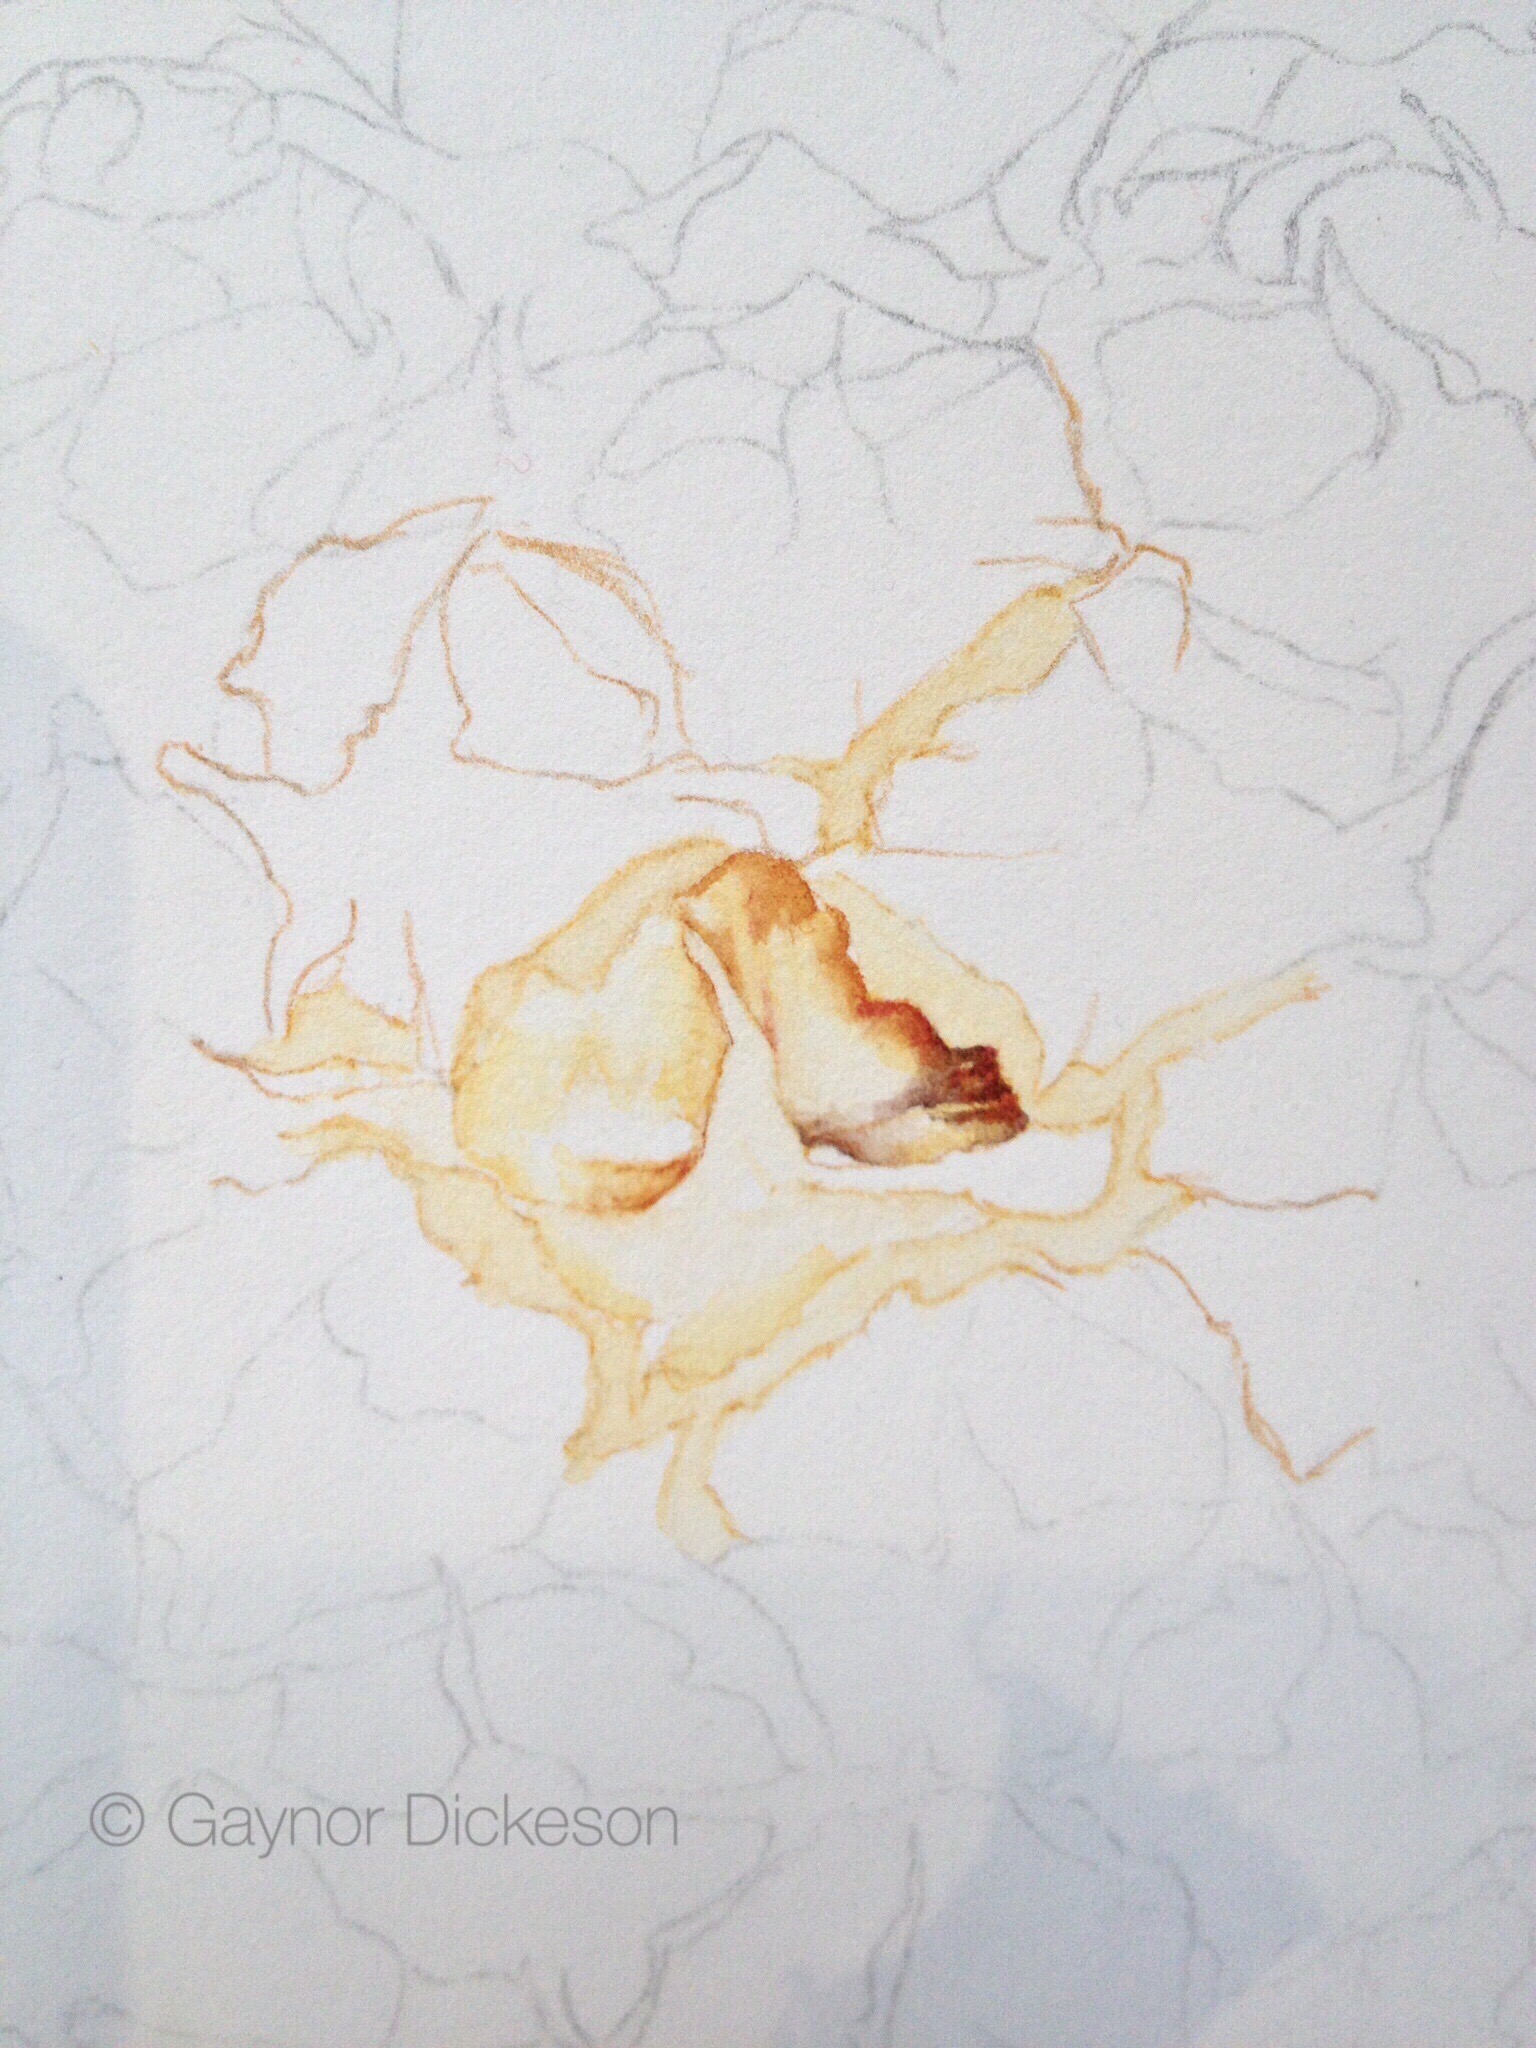
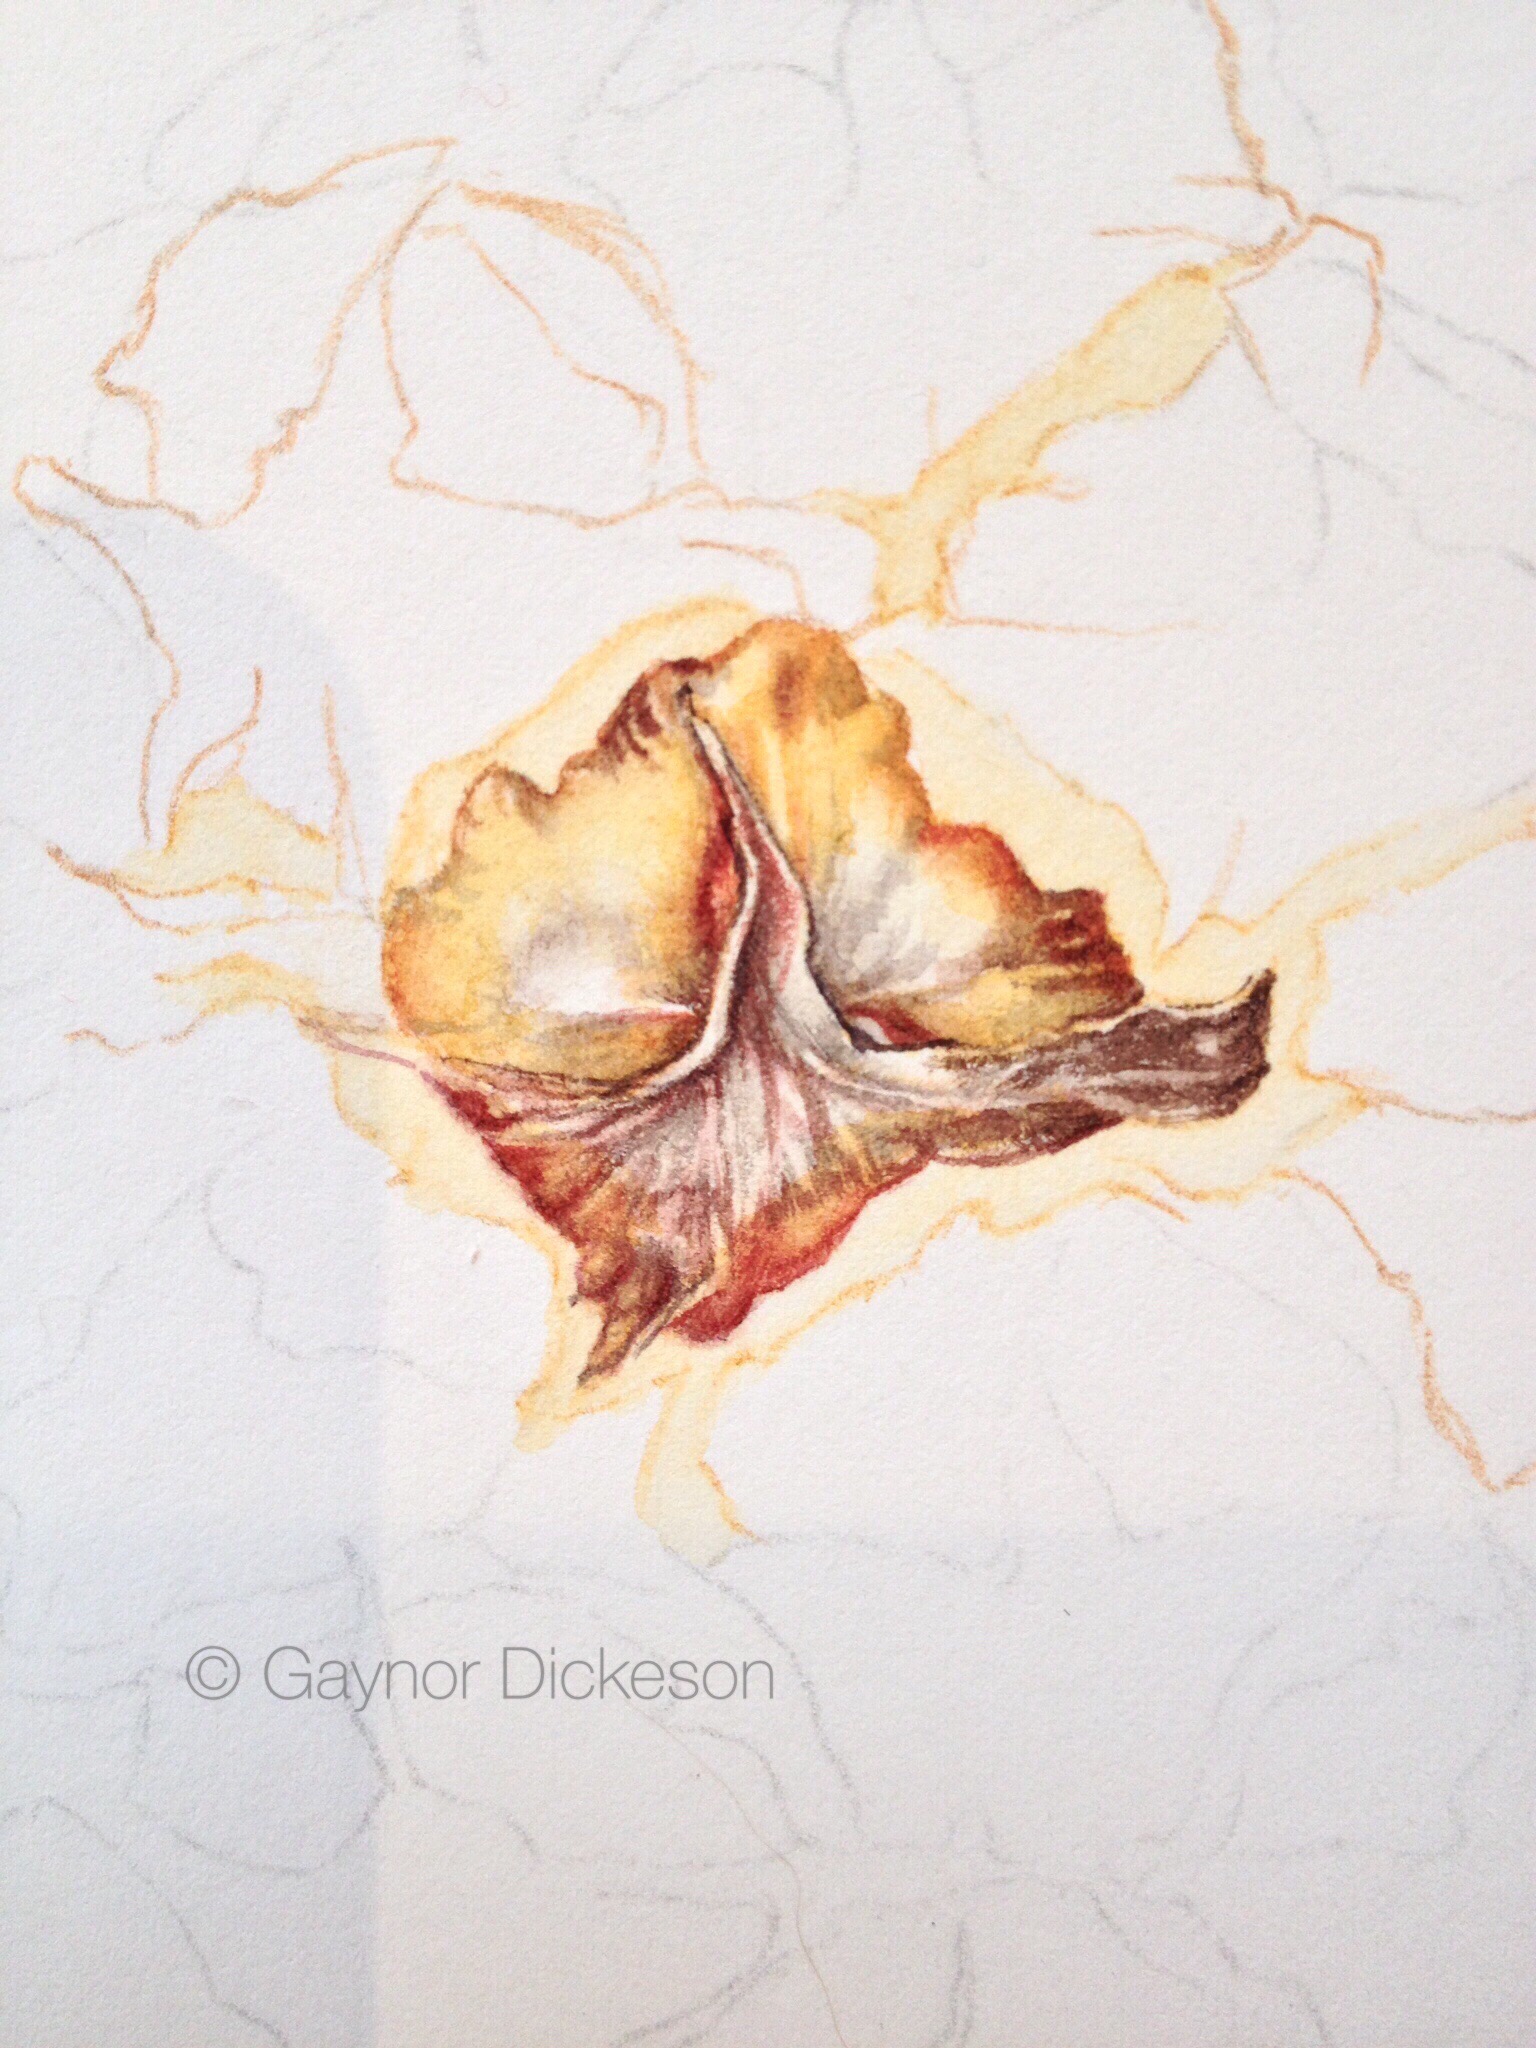
It is now several years since I painted my last pineapple and I have been asked to paint another one. I started the drawing before I went to Norway and today have got back to it having caught up (sort of) with other outstanding tasks that accumulated whilst I was away.
The trouble is, we had to eat the last pineapple before we went away! So what do I do? It was delicious by the way.
When you buy a pineapple, it has been cut and removed from the parent plant. This of course is obvious, but what is less understood is that it will not become riper after it has been cut. As far as I understand the pineapples are cut at their ripest. Some buyers prefer to buy them green and if the golden yellow colour is wanted they are sprayed about a week prior to harvest with a plant growth regulator. If you want to check this up read http://en.wikipedia.org/wiki/Pineapple.
The pineapples that I have bought are mainly from Costa Rica and I think are the cultivar “smooth cayenne”.
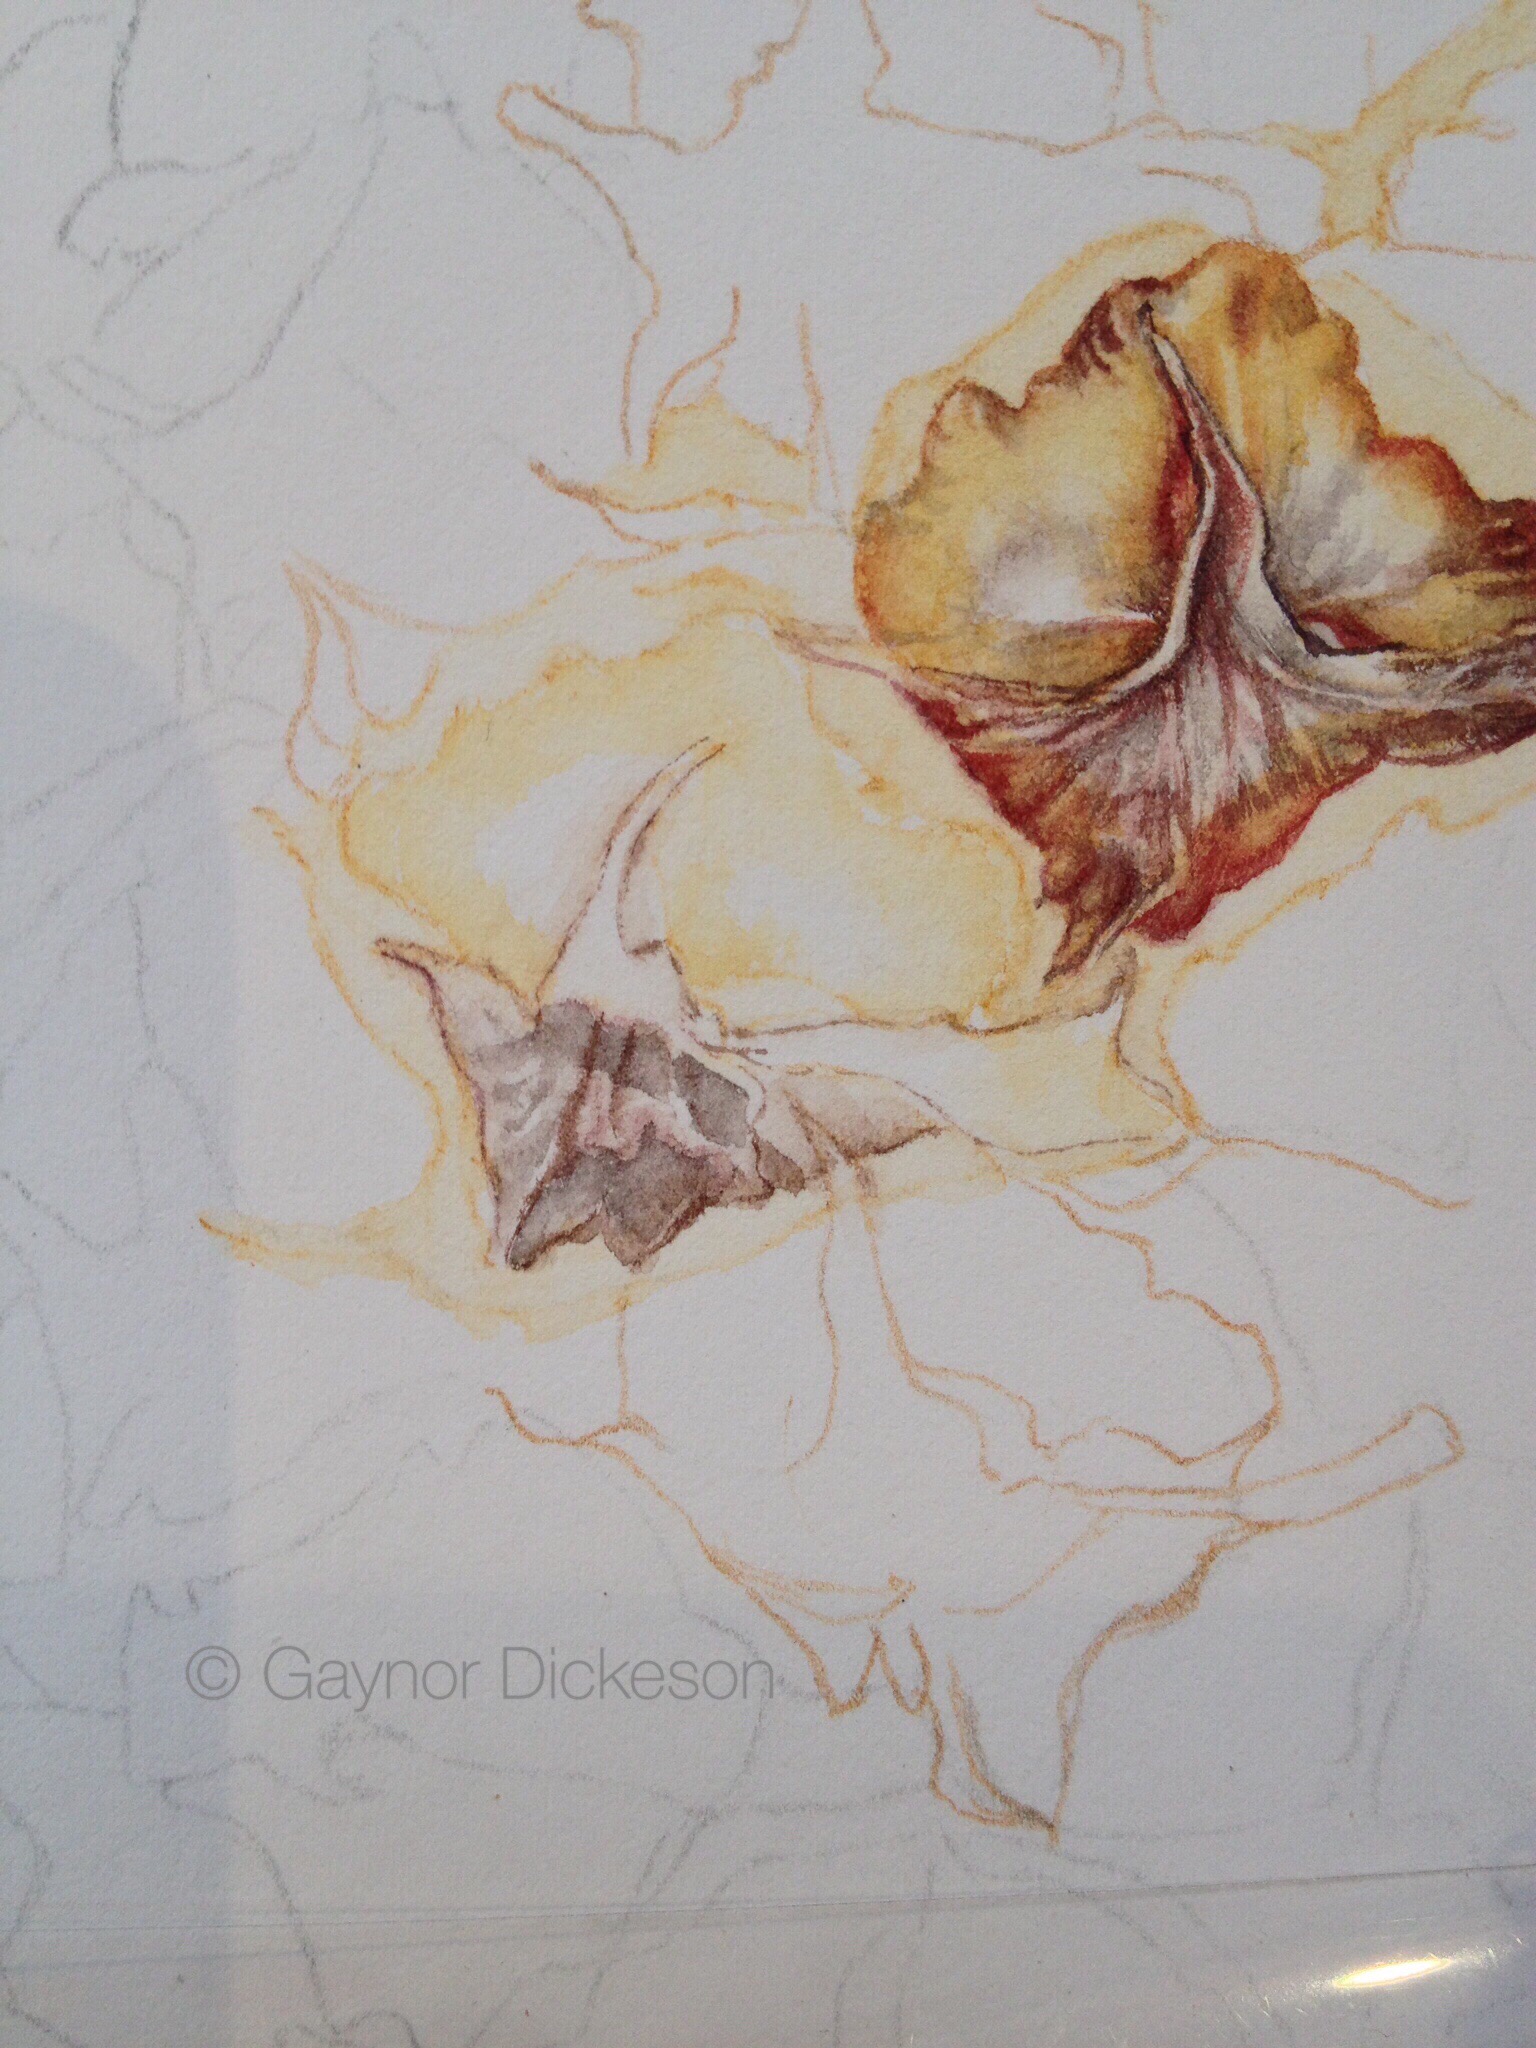
I normally take pictures of my subject first so that I have an idea of what it originally looked like, so that when it dies or rots too much, I can replace it with a fresher specimen. In this instance my original drawing and placing of segments will be different to any other pineapple I get. But, I can use segments in the new pineapple, making sure that they are in a similar position and lit in a similar way to the original specimen. Thus I can continue to paint from life – which for a botanical artist is far the best thing to do.
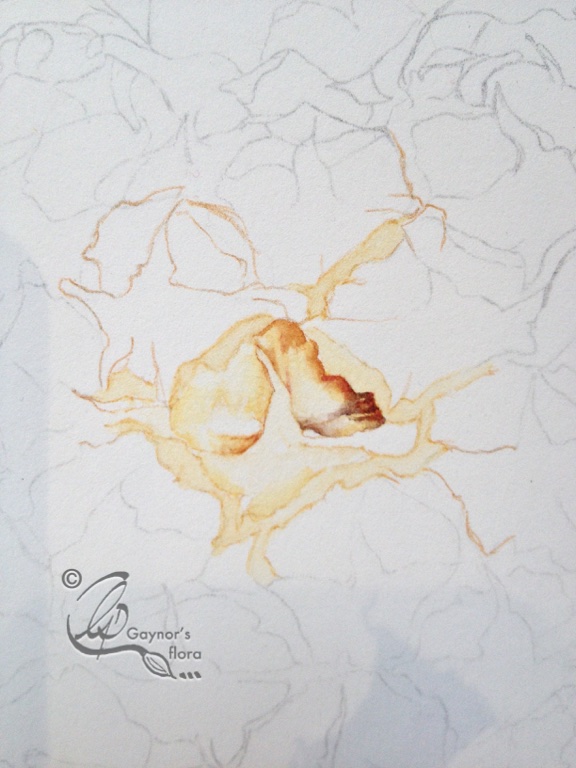
My initial work:
Initial pineapple drawing.
Note the tramlines in a Fibonacci spiral. I observe the lines, draw the crossing tramlines and at each intersection place a segment. Once a tracing has been made, I do a very rough shading on the original sketch to indicate the form of the fruit.
The tracing of the original drawing.
I traced over onto a Fabriano Classico HP 640gsm paper in a manner that I have previously described in one of my blogs. This leaves no indentations from the pencil and is easily removed before painting.
I used a watercolour pencil to lightly outline my segments in an area of the pineapple I can manage initially. When I begin to paint, this colour will be absorbed into the painting avoiding lines. I don’t do too many at once in case I really need to change any of the segments in a later pineapple.
In case anyone thinks I have forgotten all about the important subject of Botanical Art – I haven’t!
But, for the last few days Robin and I have been in Norway preparing for the botanical art course there 28 June until 5 July. But at the moment it is deliciously cold there.
We have been checking a few things out, buying more wool for yet another Norwegian jumper and stripping some beautiful old stairs.
My daughter has a house in Tønsberg, a few kilometers down the coast from Åsgårdstrand. Her stairs have a very lovely shape to them which is identical to ones in the house where she grew up. In those days I stripped, sanded and varnished those stairs to bring forth their natural beauty. She wanted to do the same thing with her own stairs and we agreed to help her. We got as far as stripping!
Yesterday we took the day off and went for a drive to The End of the World. Verdens Ende. This is a beautiful NAtional Park area on the southern tip of an island called Tjøme. If you want to look at a map, find Tønsberg, follow a few kilometres south onto an island called Nøtterøy, And the main road leads to Tjøme and the Verdens Ende.
The pictures are from that area before the snow came. That arrived as we left Norway today.
To finish off that lovely day, cards on a soft surface!
The SBA botanical art exhibition in Palmengarten, Frankfurt, has almost left my to-do list for this year! Our SBA member Sue Henon and Palmengarten have already started having meetings about the next exhibition in 2016, but I will now have nearly a year free to decide about any involvement I might or might not have.
The pictures that came back are nearly all out of the house and there is only one last collection due. The house almost looks empty – so much so, that I can now see all the dust that quickly collected when so many people were in and out of the house collecting pictures. We will have exactly six days to clear up before our Christmas guests arrive!
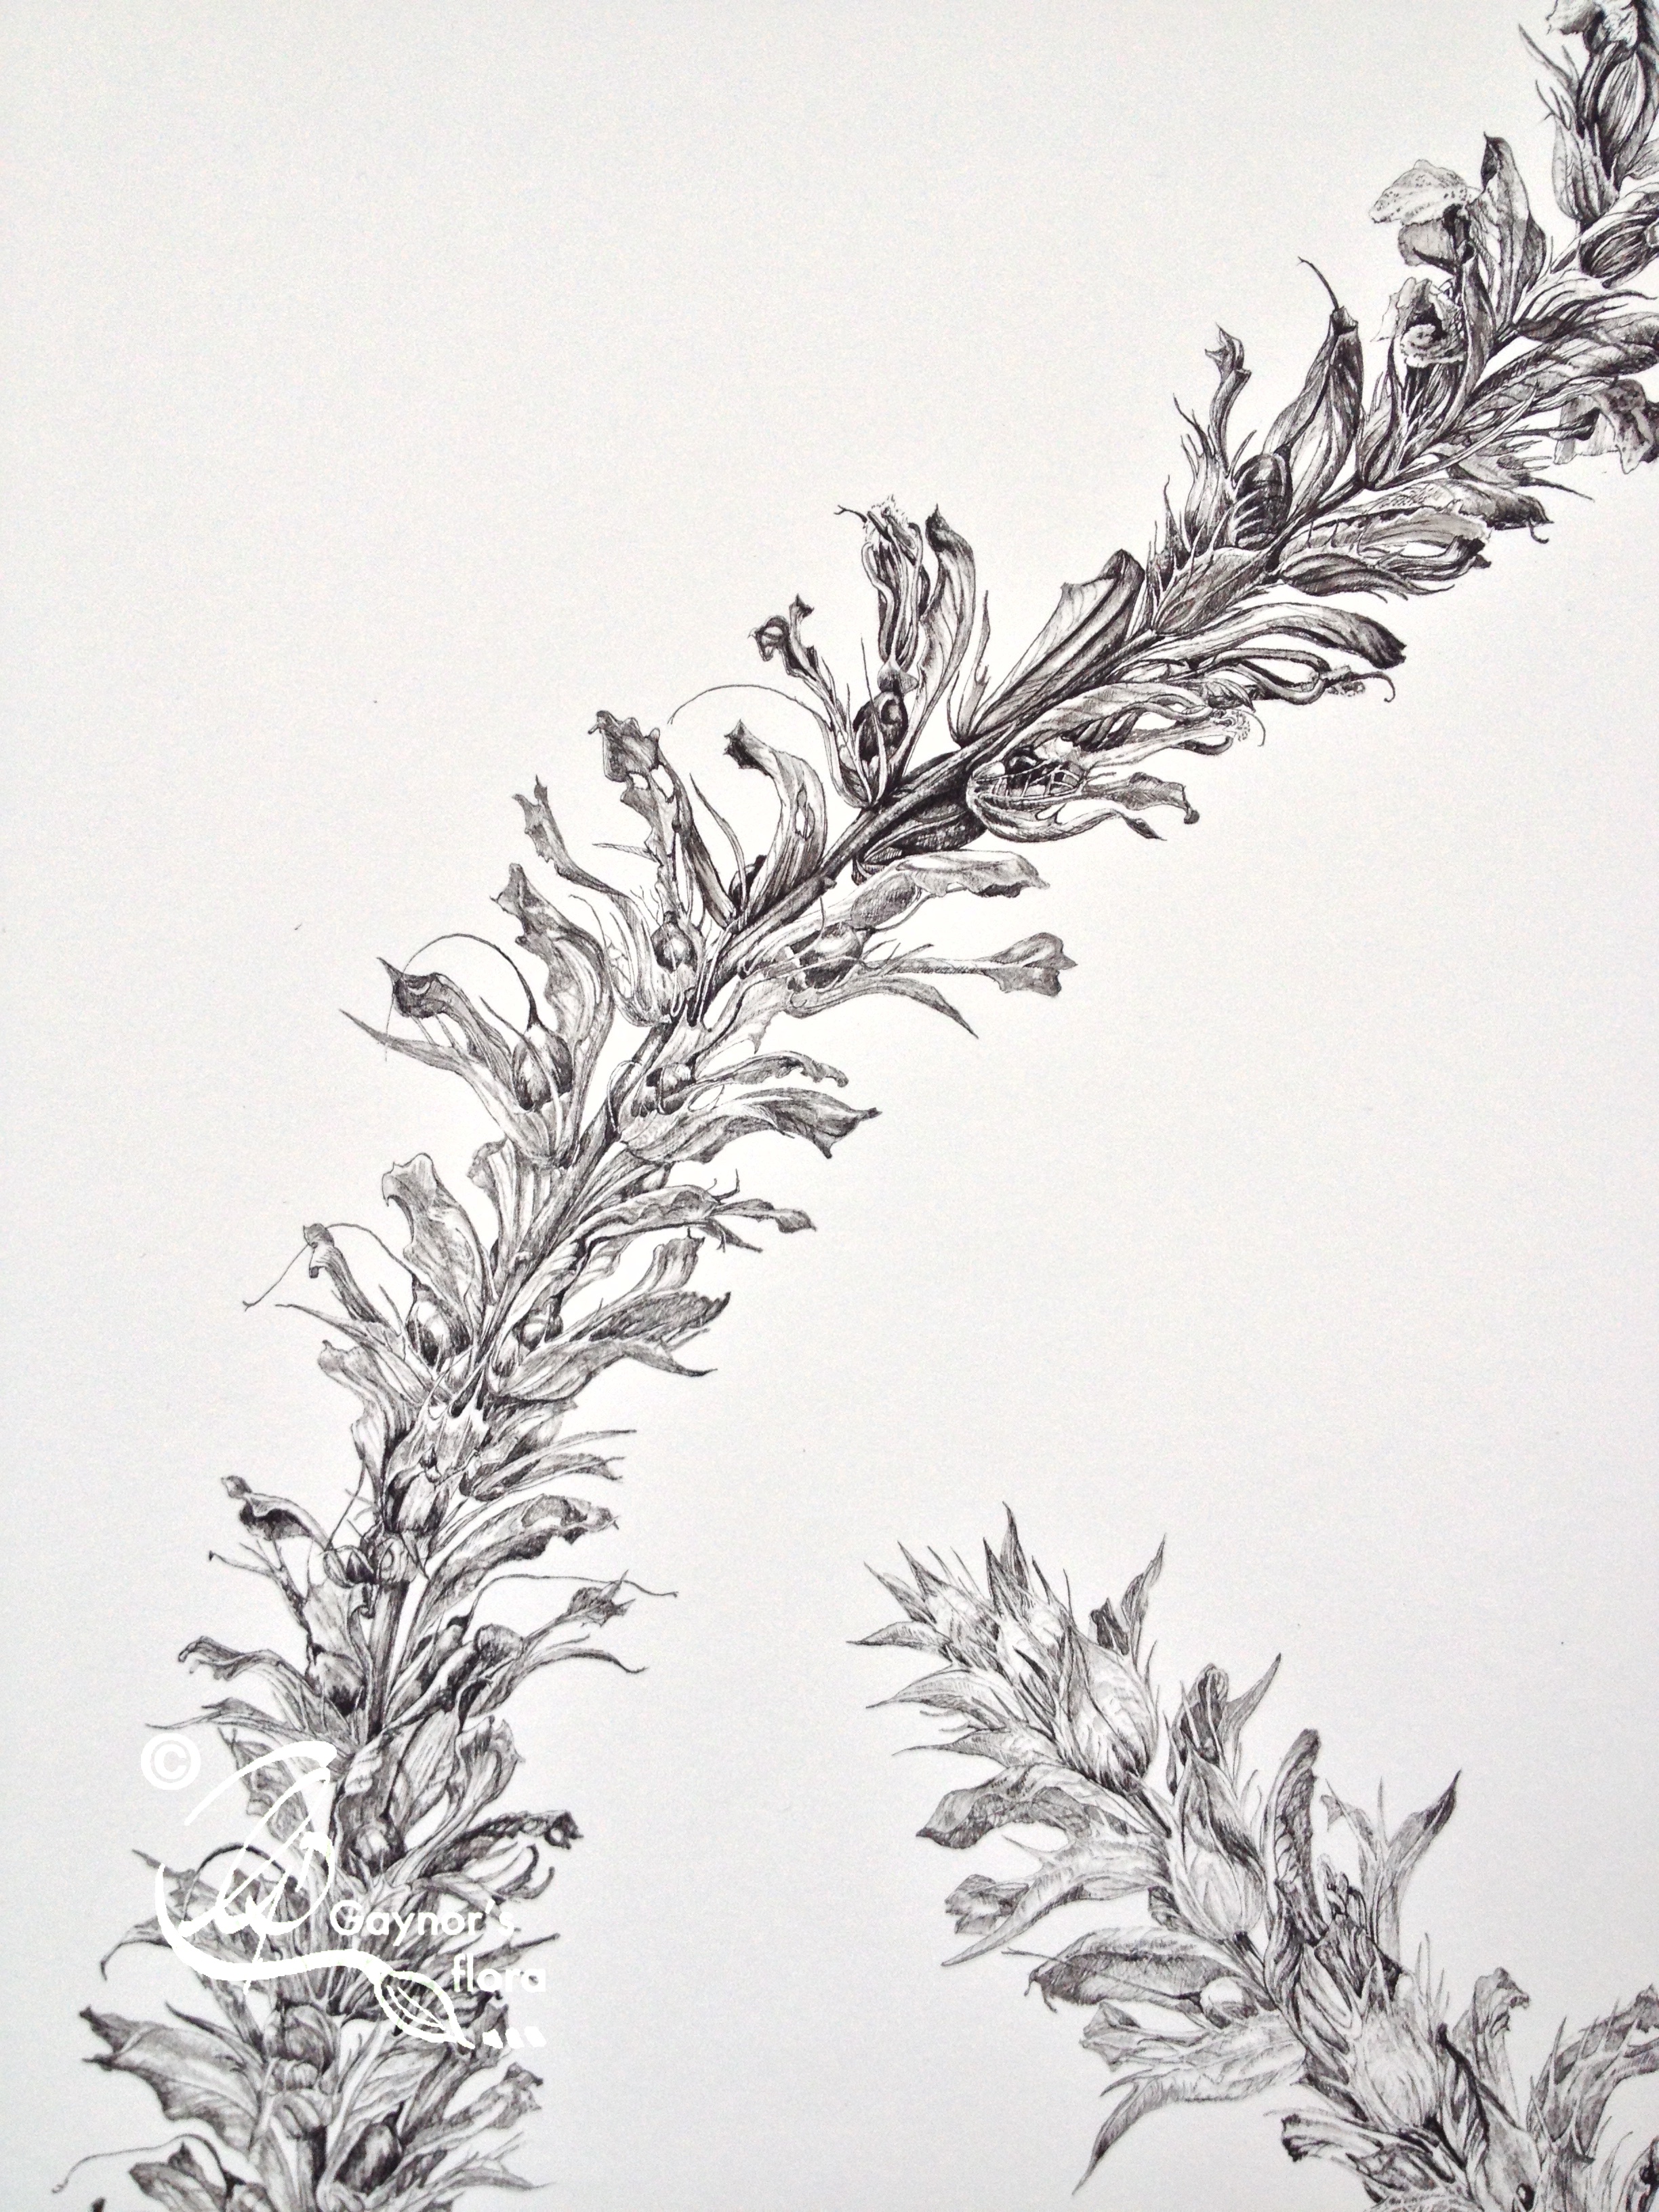
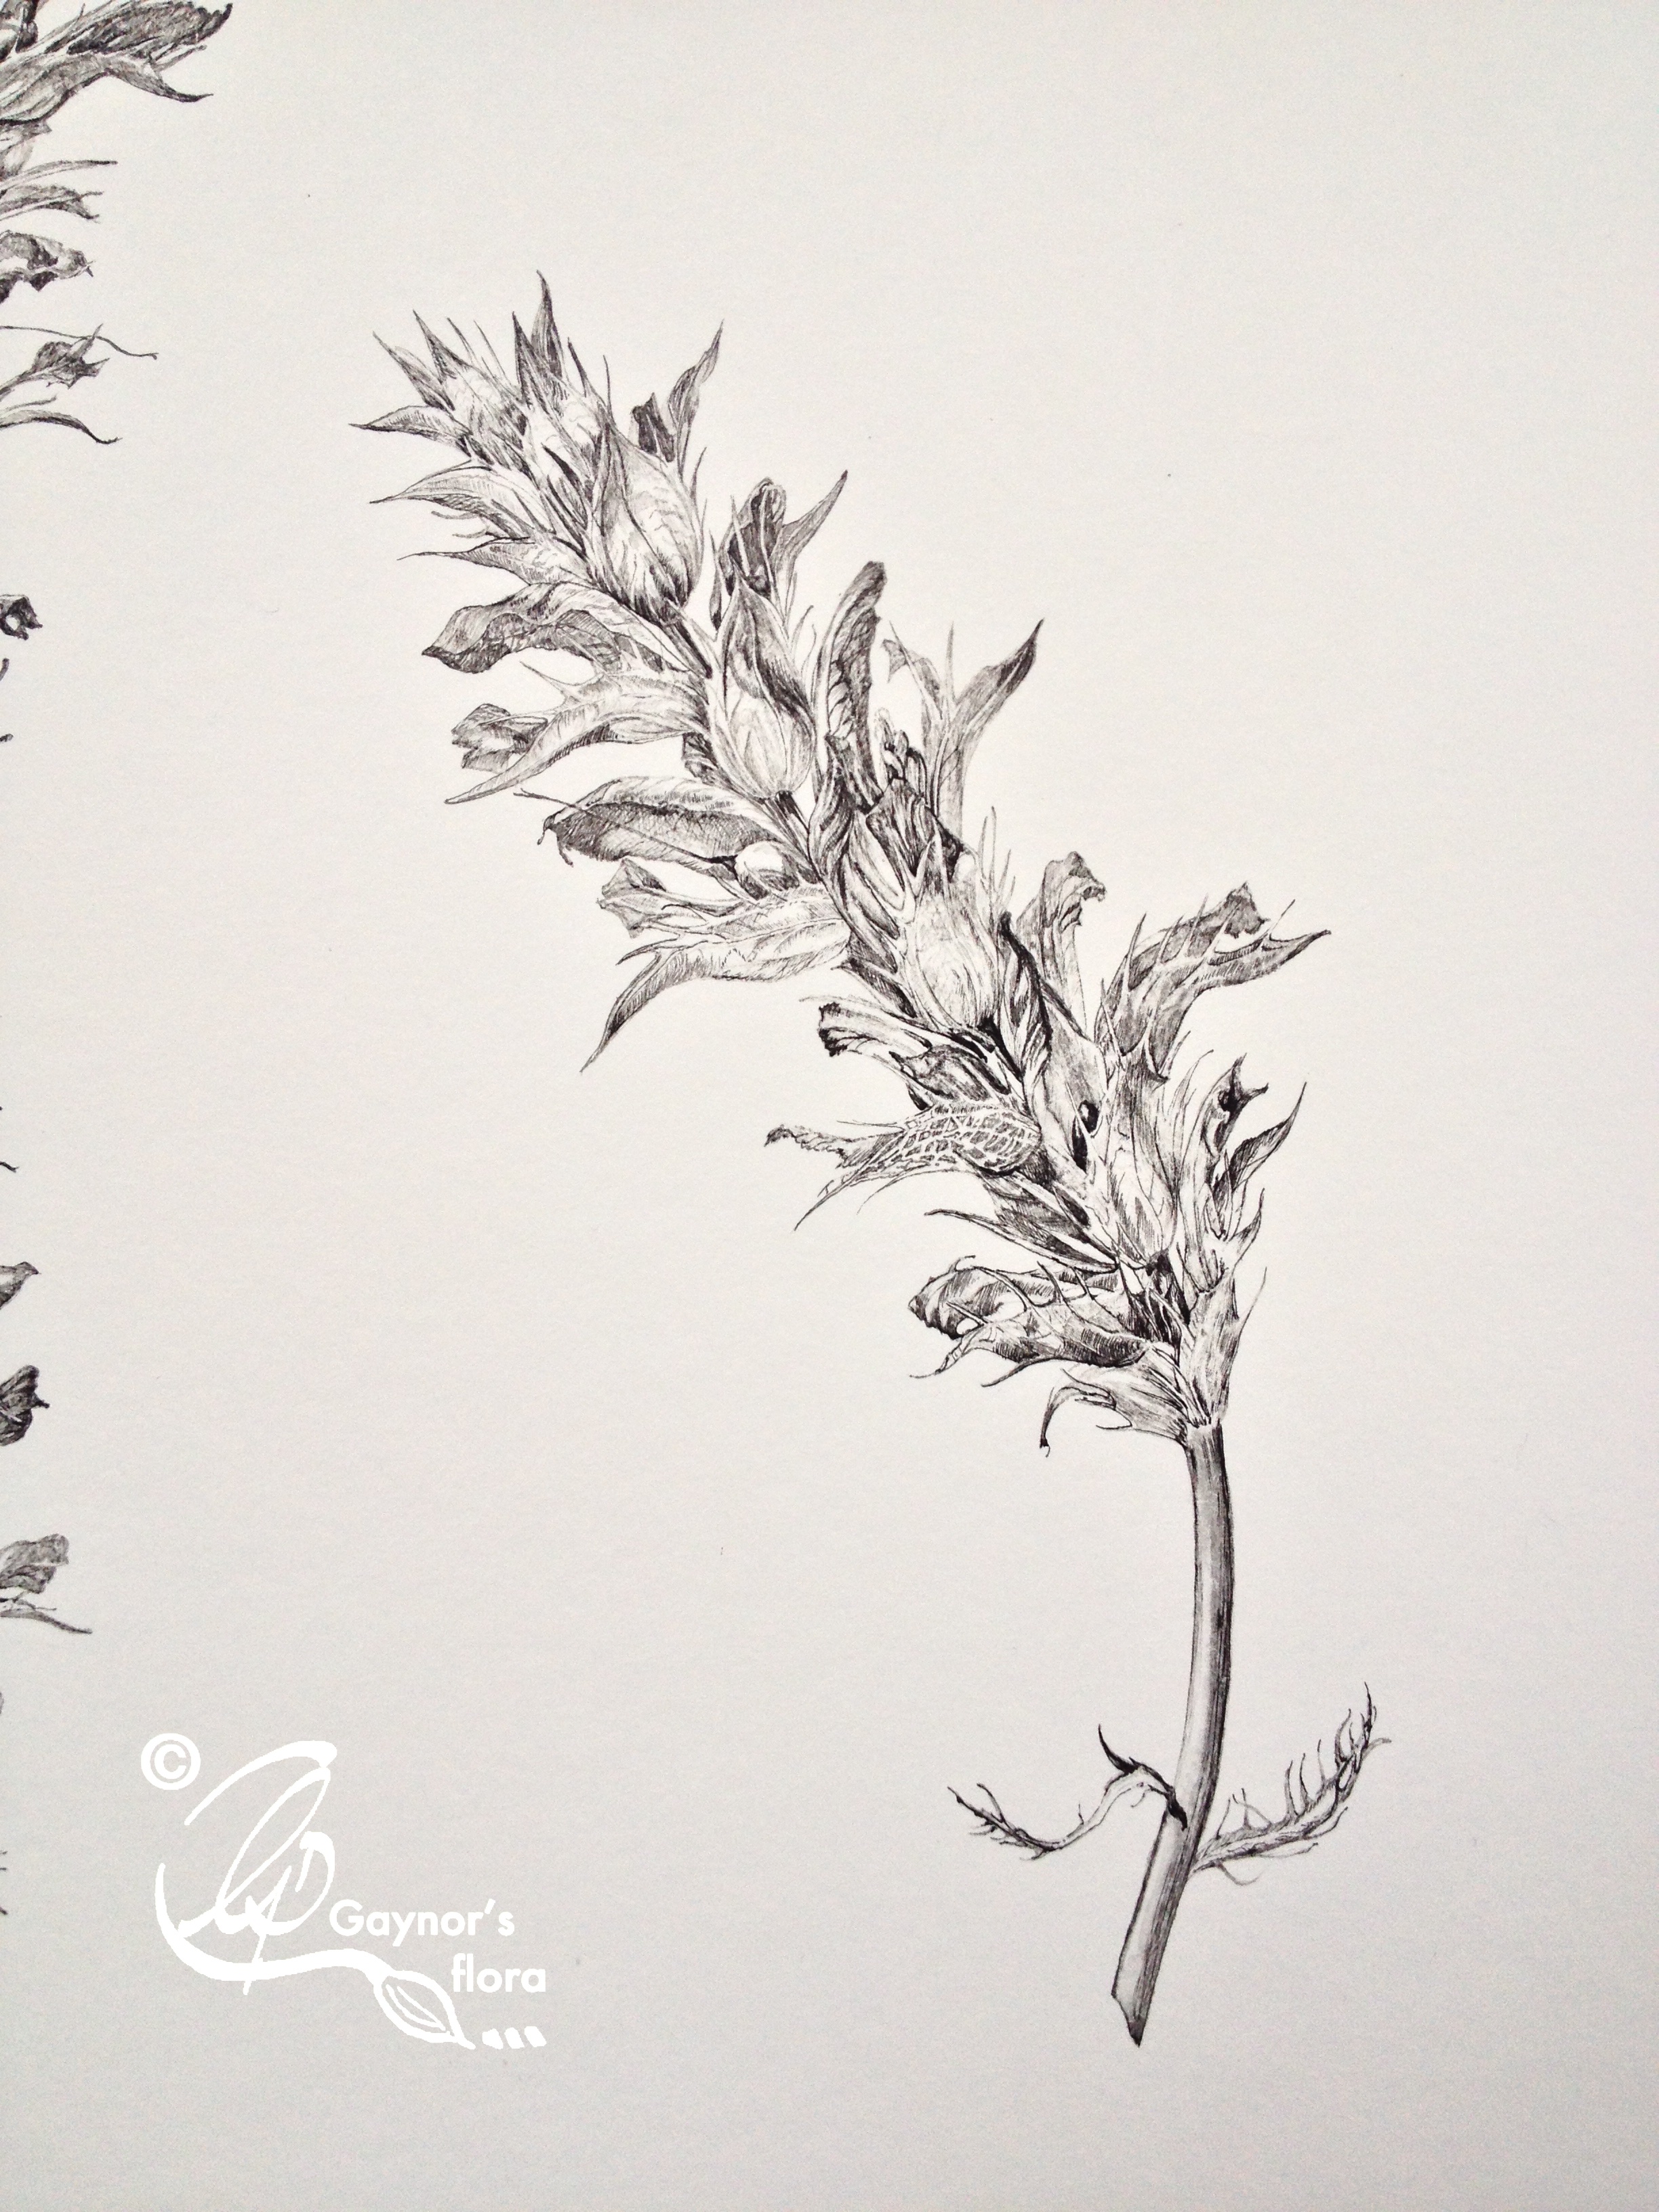
As so many people were coming and going, I decided it was best to leave the Acanthus work in the house so that I could do a little of it whilst waiting for people to arrive. This is where I have got to with the picture. It is taking its time.
More importantly for me – and hopefully for a few of you out there, I now have all the details for the next Botanical Art workshop holiday in Norway. By clicking on the image below you will be linked to my website to download further information including the booking forms.
In trying to catch up my own paperwork today (not that I have succeeded), I have at least put in the forms for the Chichester Open Studio event starting the weekend of the May Bank holiday in 2015. One box ticked off.
Since then I have been putting together my brochure for the Botanical Art Holiday in Norway 28th June to 5th July at Åsgårdstrand, near Tønsberg in south eastern Norway. A beautiful area, with lovely light and very peaceful. The brochure still isn’t finished.
People who might have their pictures returned from Palmengarten after the exhibition are arranging dates with me for collection. That is good as I will want to put my family up for Christmas!
I have my weekday class tomorrow morning and then its back to the grindstone in the shed.
Many of the artworks at Palmengarten have made quite an impression on me and some the artists have helped me considerably on my journey. The pictures that I will show for the rest of the week are a mix of these.
I love working with coloured pencil and although all of these pictures are not CP, the ones I am showing you today are by the artist who first taught me to use this medium – Susan Christopher Coulson.
The fourth picture by Maggie Fitzpatrick is just a picture that stood out for me. It isn’t big and flamboyant, but beautifully delicate. Please enjoy them as much as I have. Sorry they are wonky!
The Dose Makes the Poison – Coloured pencil. Susan Christopher CoulsonMedieval Medicinals from an Apothecary’s Garden. Coloured Pencil by Susan Christopher CoulsonCures from the Potager Garden. Coloured pencil by Susan Christopher CoulsonIvy &White Bryony on Horse Chestnut branch. Watercolour by Maggie Fitzpatrick
This was a good workshop. I needed to do only a few demonstrations, and none of them were in relation to laying on the colour. However, we did talk a lot about ‘form’ and how to achieve this and what needed to be in a botanical art picture.
I also have several dried Teasels in the studio, so the next obvious question was, how to draw these ready to paint. A lesson on Fibonacci ensued.
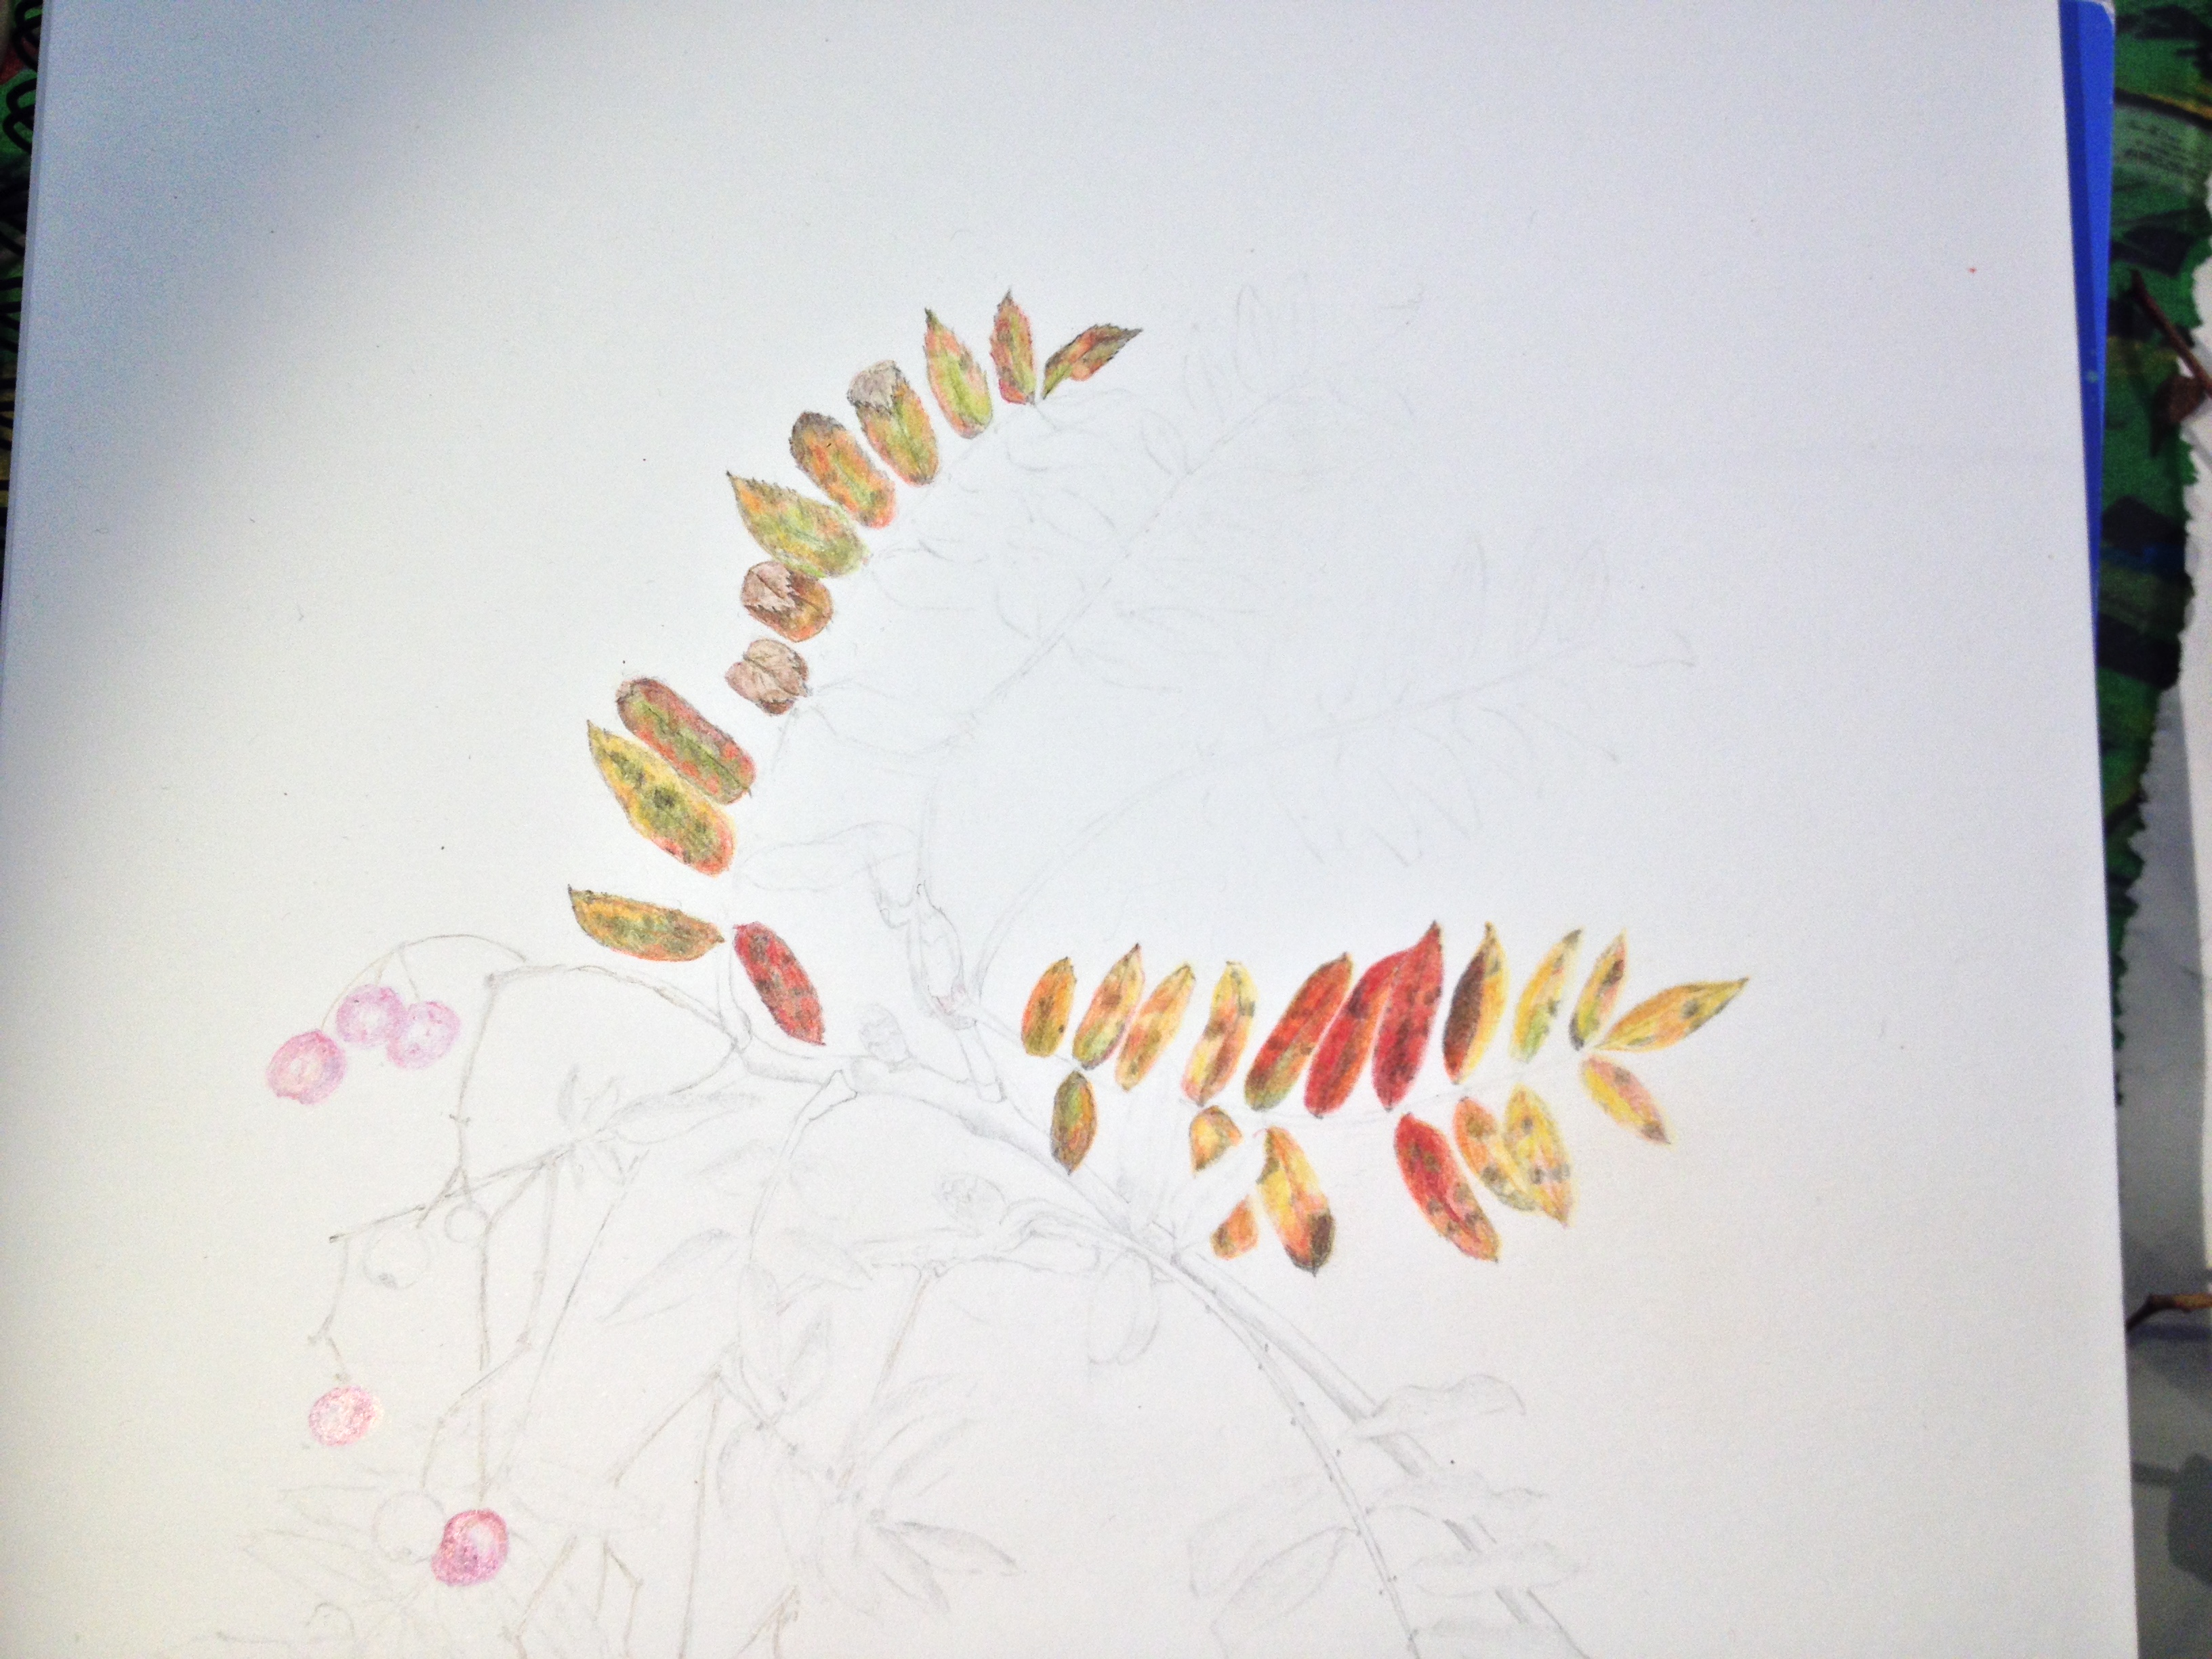
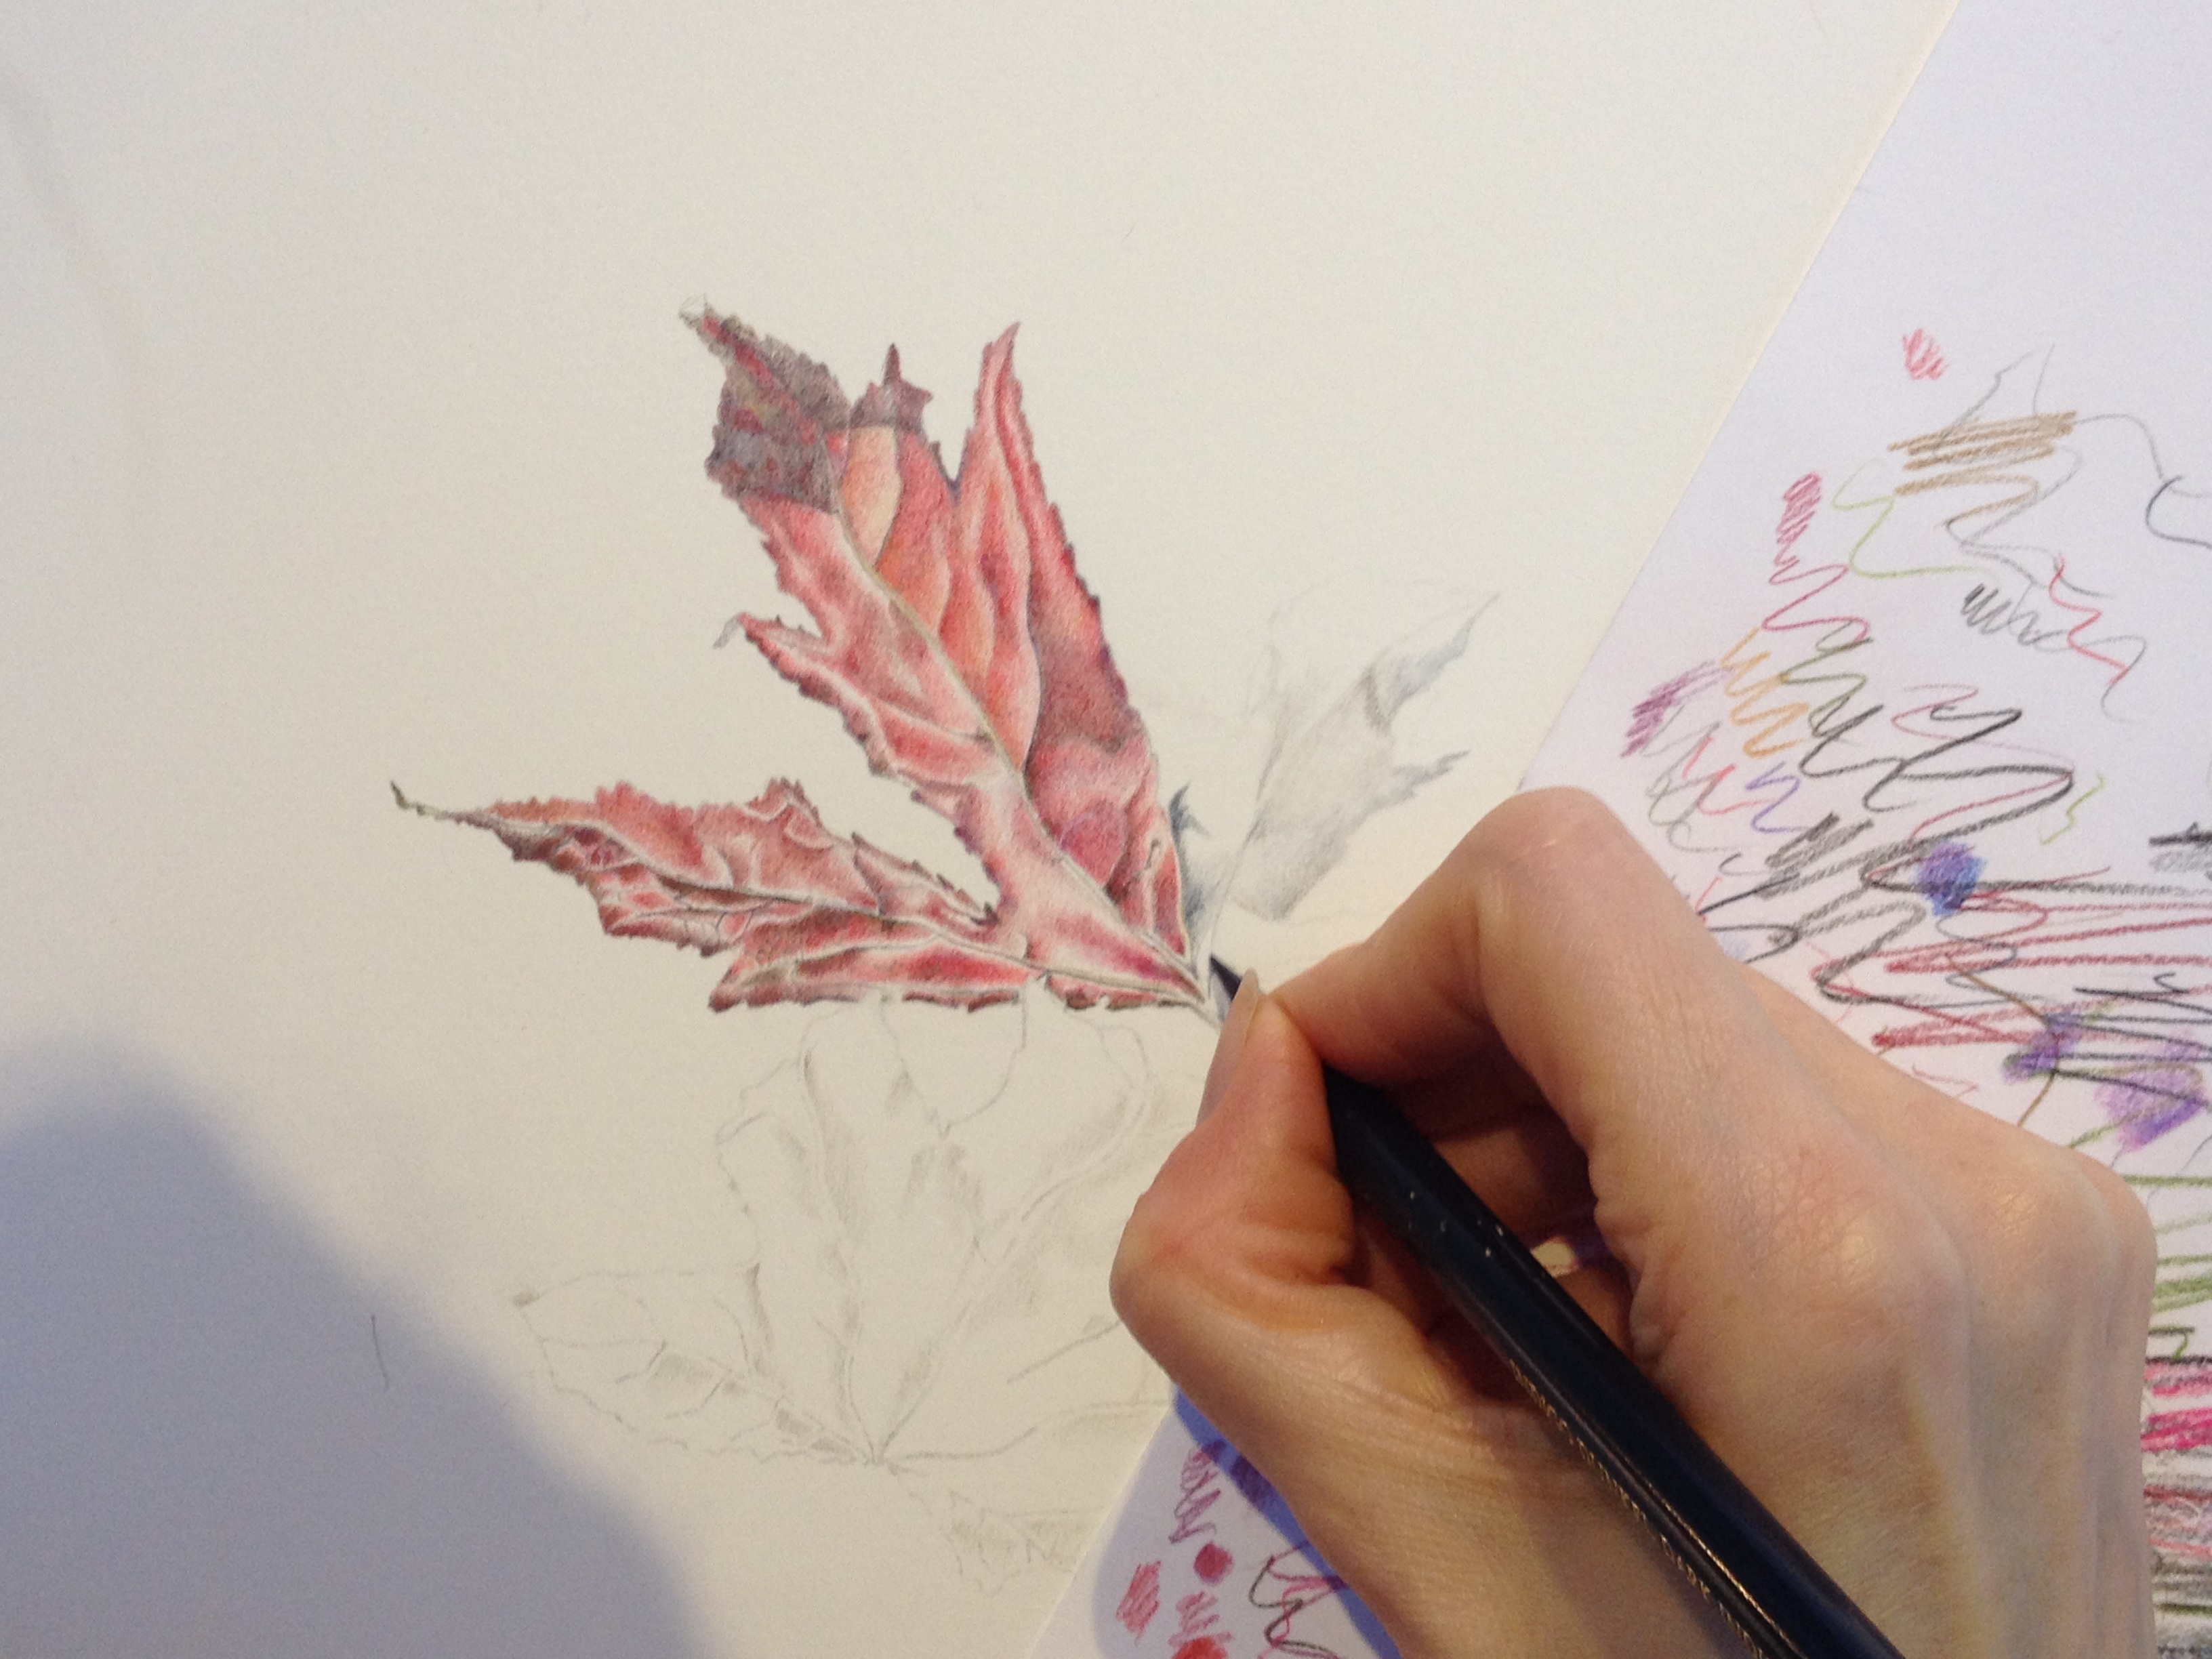
Enjoy the following pictures from this workshop. The two pictures started last Monday on the SFP workshop will probably require no more than simple adjustments if necessary. There are two pictures with Liquid amber leaves – but the styles are hugely different and work. The Sorbus picture will take a while to come to completion with all the tiny leaves and detail. The honeysuckle has needed a lot of planning and thinking ahead, more of the basis work is in place and now she can just carry on painting the rest of the picture.
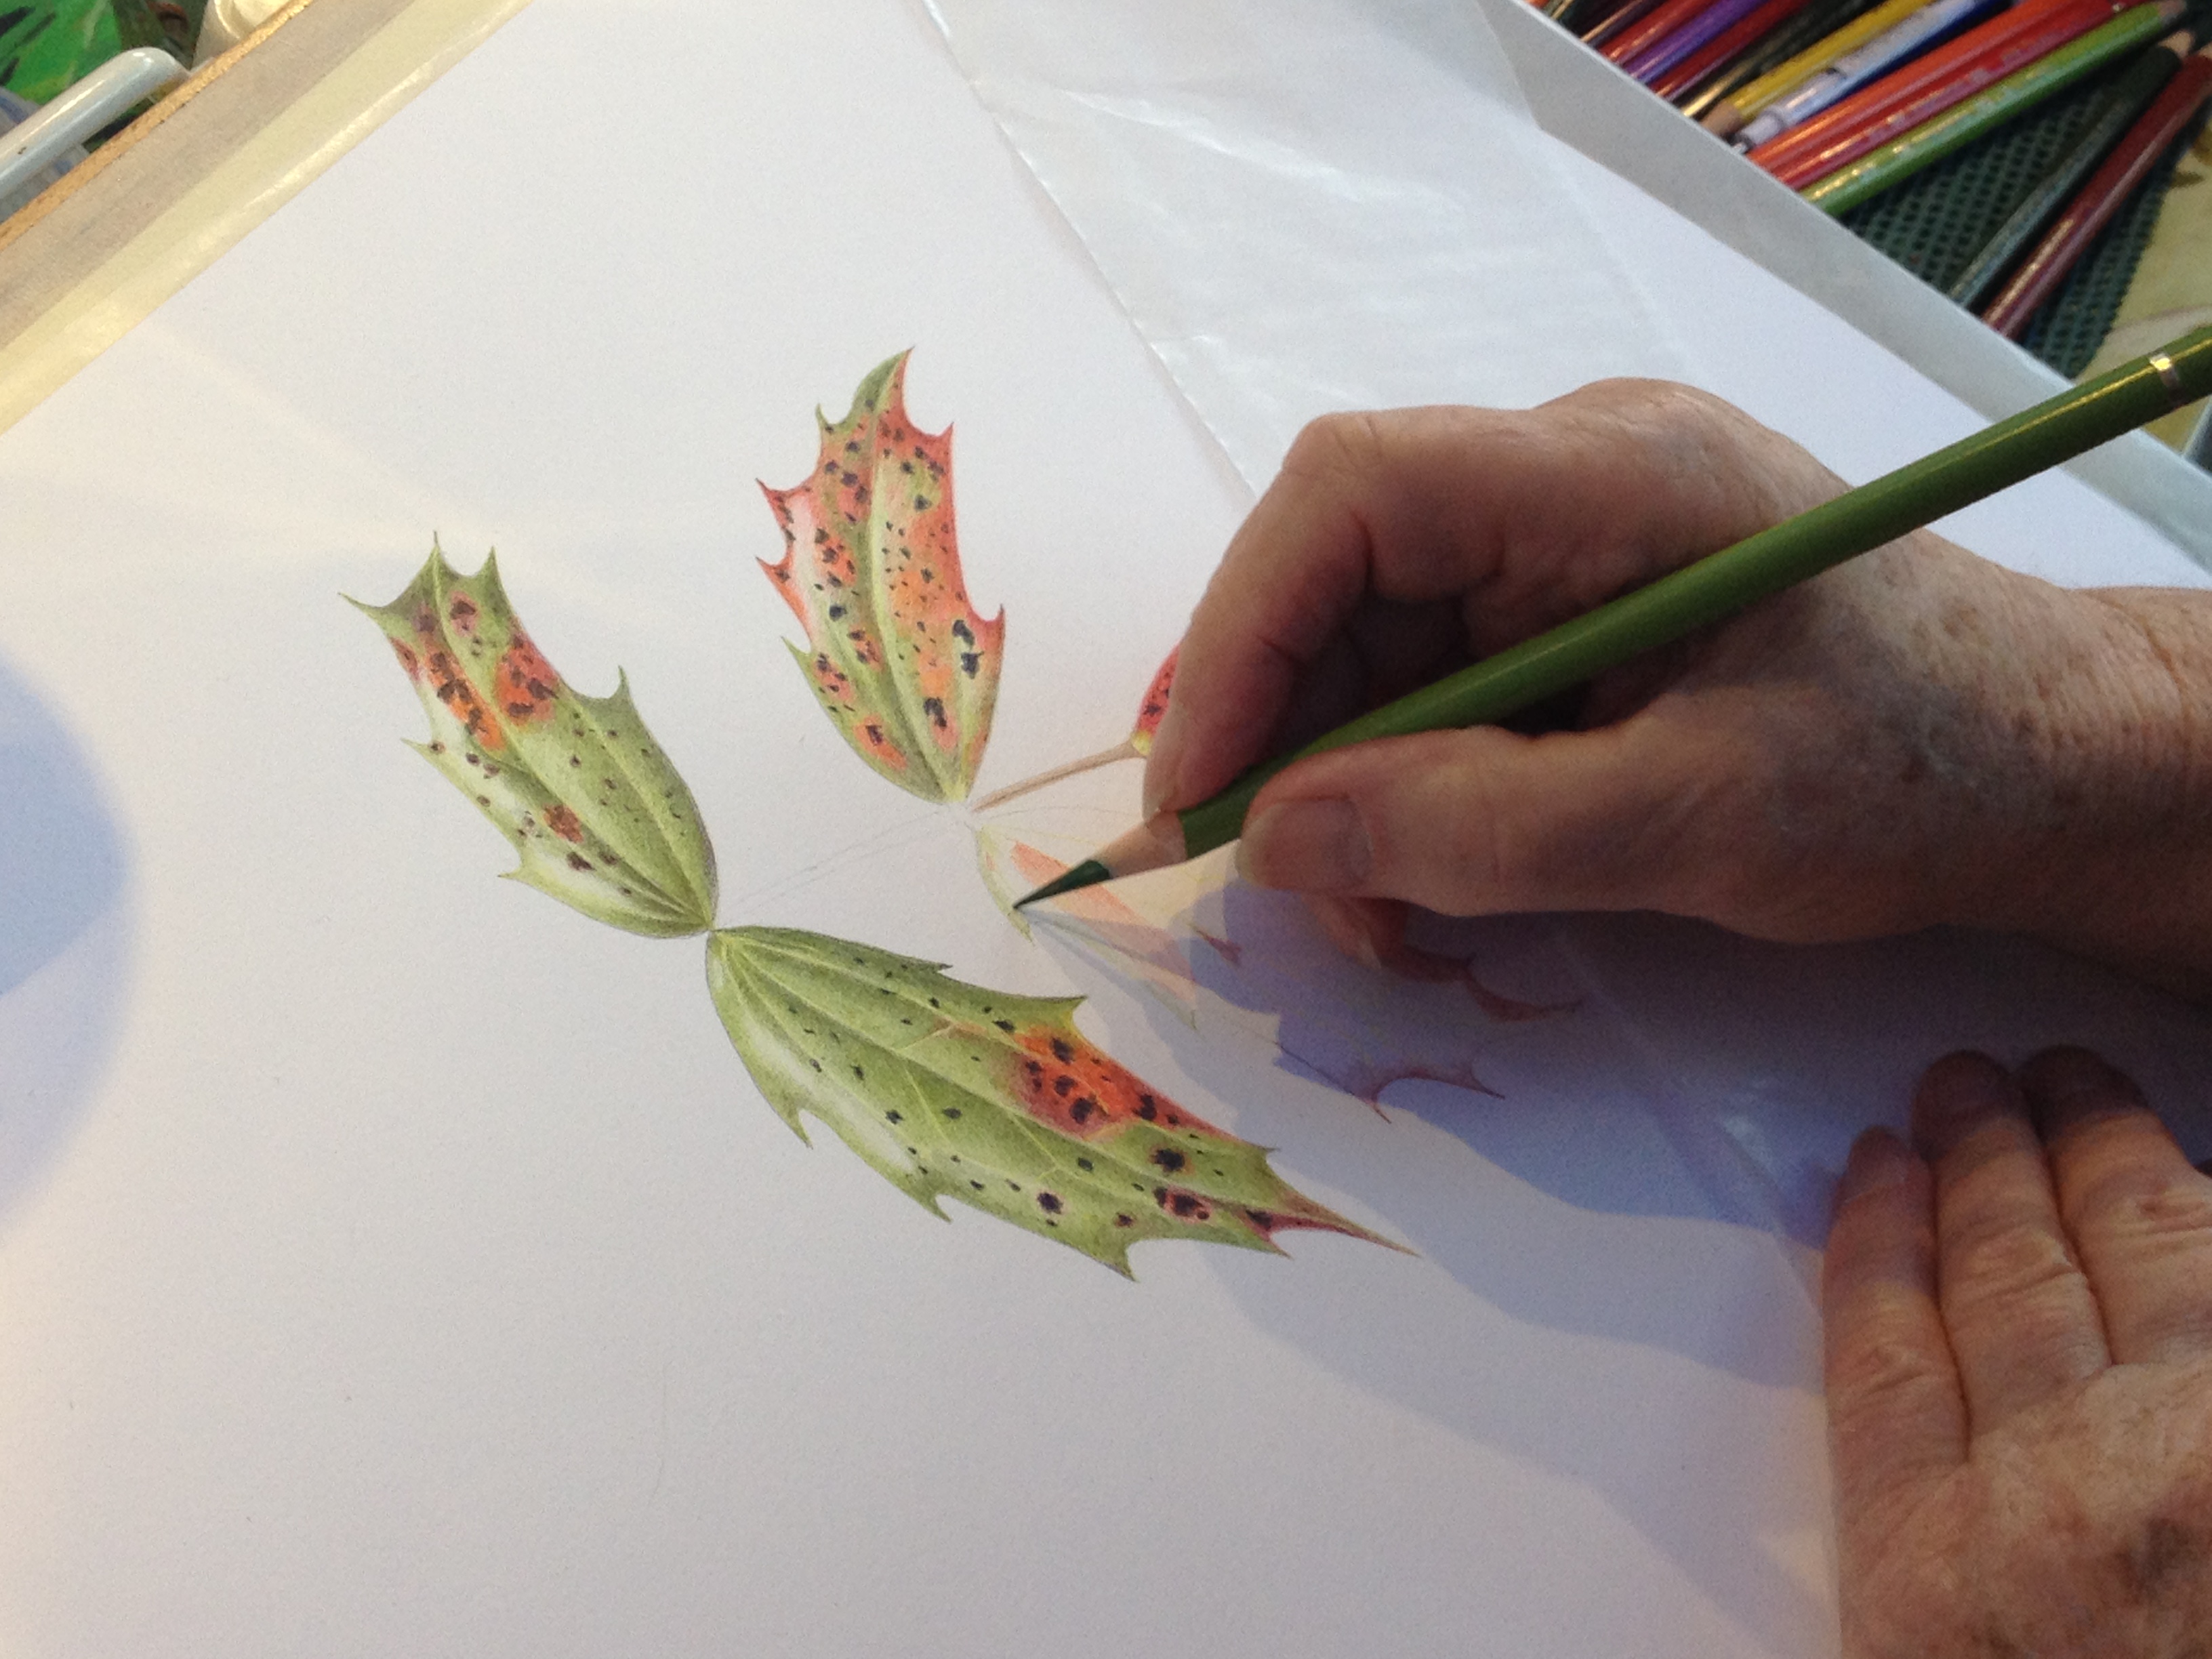
Horse chestnut leafMahoniaLiquid amberRowanLiquid amberHoney suckle – all in the planning
And Palmengarten pictures.
Artwork by Alister Matthews
Artwork by Alister MatthewsArtwork by Joanna Craig-McFeely, Roger Reynolds and Rosemary LindsayArtwork by Sue Dalton and Janet Pope
I have had a very good day in teaching this workshop. I mentioned yesterday that I had the feeling that there would be some lovely results from the workshop; that feeling persists.
Even so, their accomplishments continue to amaze me and therefore I also need to be on my toes and give enough advice for continued development. I was glad to see that they took a couple of active breaks whilst drinking their tea or coffee, so that they could go back to the drawing board with fresh eyes. But, even though taking a break they continued to discuss their progress.
Some of the work as it is developing. There is a huge difference in each of their styles of working and every student has a struggle with a certain aspect of their picture. Two of the pictures were started on Monday at the SFP workshop, but you can see how their pictures are developing. Some have chosen very complicated pieces to draw and in fact only started using coloured pencil this morning. Not all of the pictures are shown here.
The last one shown below is the Honeysuckle. I think you might be able to understand the quandary the artist has when painting this picture. We are now in mid November, she has found this Honeysuckle still flowering, but knows that its days are numbered. In addition to the limited supply, she also wants to get done that part of the plant that is likely to die first – the flowers. This is typical of all botanical art painted from a live subject – what do you paint first and what is likely to change most?
In addition to this, if choosing to paint the flowers first, how much shading does one put into the flowers? If the dark leaves are done first, then the ‘hole’ left in the picture for the flowers is likely to need much less shading than if done without a dark background.
Painting white or very pale flowers on white is quite daunting. It is possible, but one has to make sure that the shading to create form, is not overdone. The problem is minimised if the pale flowers are against a dark background, or background of leaves. The hole you leave in the painting for the flower is a shape and therefore the problems of creating the appearance of three-dimensional form are reduced.
The form of a subject is created by light hitting the surface of the subject. Some areas will be exposed to light and some areas less exposed to light or very little light. Thus the combination of the flat shape of the object, and the tonal differences created by light exposure, give you form; and a means of identifying the object. Colour is another issue altogether.
In the case of this Honeysuckle, it was decided that a grey underpainting on the leaves would be done first so that the flowers would stand out as white shapes. Before the leaves are completed fully, the flowers will be completed delicately and the leaves finished afterwards. The bark will be finished last of all but I doubt that you will get to see that part of the picture.
Honeysuckle attached to Eucalyptus bark.
So, some more pictures from the Botanical art exhibition held in Palmengarten the botanical gardens, Frankfurt, Germany.
Artwork by Linda Pitt, Roberta Mattioli and Hazel RushArtwork by Nicki Tullett, Charlotte Linder, Rosemary Lindsay & Anne LawtonArtwork by Barbara Munro, Charlotte LinderArtwork by Sue J. Williams and Janet Pope