I have been so excited and full of expectation for a few weeks now, but last week I spent five days learning all about Scientific illustration; botanical of course.
In the previous sentence I said ‘all about’! I loved it, but it was something completely outside my comfort zone and my choice to do it. I now need lots of practice as I am a long way from knowing ‘all about’ scientific illustration.
But first of all, why as a botanical artist did I feel I needed to study botanical/scientific illustration? There are loads of reasons, but I suppose it starts off with the way I do botanical art. I am not a loose painter, I like to get the details completely correct and therefore much of my work is done with a fairly dry brush. I have always liked detail and accept that this is the reason I get so much enjoyment out of botanical art. I like to see and show how the plant functions.
Also, and very importantly, I want to show viewers of my artwork, the correct detail in an artistic way. Compare it to doing a portrait of a person and the need to get the likeness as close as possible whilst having some artistic freedom in the way you do it..
Therefore these are some of the reasons why I think that studying botanical illustration helps me, bearing in mind I am not a botanist:
- I can study the minutest detail on the plant and include it in the final artwork.
- I get to see how this bit connects to that bit.
- I can see the differences more clearly from one plant to another and one species to another.
- If painting a species through different seasons, I am not so dependent on keeping my specimen fresh but can paint from it when pressed and dried.
These thoughts are related specifically to me and my development as a botanical artist, but may also be of interest to others.
Having said this, I can also see where it might help a lot of people. I don’t know how many times I have seen pictures where connections have been incorrect or where someone has quickly done some thorns or hairs, but maybe painted or drawn the wrong sort and included them the wrong way round. Scientific illustration would help everyone to correctly:
- Observe
- Identify
- Depict
I went on this course with Anita Walsmit Sachs at her studio in The Hague, The Netherlands. I chose to do her course because it was for five days and not just a couple of days. This is her website:
What I found were motivated students, a warm welcome and an extremely experienced tutor in scientific illustration. Anita’s work is beautiful and she guided us each through the depiction of the plants we had chosen to do. Some chose to work on live specimens (a little easier [I think]) and two of us chose to work on dried specimens. Some had been on a similar course with Anita previously and two us hadn’t (one using a live specimen and I a dry one).
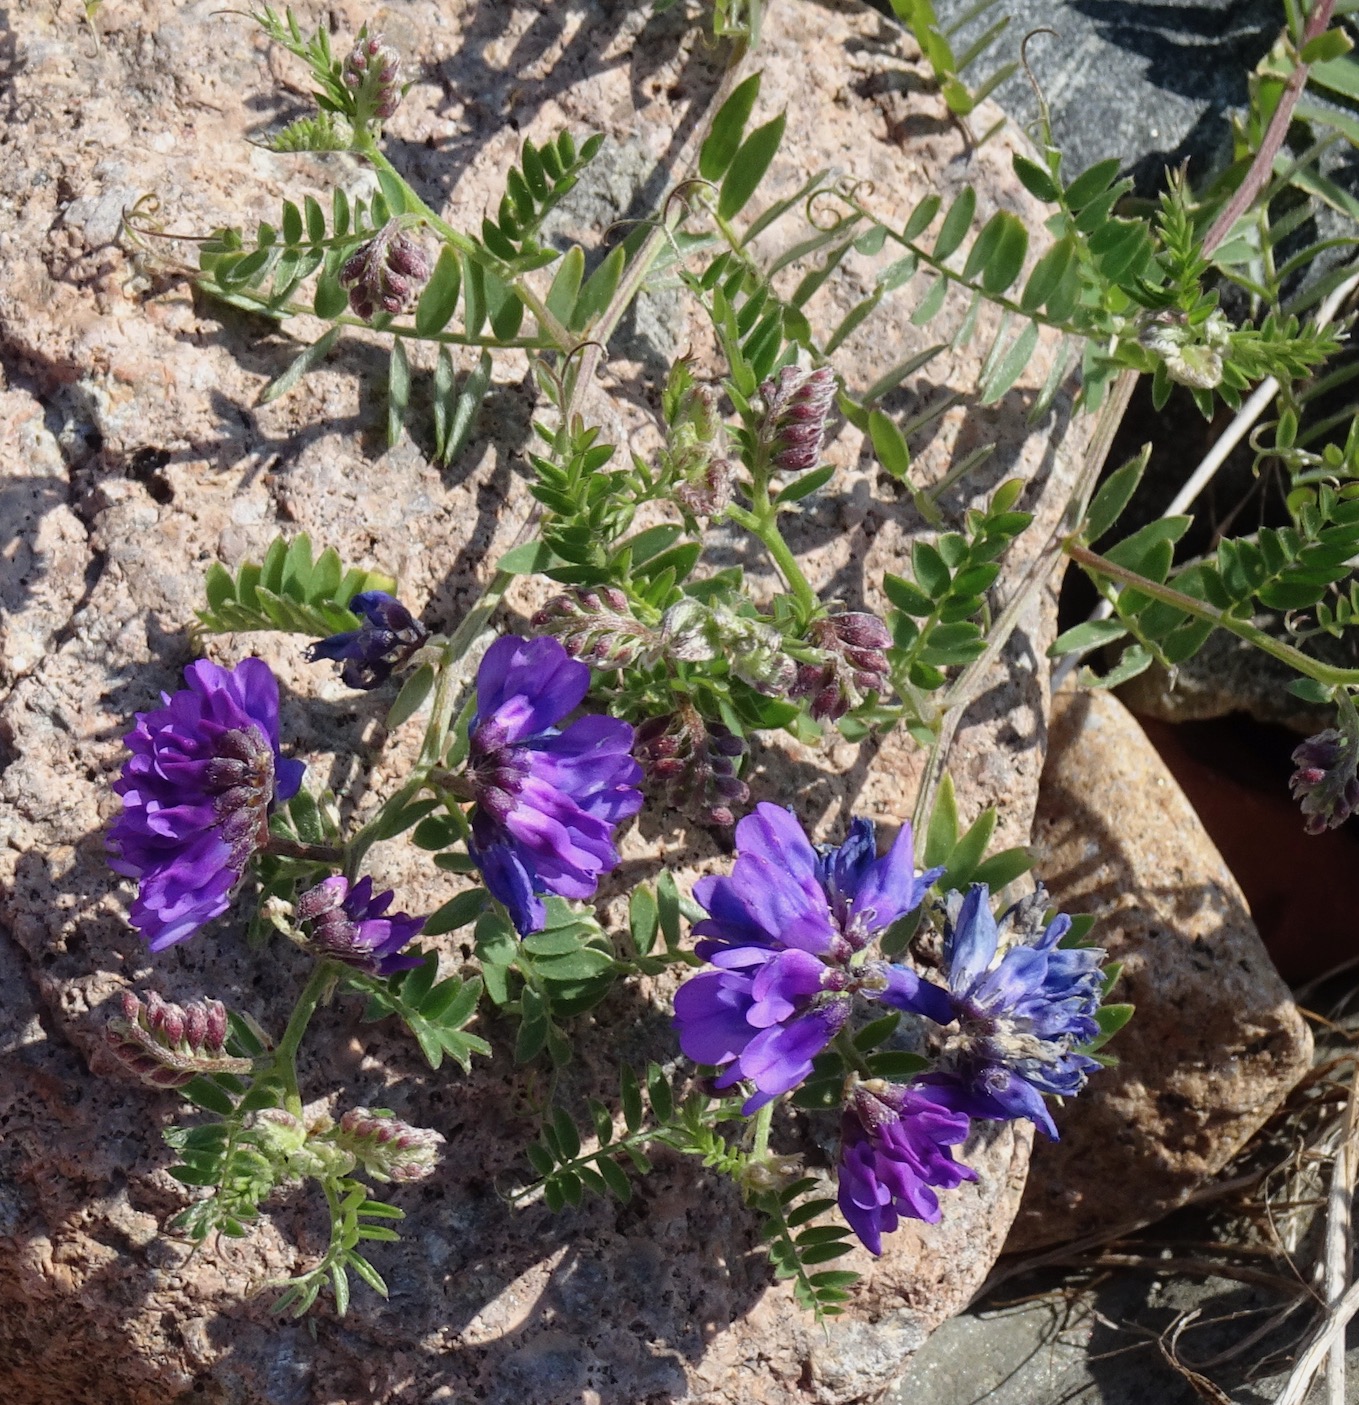
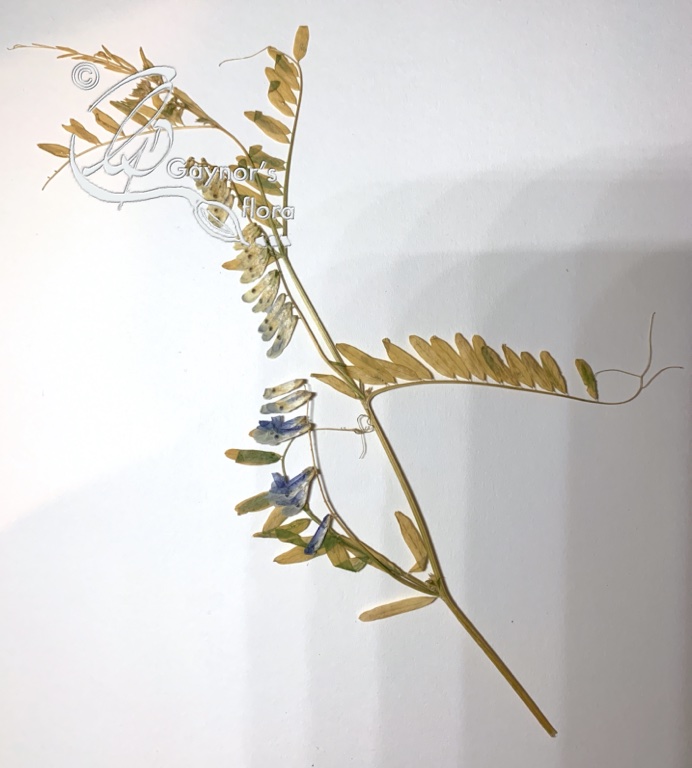
My plant was Vicia cracca – Tufted vetch. Anita had several pressed and dried plants to choose from – as well as live specimens. I chose the Vicia cracca because it reminded me of being on a stony beach near my daughter’s home in Norway. I took the above picture last summer. Though one of the struggles I had with my choice was that every part of it was tiny and very delicate.
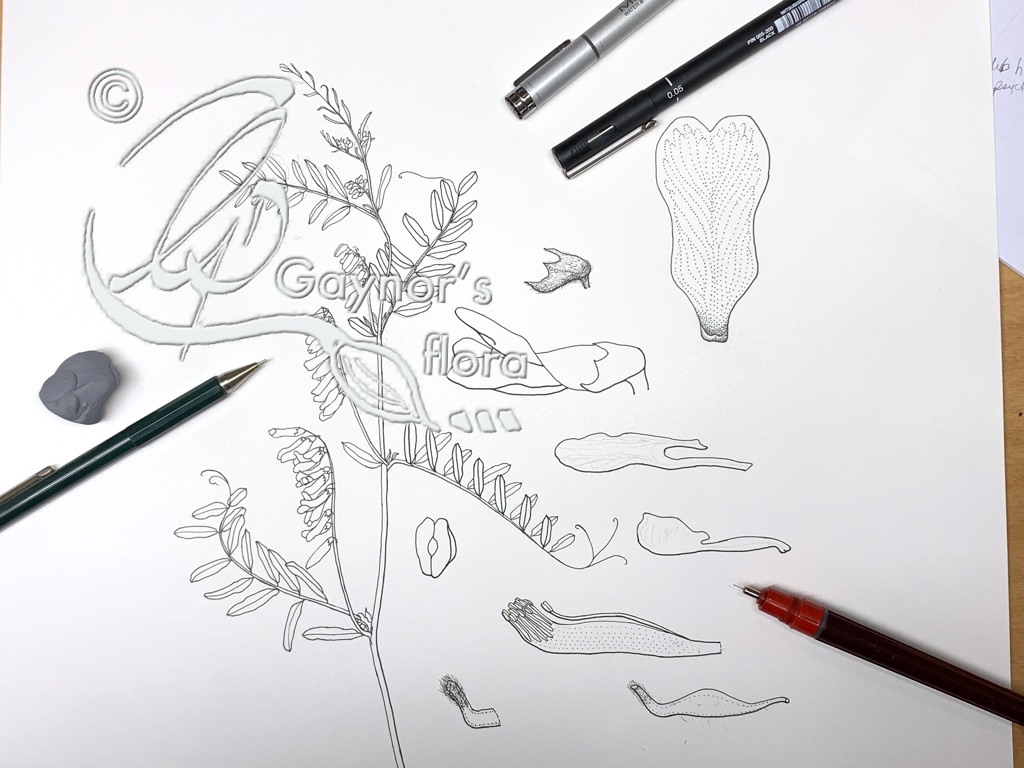
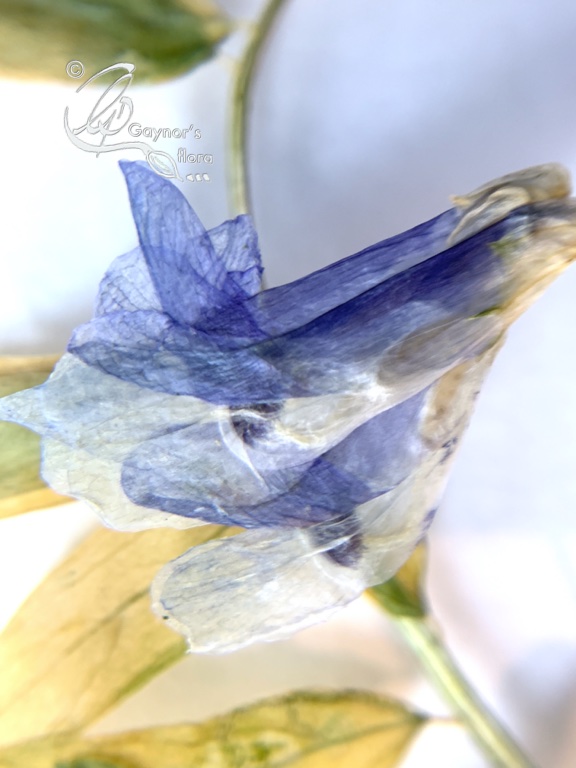
Below are some of the pictures I took of the plant. The tiny flower had to be dismantled and each part drawn. For this, the flower is specially treated and after that I spent a lot of time chasing it and its parts around a Petri dish with water in it. The picture of the flower is while it is floating in the water. Can you imagine chasing a petal, or even an anther (0.3mm) around so I can get it under a piece of glass for the microscope. Each time you try to lay the glass down, the specimen whooshes away. I tried to keep my comments under control!

The last two pictures are of the plan and some of the work done on the final plate. For this I used both Micron pens and Uni pens. But now I am home again I have been cleaning up my Rotring Pens.
My final comment on this blog is to mention ‘stippling’. If doing it properly, it is not a lot of dots! Each mark is placed carefully on the paper. This is the area where in particular I need a lot of practice; but the results can be incredible. I wish I could show you some of Anita’s work as it was extremely beautiful – but it isn’t mine to show.