Nearly there with the Benton Iris ‘Farewell’

Hopefully, through this series of paintings with the Benton Iris ‘Farewell’ you will have understood how important it is to plan and prepare a painting from the initial composition , through tonal sketches, practicing techniques to finally the painting.

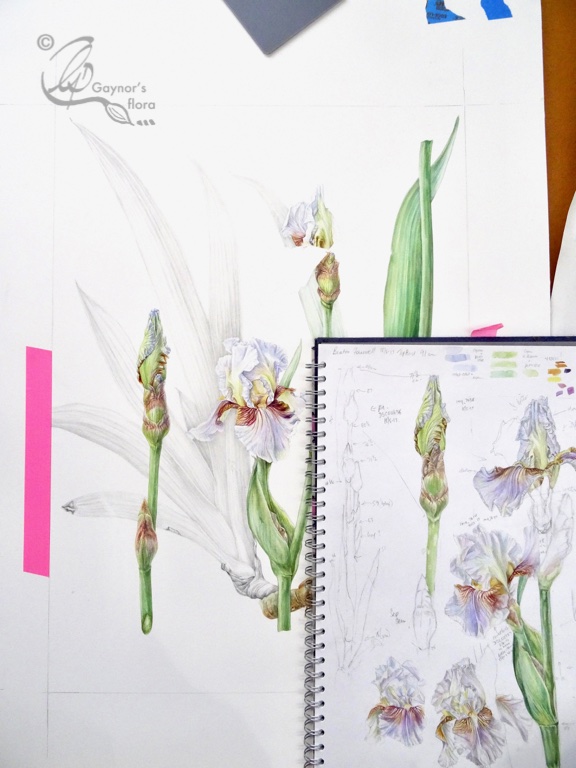
Because i believe that good preparation is the basis for getting a result in botanical art that I am happy with, I planned this year’s workshops to help others with this process. The next one is 23 -24 March and is all about developing the careful line drawing and using it as a basis for the rough tonal drawing. There are still places, so do get in touch.

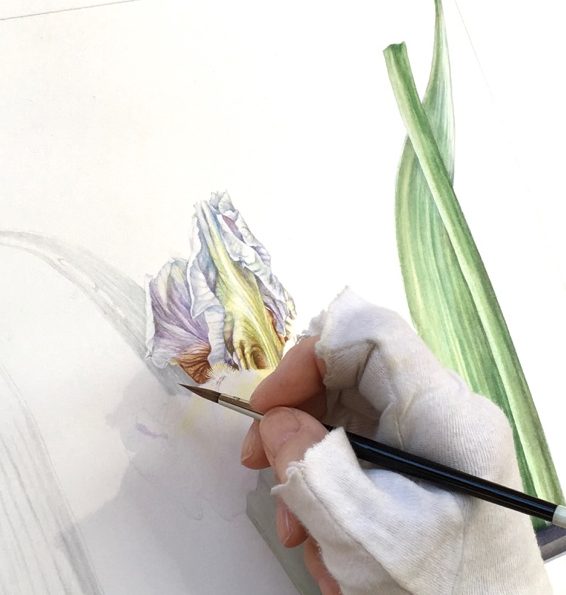
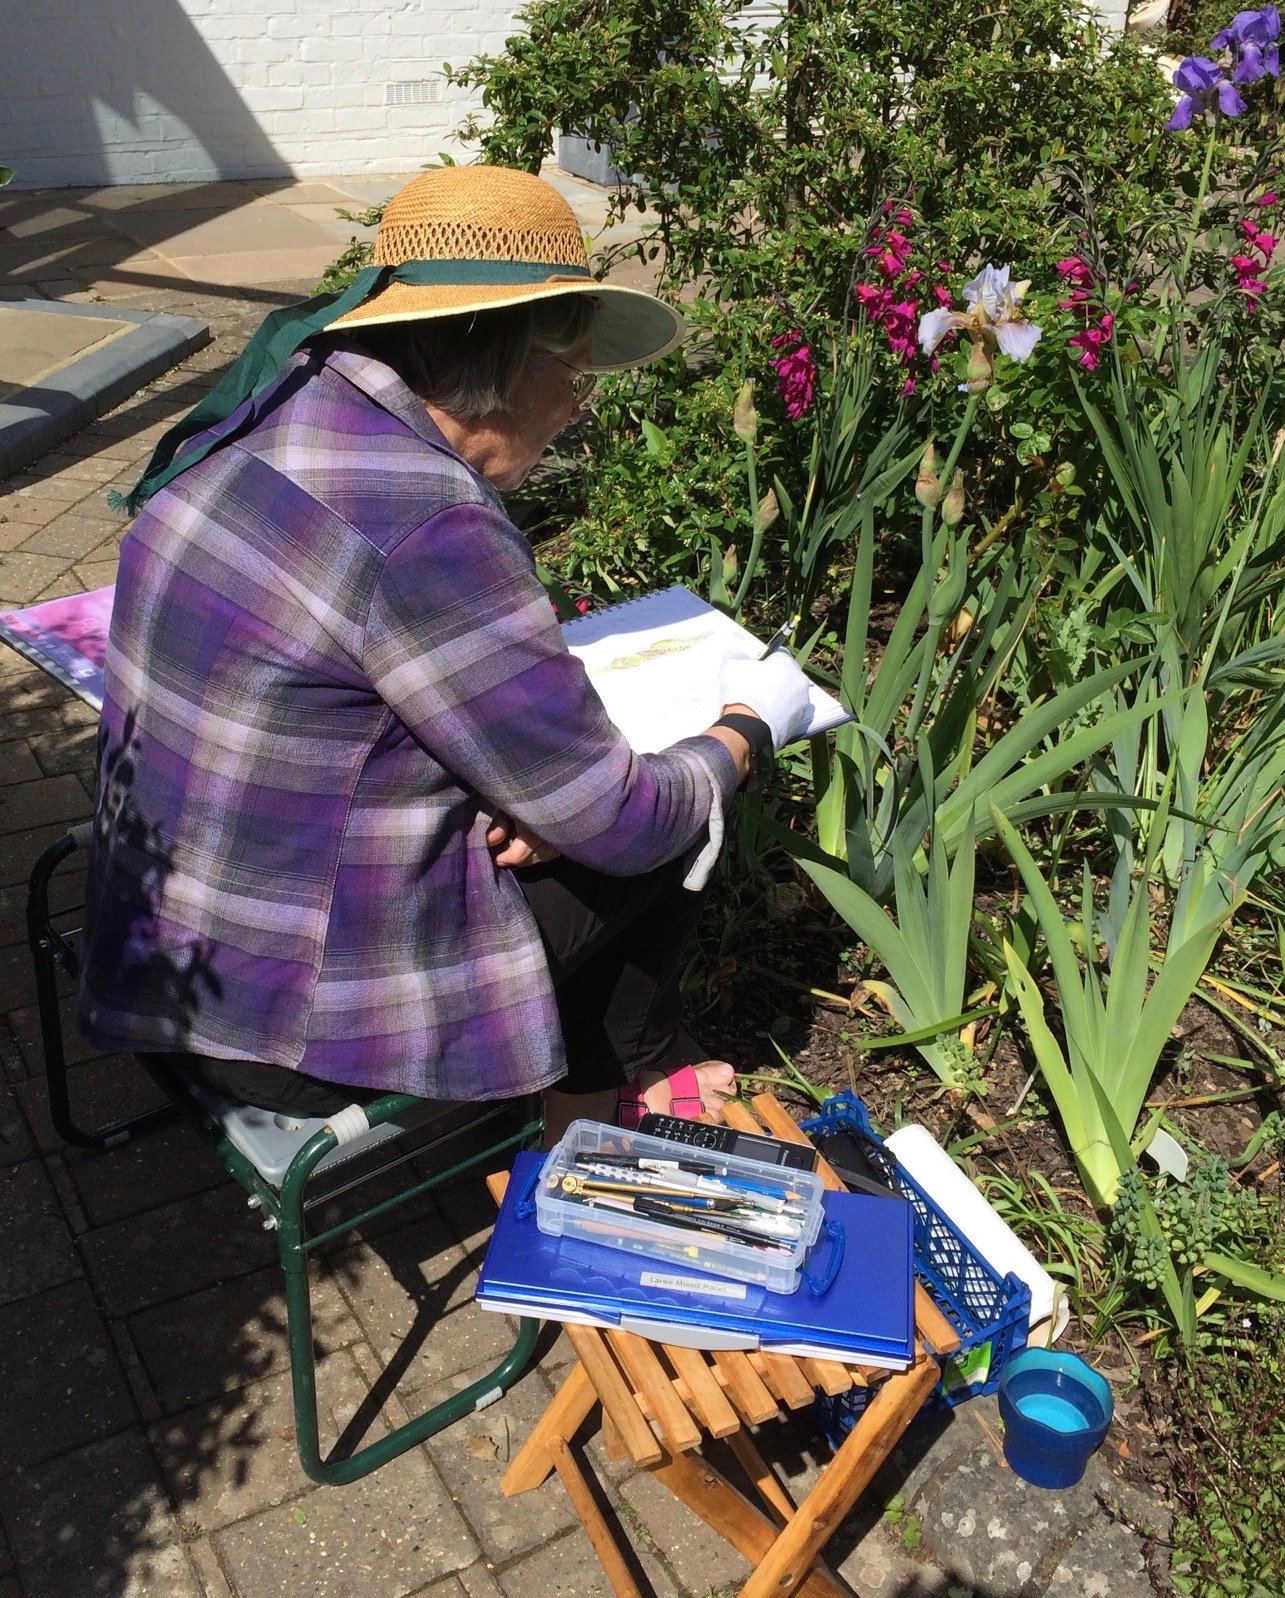
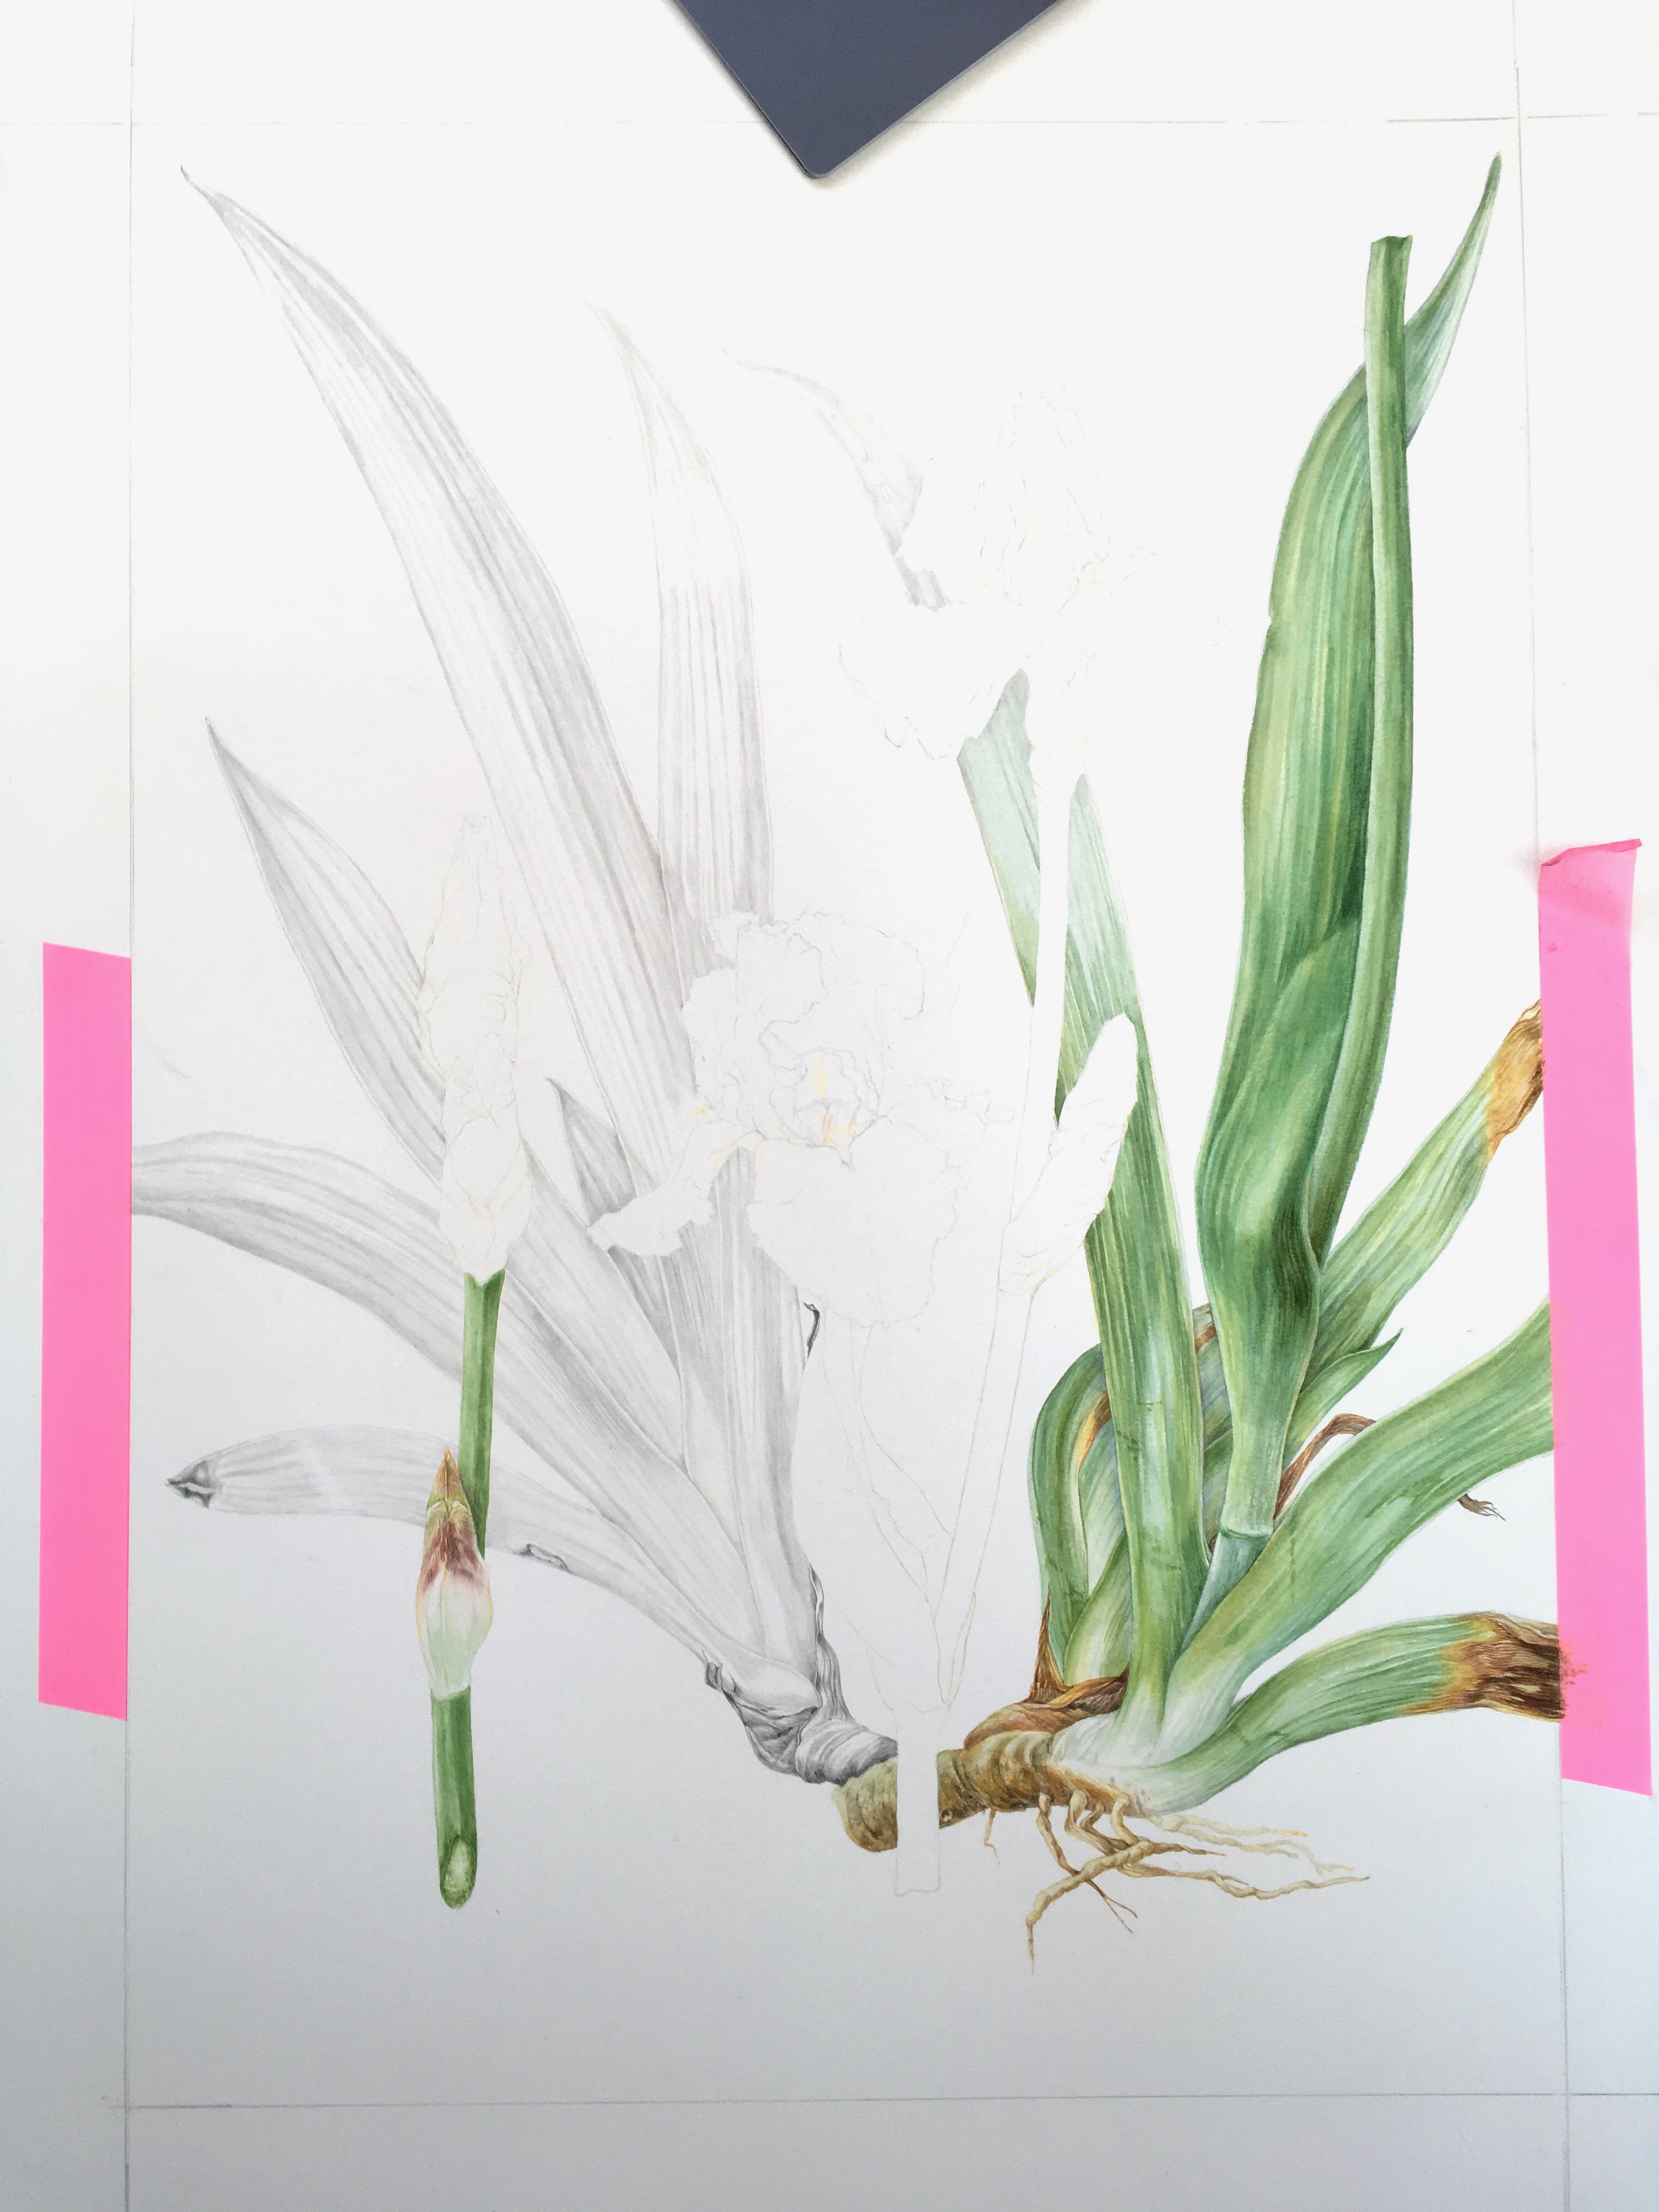
But back to the Benton Iris. Actually as the painting has developed I have felt some sadness that there isn’t too much left. Obviously I also learn from doing it and this painting has been rather different to ones I have done before. It has been quite a large painting, it is on 640 gsm which doesn’t feel quite as smooth as 300 gsm paper. I used quite a bit of graphite so that the picture would not be heavy and doing this on the 640 gsm was not so easy. It was important to show all the intricacies of the plant, to get them absolutely right and to make it an attractive picture as well.

Some of the things that I had to include in the flower were:

  • The view showing the Stigmatic lip. This is the view into the flower showing the sexual organs. look very closely inside the back of the flower and you will see a slight transverse ridge; that is the Stigmatic lip. The Stamen – male organ, is vertical, deep inside the flower and just below the transverse ridge. The pollinator climbs over the beard to try and reach the nectar deep inside the throat of the flower, gets pollen on its back and rubs it off on the stigmatic lip, fertilising the plant. You will see this view in more detail in the last blog.
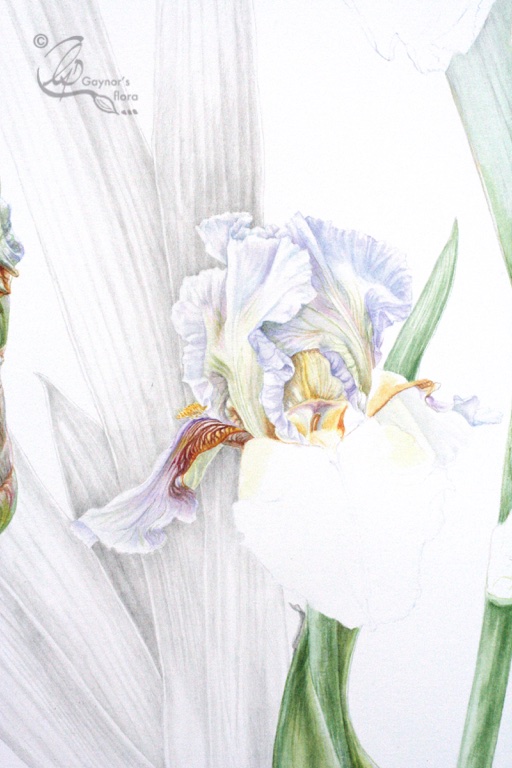
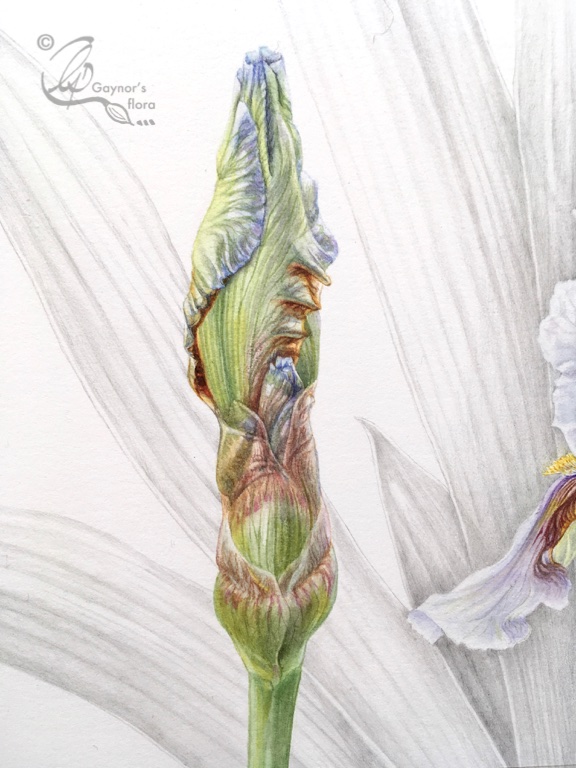
  • The view with the emphasis on the Standard and Fall petals (this blog),
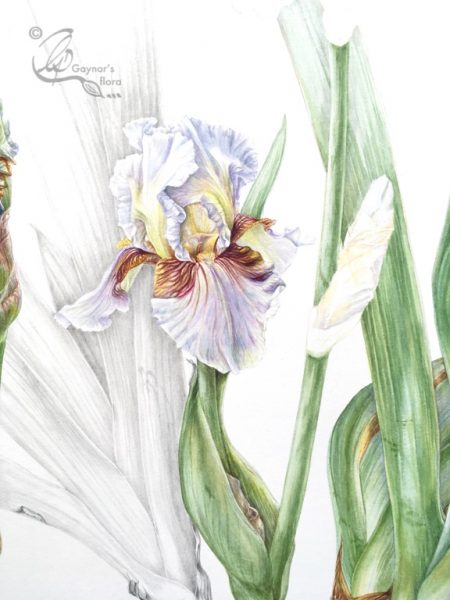
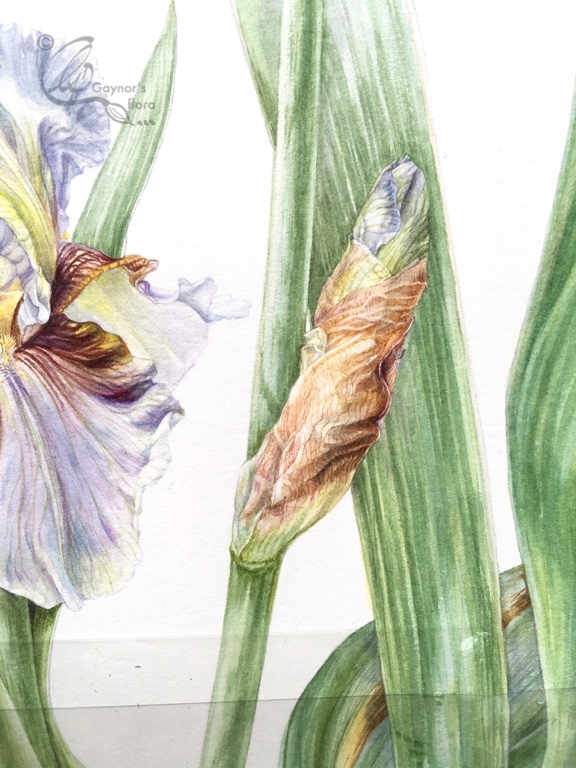
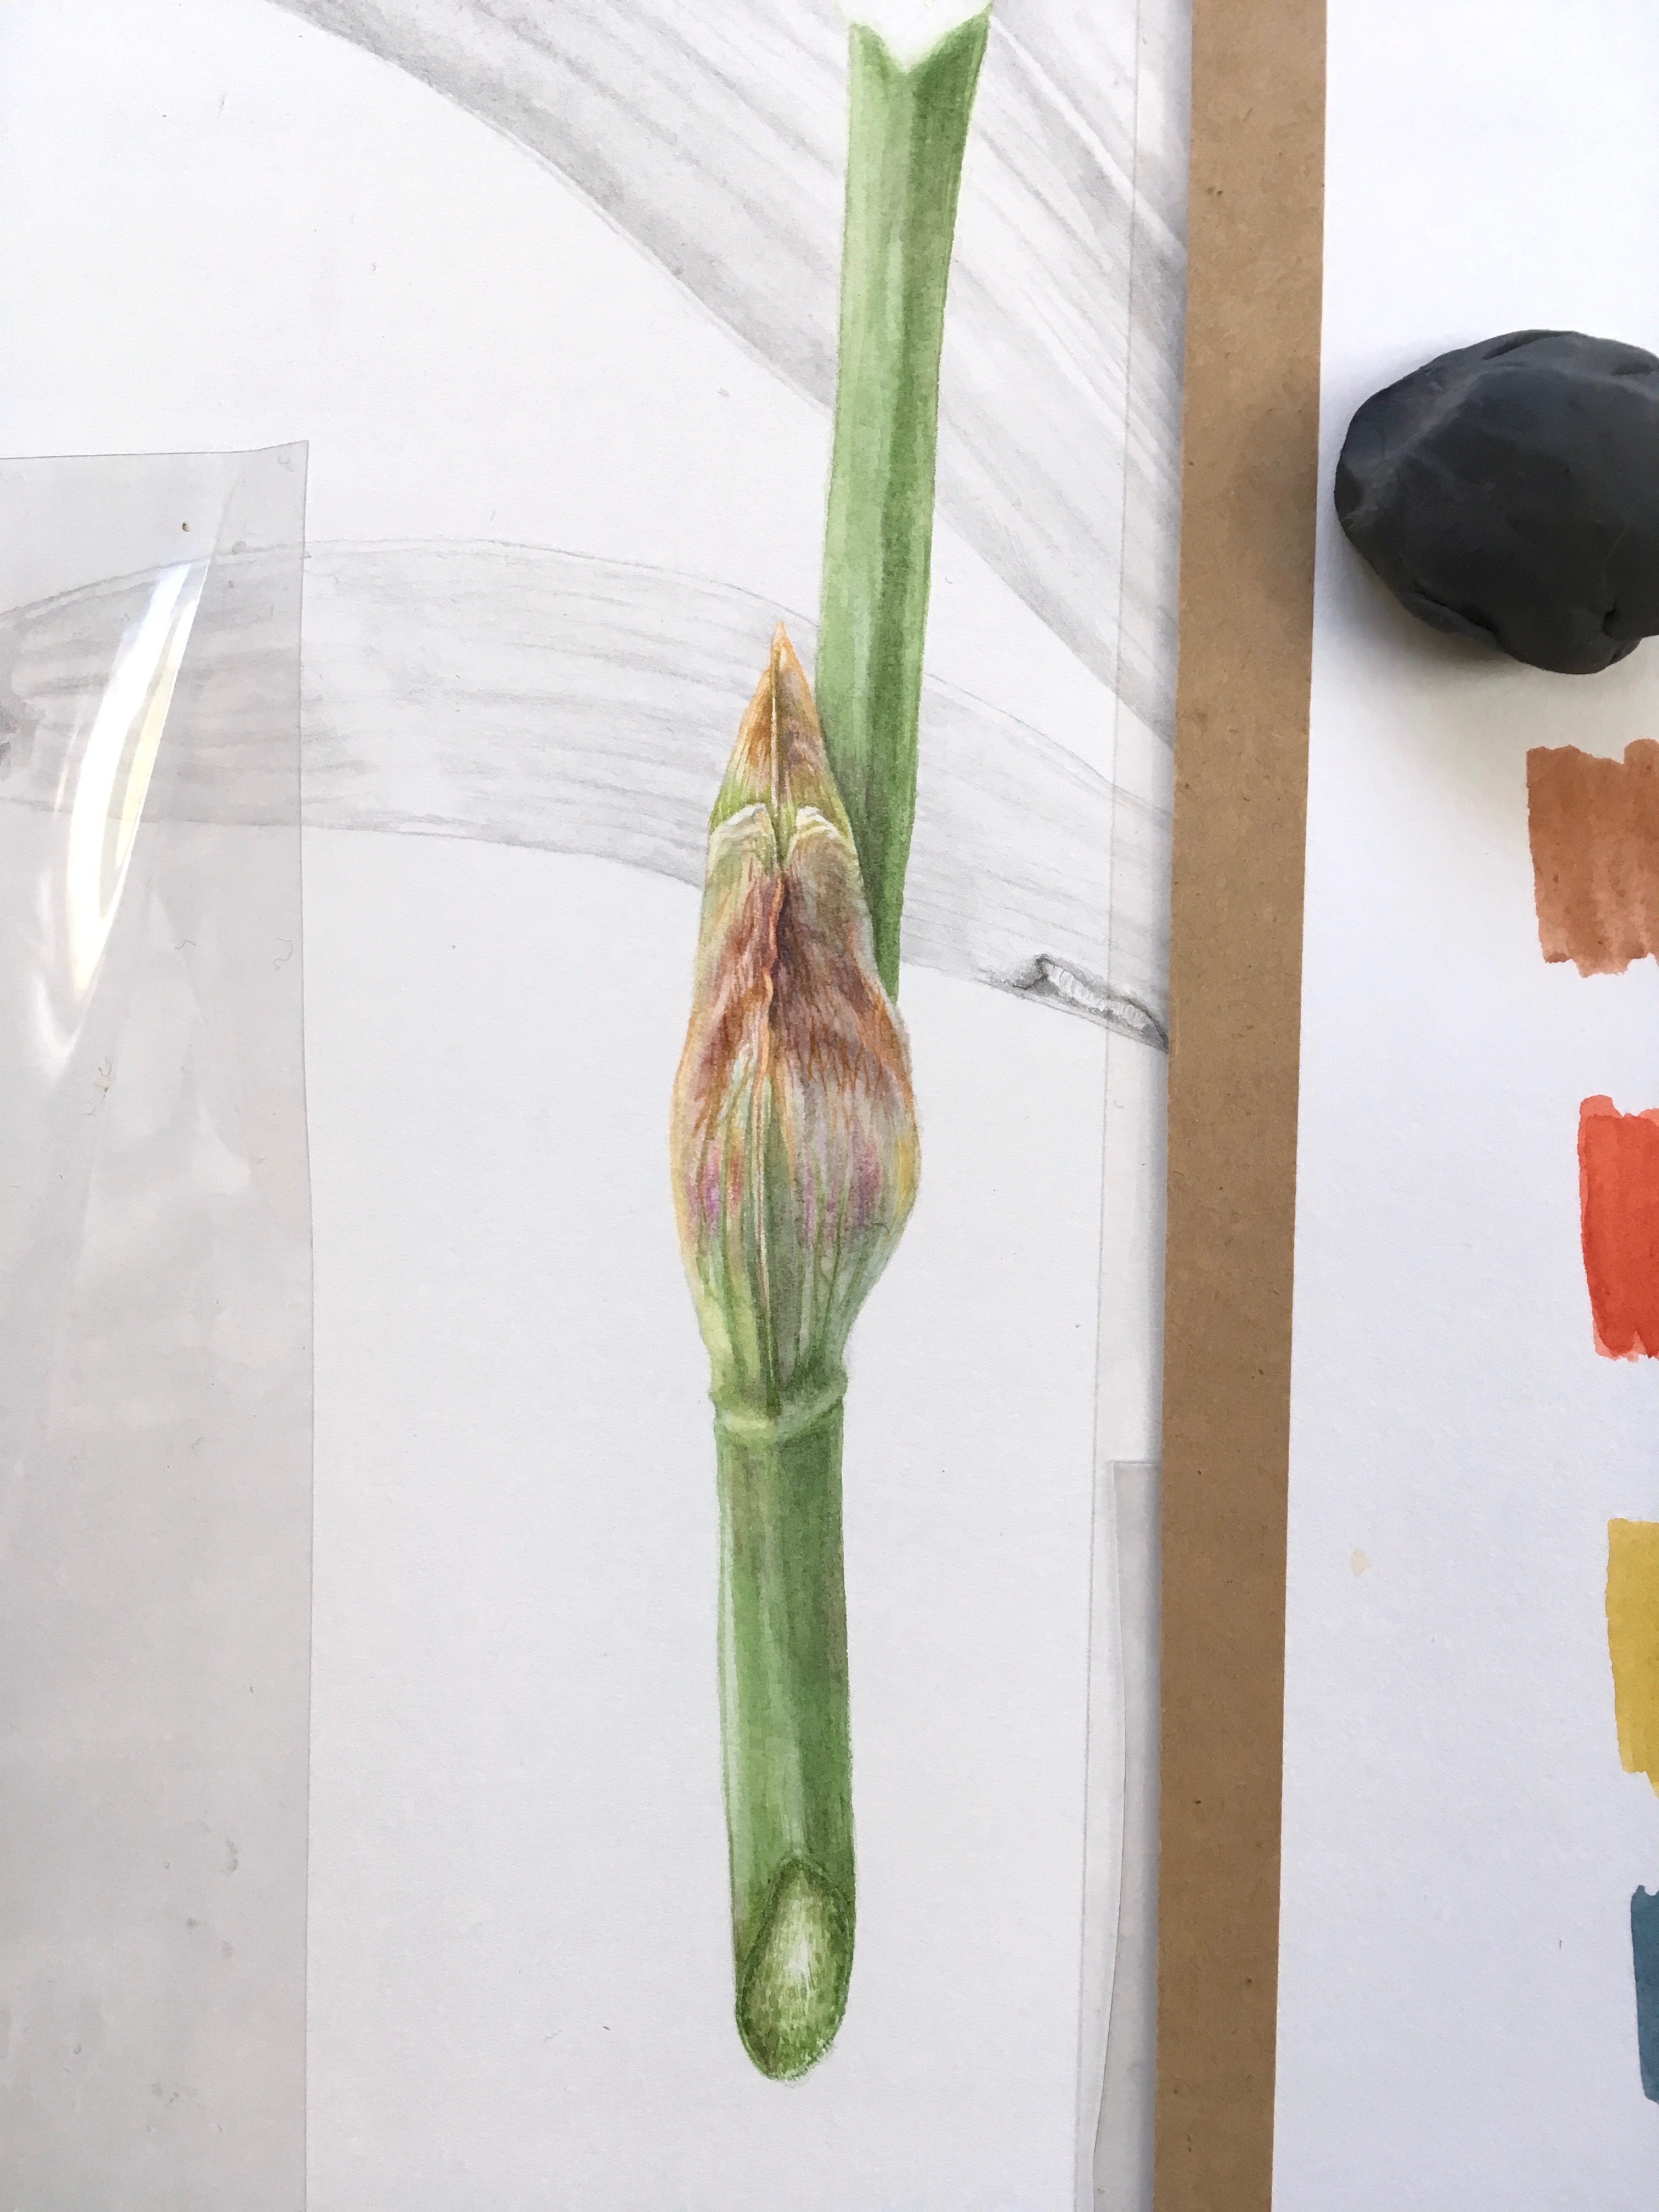
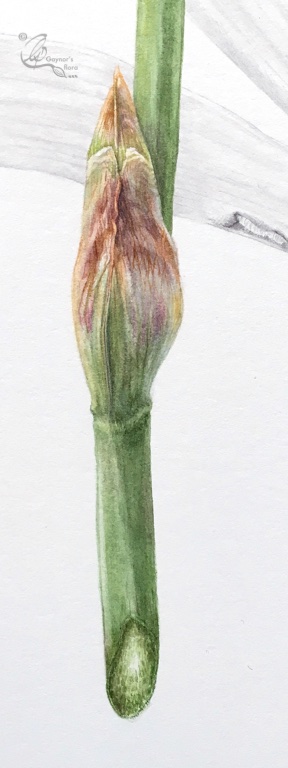
  • Buds developing
  • The height of the flower spike.
  • The height of the leaves particularly related to the spike.
  • The top part of the rhizome.
  • The growth habit (the fan of leaves)

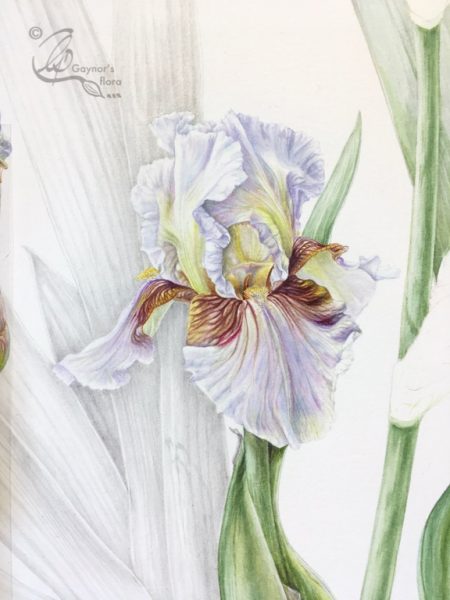
This time my pictures show the development of one of the falls.


This slideshow requires JavaScript.


This is the final stage of the top flower. I will show you the complete painting in the next blog, so that you can judge whether or not the painting is successful. It is the viewer that determines this. 


A little more of my Benton Iris ‘Farewell’

Trying to paint more with the Benton Iris – work that I love doing, has been complicated by all the adjustments in relation to the botanical art exhibition ‘ In Ruskin’s Footsteps’. But you can now see the updated website in relation to the new improved venue (still at Lancaster University) and adjustment to the dates. I will give you the link at the end of this blog.

In my last blog I showed you my progression in relation to the large fan-like leaves of this majestic plant. I chose to include only colour for those on the right hand side of the artwork and graphite on the remaining leaves. This was so that the picture would not be overwhelmingly heavy with green leaves. 

I finished off last time with the bud spike on the left hand side of the artwork. Now I will show you the start of the main flower spike, which needed to be divided in two because of the height of it.


This is customary in botanical art when painting correctly.


It is important to give an indication of the habit of the plant if painting life-size and the plant is very tall; try to include as much of it as possible in the same painting. I have divided the flower spike in two and have shown the cut ends with the same profile at the cut edge.

On this stem you can clearly see the flowers and buds spiralling off.

I have started off with a pale wash for the bud leading up to the main flower before completing the detail with a dry brush technique.

Now the start of the top flower and he developing bud just underneath. This was actually quite difficult to get right.


All my sketches were done outside in the garden last year and if you don’t keep your head still while drawing, the detail visible will change.

If you are enjoying following the stages in the development of the Benton Iris ‘Farewell’, you might like to come to my next workshop March 23-24th, where this time we will be concentrating on a line drawing and tonal sketch. Normal, good preparation for any botanical art painting. Get in touch with me via the contact form below if you would like to join us. The details are on the Workshop page of my website.

Look at the last blog of 2017 to remind you about how I started off this Iris. https://gaynorsflora.com/2017/12/30/last-gaynors-flora-blog-of-2017/.

Although botanical art is fairly strict in what is ideally included in a picture, it is quite wide ranging and much wider than for pure botanical illustration. But it is important to remember that what I show you in my blog is my style of working. There are many different styles and none are wrong; It is the result that counts!


Last but not least the link to the Association of British Botanical Art website: www.britishbotanicalartists.com/2018exhibition

A little bit further with the Benton Iris ‘Farewell’

The Botanical Art Worldwide Exhibition; “In Ruskin’s Footsteps”, which is the English and Welsh contribution to the global exhibition happening 18 May 2018, is taking all my time these days, in addition to marking some really interesting assignments. Attracting people to look at botanical art and perhaps trying it is always an exciting prospect. For the exhibition, go to the Association of British Botanical Artists (ABBA) website: www.britishbotanicalartists.com. Here you will find all the updated information.

For my online botanical art course go to:gaynorsflora.com/tuition-2/online-botanical-art-course/

But I have done some more of my painting the Benton Iris ‘Farewell’. Last time I had done some of the leaves and told you that I was going to use graphite for some of them. I have decided that to show the habit of the Iris to the best advantage with the fan-shaped leaves, I would do these solely in graphite. In this way the overall effect of the picture will not be too heavy and the flowers will come to the for.

It was not easy doing so much graphite on the heavy Fabriano paper (640gsm) and I will need to adjust the strength of this as I add the flowers.

Below you get an idea of the overall layout of the picture with the flower spike with buds on the left side of the picture.


To the right is the bottom bud on the flower spike. After finishing this section I needed to adjust it because it came directly below and in line with the top bud. But as in so many plants the buds spiral round the stem and of course this is an important part of correct botanical observation.

The ideal would have been to get it right first time during the line drawing and not after having painted it! The image below is the corrected version. Here you can see the centre line at the bottom of the bud, has been moved slightly to the left.


And so the voluptuous terminal bud, with another one developing at its base. The bud of the Iris Farewell has a very typical shape to it and in my garden where I have different Irises, I can see the Farewell straight away. The tip is almost squared off rather than pointed. I think this is part of its attraction.
You will notice that I have started the flower to the right, but I will come back to that in my next blog. Whilst painting each section of my composition I am constantly looking at the rest of my picture and adjusting as I go along. I added a little more shadow to the right of the bud after I had started the flower. The image is from that stage.

I hope to get back to you soon with more images from the development of this picture.

I have another workshop in just over a week’s time. 23 – 24 February is a workshop on Composition and Perspective. If you want to improve on these particular topics in your own practice, sign up for the workshop as soon as you can.