The title of my exhibit at the “RHS Botanical Art & Photography Show” is as above:
Foraging Plants in the Norwegian Mountains – From Bog to Sand.
Six of my watercolour and graphite paintings are exhibited by order of habitat starting with those growing in the wettest environment to those in the dryest. Seven paintings were completed not just the six, therefore it was a difficult choice to remove one of them. The second one shown below, the small cranberry, is not in the exhibition.


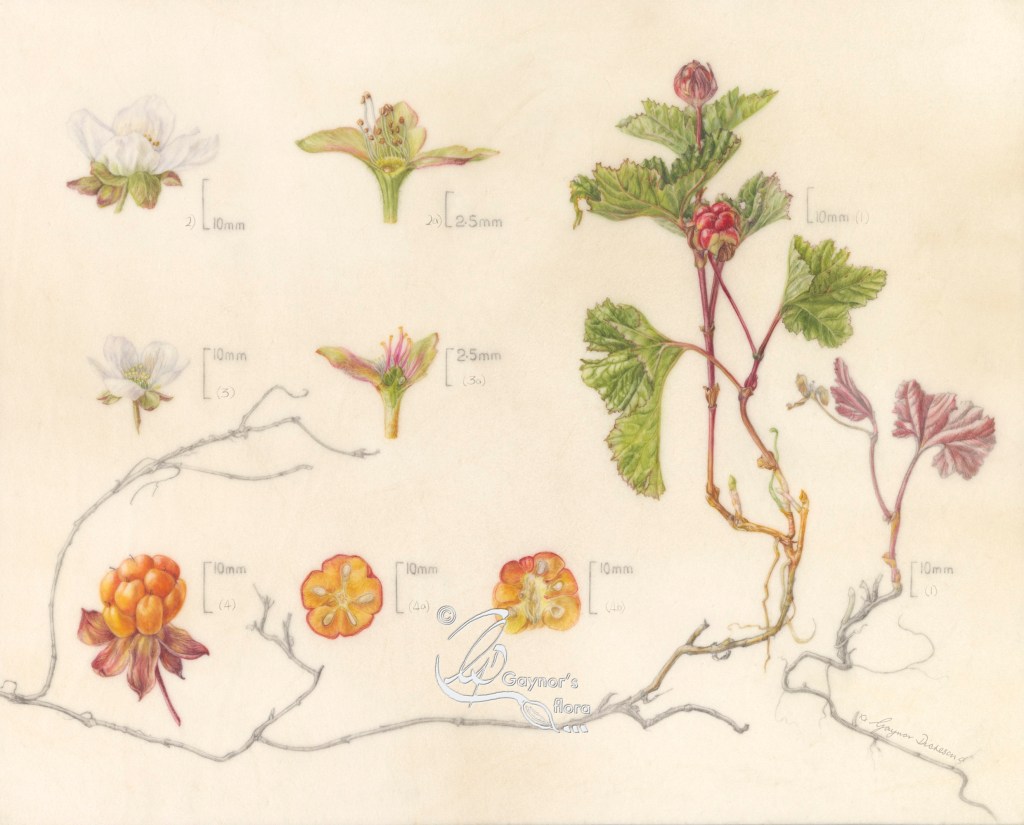
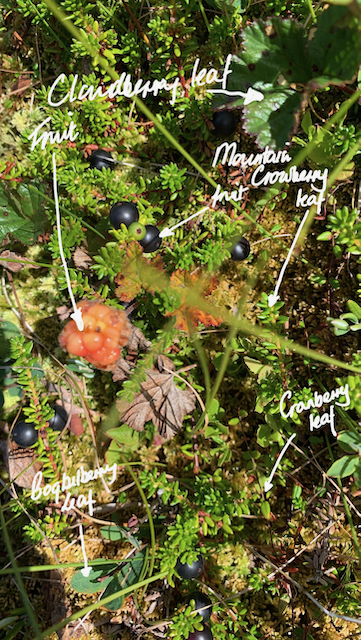
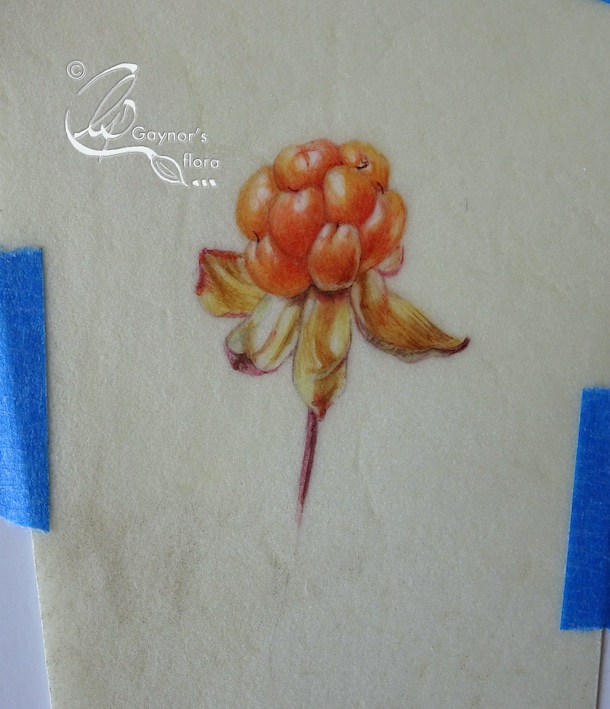
1. Rubus chamaemorus – Cloudberry – Multe
Watercolour & graphite on vellum.
August 2022
1) Habit
2) Male flower – 2a) LS Male flower
3) Female flower – 3a) LS Female flower
4) Fruit
4a) TS fruit
4b) LS fruit
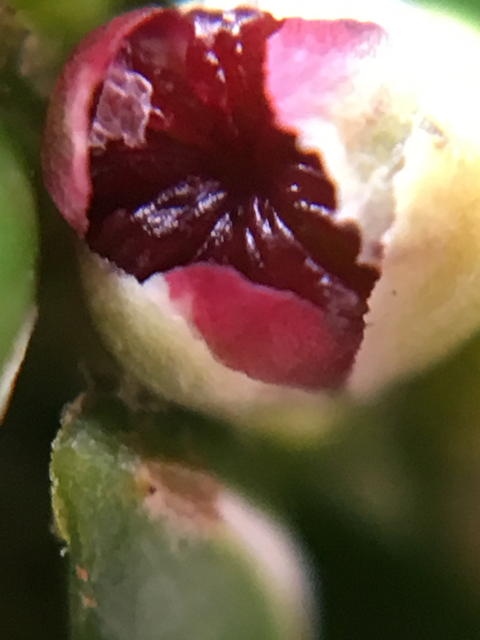
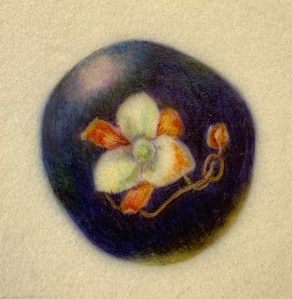
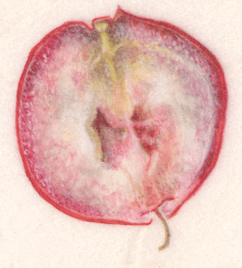
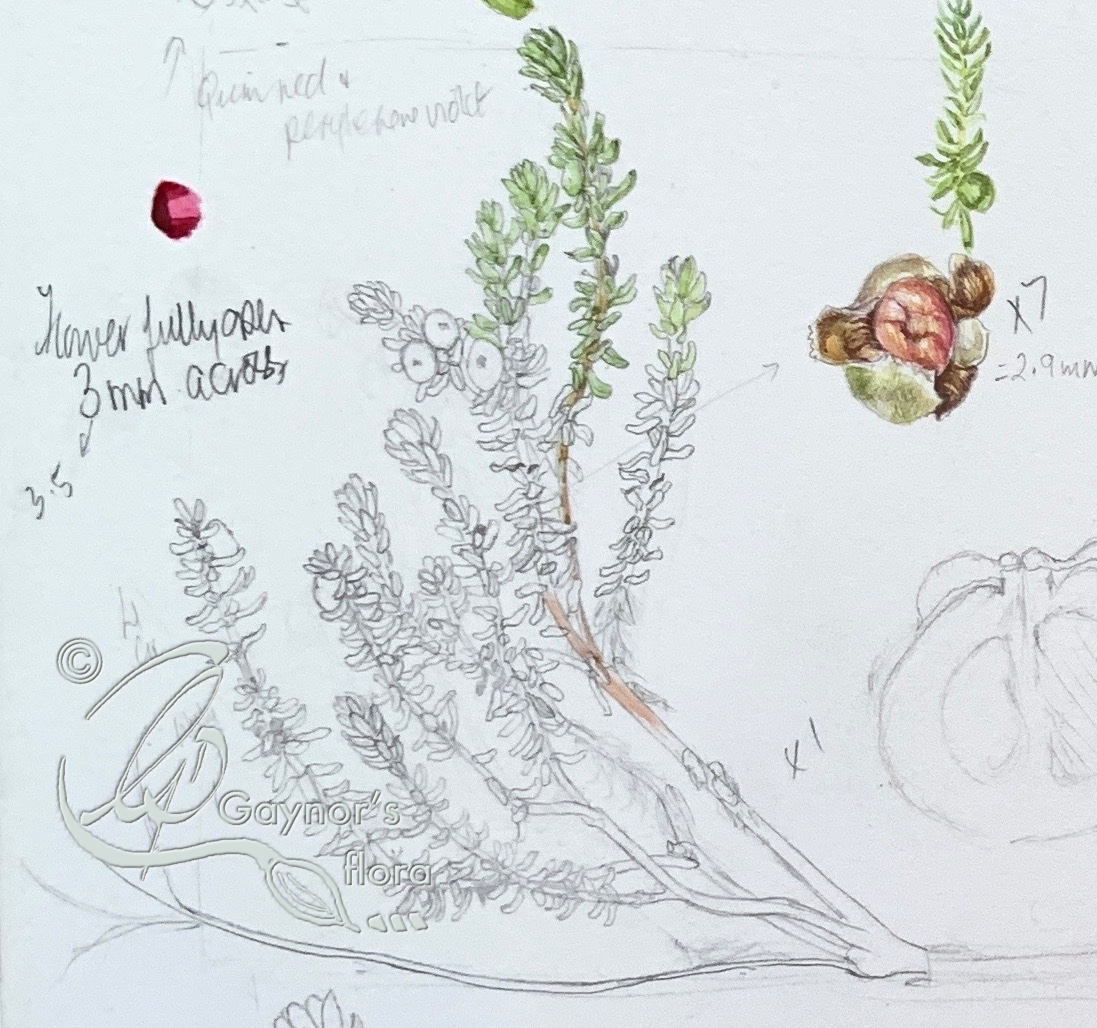
2. Vaccinium oxycoccus subsp. microcarpum – Small cranberry – Små tranebær
Watercolour & graphite on vellum.
January 2022
1). Habit
2). Flower
3). TS fruit
3a) LS Fruit
3b) Fruit


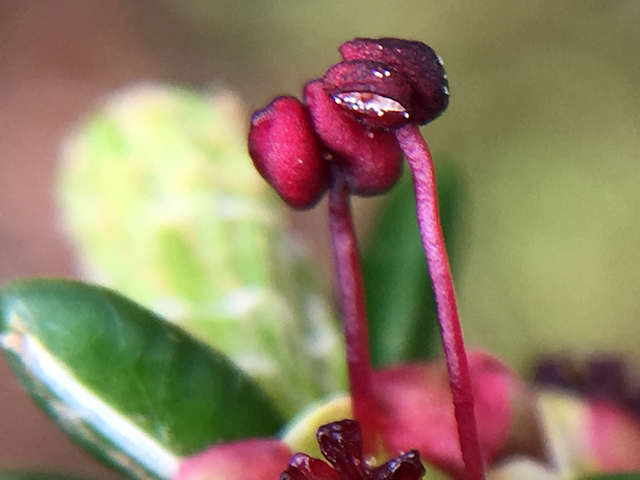
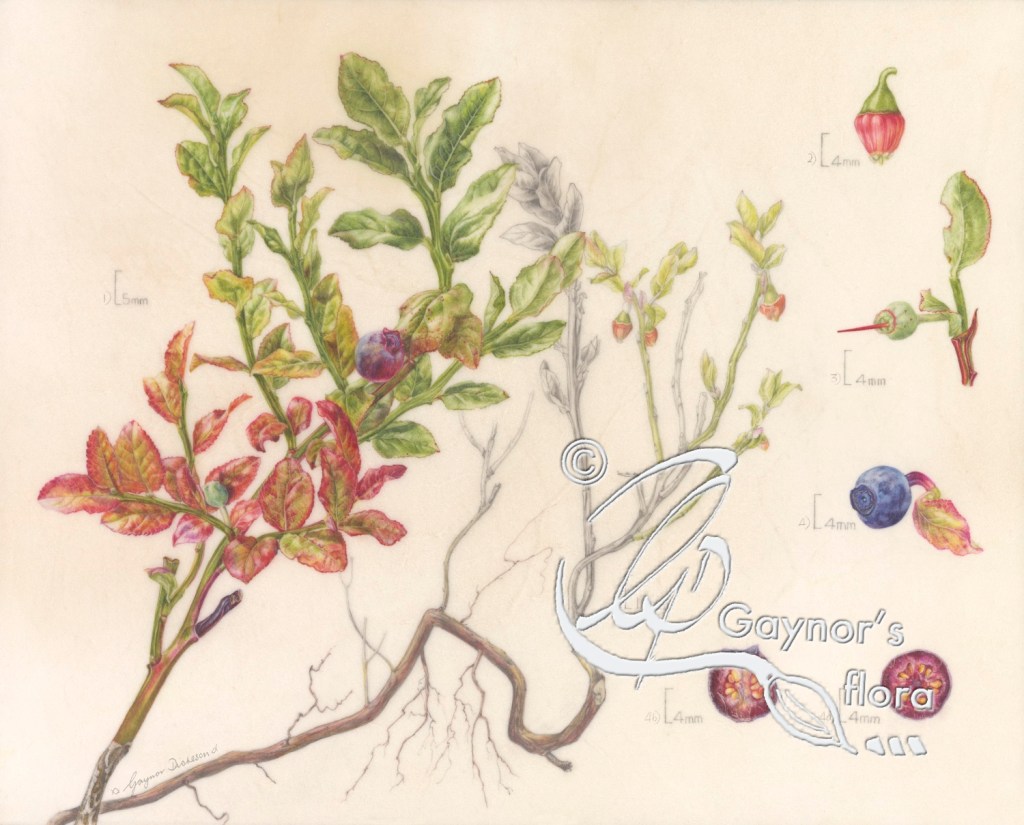
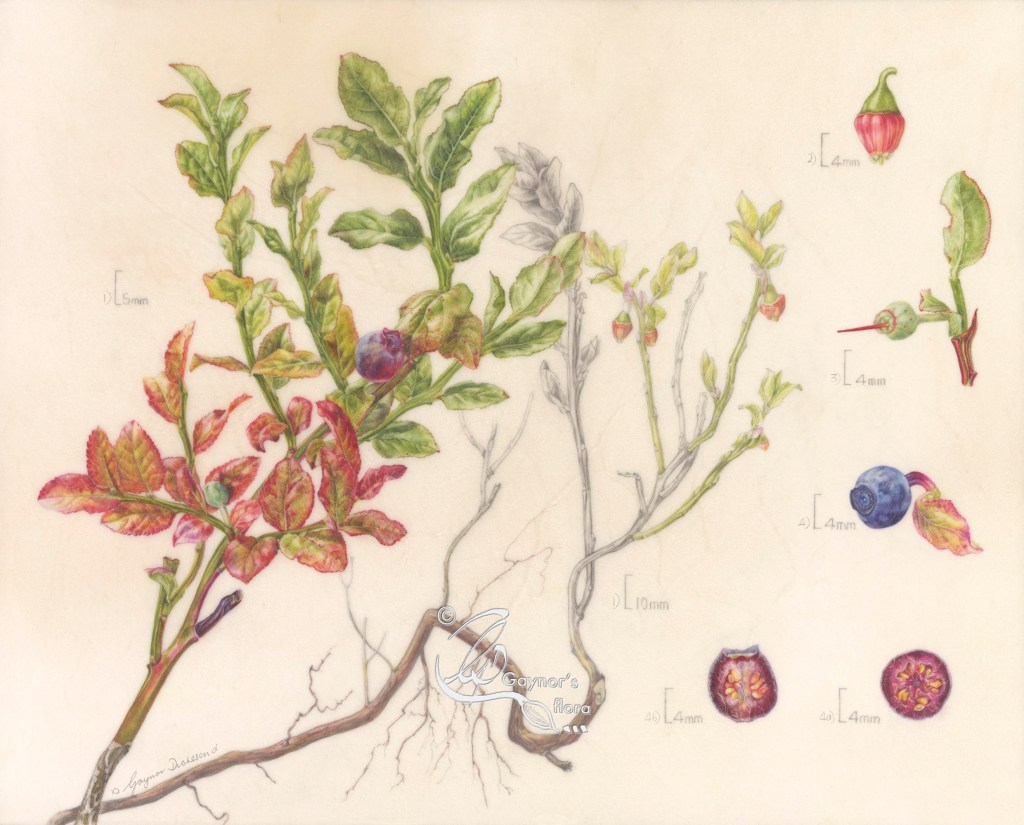
3. Vaccinium uliginosum – Bog bilberry – Skinntryte
Watercolour & graphite on vellum.
December 2021
1) Habit
2) Flower pair
3) Fruit
3a) TS fruit
3b) LS fruit
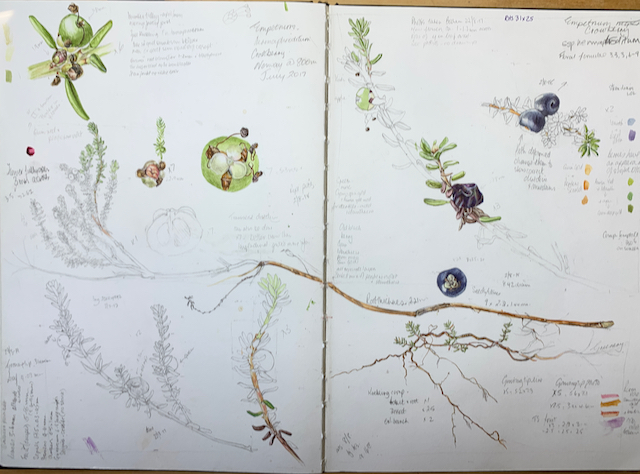
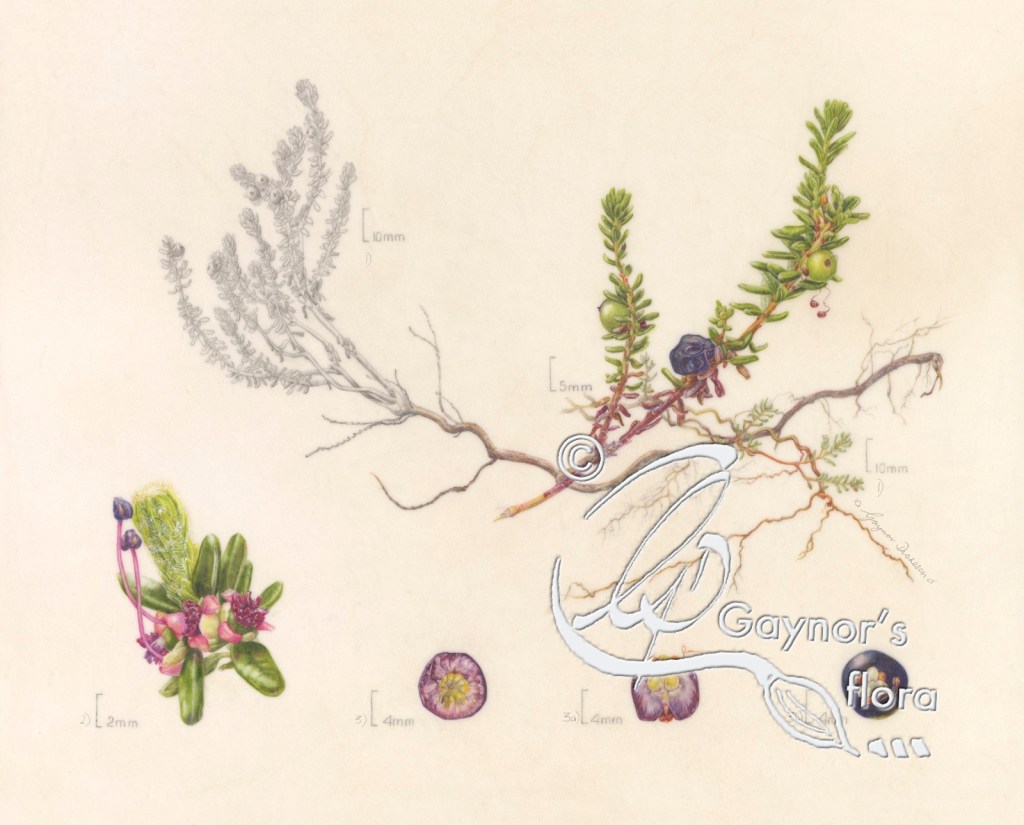
4. Empetrum nigrum subsp. hermaphroditum Mountain Crowberry – Krekling
Watercolour & graphite on vellum.
January 2022
1). Habit
2). Flower
3). TS fruit
3a) LS Fruit
3b) Fruit

5. Vaccinium myrtillus – Bilberry – Blåbær Watercolour & graphite on vellum.
March 2022
1) Habit
2) Flower
3) Immature fruit
4) Fruit
4a) TS fruit
4b) LS fruit
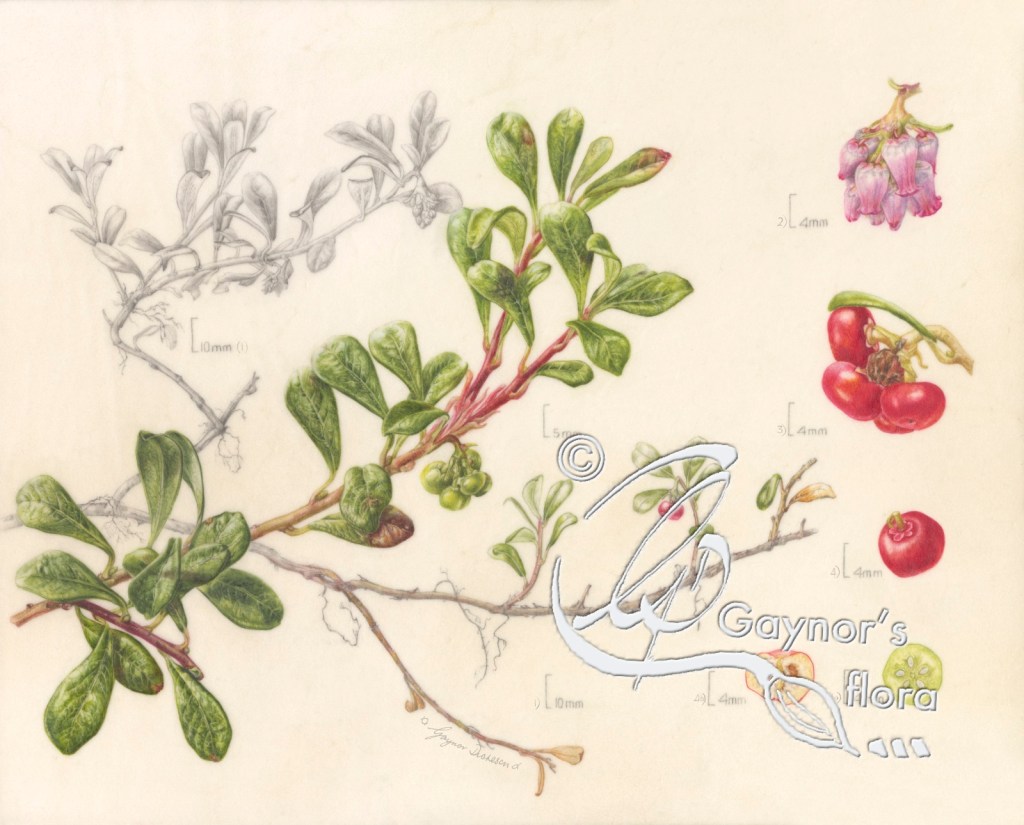
6. Vaccinium vitis-idaea – Cowberry/Lingonberry -Tyttebær
Watercolour & graphite on vellum.
November 2022
1) Habit
2) Flower cluster
3) Fruit
3a) TS fruit
3b) LS fruit

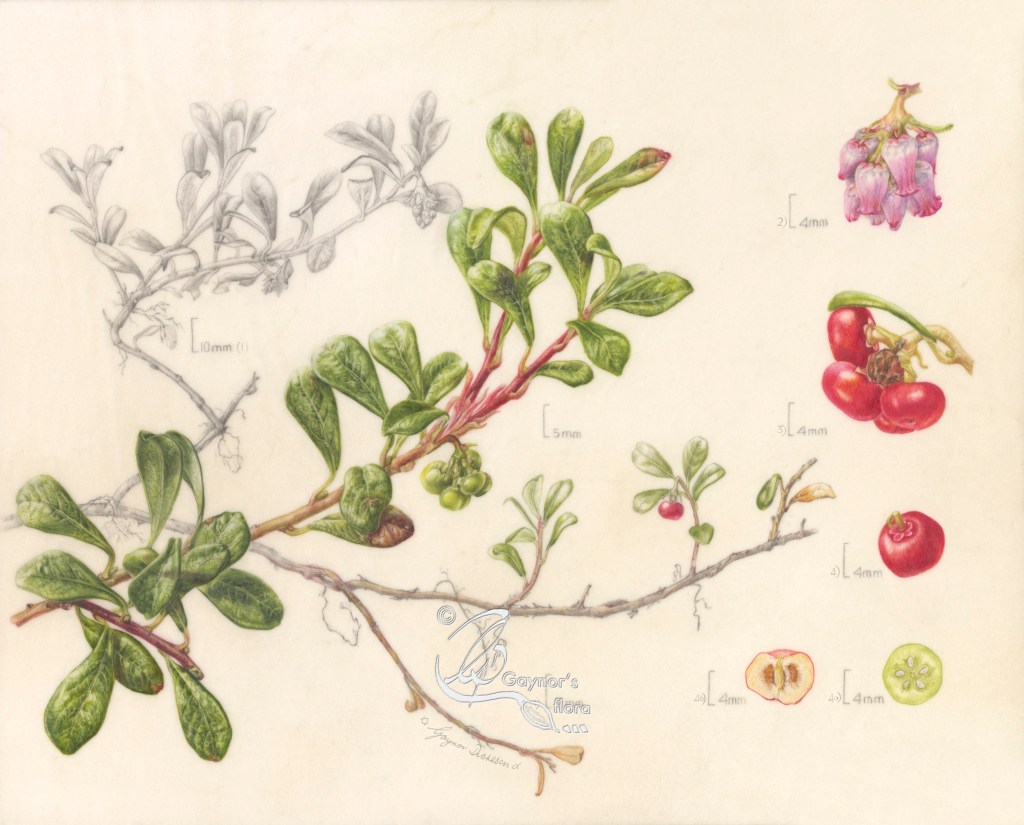
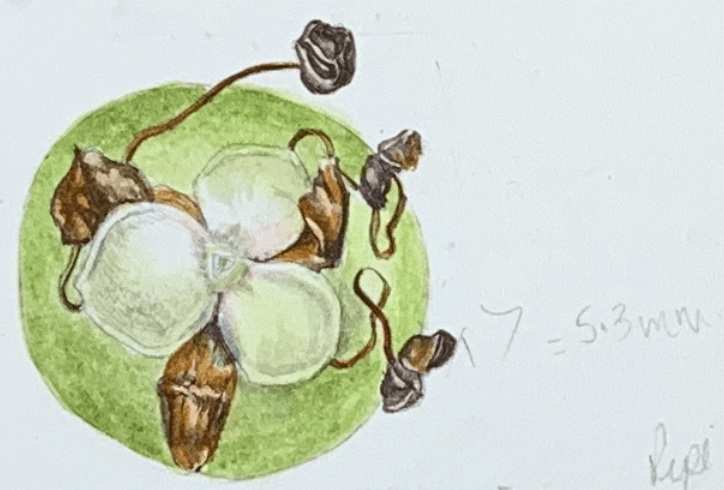
7. Arctostaphylos uva-ursi – Bearberry – Melbær
Watercolour & graphite on vellum.
October 2022
1) Habit
2) Flower cluster
3) Fruit cluster
4) Single fruit
4a) TS immature fruit
4b) LS ripe fruit
If you have read the blog series you will understand that the Cloudberry and Small cranberry enjoy the wettest environment – bogs and marshes, whilst the Bearberry is often found on a sandy forest floor. The other species are found in various types of environment from damp woods to harsh mountain tops. Some, like the Bog bilberry will grow very well just about anywhere as long as it has water and plenty of sun.
All of the plants in this series live in the Subarctic part of the world and have always provided a lot of nourishment for those living in the far north, the rest of us a little further south and of course animals that roam the area.
Some of the plants typically don’t grow in certain areas as witnessed by the difficulty I had finding the Bearberry. In very hot and dry years some plants produce next to nothing; Cloudberry and Small Cranberry are good examples. Can you imagine the risk that Global warming brings to these plants as well as to us. The warmer the planet gets, the more further north these plants are likely to move making it even harder for us and the animals they support, to find them. As it is, plants that can normally be found further south in Europe, are now beginning to appear in Norway; their pollinators moving with them and having a negative effect on the species that belong.
When choosing to study and paint these plants I didn’t realise how much I would learn about them. I loved the plants (and their fruit) before this, but now have so much respect for them and the environment in which they grow. I hope that I have been able to pass on at least a smidgen of this.
Thank you for following this series.

Latest news: I am really pleased to say that following the judging process yesterday, 14 June 2023, the judges decided to honour me with a Silver Gilt medal. The award ceremony will be held this evening at the Saatchi Gallery during the preview to the exhibition opening tomorrow.
I look forward to getting detailed feedback about my exhibit from the judges this afternoon.