Rory McEwen and my pineapple.

There is nothing to connect Rory McEwen and my pineapple – other than botanical art.

But I am dead chuffed and sad at the same time. I watched the programme on BBC today about Rory McEwen and felt so sad that such a gifted person died so young and in such a manner. I so wish I had been around when he was doing his wonderful paintings.

When I was at the Hunt Institute in Pittsburg two years ago, I had to pinch myself that because my work was accepted in the Hunt, and while there I was allowed to see whatever works that they had in their collection. I wanted to see Rory McEwen’s work and saw it in the ‘flesh’ without being protected by glass. It was amazing.

Four minutes after the end of the Rory McEwen programme today I got an email from the Hunt to tell me that I had been gifted a piece of Rory McEwen vellum. When he died, his vellum was given to the Hunt Institute and pieces have been gifted to botanical artists over the years. Now I am one of them. I can’t believe it.

Painting on vellum is hugely different to painting on paper. I will have to think of something really special to paint on it in due course.

But my pineapple. More pictures.

IMG_0065

IMG_0066

IMG_0067

IMG_0068

More pineapple segments

I have a feeling that posting the progression of this pineapple might be just a little boring for some. But on the other hand it also portrays the amount of work necessary and how I have to continually adjust the colours and the segments in relation to each other.

Knowing how I paint each segment in a rapidly changing pineapple is interesting in itself. Obviously I paint what I see, but I have to bear in mind that once all the segments are done, they need to be moulded into a complete shape. I can envisage that being the tricky part.

For this past week I have been painting every spare moment. My pineapple is somewhat further advanced than I am showing you here, but as this is a commission, I don’t feel it is right to show the completed work until the client has received the picture. The picture is far from being complete, although to date we have eaten four pineapples that were rather the worse for wear. They still tasted good though!

I mentioned that I take pains to draw the pineapple and arrange the segments appropriately. Once that is done I transfer this to my watercolour paper. But what happens then, particularly when I have to change pineapples? This is why I draw the segments in so they can easily be adjusted. I paint from life, therefore when I begin a new pineapple, I place it in such a position as to be able to find segments facing the same direction as on my original drawing.

Sometimes it can be quite difficult as every segment is different, and may not fit in too well. But so far it is going OK.

I have just had a thought. The Norwegian Botanical Art holiday workshop is over a longish period where one can work continuously and with guidance. A pineapple (although not of Norwegian origin) would be something one could work on. Do you fancy having a go? Look at http://www.gaynorsflora.com/page10.htm for details.

IMG_0062

IMG_0063

IMG_0064

IMG_0061

The Pineapple and a new workshop

I was reminded today by a friend that I have been remiss in my blogging. I am sorry for that. Therefore to catch up-

Last Saturday Robin and I were at the Society of Floral Painters(SFP), AGM and lunch. It was a very good meeting and lunch finishing off with an interesting talk by Roy Lancaster. It is the first such meeting I have been to and I gained a lot from it – as well as meeting lots of other botanical and floral painters.

The SFP have their next exhibition in Chichester Oxmarket arts Centre 20 May – 7 June. Look at my website http://www.gaynorsflora.com for details.

But since Saturday I have been continuing with the Pineapple picture – when time has allowed. I am adding a few more pictures at the end of this blog.

Tomorrow I am having a new two-day workshop here in Bosham. The topic is ‘Twigs and things’. It will be very interesting to see what people bring with them. I hope to be able to post some pictures after the workshop.

The next workshop is Friday 27 February – Sunday 1 March and the topic is Hellebores – floating. This means one has the opportunity to paint the flowers face up, showing their beautiful and colourful detail. There are a very few vacant places, so do contact me or look at my website (details above) for more information.

The pineapple-

2015/01/img_0059.jpg

2015/01/img_0060.jpg

2015/01/img_0055.jpg

2015/01/img_0056.jpg

2015/01/img_0057.jpg

2015/01/img_0058.jpg

Another Pineapple in watercolour

It is now several years since I painted my last pineapple and I have been asked to paint another one. I started the drawing before I went to Norway and today have got back to it having caught up (sort of) with other outstanding tasks that accumulated whilst I was away.

The trouble is, we had to eat the last pineapple before we went away! So what do I do? It was delicious by the way.

When you buy a pineapple, it has been cut and removed from the parent plant. This of course is obvious, but what is less understood is that it will not become riper after it has been cut. As far as I understand the pineapples are cut at their ripest. Some buyers prefer to buy them green and if the golden yellow colour is wanted they are sprayed about a week prior to harvest with a plant growth regulator. If you want to check this up read http://en.wikipedia.org/wiki/Pineapple.

The pineapples that I have bought are mainly from Costa Rica and I think are the cultivar “smooth cayenne”.

I normally take pictures of my subject first so that I have an idea of what it originally looked like, so that when it dies or rots too much, I can replace it with a fresher specimen. In this instance my original drawing and placing of segments will be different to any other pineapple I get. But, I can use segments in the new pineapple, making sure that they are in a similar position and lit in a similar way to the original specimen. Thus I can continue to paint from life – which for a botanical artist is far the best thing to do.

My initial work:

Initial pineapple drawing.

Note the tramlines in a Fibonacci spiral. I observe the lines, draw the crossing tramlines and at each intersection place a segment. Once a tracing has been made, I do a very rough shading on the original sketch to indicate the form of the fruit.

The tracing of the original drawing.

I traced over onto a Fabriano Classico HP 640gsm paper in a manner that I have previously described in one of my blogs. This leaves no indentations from the pencil and is easily removed before painting.

03.IMG_1985


I used a watercolour pencil to lightly outline my segments in an area of the pineapple I can manage initially. When I begin to paint, this colour will be absorbed into the painting avoiding lines. I don’t do too many at once in case I really need to change any of the segments in a later pineapple.


Botanical art trip to Palmengarten, Frankfurt

It’s now Saturday at 23:00 and we are due to get up at 04:00 to drive to the Channel tunnel train leaving around 06:00. There is no wifi at the moment, so can’t even connect to get the pictures taken earlier today. However, as soon as a connection is made I will get this blog off. It’s amazing how dependent we have become on modern technology!

First thing this morning we were rushing around finding all sorts of extra equipment for hanging the SBA members pictures once we get that far. It was incredibly warm and felt like summer as I rushed thinly fled from house to shed (some call it a studio- but it’s a shed) and back again. Our journey to Kent was uneventful apart from the usual hold-up with road works.

Another SBA member had been the delivery point for most of the other half of exhibits and kindly offered us supper and a bed for the night once she had also helped with the reorganising and loading of her store of pictures.

She like I were amazed at the empty spaces we had once the collection was loaded onto the van. The van was packed fully. I’m glad that there weren’t more pictures.

Hopefully I can access the pictures I took today- tomorrow.

IMG_0441.JPG

IMG_0445.JPG

IMG_0442.JPG

And the Bears Britches

IMG_0478-0.JPG

IMG_0479-0.JPG

IMG_0480.JPG

Day before the journey to Frankfurt’s Palmengarten

My last blog mentioned that the botanical art exhibition at Palmengarten is now less than a week away. Each day that comes I think that I might get a little painting in before we go – but no such luck. I will show you a couple more pictures from the pen and ink drawing of Bear’s britches progression though.

I thought I had all the paperwork for Palmengarten clear in relevant folders etc, but then the cat jumped up onto the keyboard and knocked my tea all over the paperwork and the printing paper. That took a couple of hours to reprint it all as well as clear up the mess.

But today, my husband Robin got up early, gave me a cup of tea in bed and then took the train to Portsmouth to collect a van for our trip to Frankfurt. It is quite a large van, but he thinks we will be comfortable enough during the long journey, although it doesn’t seem to have all the mod cons one might expect/ wish for.

So we checked all the paintings etc against the spreadsheet I had done and loaded everything onto the van. Robin fastened everything securely and one of the cats, Fudge, inspected the lot to see that we had done it properly. His black and white brother (guess what his name is) inspected the suddenly empty spare bedrooms. They will be having a strict cat-sitter for the duration!

A good night’s sleep tonight and tomorrow we will be on our way to Kent to pick up the other half of paintings.

IMG_0648.JPG

IMG_0650.JPG

IMG_0652.JPG

The bear’s britches (Acanthus)

IMG_0475.JPG

IMG_0477.JPG

IMG_0476.JPG

Another Pen & Ink workshop

I thought that last Saturday was likely to be our last day of summer, so used the opportunity to go out with the kayaks in Chichester Harbour – the Bosham inlet. It was fantastic. But low and behold we got several more opportunities to go out in them. We would have gone again on Tuesday at high tide, but a lot of preparation needed to be done for the Pen & Ink workshop starting the next day. However, I did get what I think might be my last trip (without wet suits) in the kayak this year, on Wednesday evening after the workshop. It was lovely and warm and relaxing – 1st October.

So why did I need something warm and relaxing? The Pen and Ink workshop was only Wednesday and Thursday, therefore I had my work cut out to teach a new technique to a full house. As normal I encouraged people to choose more realistic challenges for themselves as they needed to draw their subject before branching out into the ink technique. It was a lovely group of people and luckily they took my advice – although I think some of them might have chosen something more difficult given the opportunity. But when doing a new technique, it is always much better to choose something simple, get a feeling for the technique and thus a good result.

At the end of the first day everyone had their first layer of ink on and was ready to take a break. By the time they came back on Thursday, nearly all were enthusiastic and they stormed ahead getting the results you see. I am glad to say that most were really encouraged by their results and are very determined to do some more pen and ink work in this style.

Serious work on the big table.
Serious work on the two small tables
Chief cook and bottle washer in the background
This is meant to be a serious matter!
Back to the serious work

And so the results:

It was a seed head of some description, but we are not sure from what.
Dried Poppy seed heads
A Magnolia fruit case
Himalayan Lily seed case
Horse Chestnut - or conker before getting bashed!
Horse Chestnut – or conker before getting bashed!
Rose hip quicky
Rose hip quicky
Pine cone. How would we manage without Fibonacci?
Hydragea quickey
Hydragea quickey
Dried Teasle
Dried Teasle
Dried up Pineapple top. Notice the intriguing technique used here. I would like to see more of this.

Botany and botanical art is very exciting!

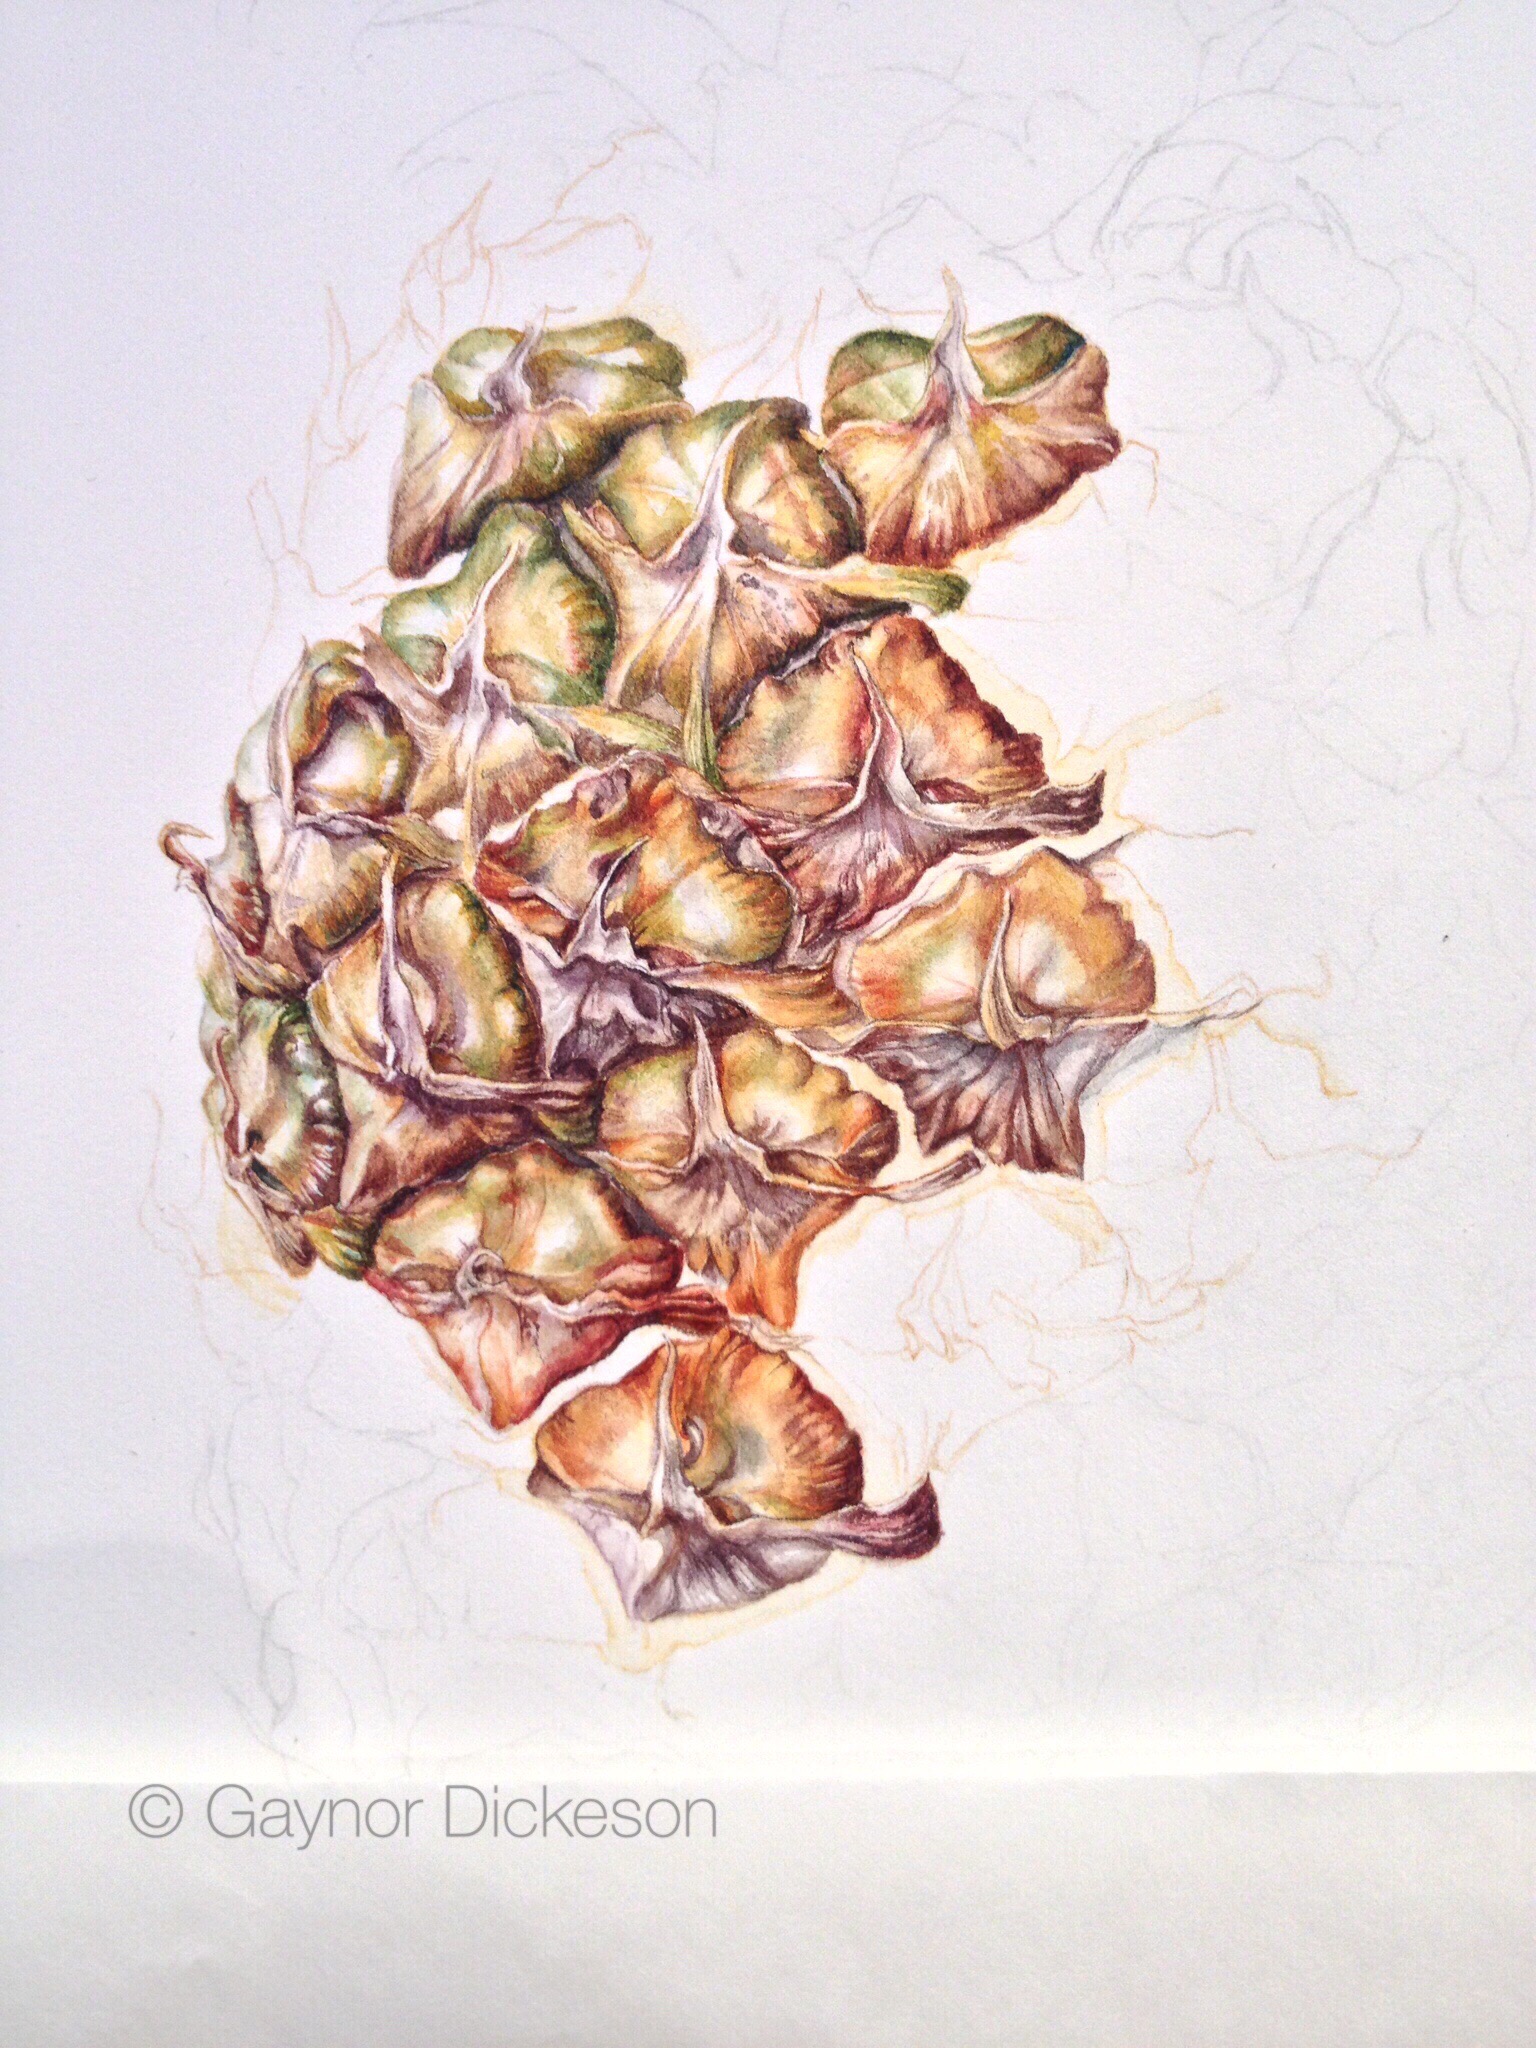
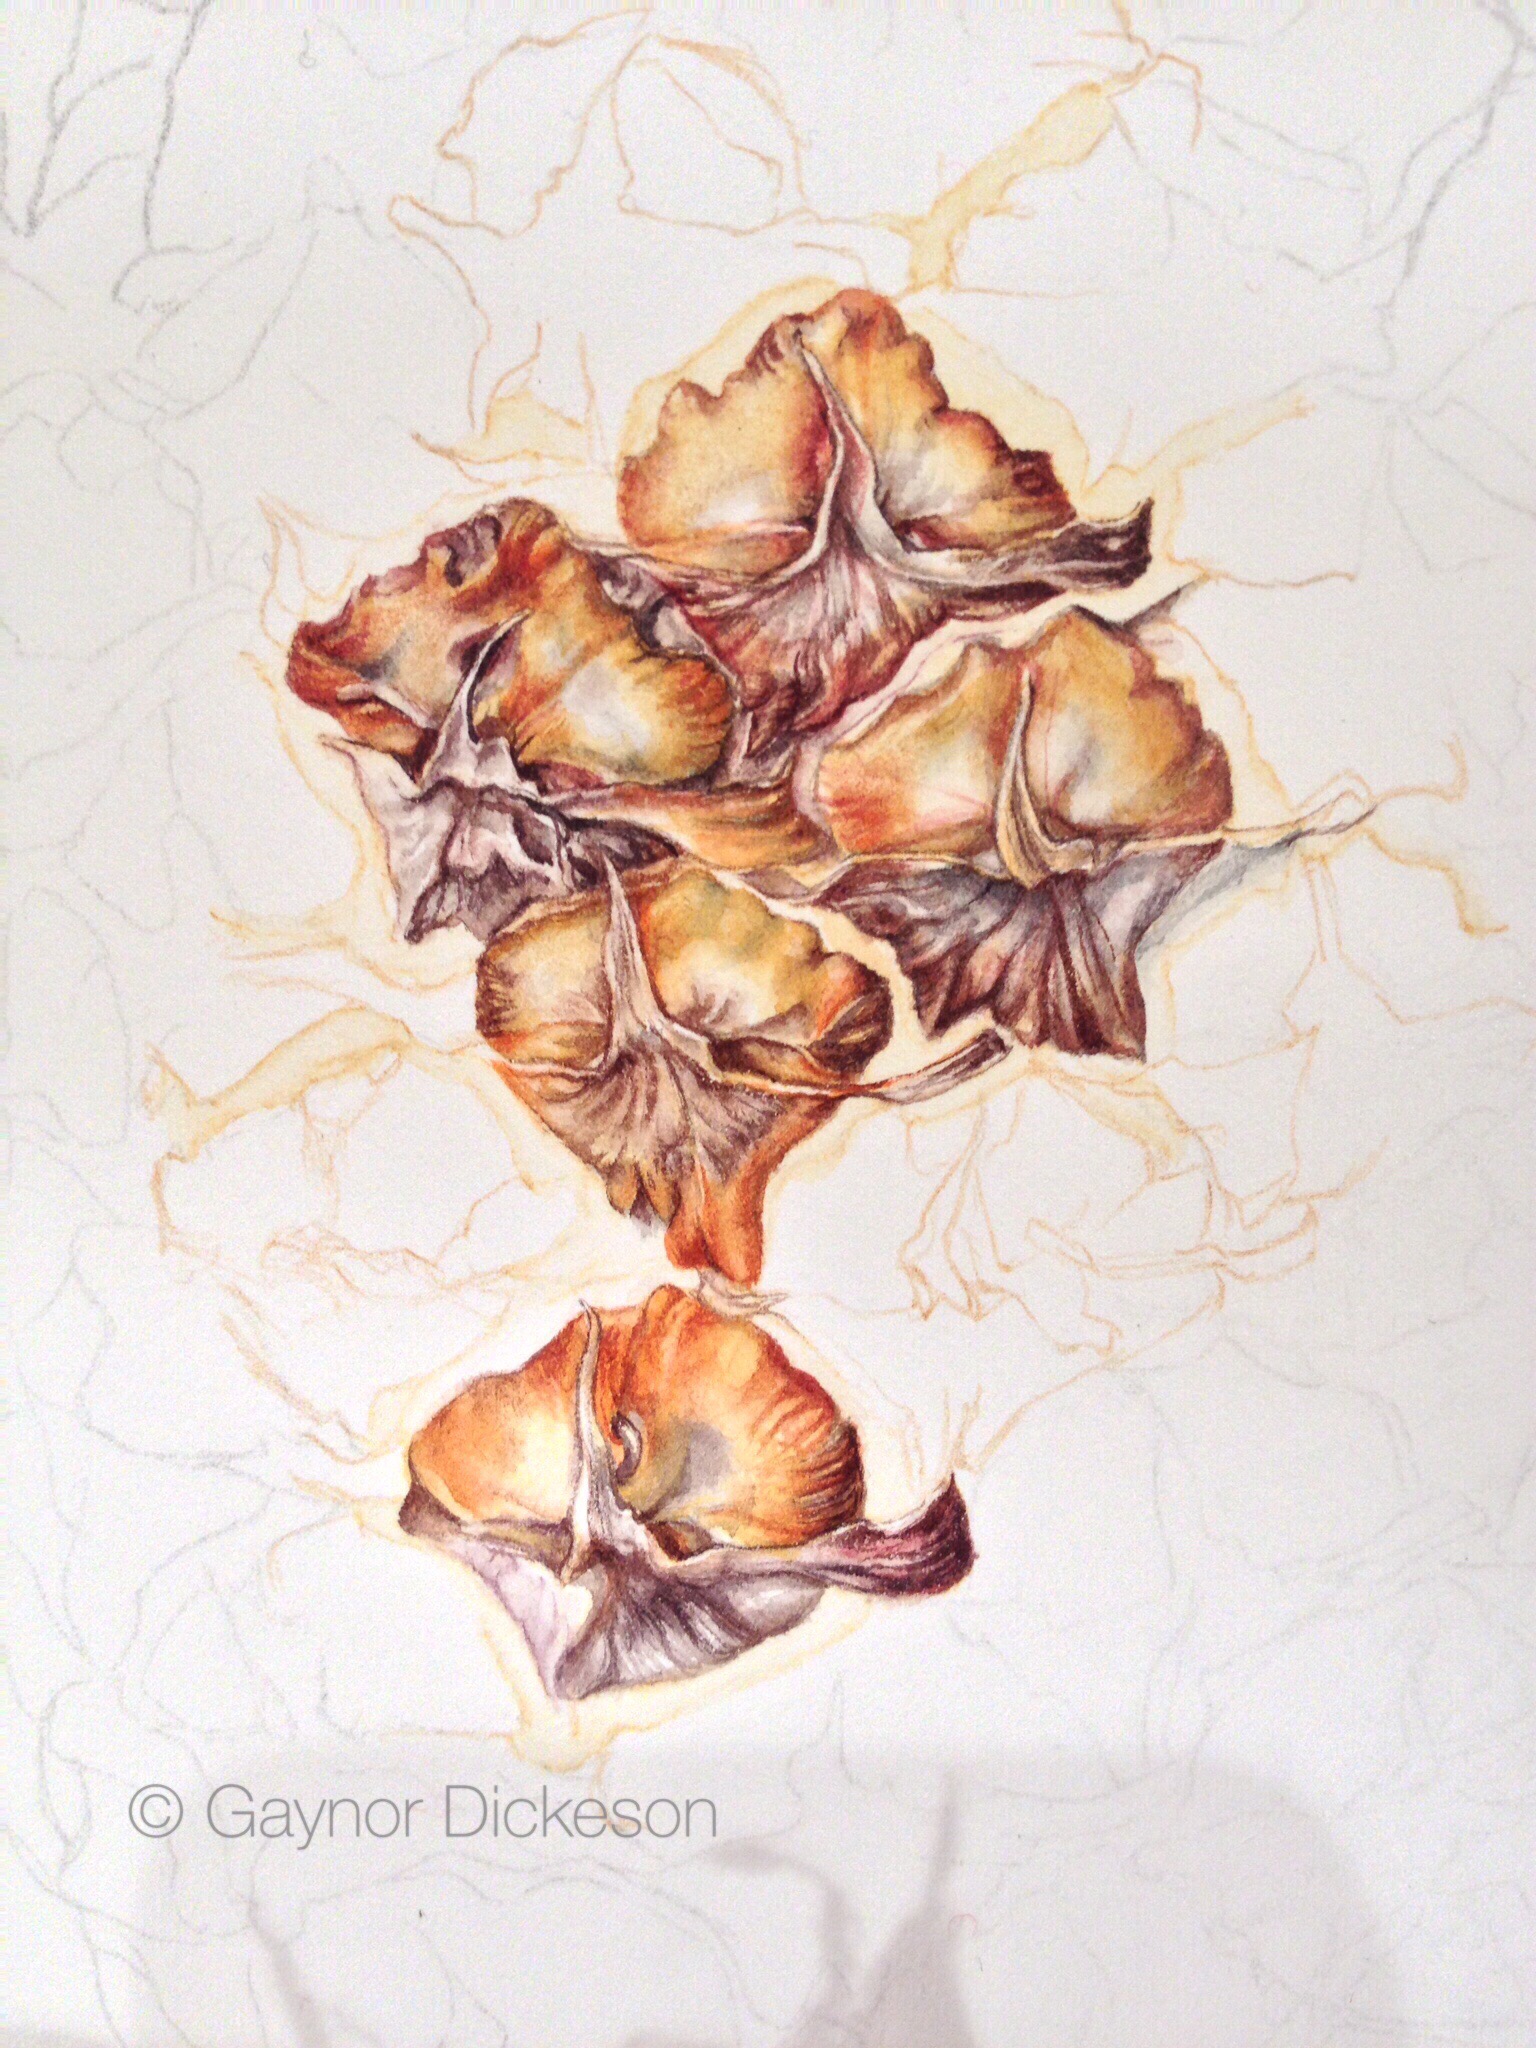
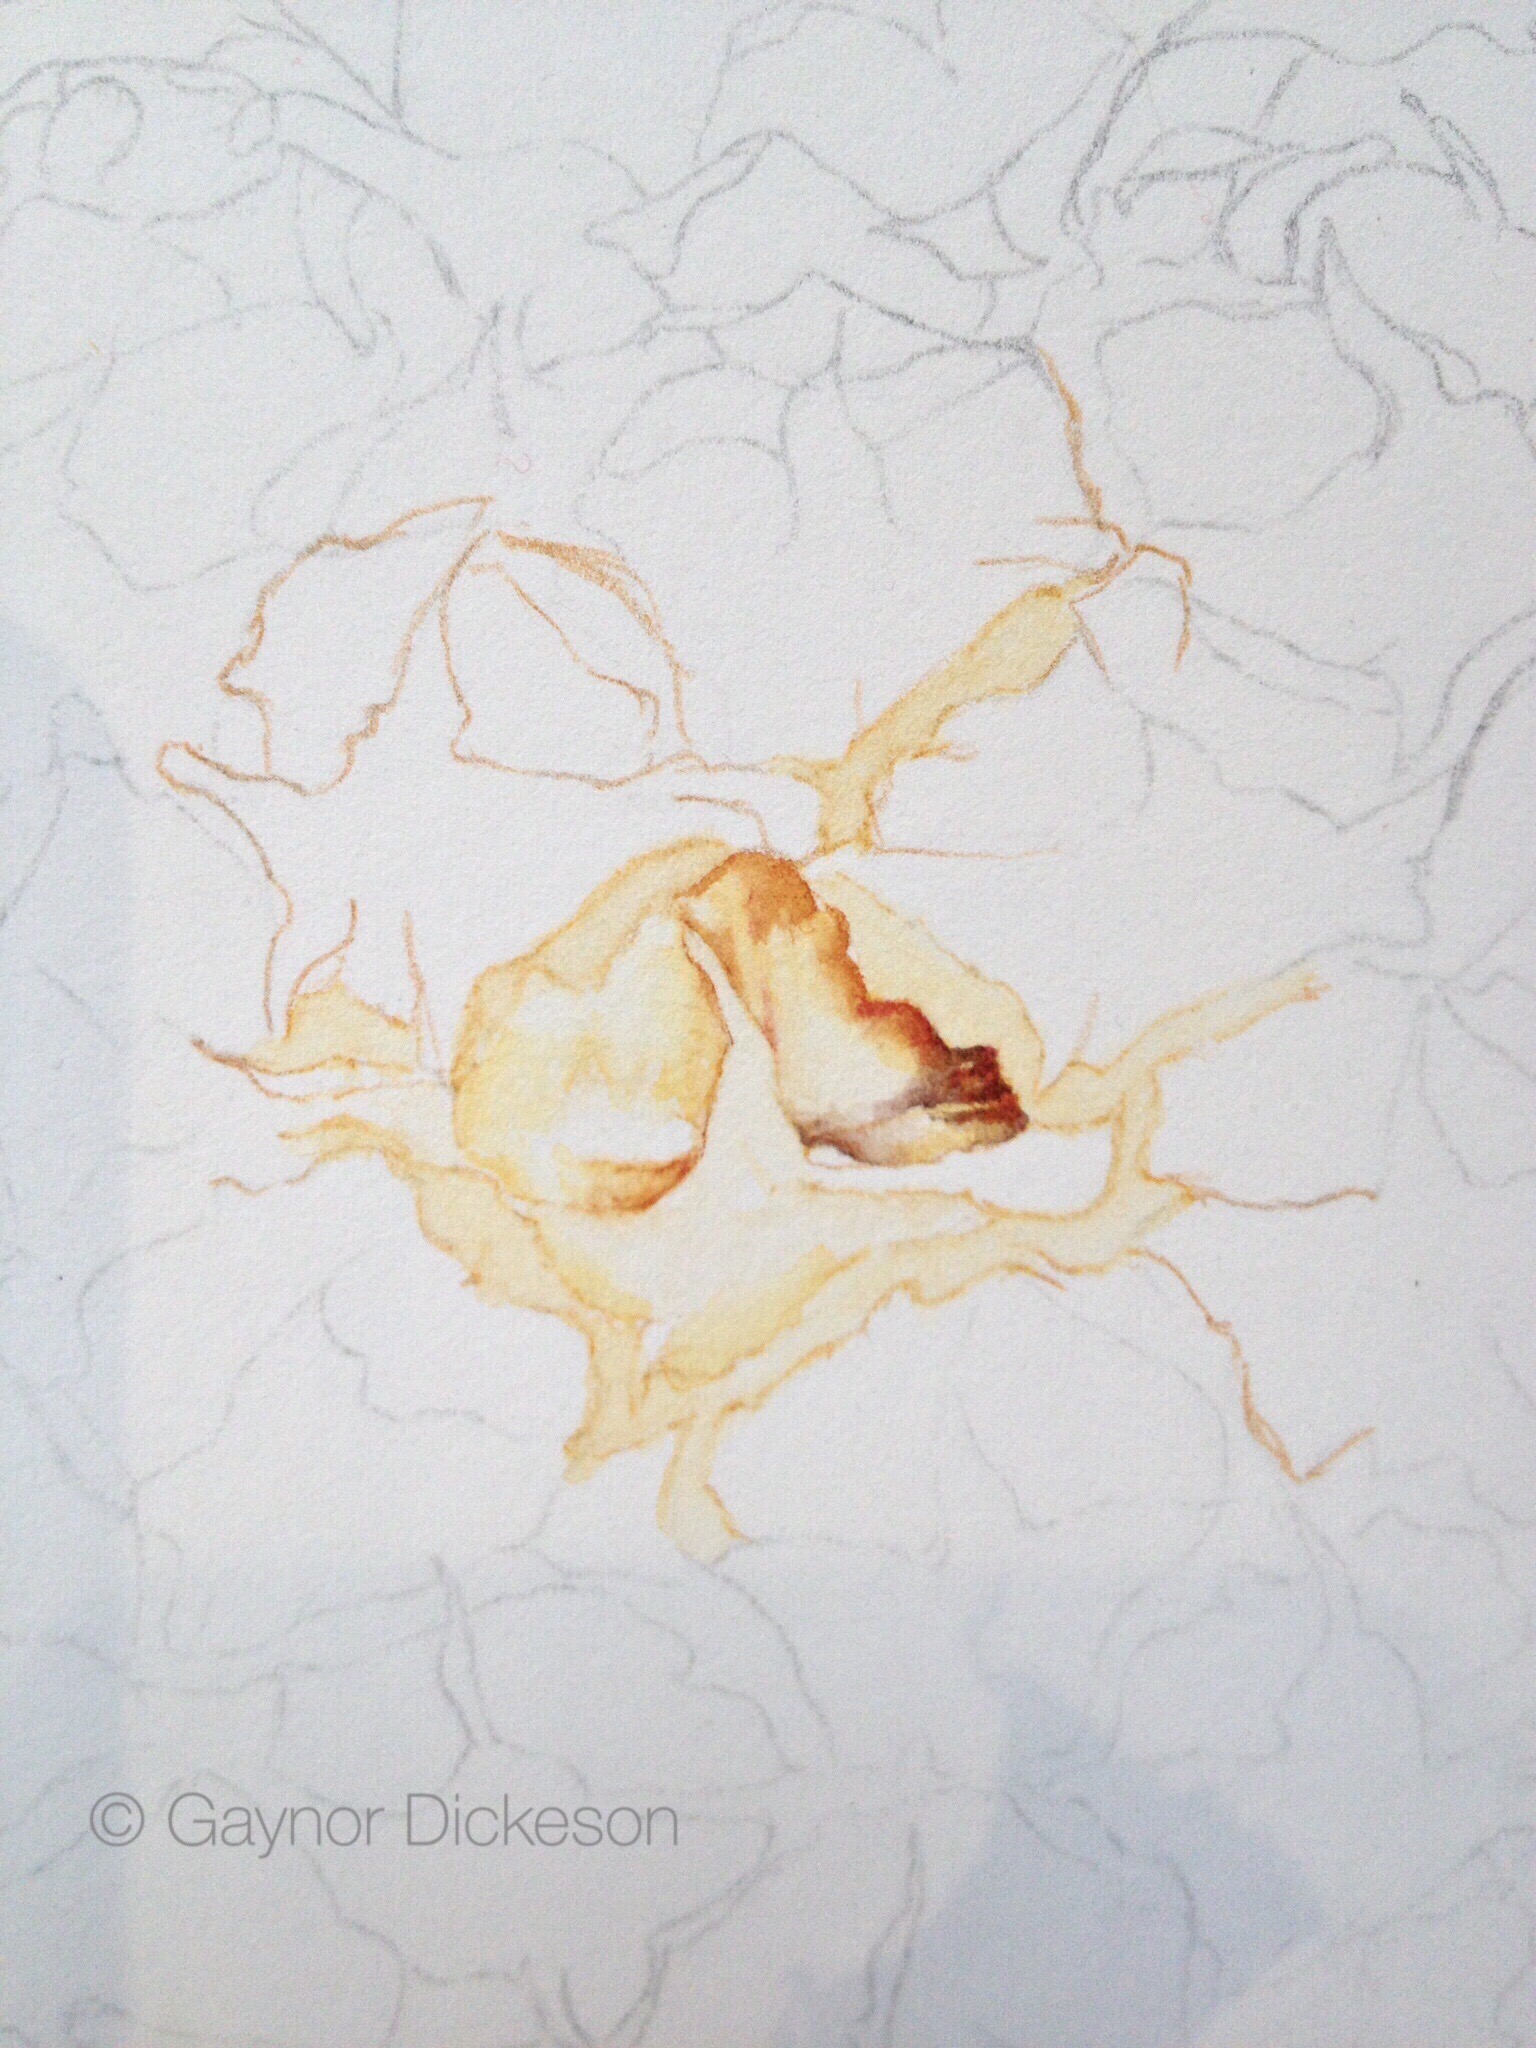
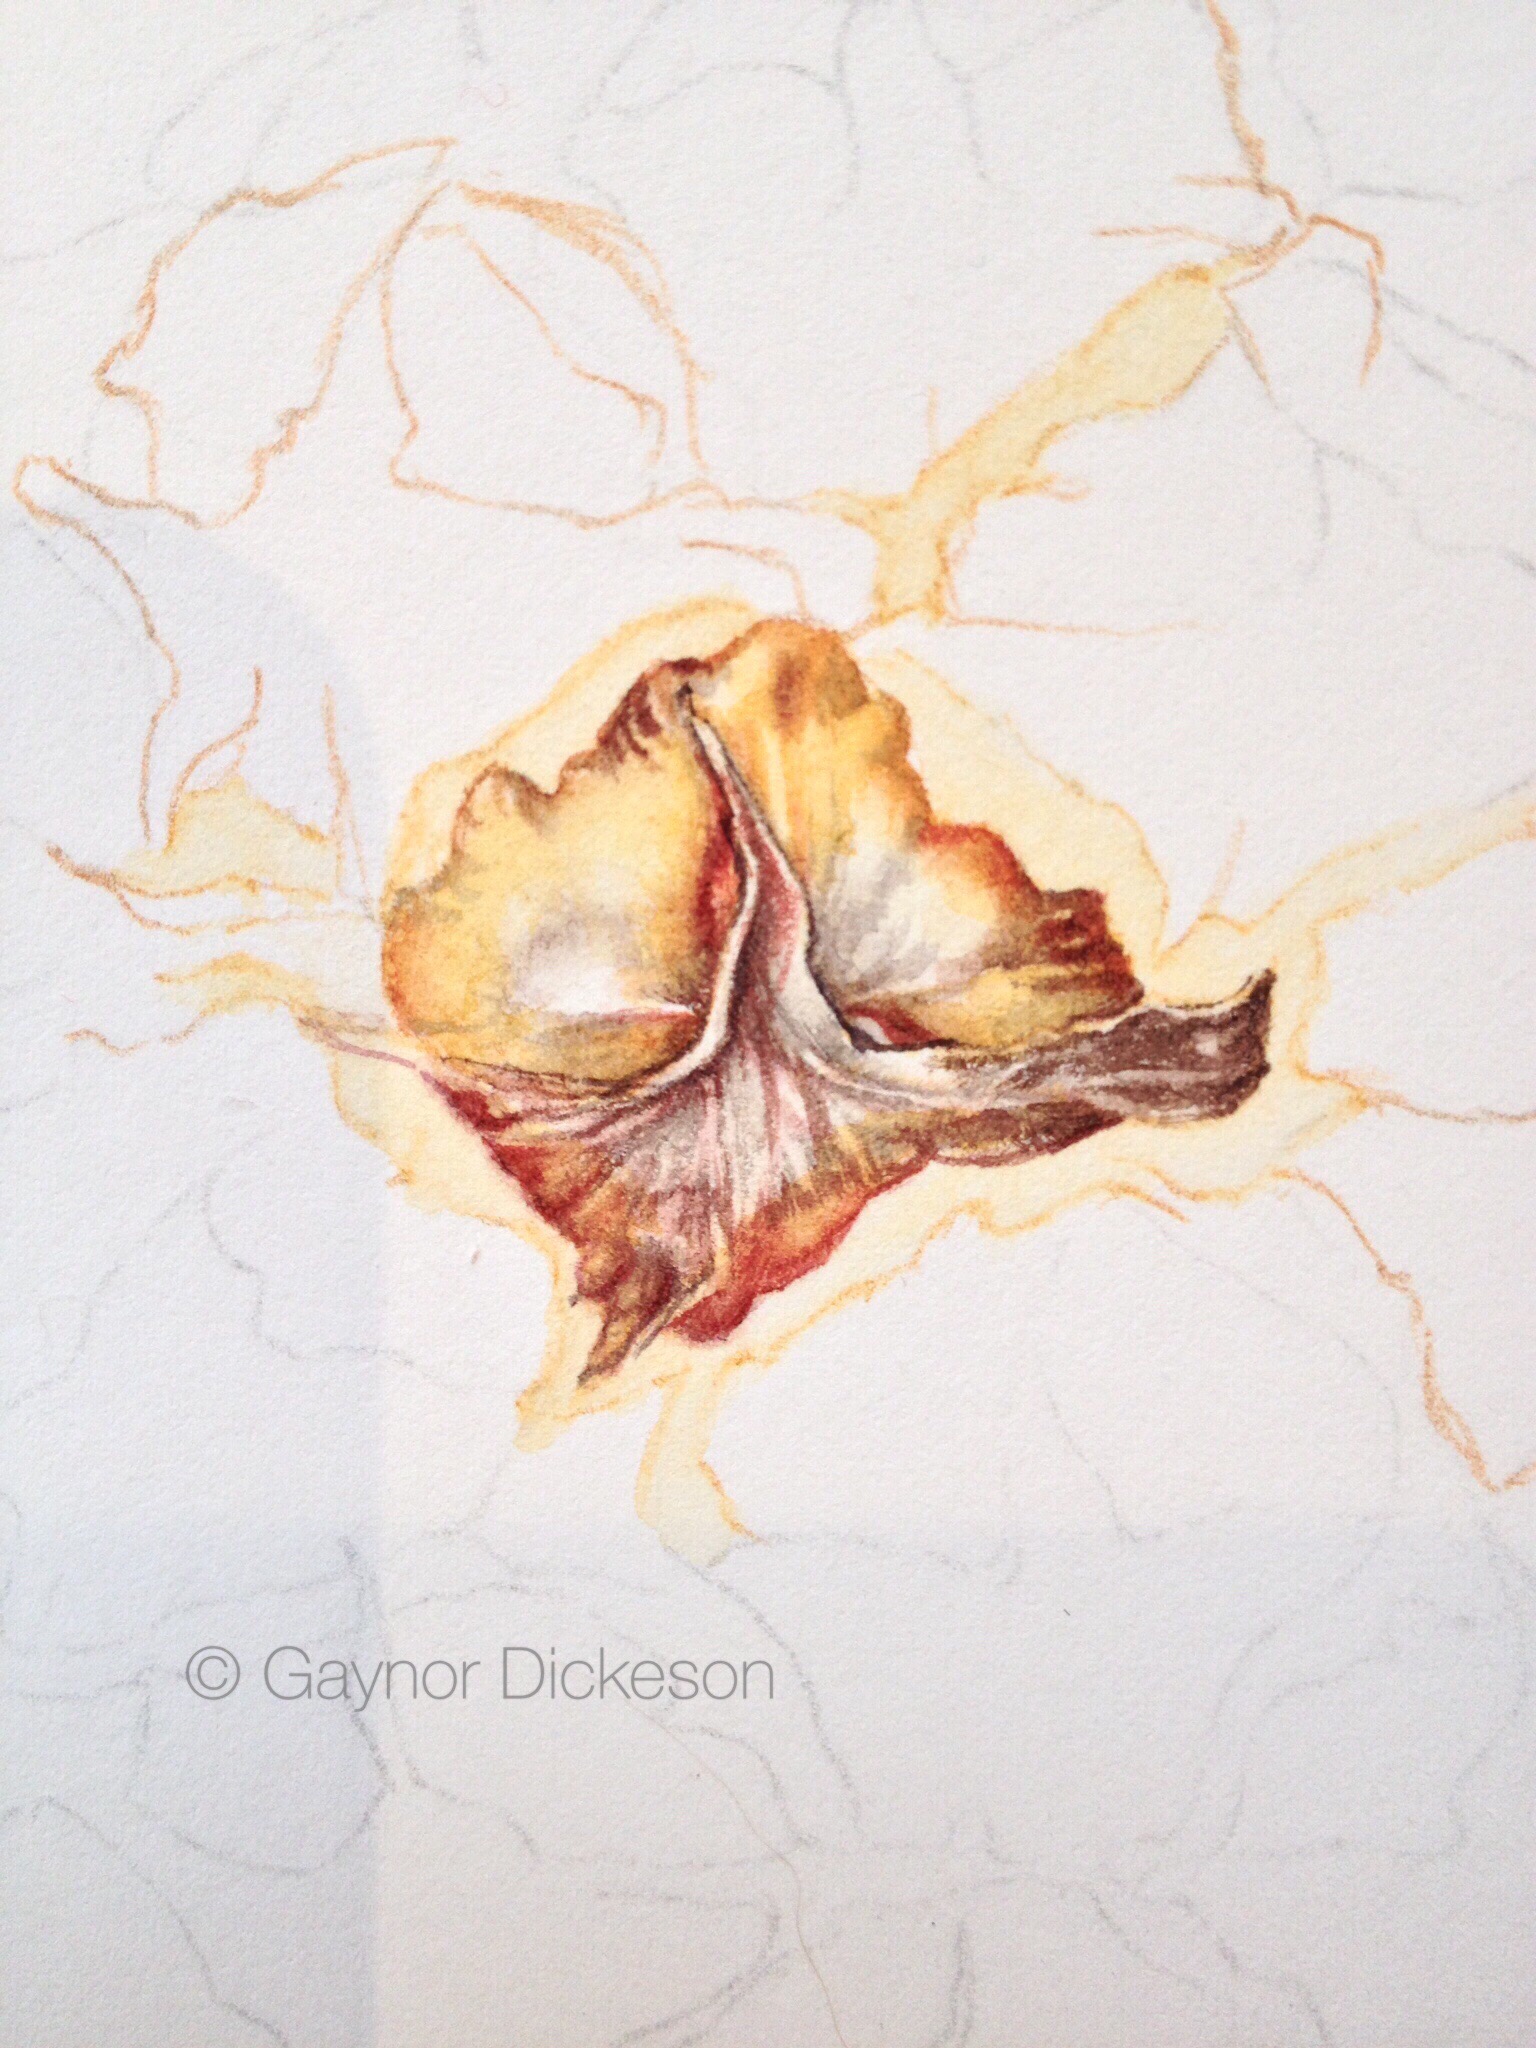
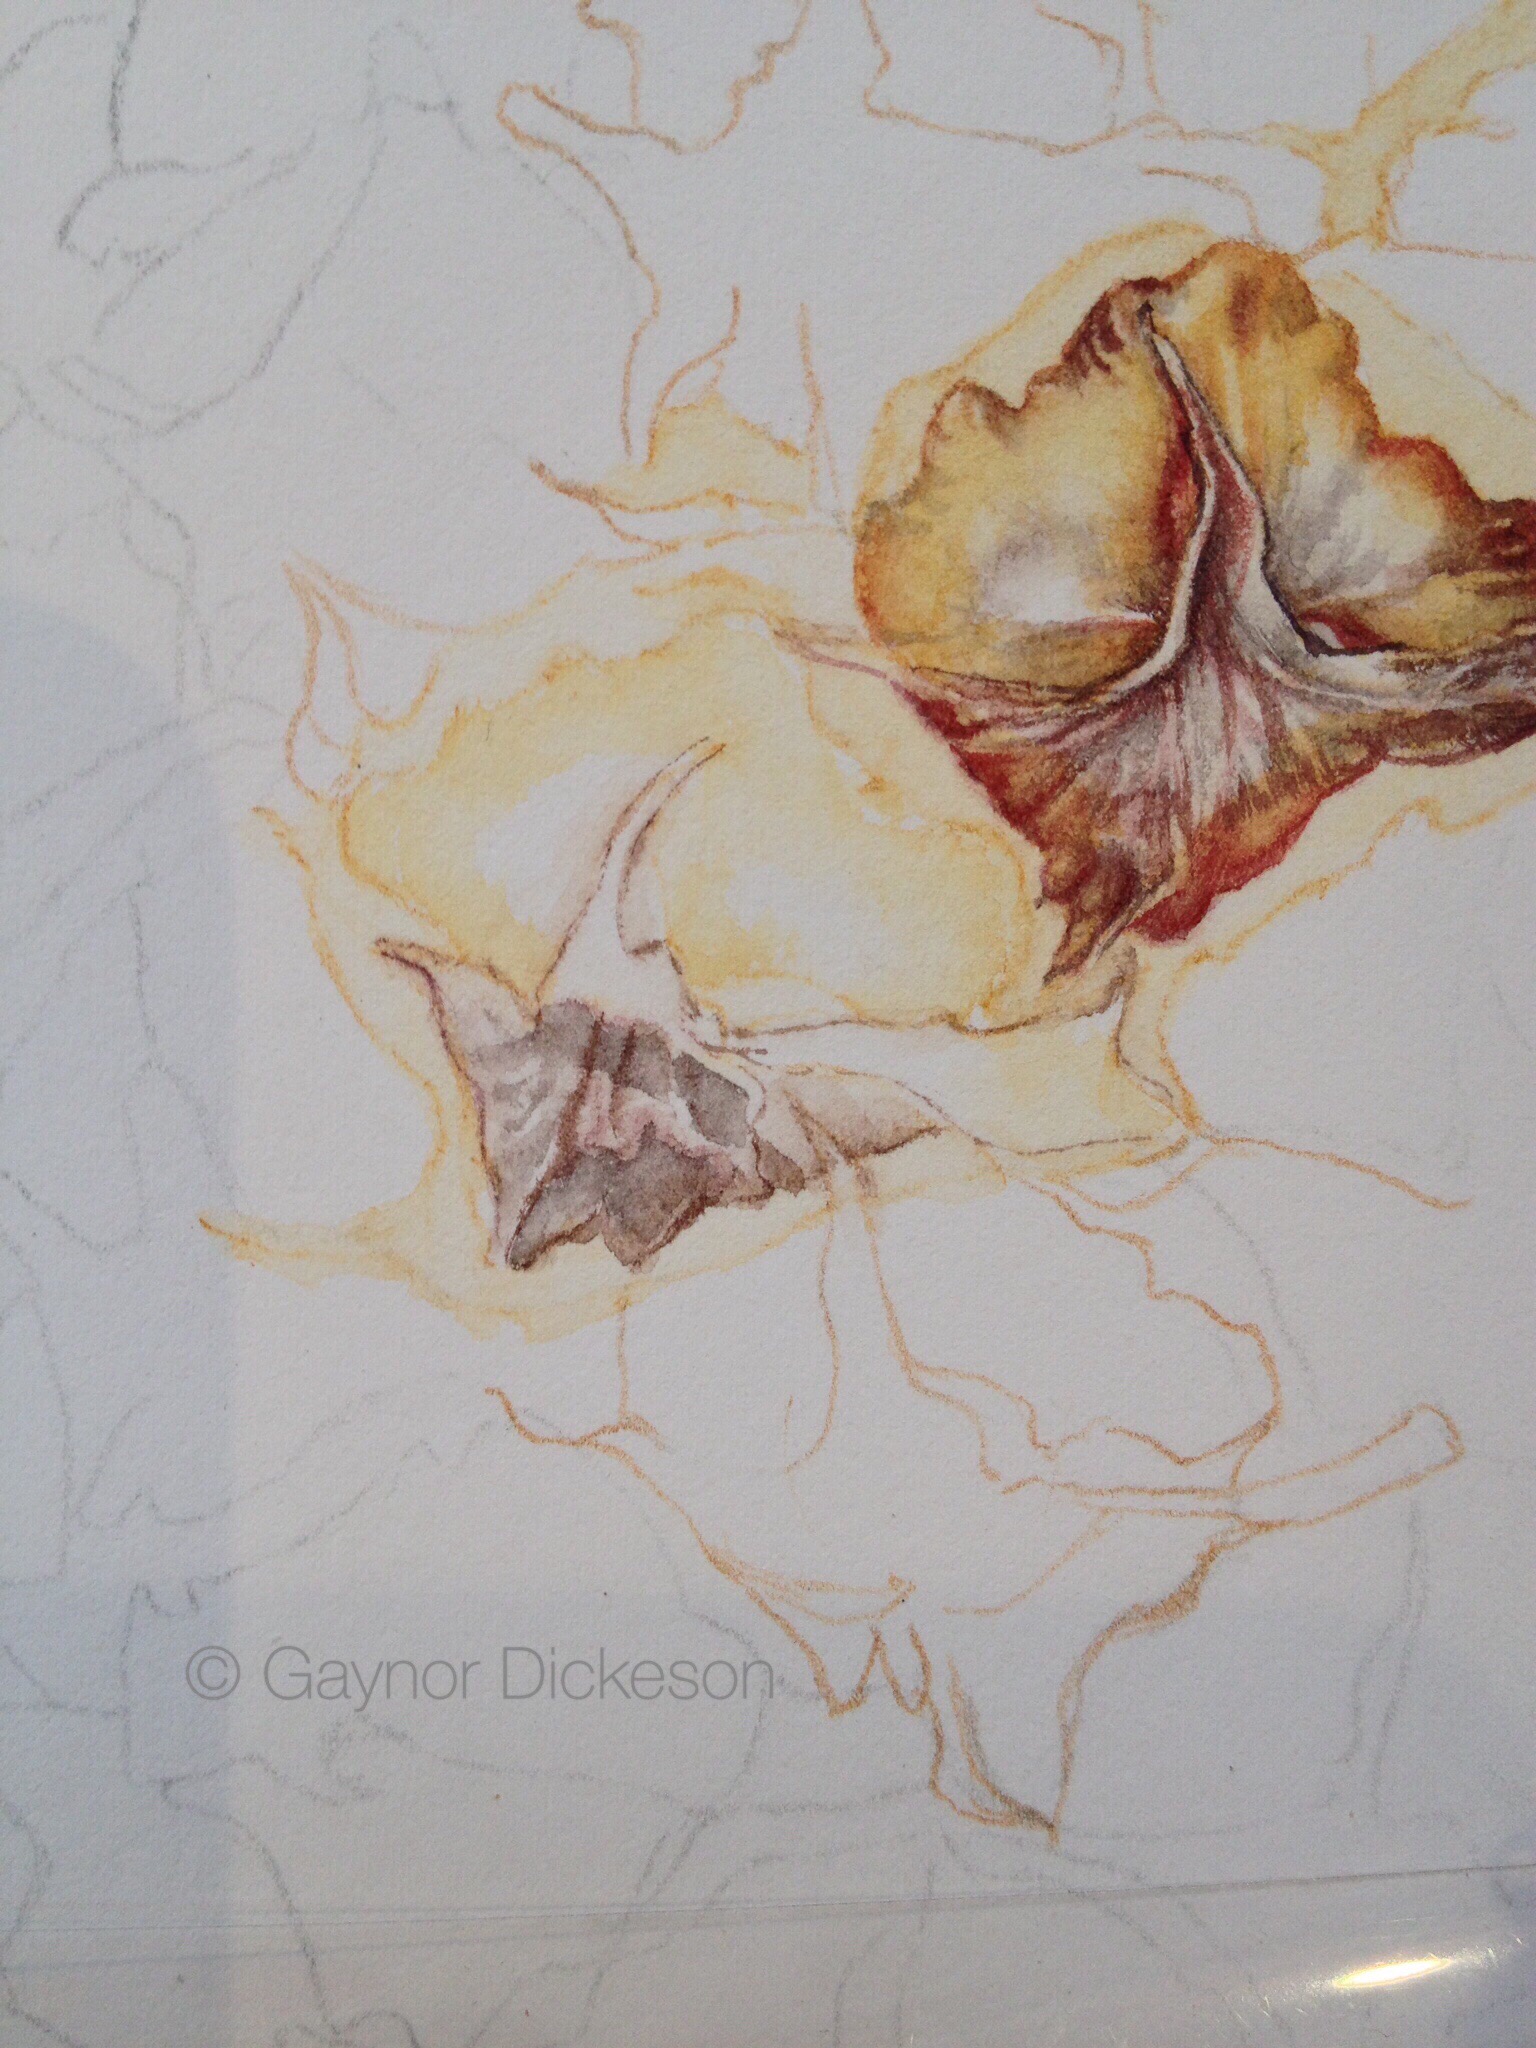
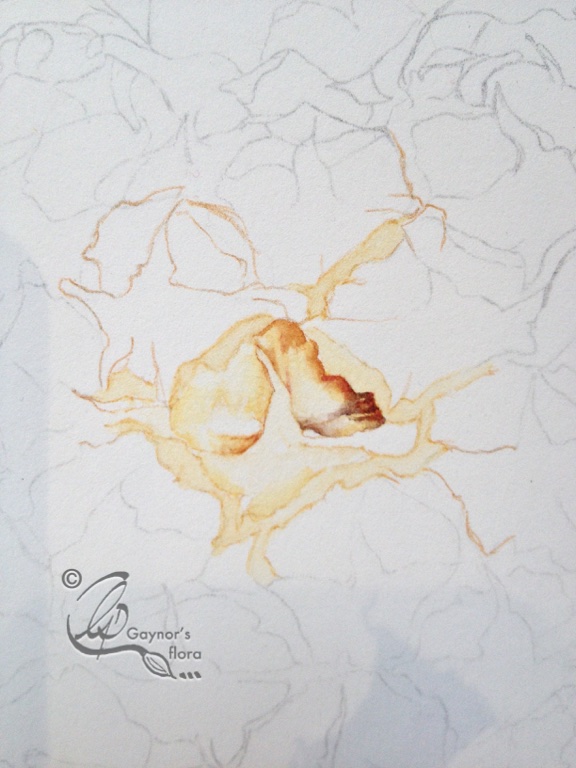
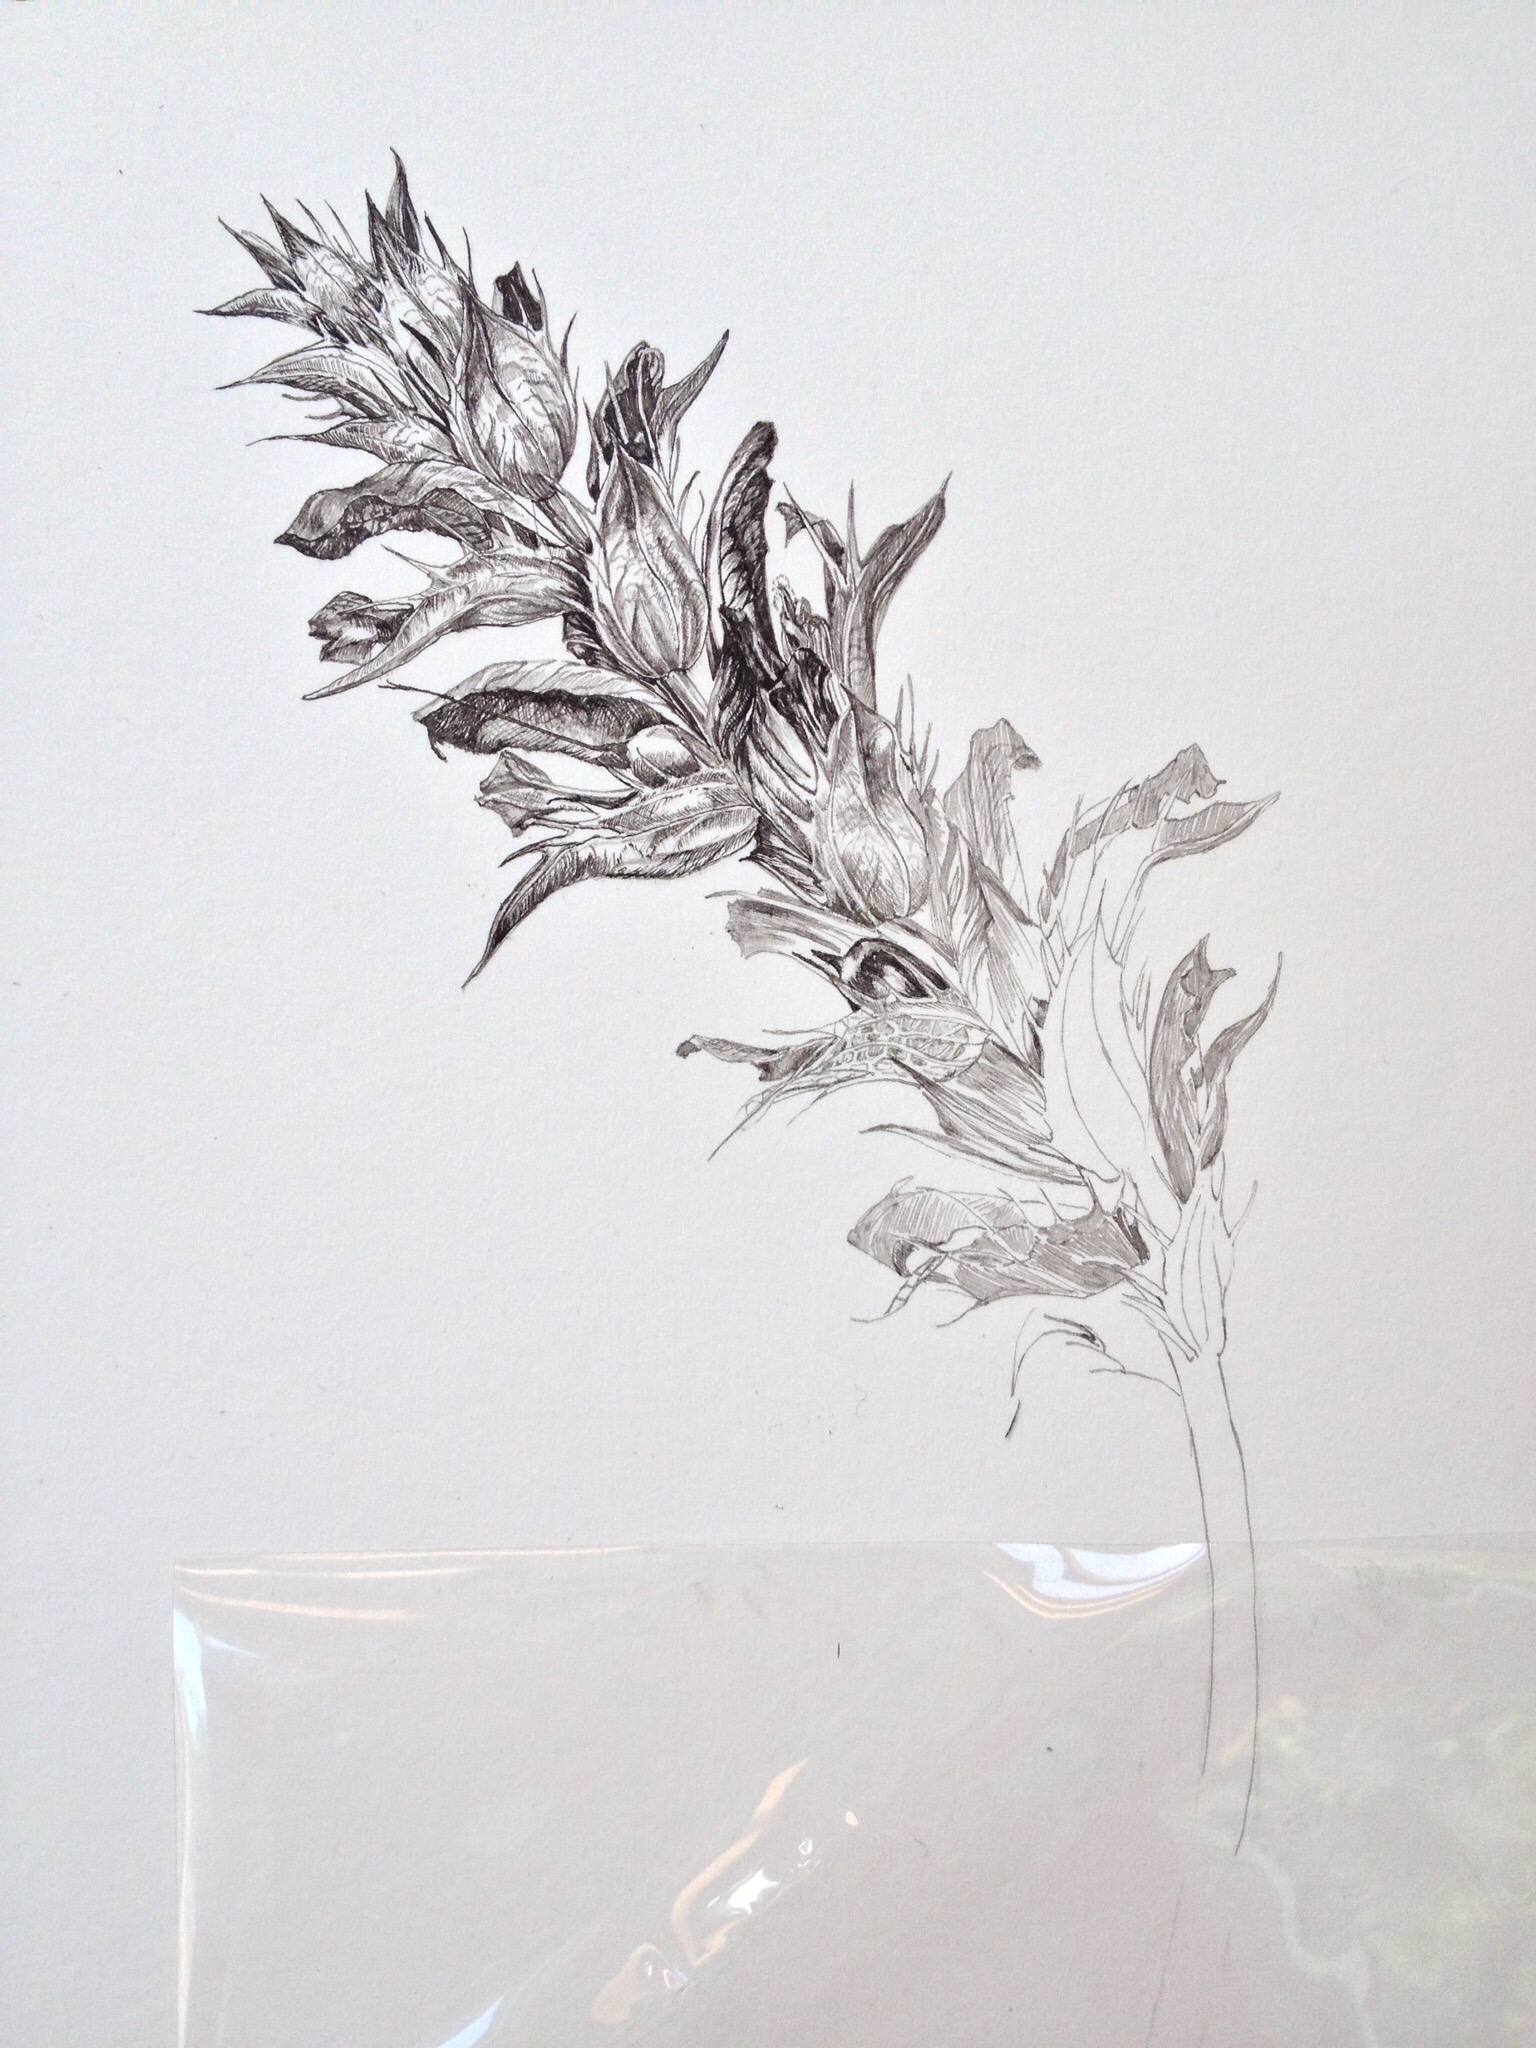
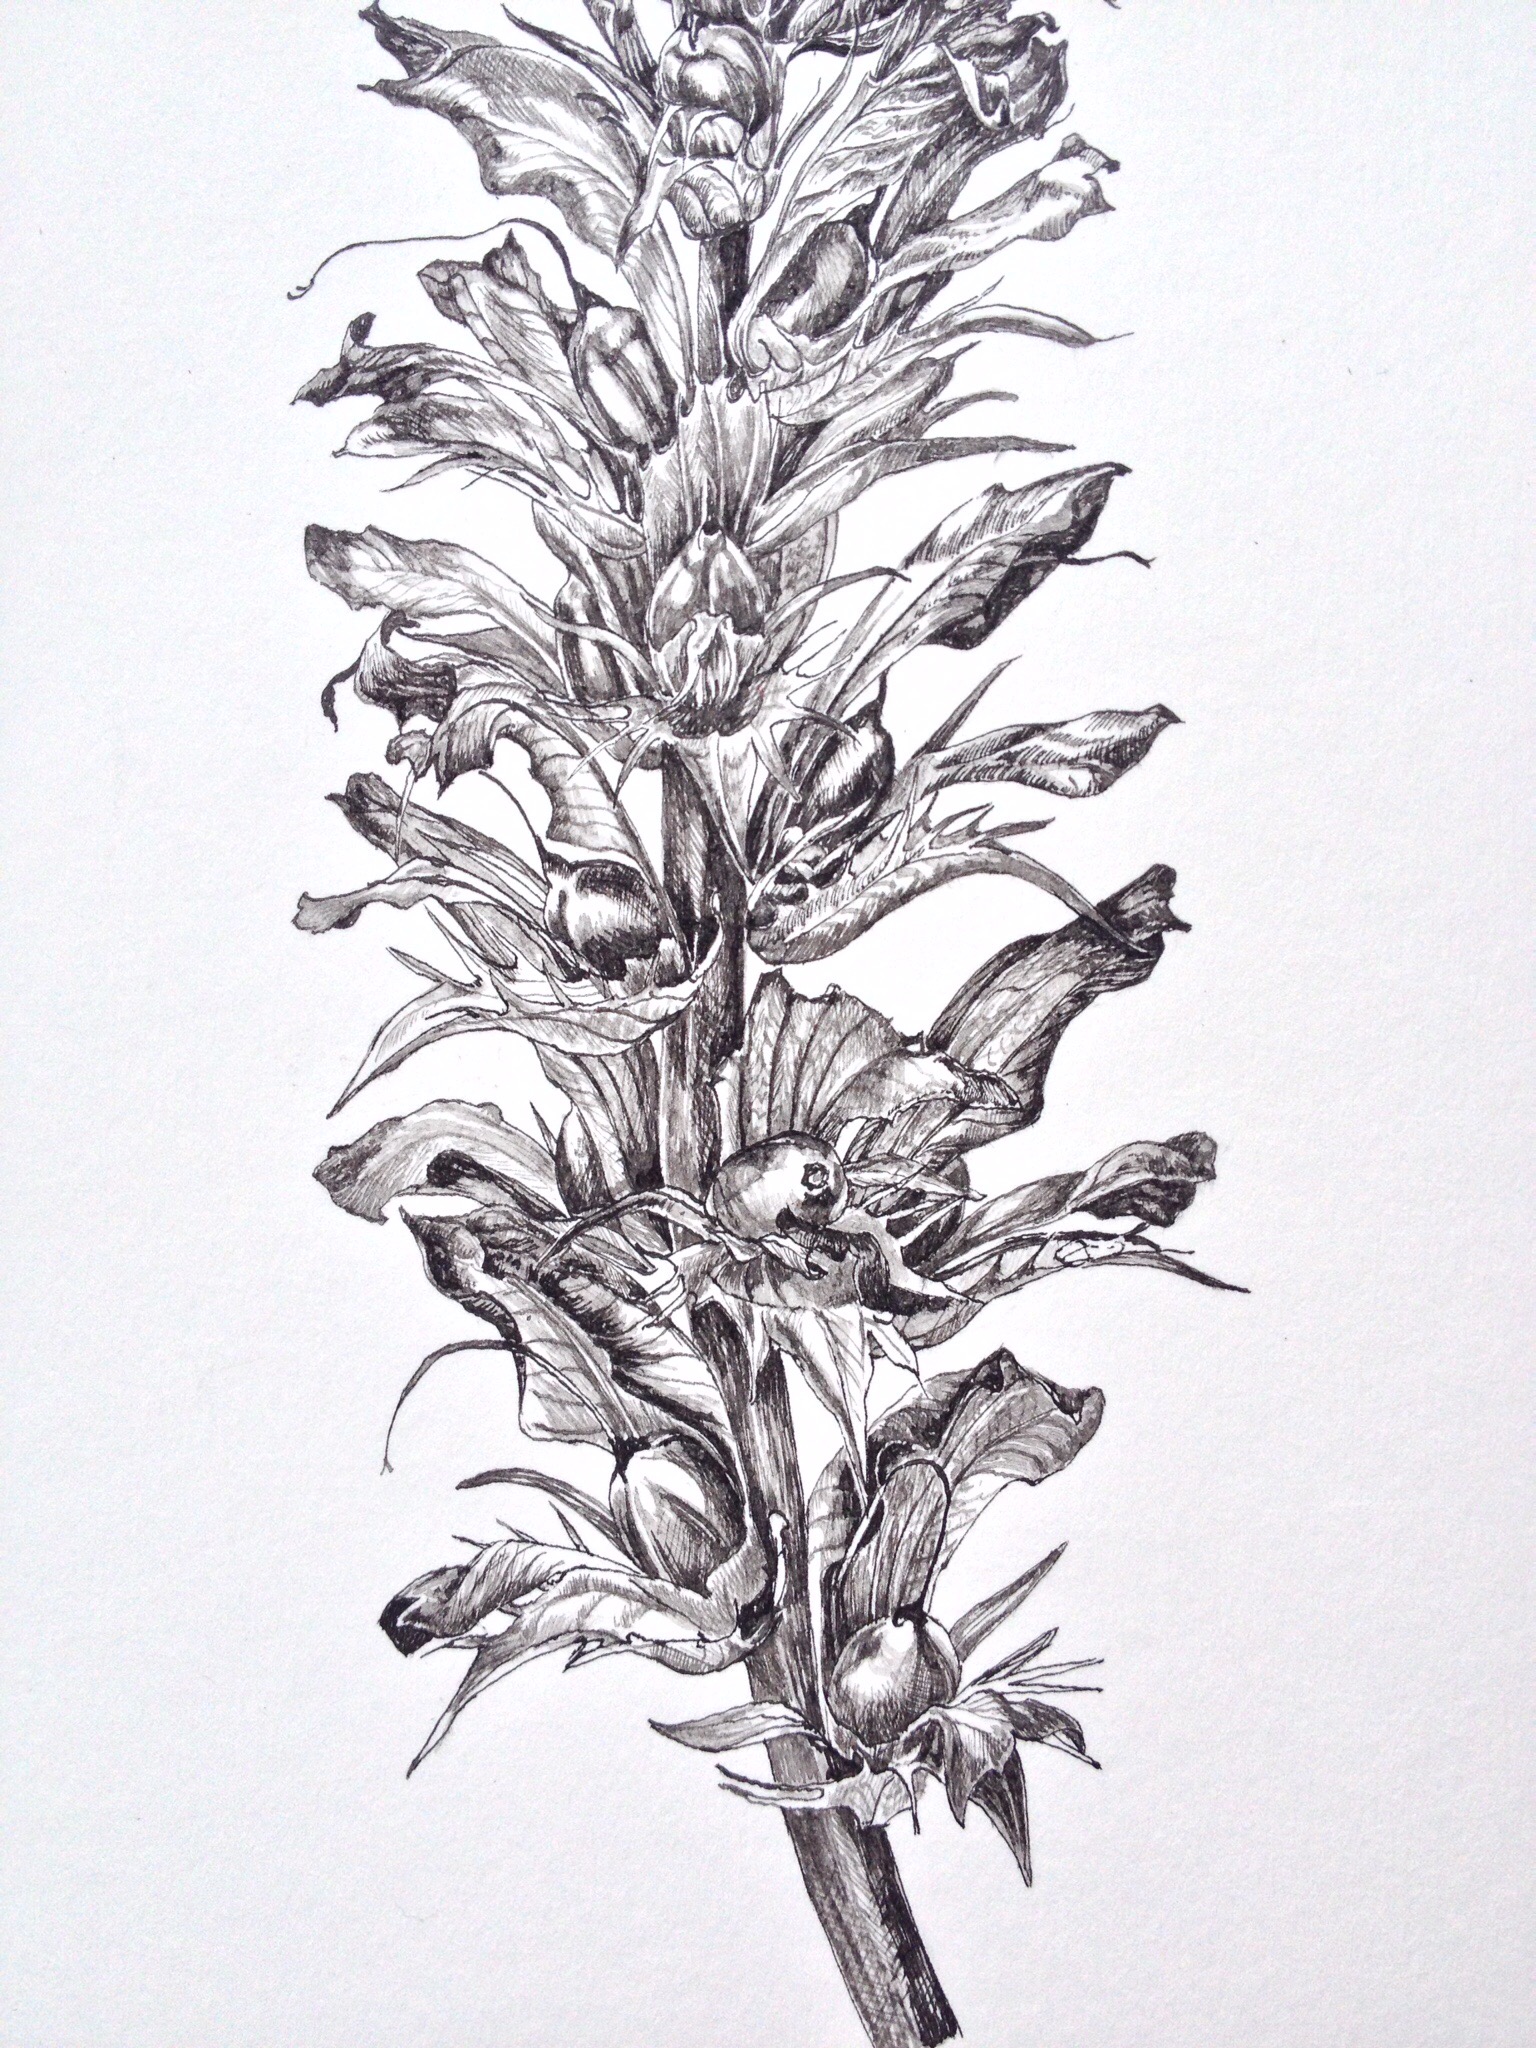
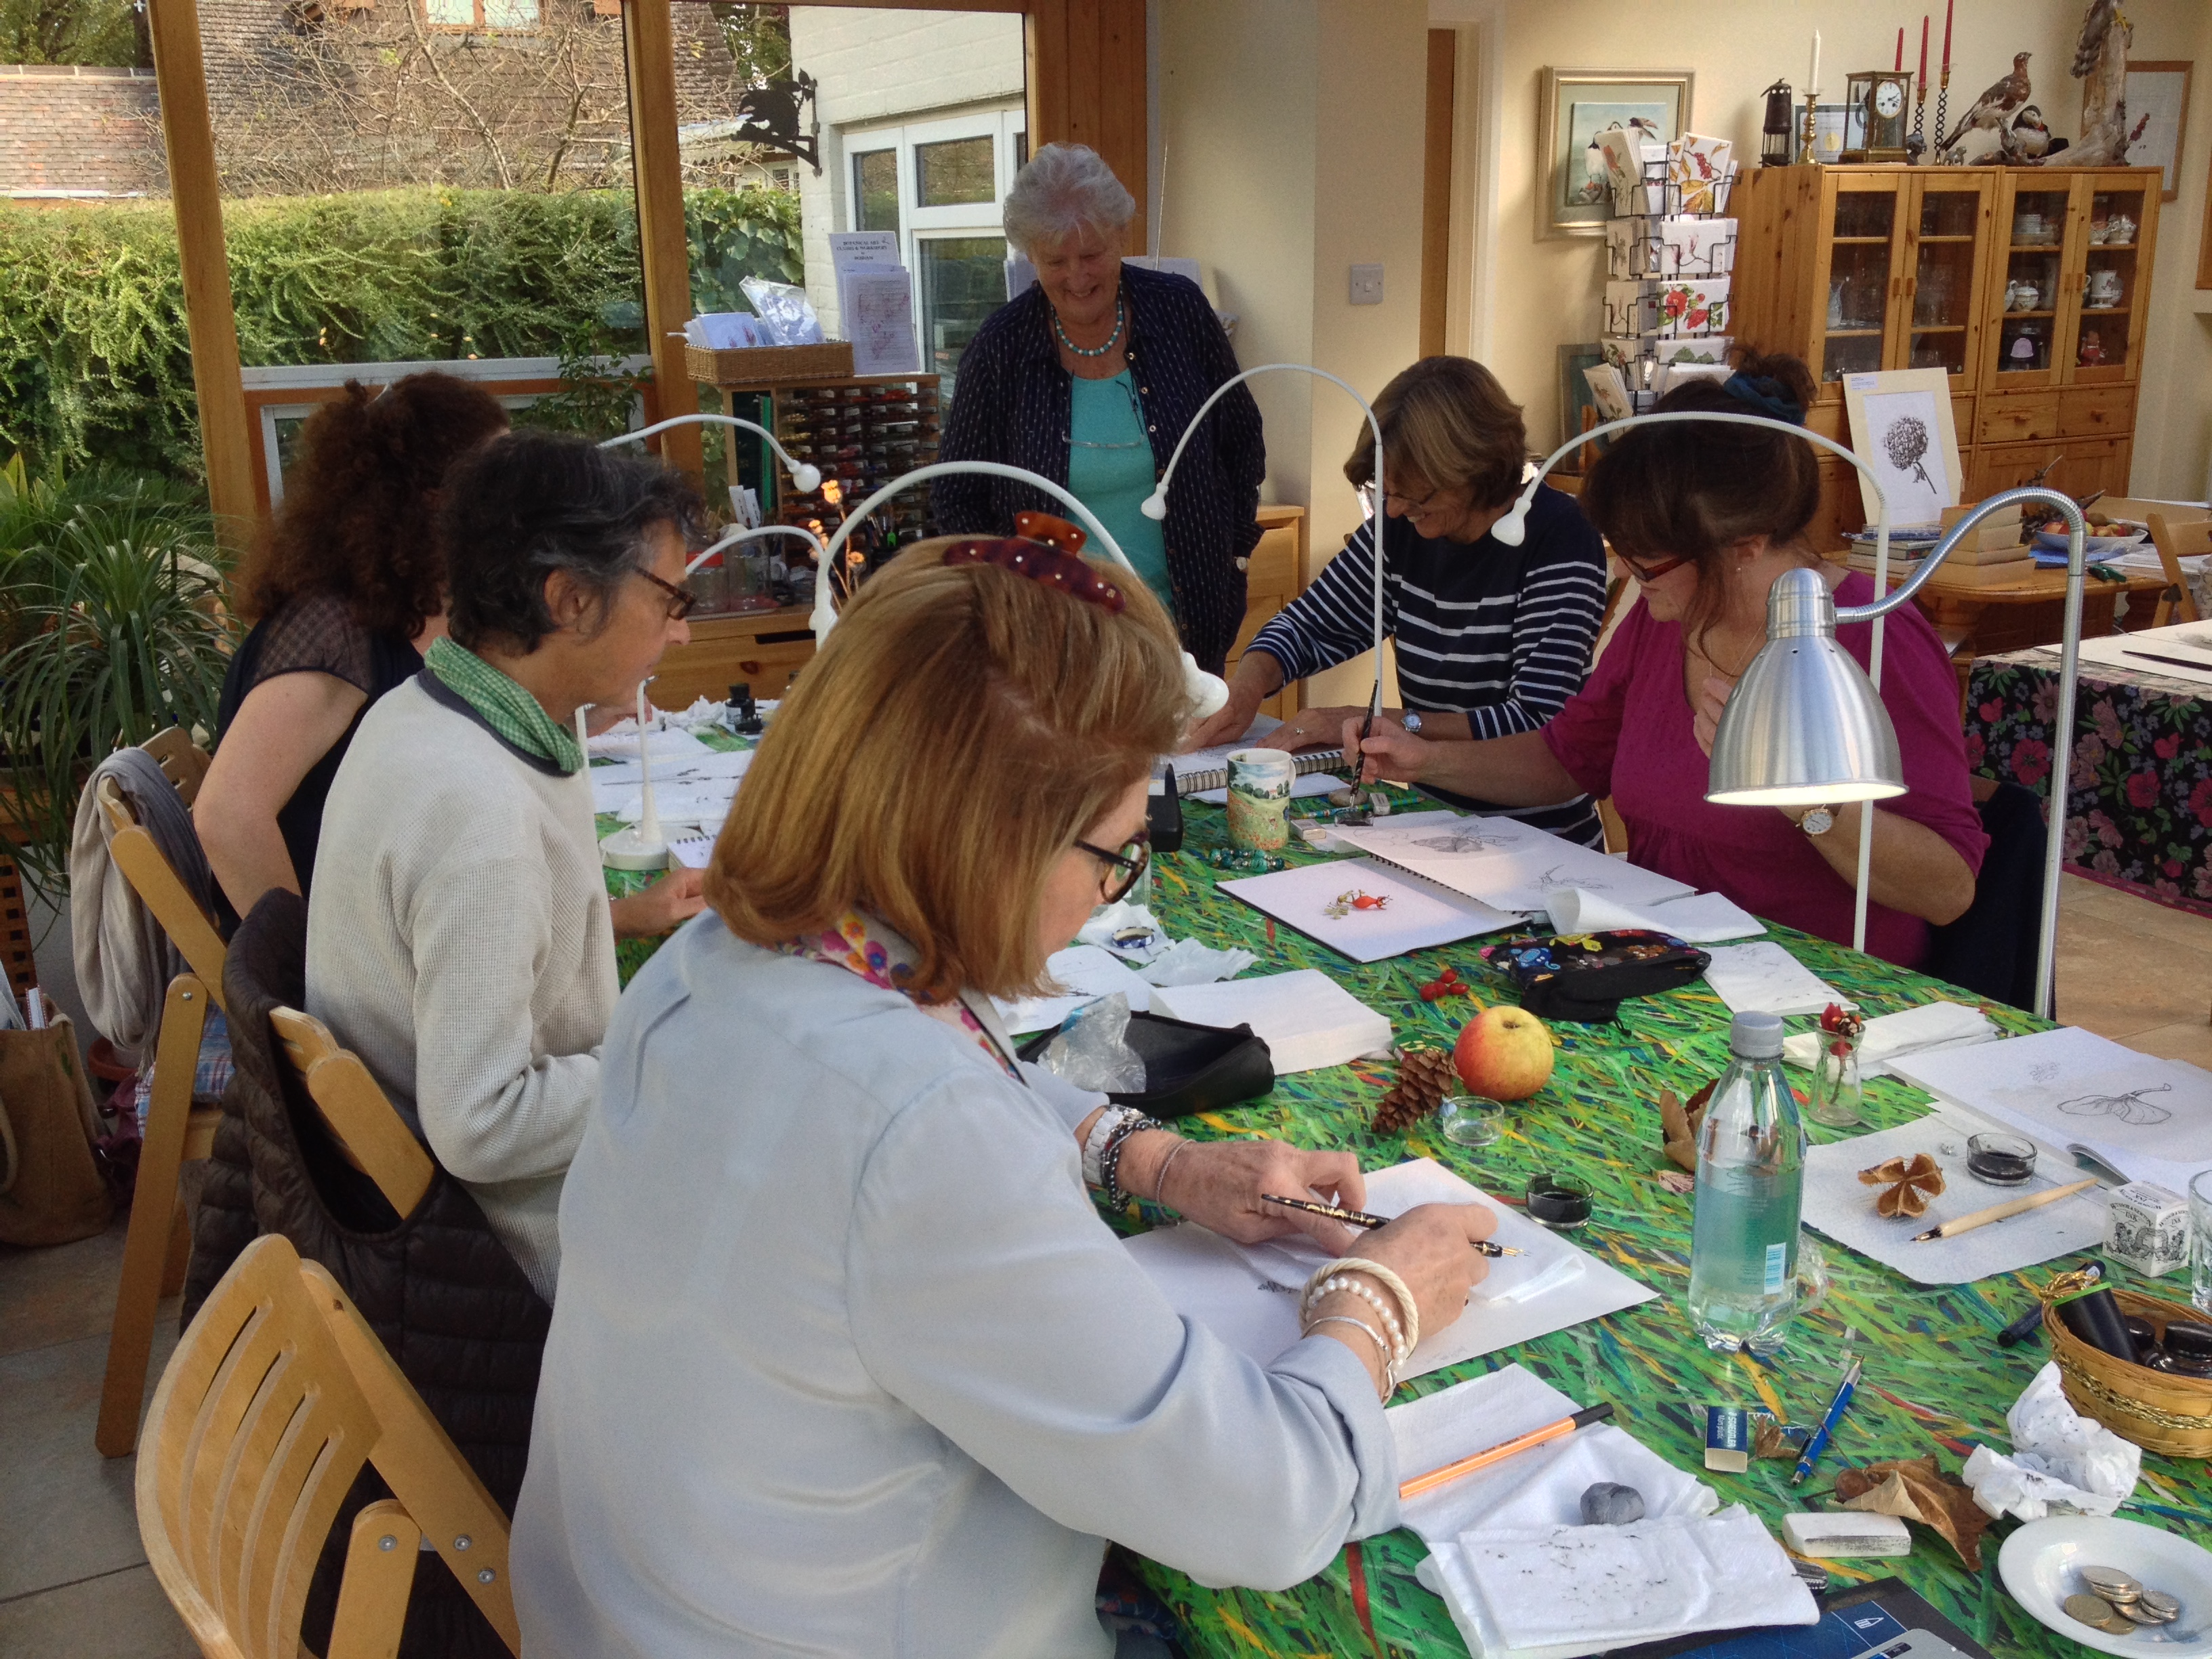
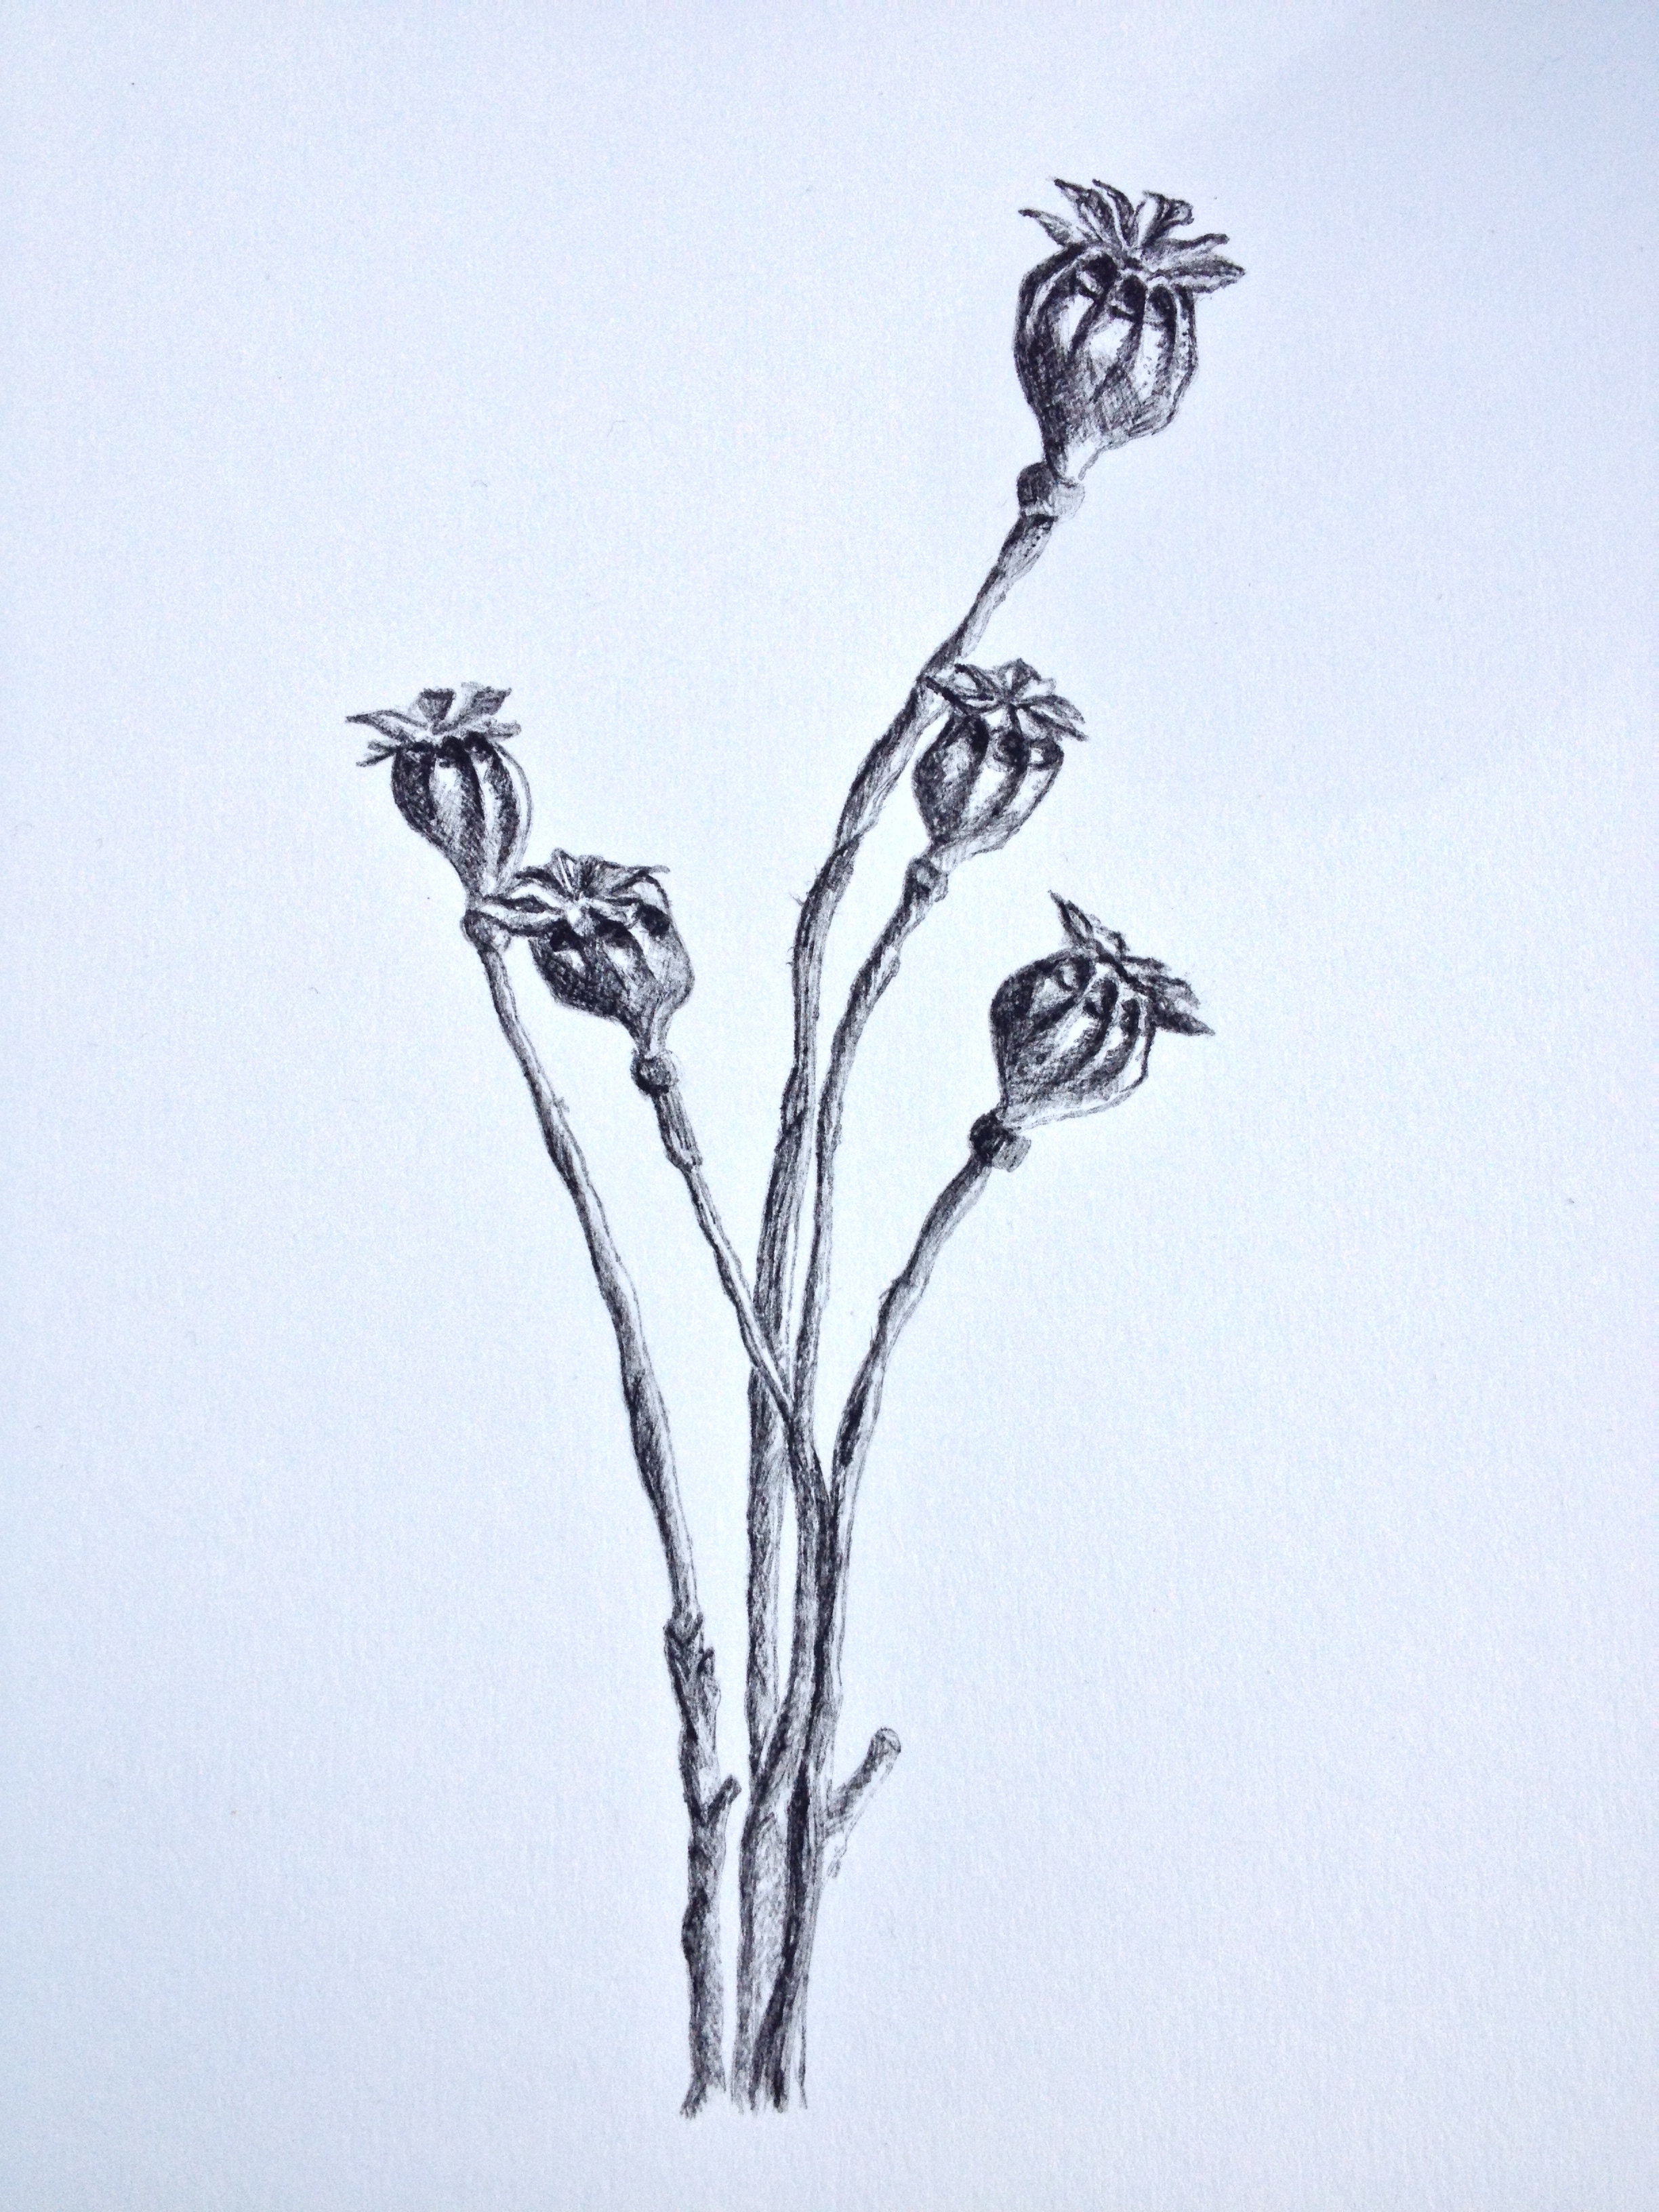
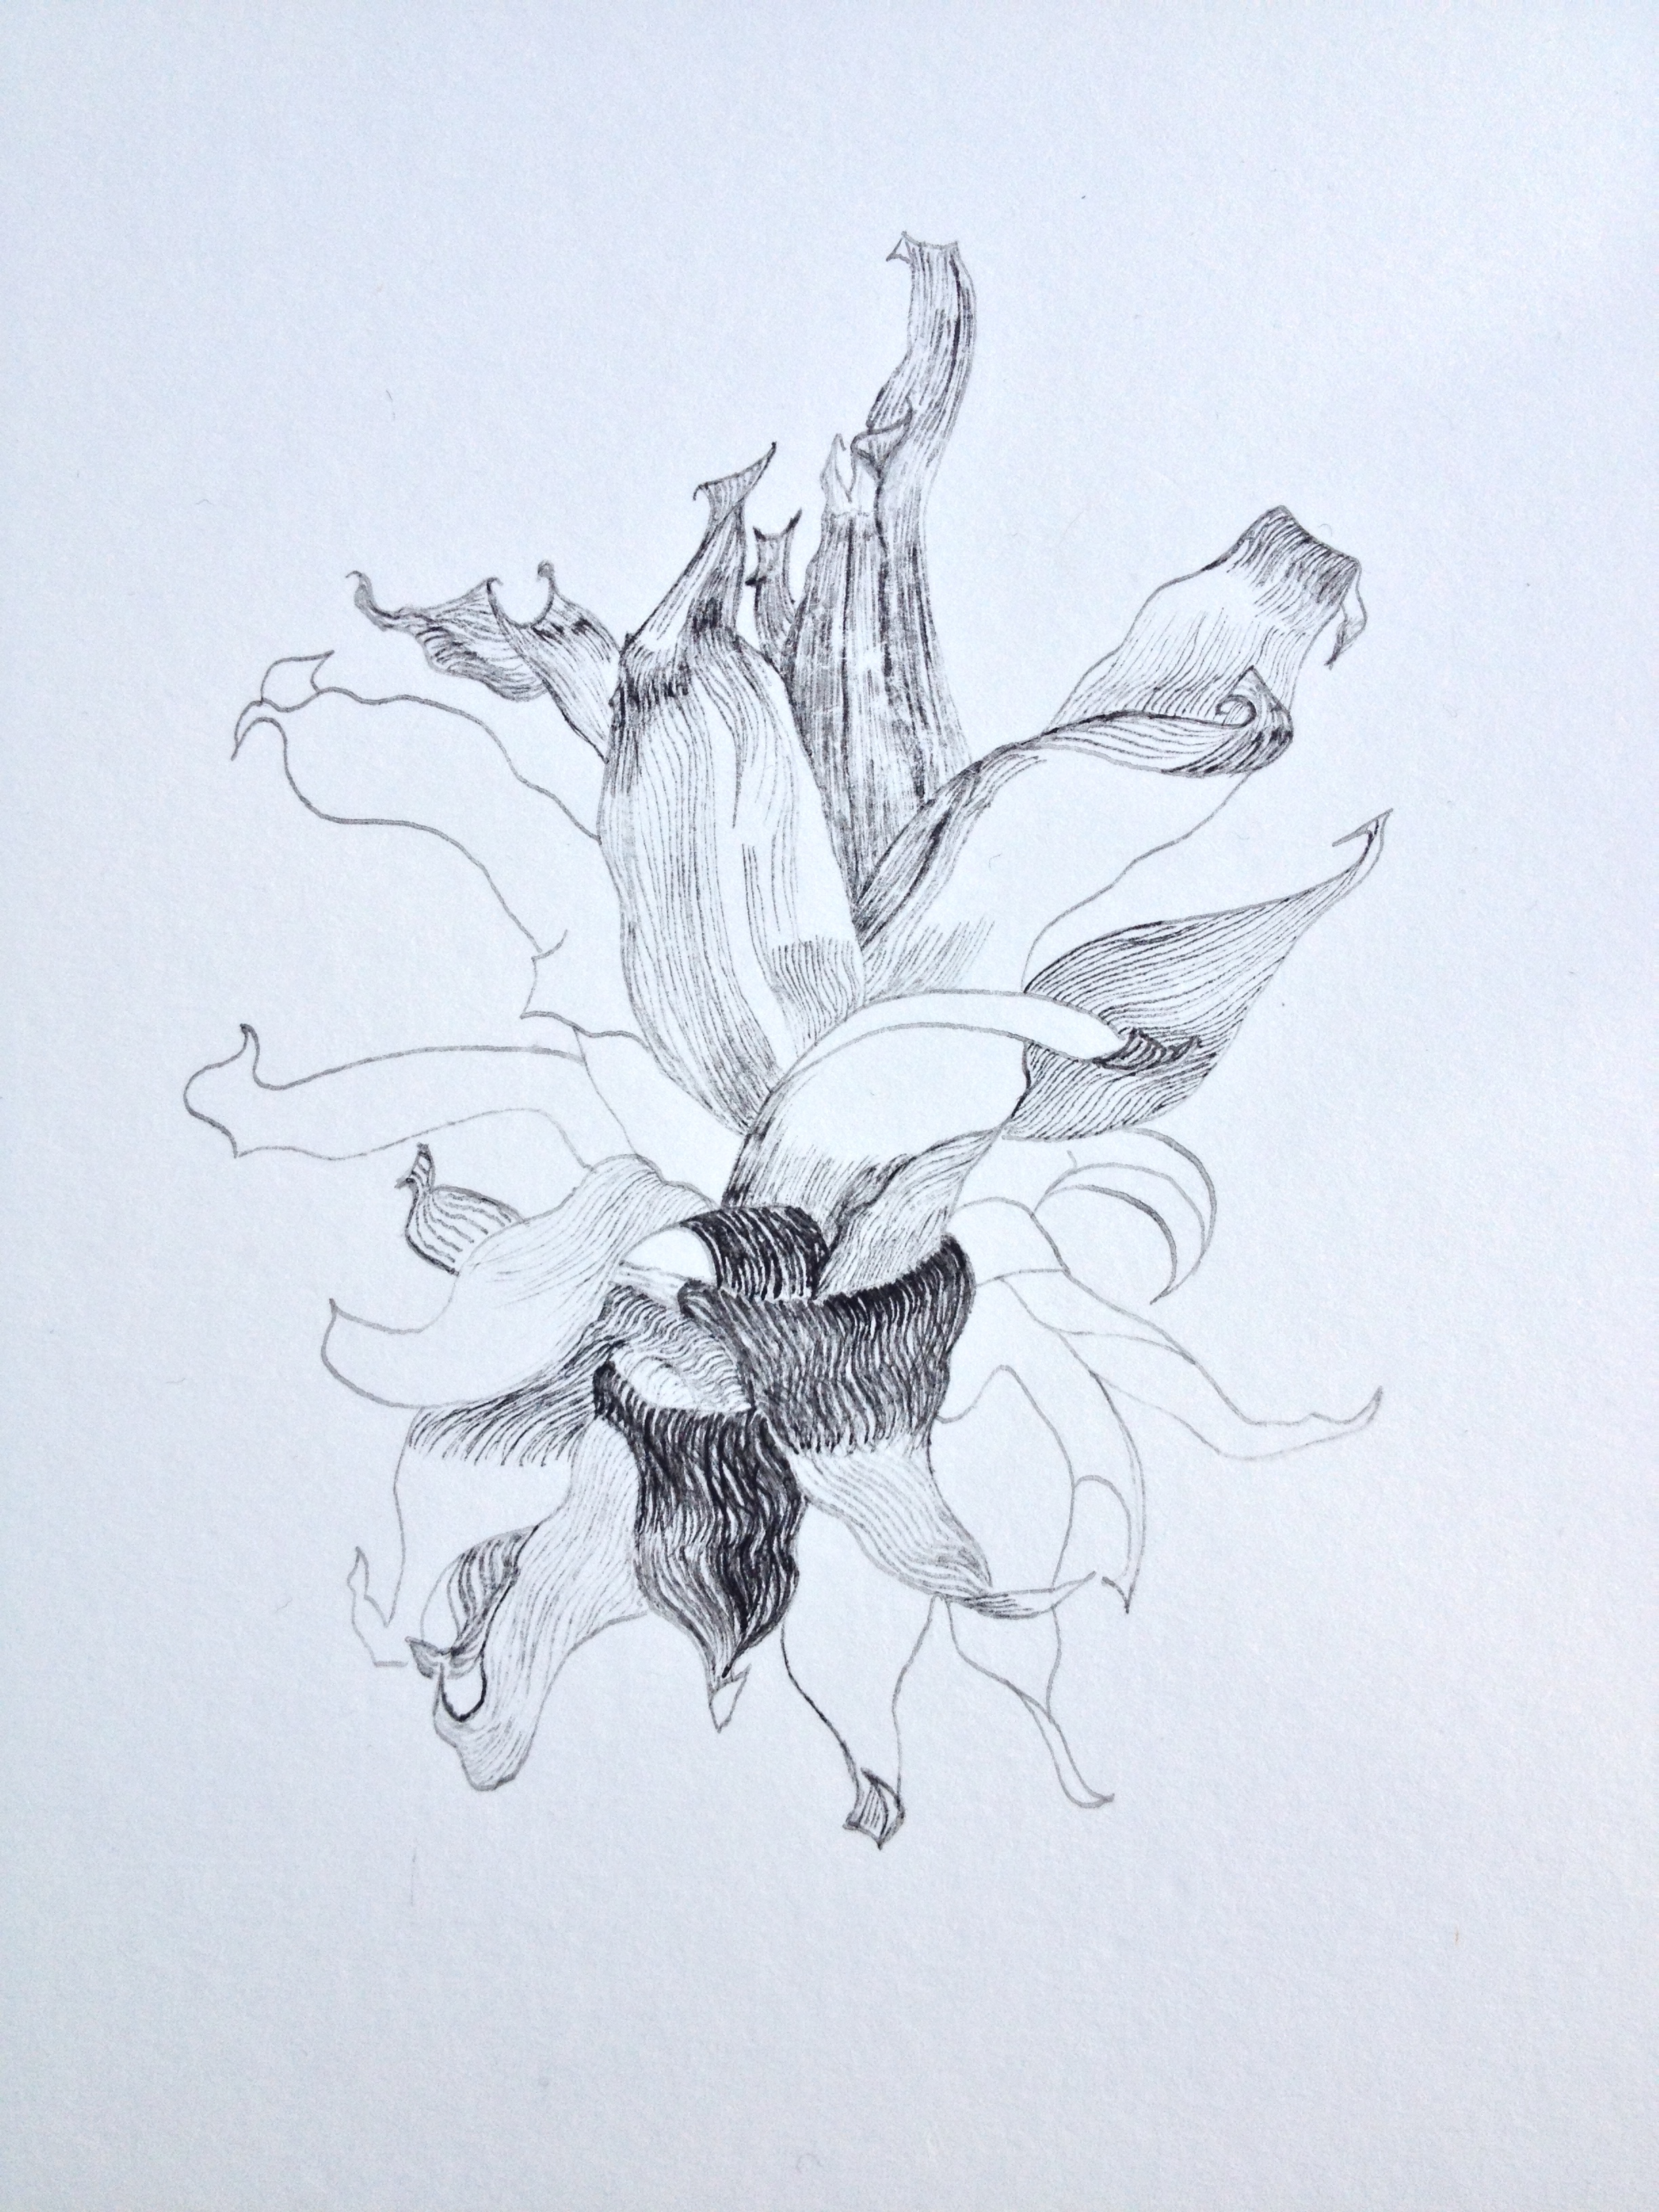
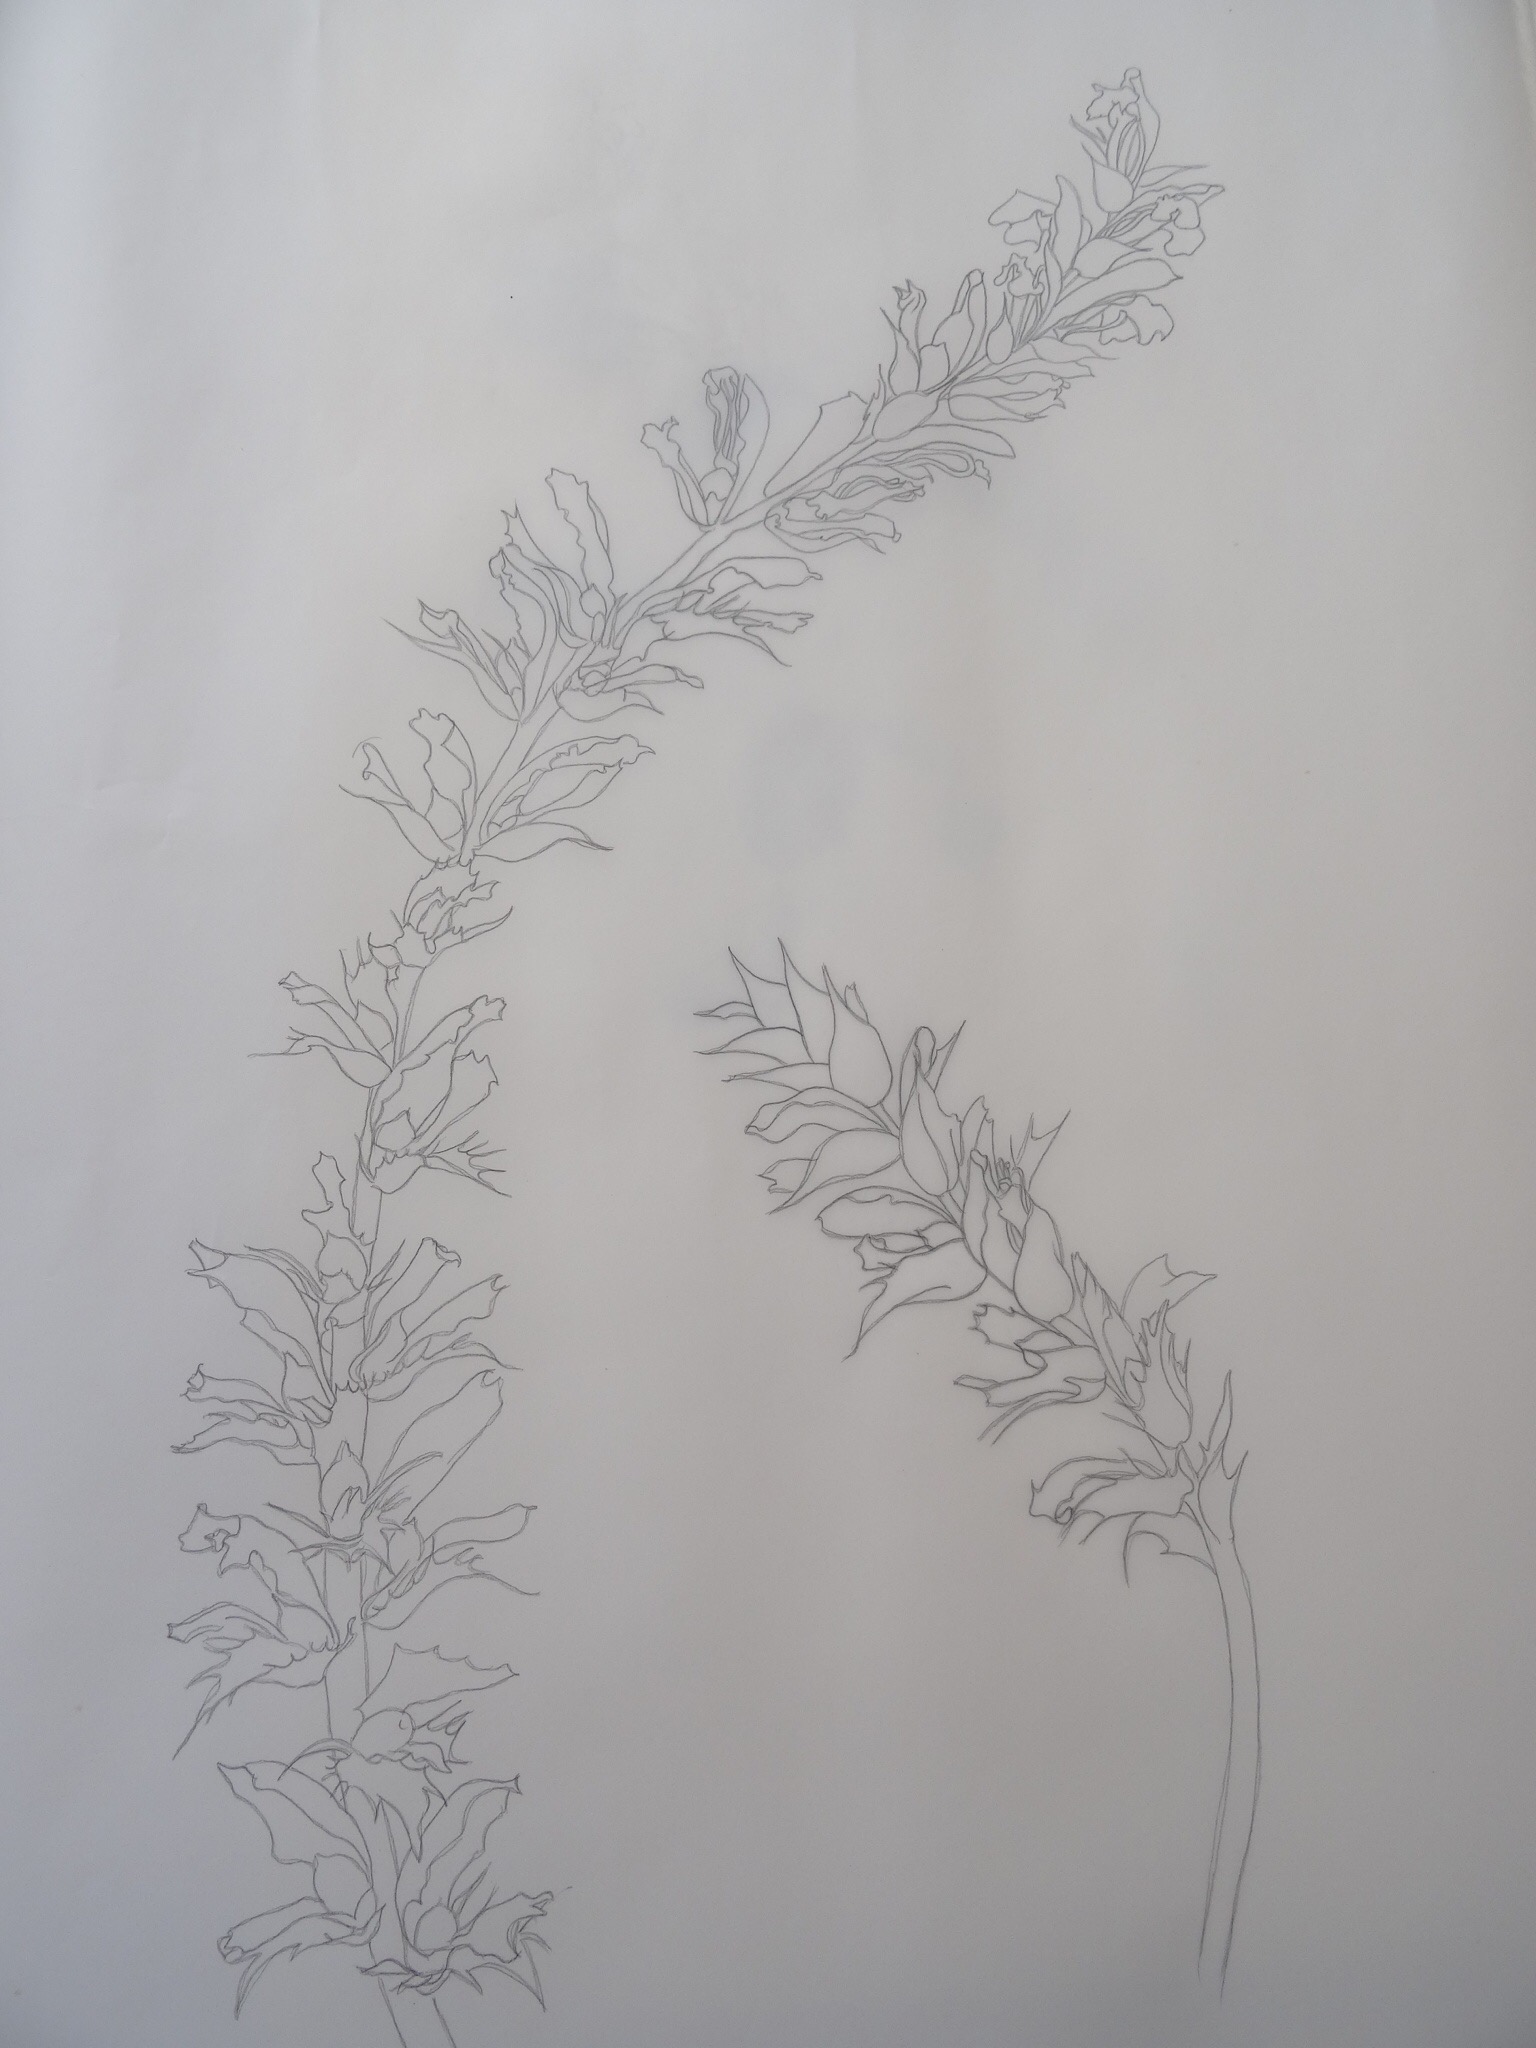
On Friday and again on Sunday afternoon after church I was able to continue with my Acanthus ( in case you wondered what my new picture was all about). I finished the sketch and transferred it to the paper I am using for the final work. A warning, the following picture is not the whole composition as it will contain a third element – hopefully. It is a large project, but hopefully it will go well.

IMG_8913.JPG

On Saturday my husband and I drove up to Leicester, visiting briefly the University botanical Gardens. But we also went to an IAPI meeting on Grasses. Now many of you might wonder what was so special about grasses – and I did too. But, with just one lecture and some amazing views through the microscope, I am converted.

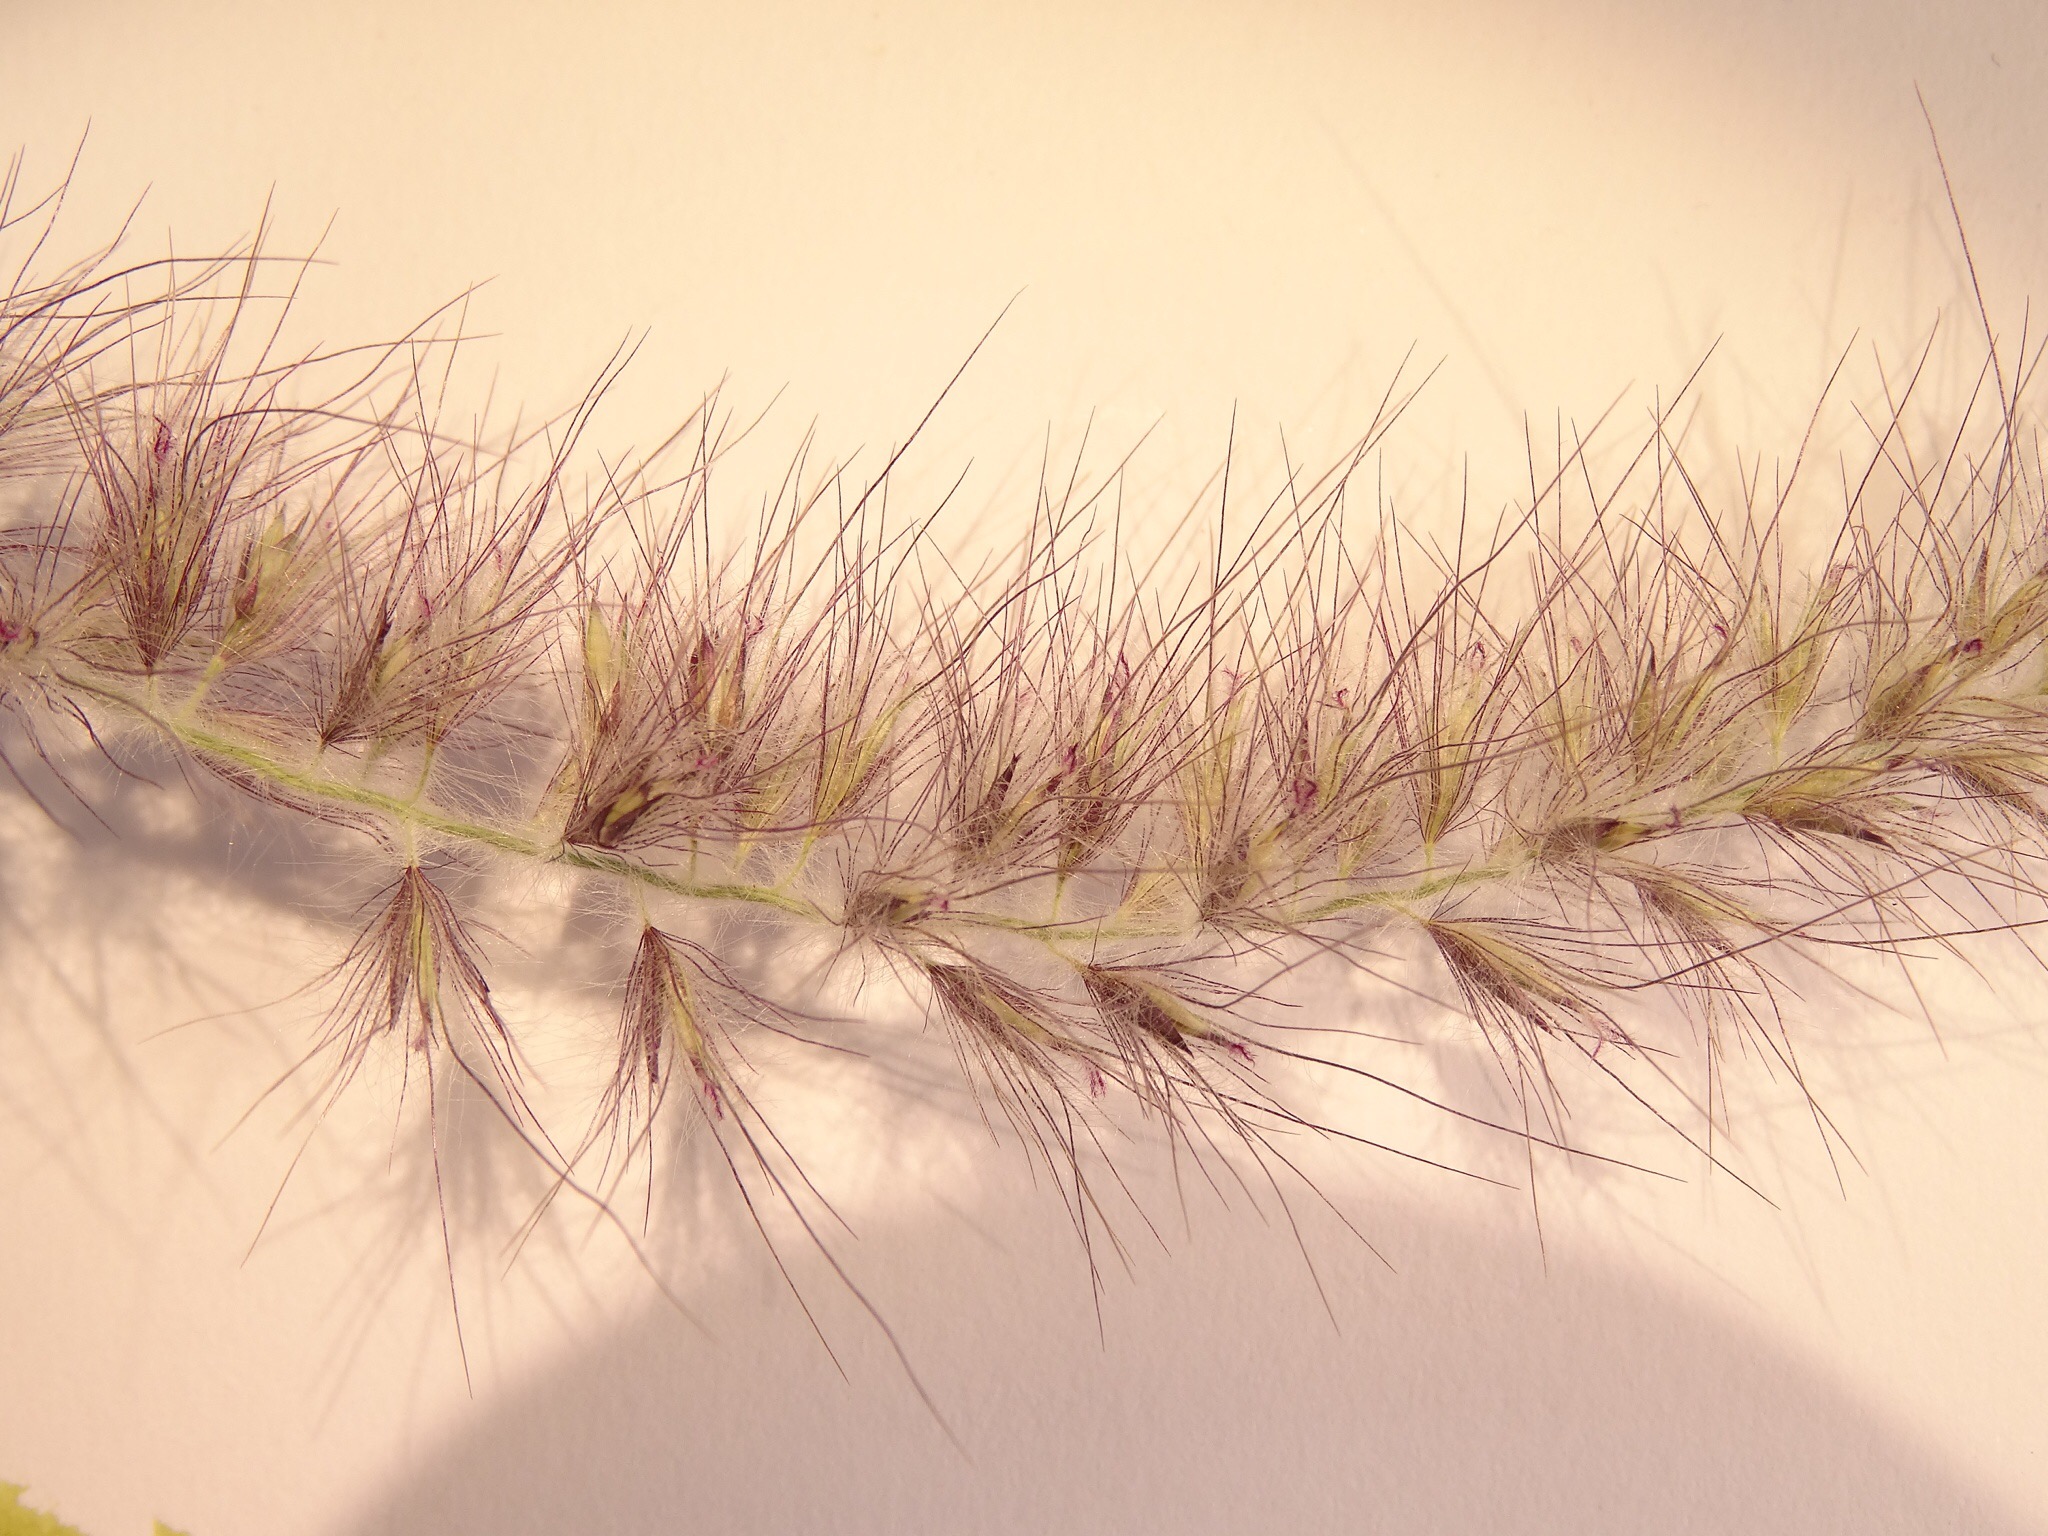
There were so many different types for different types of habitat and temperature zone. They may look very ordinary, but up close they are absolutely beautiful.

Think of a colour wheel and pointillism. If you mix the three primaries, you get a grey shade, depending upon the mix. Optical mixing of colours means that you don’t mix the colours on your palette, but by placing colours side by side, your brain mixes the colours together creating a third colour.

Now back to the grasses. When a grass is waving in the wind, depending upon the type, all you might see is a greyish or beige-ish colour in the frond. Well, at the height of the season, those ‘fronds’ are the ‘flowers’ (inflorescence) of the plant and contains the male and female parts.

I looked at these under the microscope and saw some tiny, really beautiful flowers. Most of all, the colours were amazing ( I know I’ve used the word again, but have to). The one I was looking at had wonderful reddish purple and green parts with the tiny style and stigma in purple sticking out of the tip. The colours glowed.

Unfortunately the pictures I have taken do not reflect the beauty that I saw under the microscope, but hopefully they will give an indication.

Back to optical mixing of colours. Bearing in mind the smallness of the inflorescence, even though the colours were individually very beautiful, they were small surfaces to the naked eye and therefore had the same effect as pointillism – the colours became optically mixed to a dull grey! Could this be natures way of protection?

IMG_8910.JPG

IMG_8912.JPG

IMG_8909.JPG

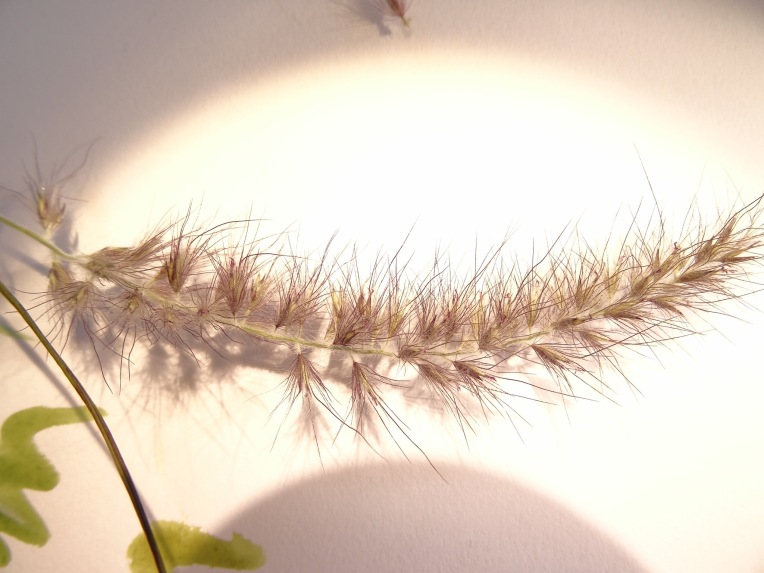
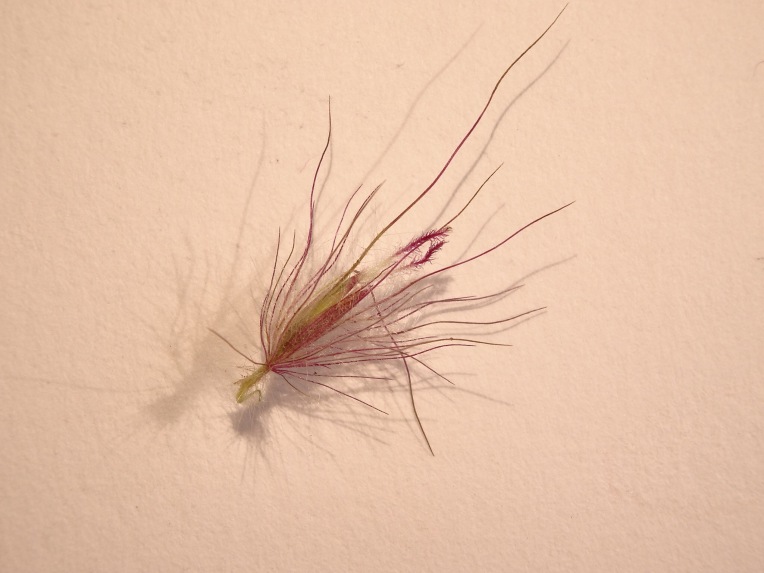
What do you think? I know the photo does not do the plant justice, but hopefully you can see the promise of the intricate and beautiful design.

A new botanical art project started.

On Saturday I will be travelling up to Leicester for the day to go to an Institute for Analytical Plant Illustration (IAPI) meeting, Grasses masterclass, at the University botanical gardens. I am looking forward to this as I have only just joined the group and this is my first meeting with them.

Monday will again be a very early start to arrive at Goodnestone Park Gardens in Kent for 09:30 in the morning. I am teaching at one of the Botanical art workshops arranged by Field Breaks and hugely looking forward to it. Goodnestone Park is a lovely place to do botanical art and the gardens contain a lot of subjects! Already I know some of the students and some use watercolour and others coloured pencil. I enjoy this mix.

But I have started another picture. I am still doing the initial sketch! But the final picture will be in pen & ink. I have another two-day workshop 1-2 October which will be pen & ink. How far I will get with this picture by the start of that workshop, I don’t know – but it will be useful having something on the go.

So far I have only started sketching it. Guess what it is!

IMG_8902.JPG

IMG_8901.JPG