Step by step Pineapple pictures and a graphite Daffodil!

So what does a series of Pineapple step by step pictures have to do with a graphite daffodil picture? Nothing, except that they were done by me.

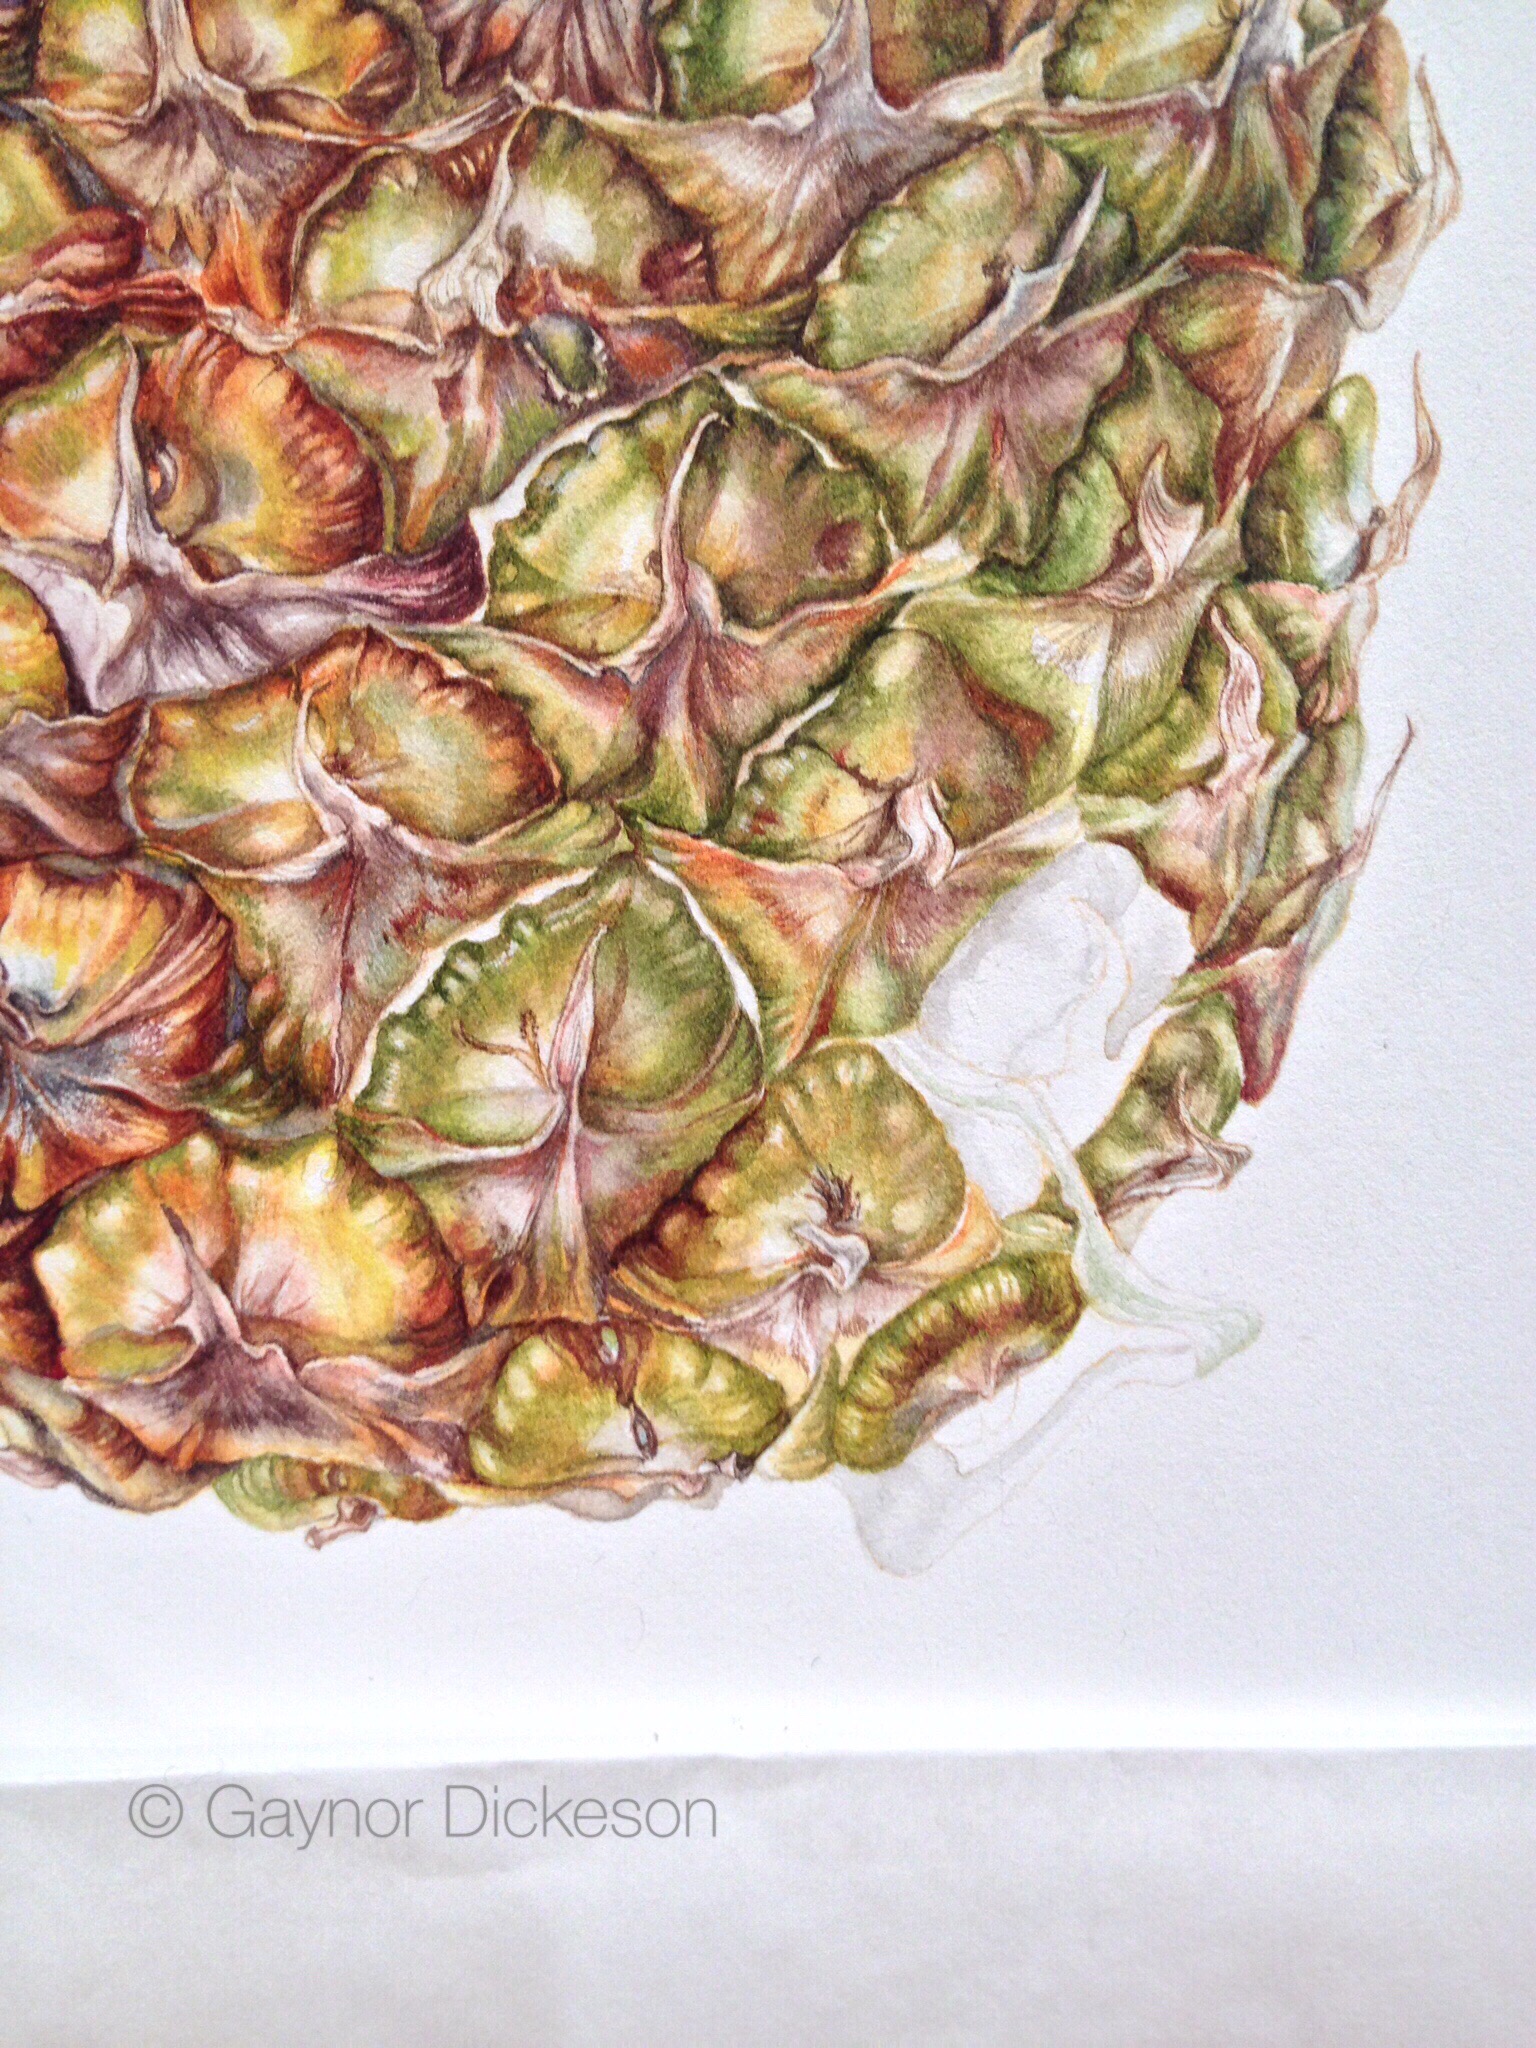
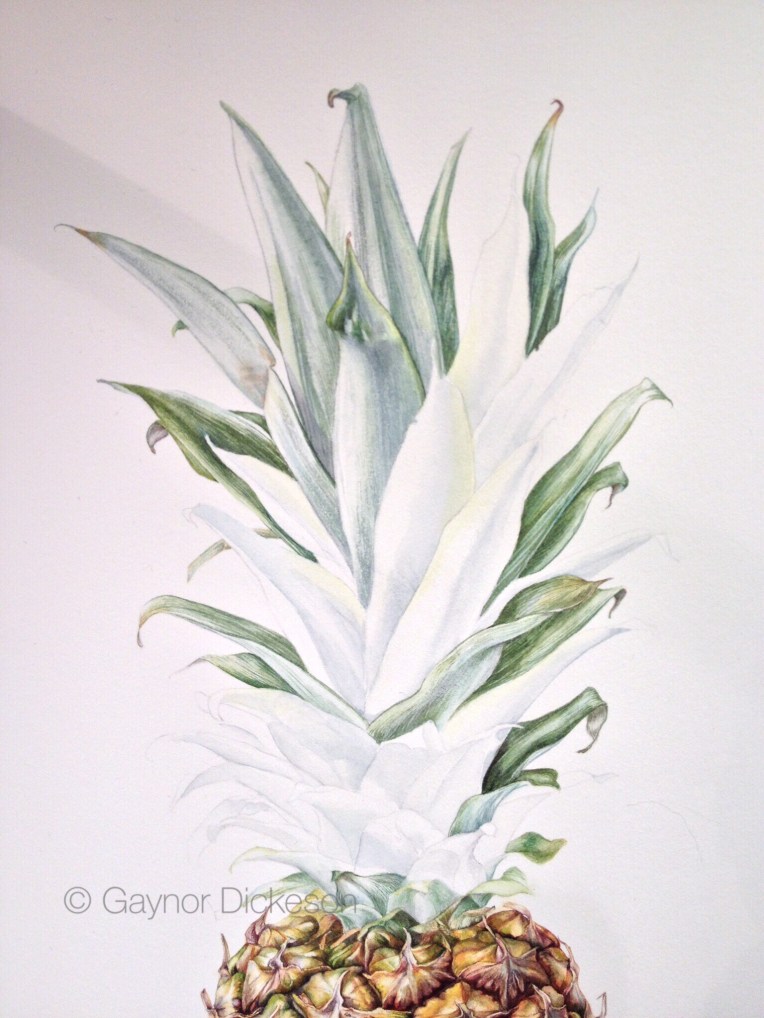
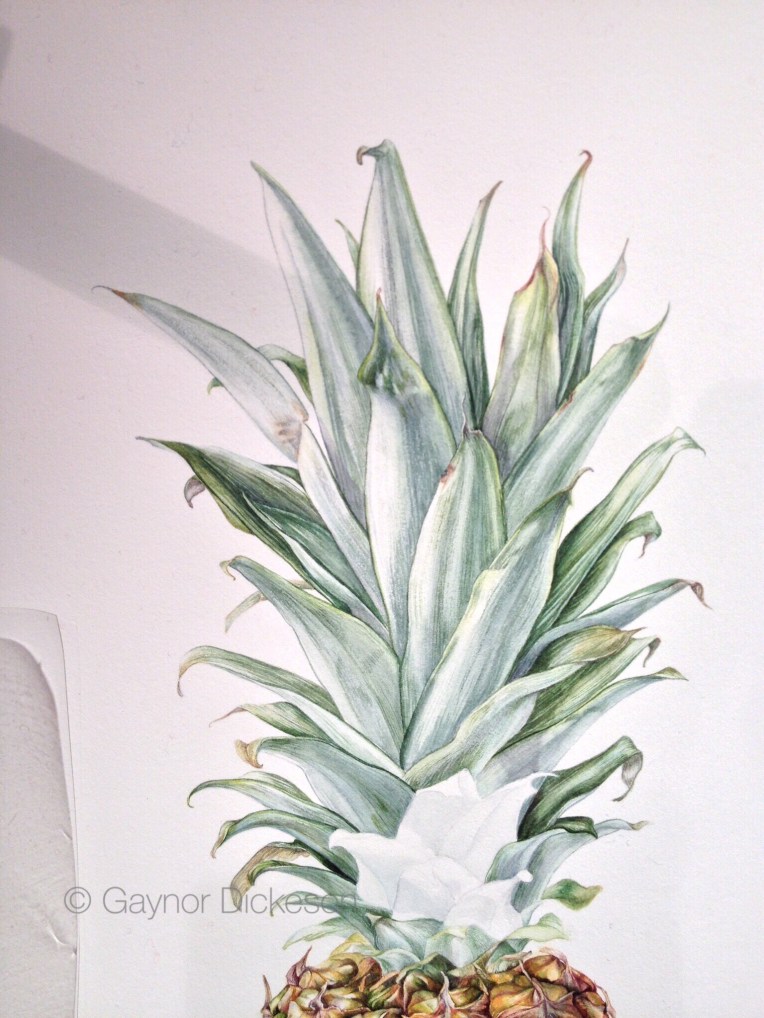
I have at last got my act together and done a separate page where all of the photos that I took during the 160.5 hour marathon for the Pineapple picture, are in one place. Just click on the heading above and you will find them all. Additionally, if you haven’t seen the YouTube video I did whilst painting one of the segments, you will find that in a link on the Tutorial page above.

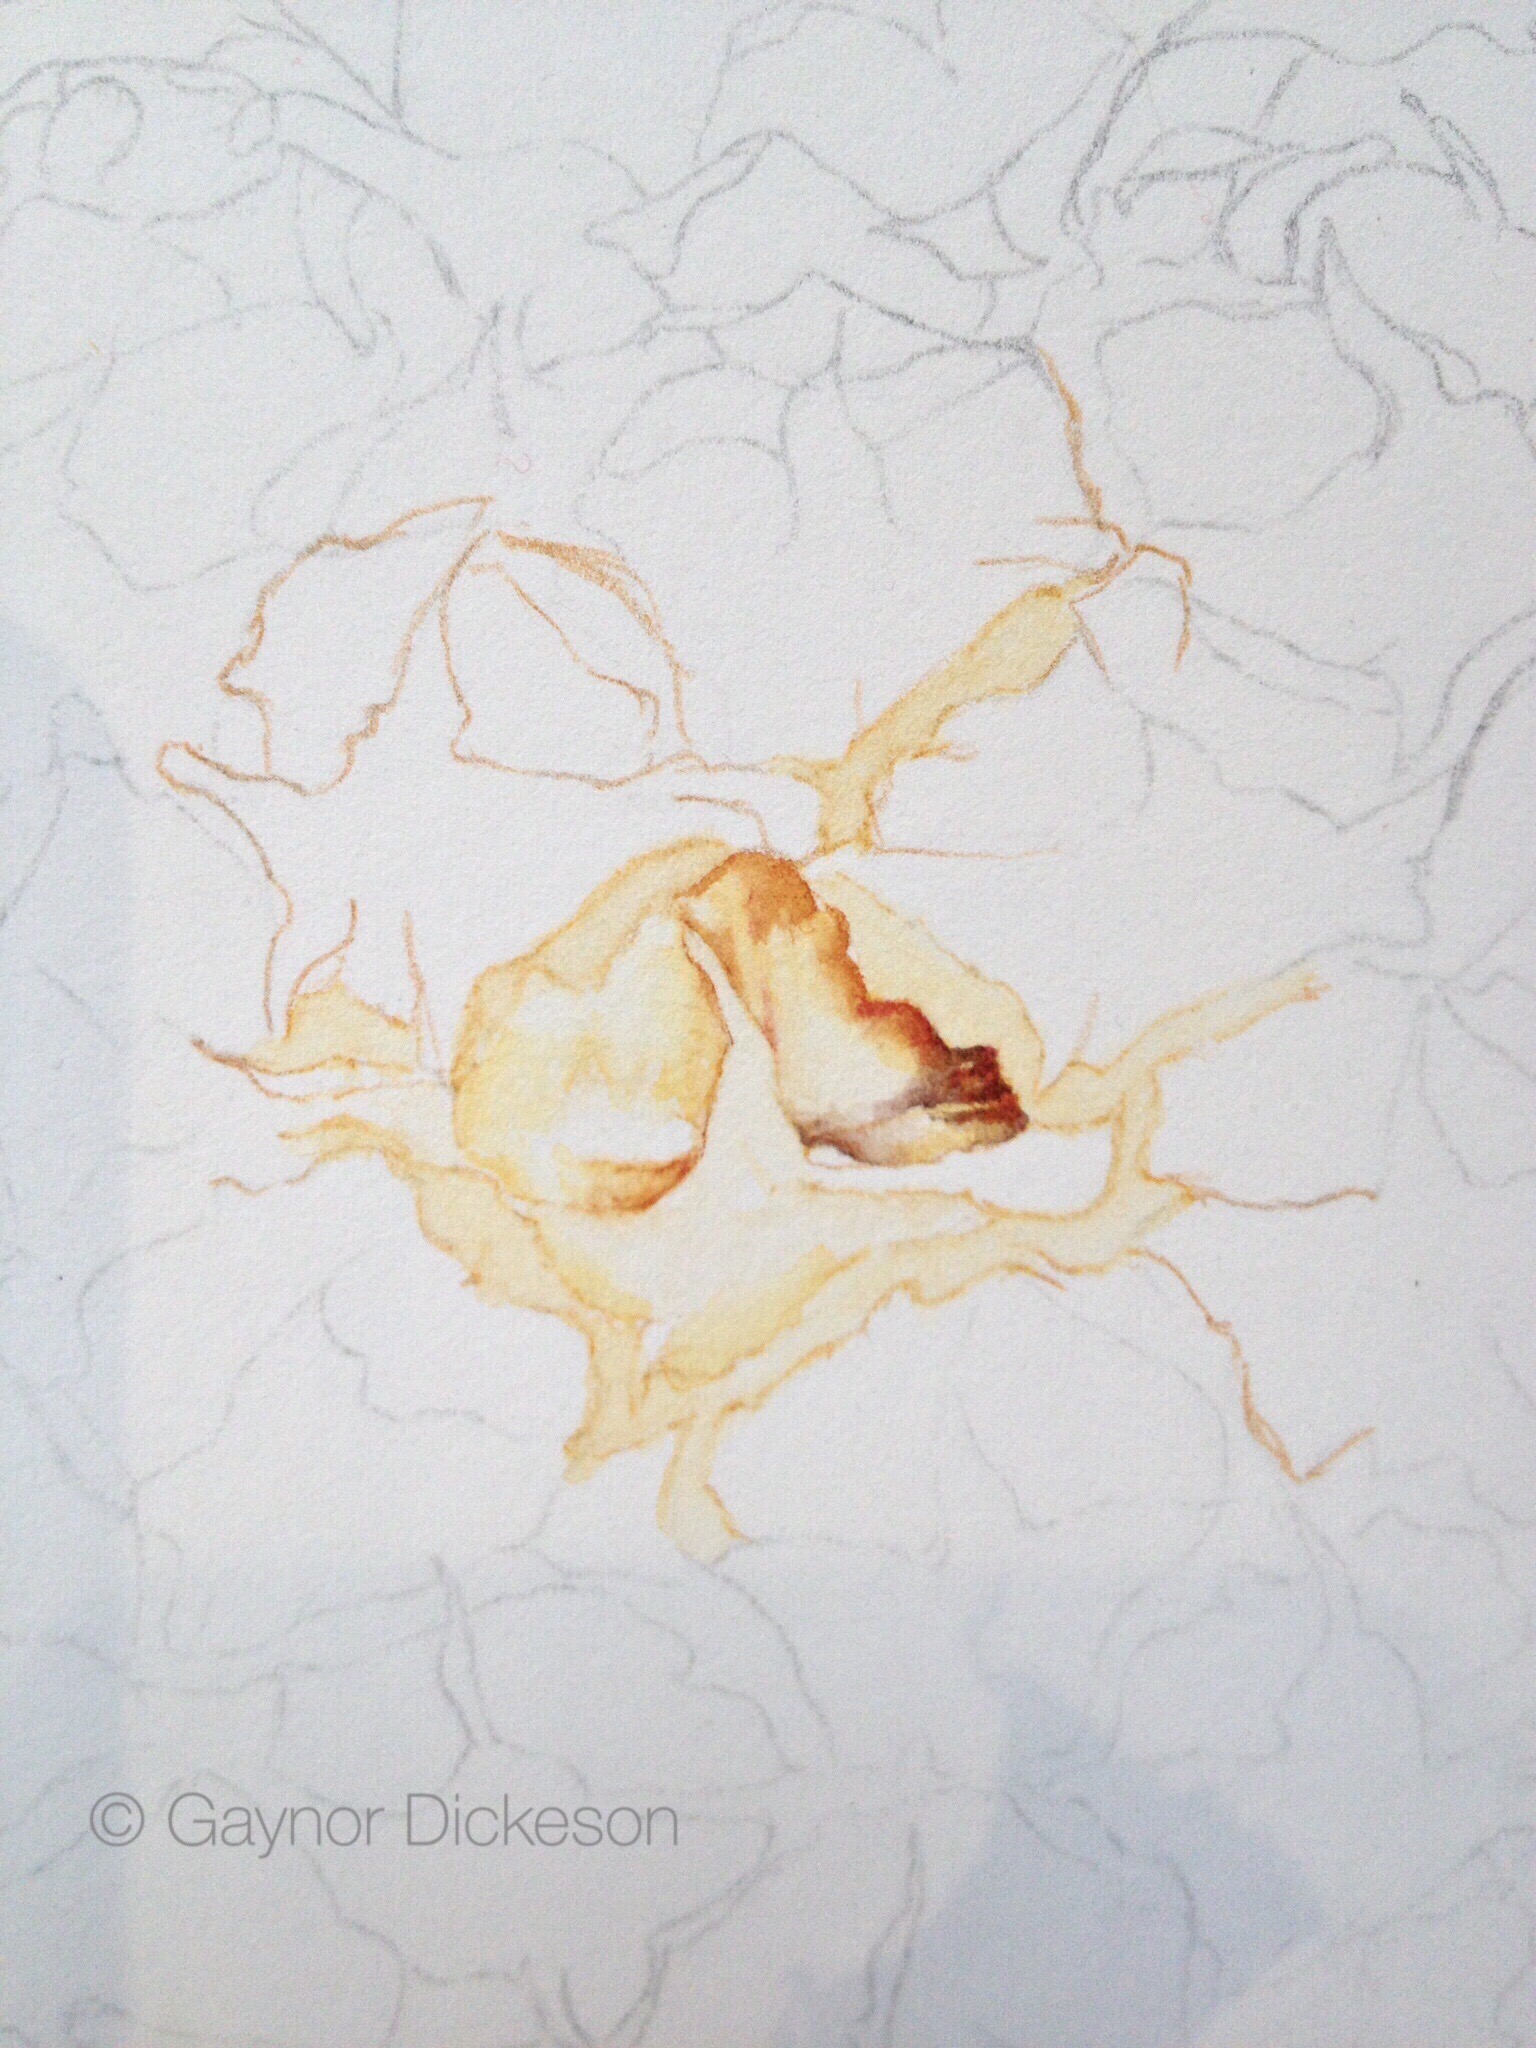
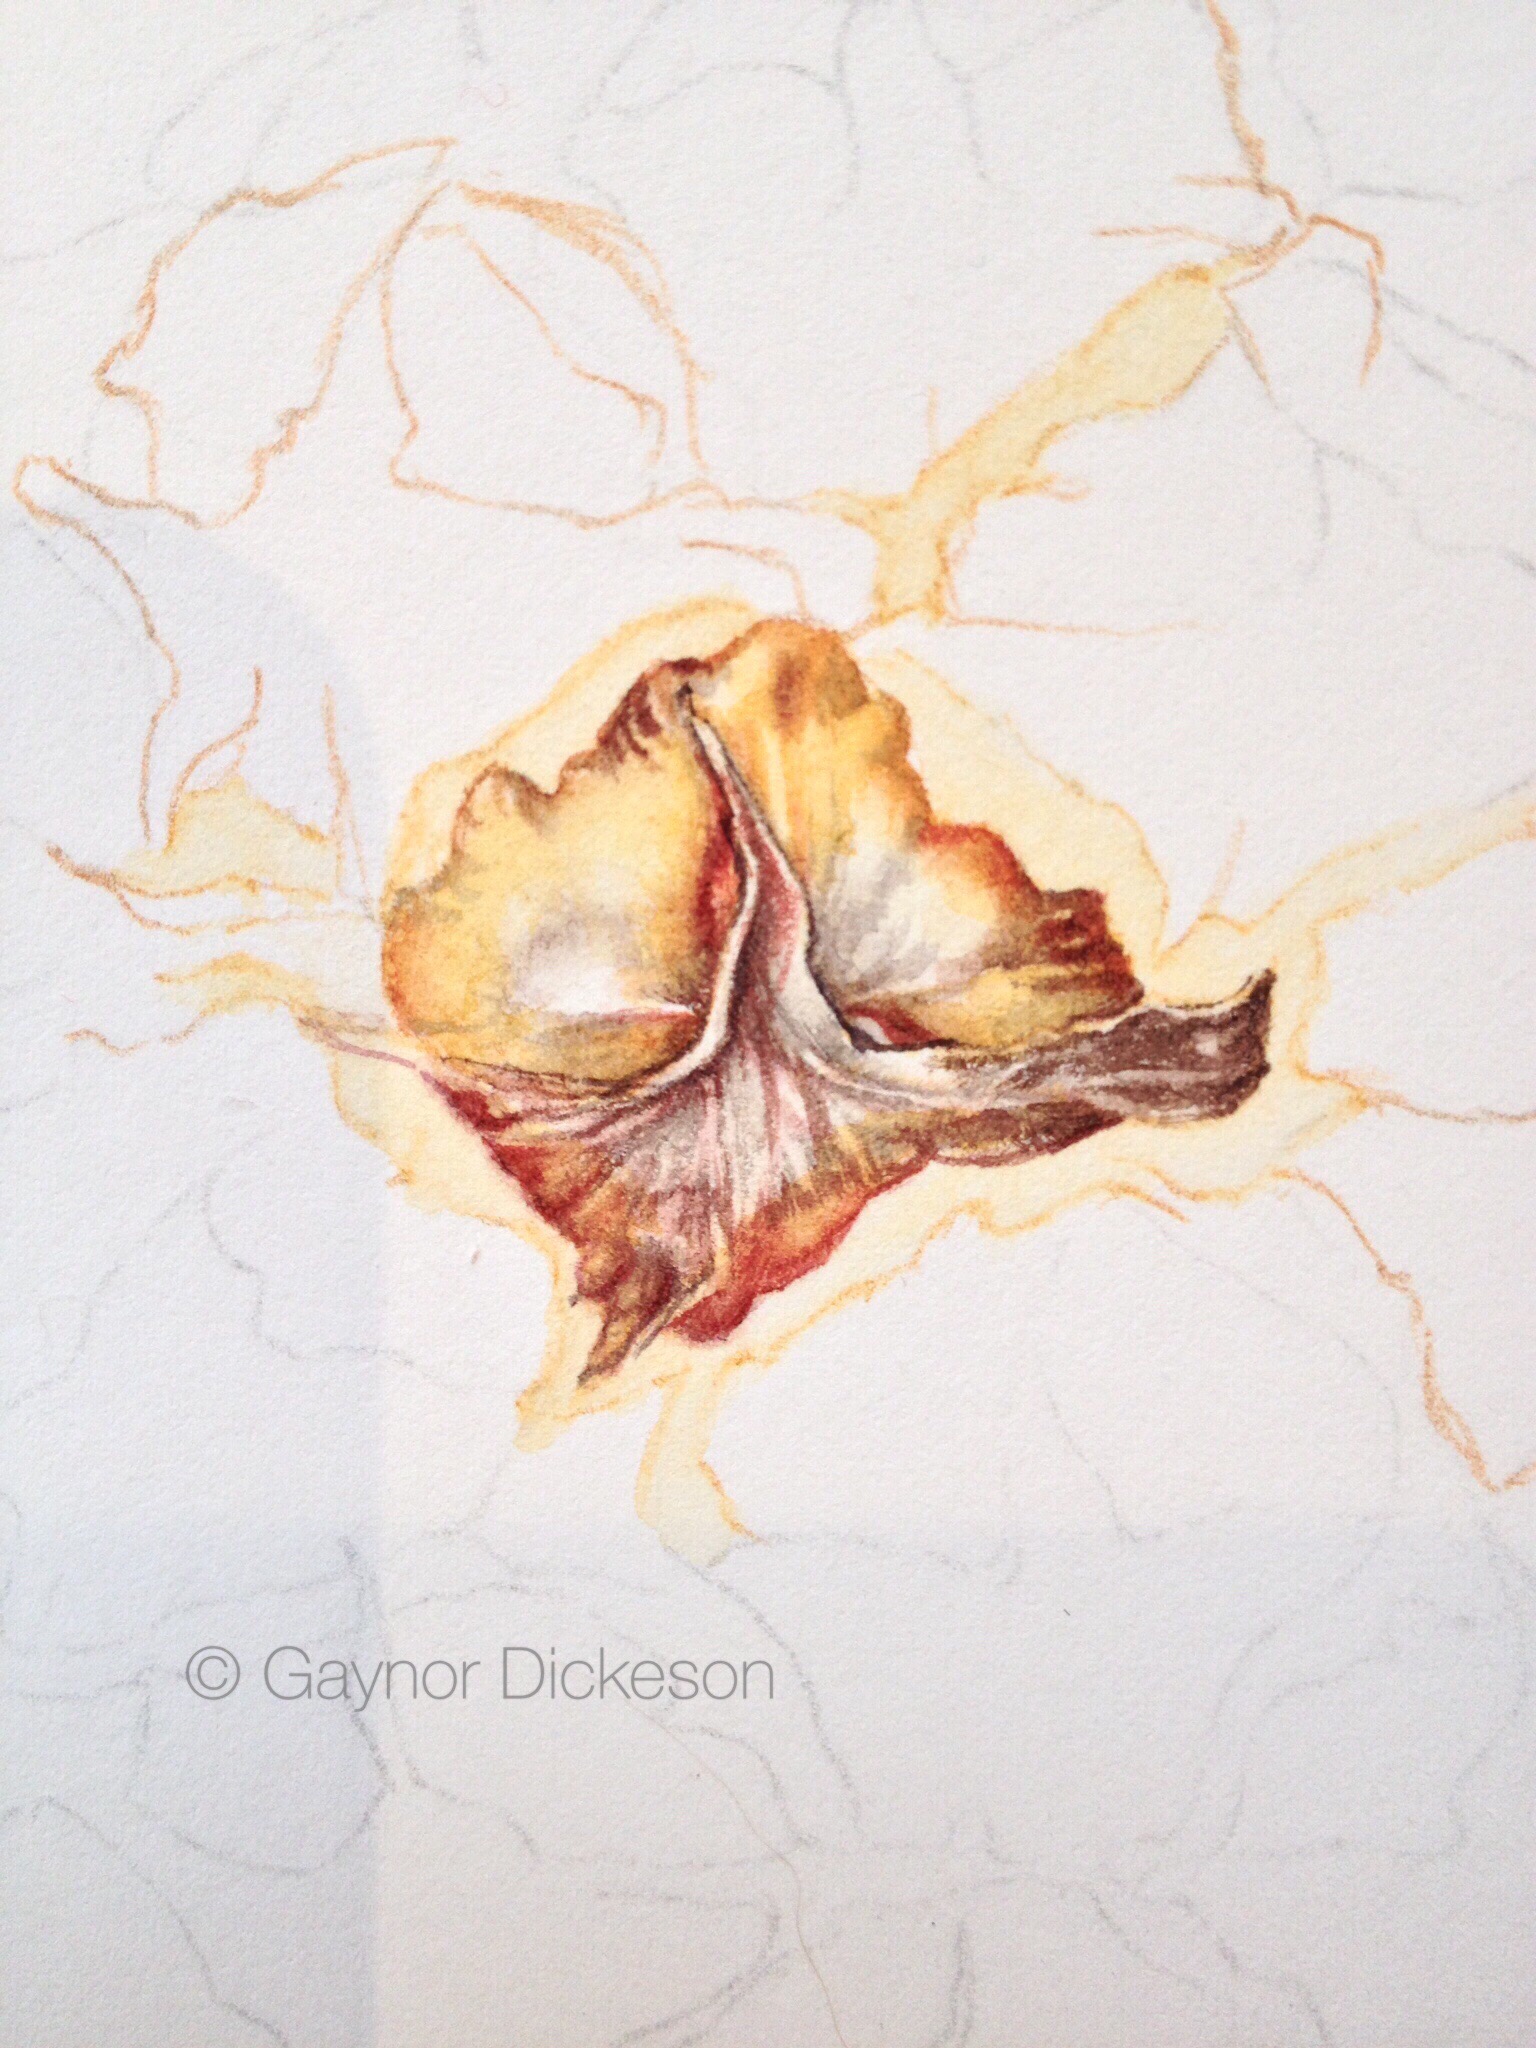
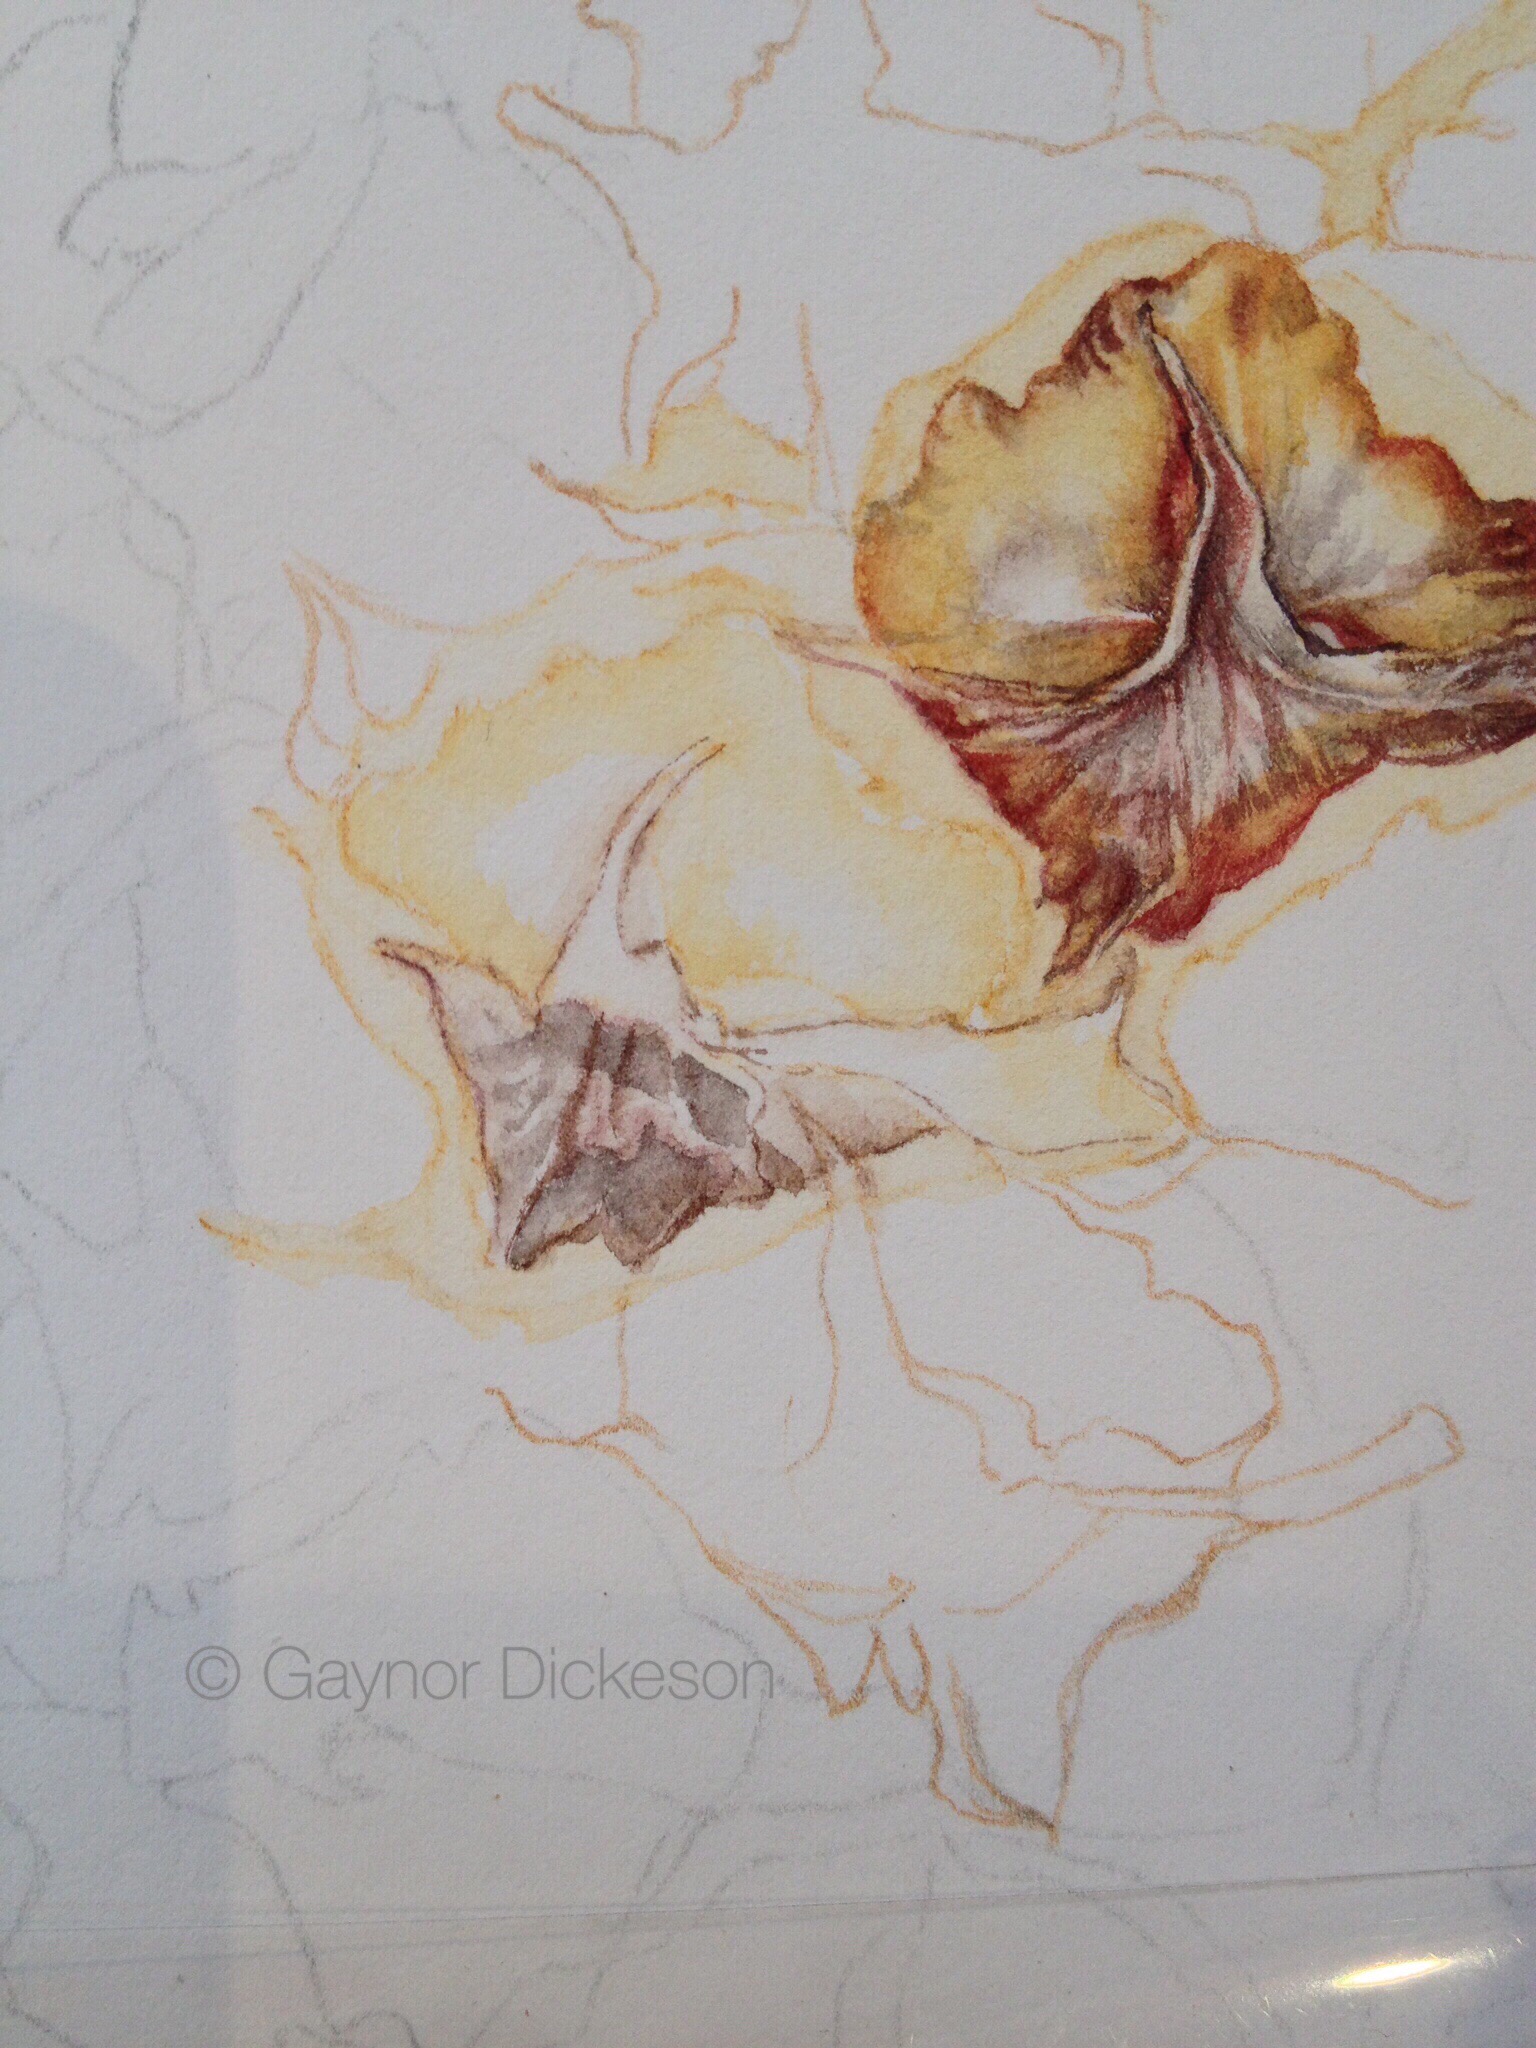
I discovered whilst painting and posting updates about the picture that many botanical artists are challenged into painting a pineapple. It isn’t simple to do although it is all in the planning – as with most things – but it isn’t that difficult either.  I noticed that several people had previously painted a pineapple, as I had done, or were in the process. Some started about the same time as me, but were finished long before me, and others started well afterwards. Pictures were done in watercolour, coloured pencil and I saw one really beautiful one in graphite. Most were done actual size and one or two over-size. They were very impressive, particularly if more detail had been included.

The differences in the results were as amazing as in the techniques. Even with watercolour, there was a clear distinction between those done mostly wet-in-wet, to the other end of the scale where more dry brush techniques were used.

I mentioned that I did a pineapple once before, about eight years ago. I was given to understand on several occasions that it wasn’t bad – although I felt it could have been improved upon no end. Putting the two side by side was quite an experience for me. One could clearly see that I had developed in that time. I just hope that I continue to develop positively. I just wish that I could work faster, not slower!

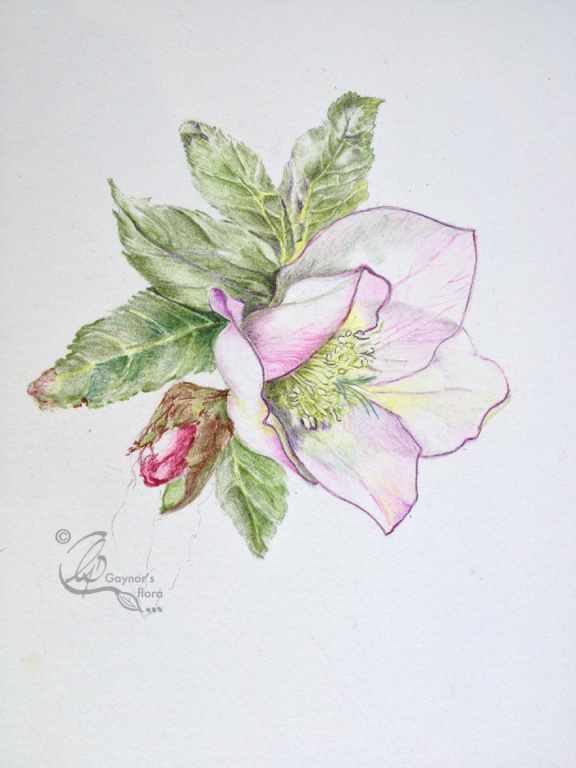
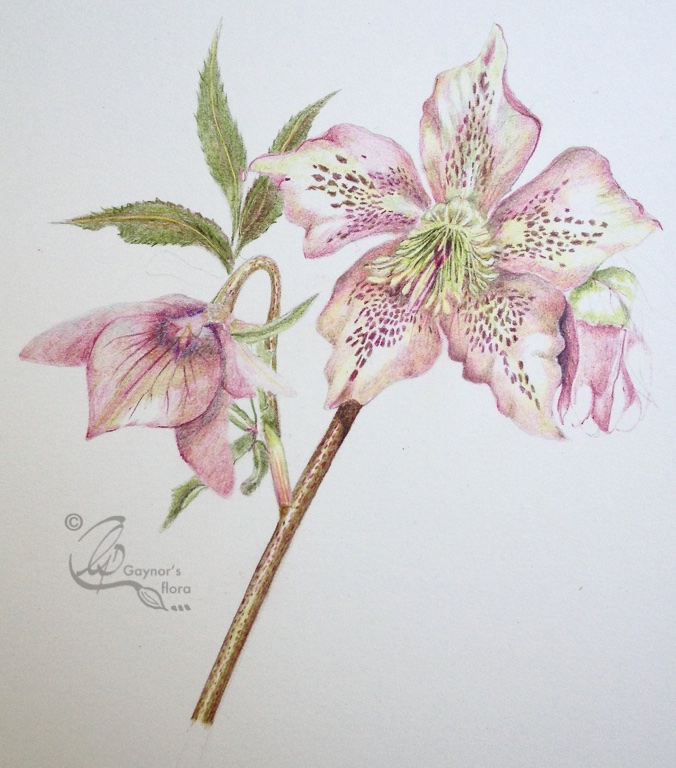
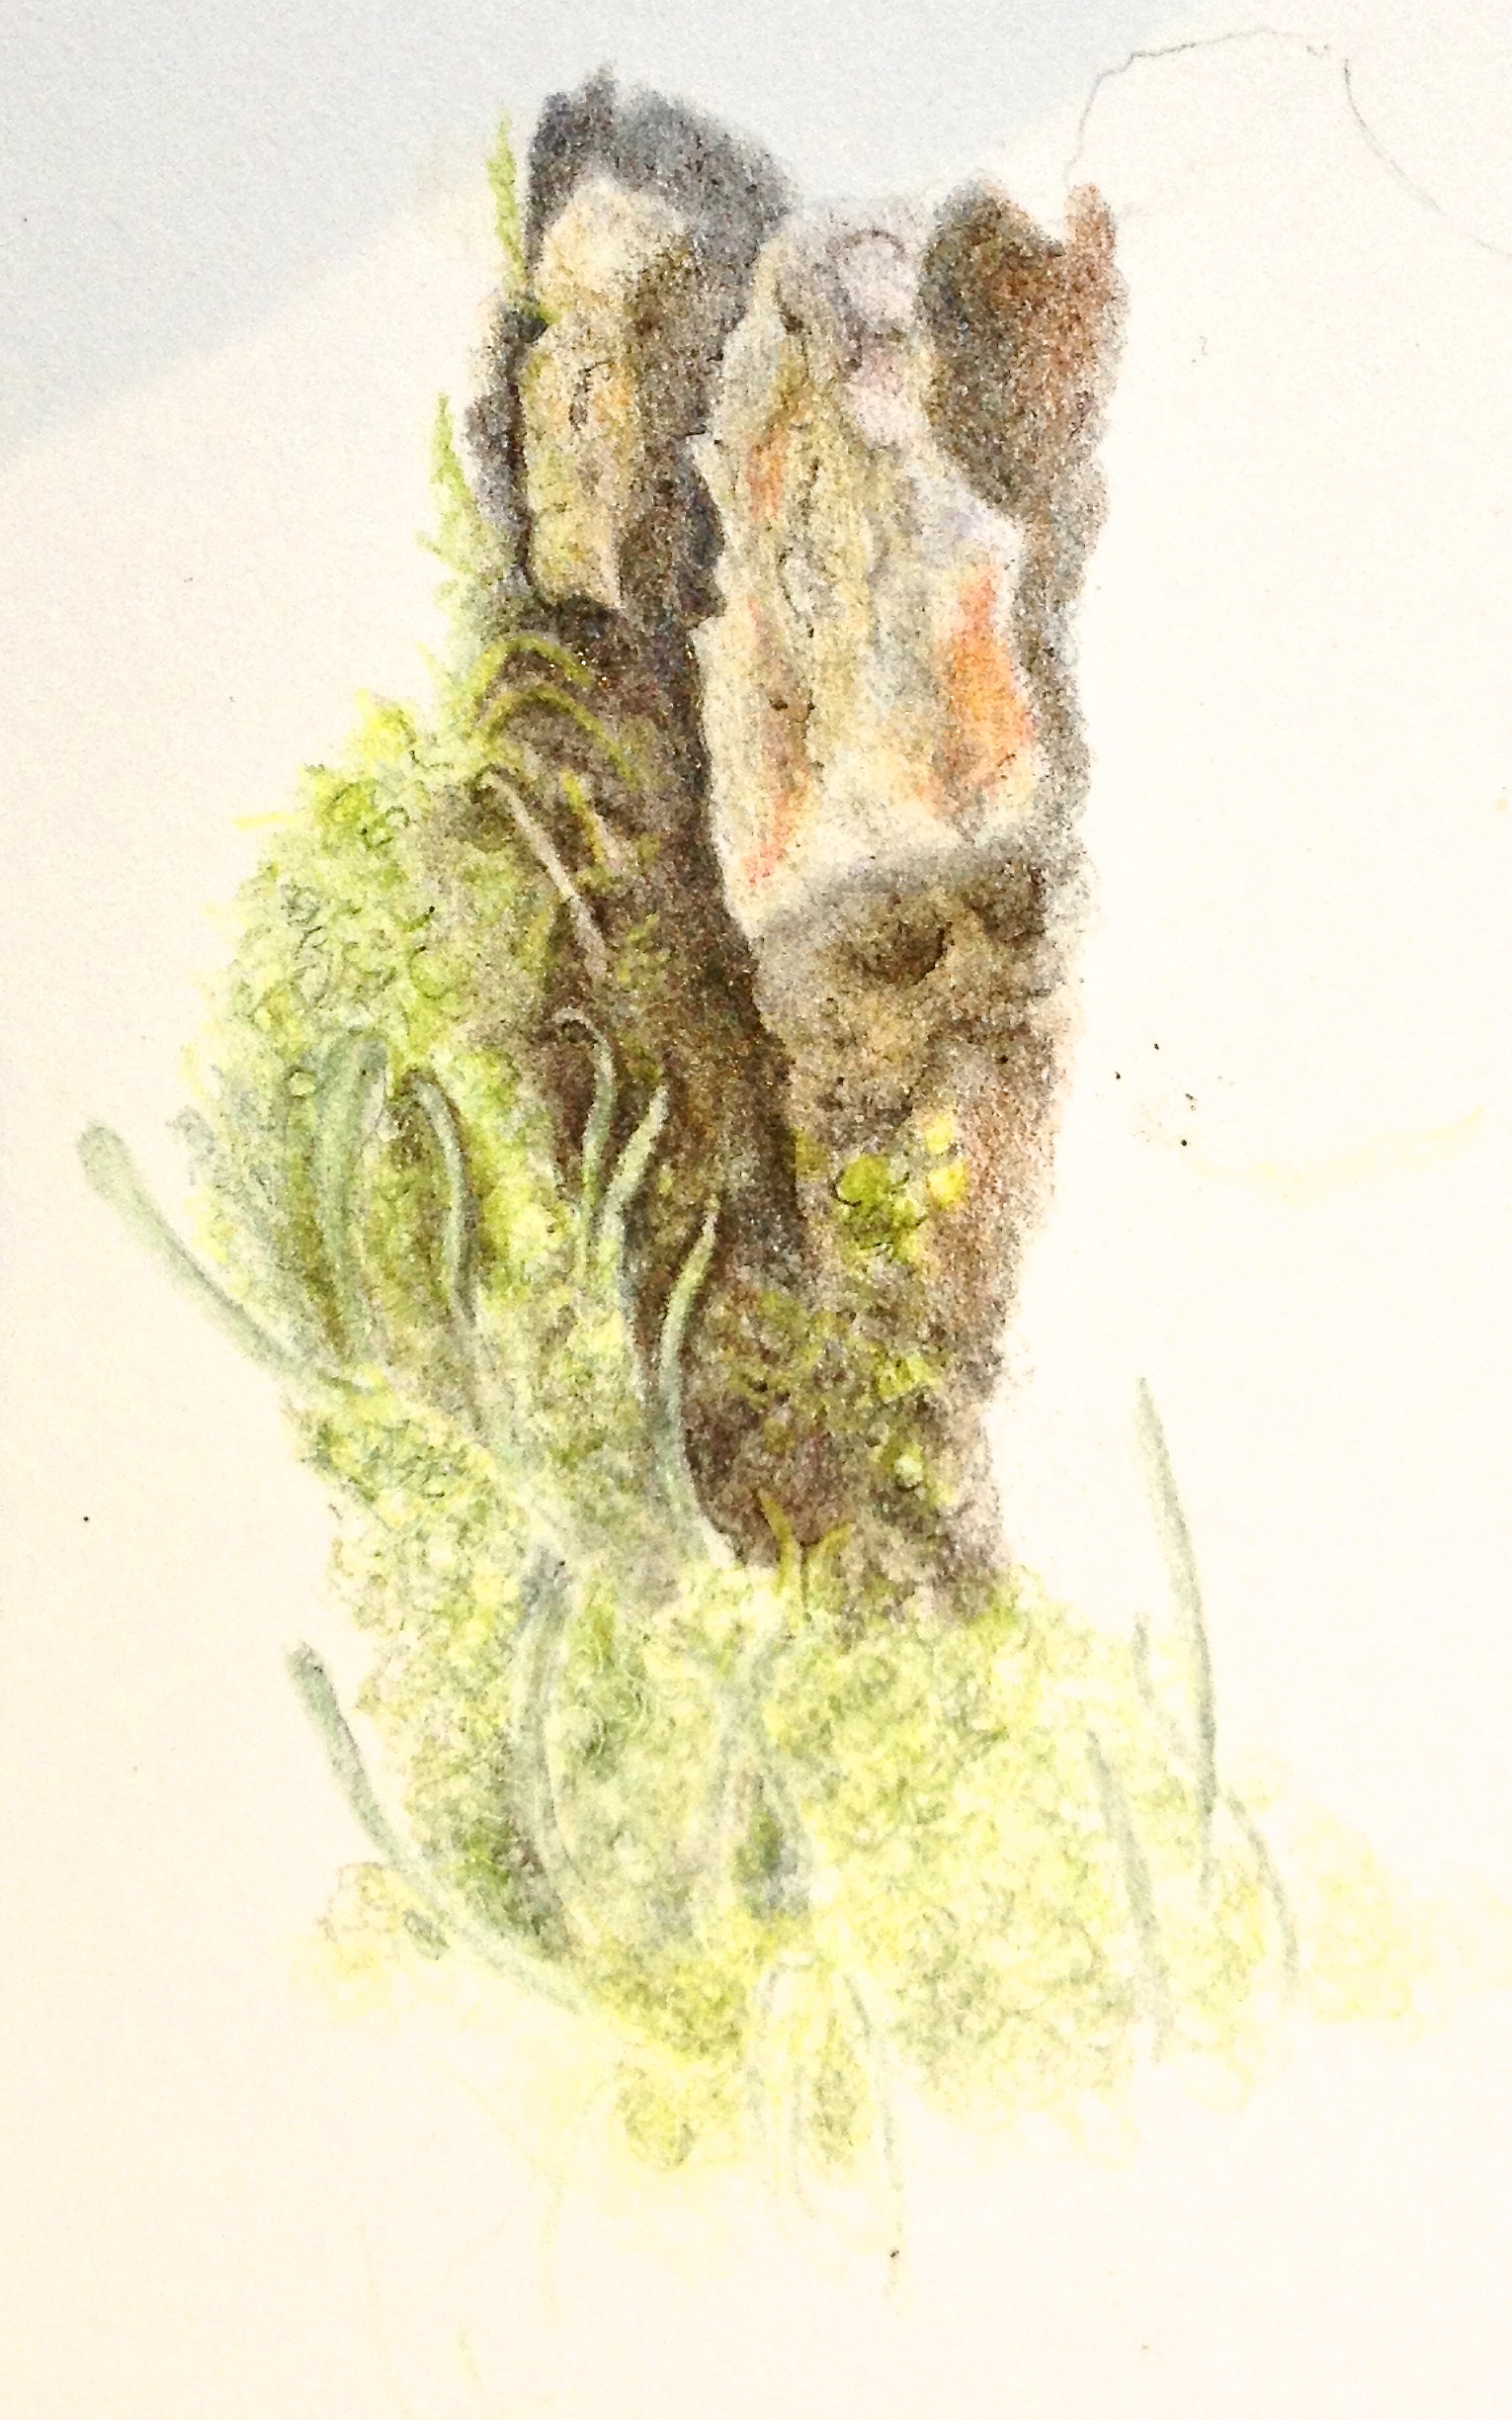
So the graphite daffodil. I had no additional pictures to show you with the pineapple, so I thought I would post my latest work. A couple of weeks ago I held a graphite workshop and just continued with my demonstration piece. I thoroughly enjoyed it and I hope you like it too.

©06.Graphite daffodil 8bit+sig

Botanical art in graphite – workshop

Today was the second and final day of the botanical art workshop using graphite. It was a lovely small group of artists and I believe that we learnt a lot from each other. 

I think this aspect of a workshop is important, whereby we all learn something from each other – even the tutor. 

I may have mentioned this before, but personally, I don’t think I would have got so much enjoyment from teaching if I hadn’t learnt a lot from the students I was teaching. I always think that a question that one person asks, sets in motion a whole thought process which makes me think about how and why, so that I can answer appropriately. From this I can develop a process, simplifying as much as possible, and cutting out anything unnecessary on the way.

Example, why do I draw my subject onto sketch paper and then trace it via a lengthy process onto my art paper? Those of you who follow my blog (https://gaynorsflora.com/2015/03/19/tracing-to-art-paper-without-indentation/)will know that once I have actually drawn my design, I trace over it  once, then again on the reverse side before transferring it to my art paper – and without leaving indented lines in the paper. The whole process seems long and drawn out, when all I want to do is paint a good picture! But I know that my final picture will be no better than the amount of preparation I put into it.

So having thought all this through, what are the benefits?

  1. Freedom to change the design as many times as I want to before the tracing process.
  2. Less waste of paper.
  3. Potential for a better composition on my art paper as I can move the tracing around the paper before tracing it over ( that was a student comment today).
  4. Pristine art paper at the start of the painting – leading to a better result.
  5. The same tracing can be used several times without additional graphite.

I expect that you can add other benefits to the above.

The gorse tracing that I made for my last blog has been used seven times since I did it, without adding more graphite to the tracing. I have just laid it on fresh paper whilst demonstrating the technique at this workshop, and rubbed gently over it with a decoupage tool as previously described.

I used the same technique when doing a new drawing during this workshop. But I used Bristol board and when I took away the removable tape I had used, it removed the surface of the paper. The same happened to one of the students. She was not fazed, and neither was I. We simply quickly repeated the process on the other side of the paper. Tip: don’t do that with Fabriano HP watercolour paper as it has a right and wrong side.

Rather than me wittering on, you will be more interested In the resulting work from the last two days. I have put a copyright on each of the pictures as they are posted on my blog, but the copyright is with each of the students.


My first home-made video – the Pineapple of course

This is going to be a very short blog as my eyes are popping out of my head.

I finished off a long series of London Art College assignments this morning, intending to go back to the easel afterwards.  I was then asked to write a short article to go on the website for the Chichester Open Studios event in May. Naturally I decided to do something about the Pineapple, put it forward as a suggestion including the use of my first video tutorial.

I know that there is already a series of videos that you can find via the Tutorial page on this website, but those are professionally done. Back to this one video so far: I started filming and doing a series of ‘time-lapse’ pictures at the beginning of the pineapple painting.  This video comprises both elements covering the initial period and lasts about three minutes. I continued to film throughout the whole painting, so in due course I hope to release something that will show the whole pineapple develop before your eyes. But that is still in the cooking pot.

Following the query earlier today, I therefore logged onto Youtube and created a channel called Gaynor Dickeson. It contains just one video: ‘How to paint Pineapple segments with Gaynor Dickeson’ . Do enjoy and let me know what you think. This is the link: http://youtu.be/htu3A2mpFCo

IMG_0074

Last two ‘pineapple in progress’ pictures.

This is a very quick blog  – I hope.

The customer has seen the finished pineapple picture and is pleased with the results. Whew! It still has to be framed, but the recipient will not be getting it for a few more months. However, I have been given permission to release it.

Today I will just show the two remaing ‘in progress’ pictures and in the next few days I will post the final picture. I’m not sure which day as I have set aside the next two for concentrated painting – hopefully.

I and my set of 231 from the Queen Elisabeth School of Nursing, Birmingham, will be celebrating our 50th reunion in Bosham in May. As I am organising it, I thought I might do a series of small originals as presents for those coming.  By actually saying this, I suppose it will be documenting my intention. So watch this space and keep your fingers crossed that I can do 30 in that time. I am a terrible perfectionist and take a long time over each picture, so I will have to make a schedule, keep the pictures very small and keep to both intentions.


Promised Hellebore workshop pictures

I promised to show the Hellebores following the botanical art workshop at the weekend.  Unfortunately I couldn’t do it before now as one student came back during the week for a class – taking advantage of being on holiday in the area; one went back to Norway; and one wanted to do some more at home after the workshop. However, here they are. I am really pleased with the pictures so far.  All the students decided to use coloured pencil, but painting Hellebores face exposed is not easy, whether using watercolour or coloured pencil. There is a lot of detailed work.

For those of you who do know a bit about coloured pencil and botanical art, no embossing tool was even near any of the pictures. They all decided to try doing it the hard way via controlling their pencil and carefully laying layers of colour. The results of this were really good.  Personally I feel that if you can avoid the embossing tool as much as possible, the result is more realistic and of course you don’t damage the paper. I think that In the end the students found the spots on the petals the most difficult.

It was the spot pattern on some of the Hellebores that had attracted several of them to choose these particular flowers, but they didn’t find it as easy as they had thought. The reason for this was that the spots guide the insects to the nectaries and this creates a specific pattern, but at the same time they accentuate the shape and fall of the petals – almost in the same way as the veins do. Not easy.

It was interesting listening to the conversation round the table about their individual choices of flowers. One felt she wasn’t able to get things really dark with CP, so chose the dark flower.  She found that spending time on choosing the right colours and deciding the order in which they were used, helps a lot – as does being conscious of contrast. Another person chose a pale flower as they had difficulty doing pale. One person didn’t really like Hellebores but wanted to learn how to do them.

As each of them benefitted from looking at each others work, it was quite rewarding. I think that all were surprised and pleased with their results.

Please enjoy.

1.IMG_2231 2.IMG_2259 3.IMG_2297 - Version 2 4.IMG_2280 - Version 2

Hellebore Botanical art workshop in Bosham

I started a three- day workshop in Bosham yesterday and was surprised to see that all those attending chose to use coloured pencil. Those artists who have already been to me before, know that I teach both coloured pencil and watercolour. I think it has only happened once before that the medium of choice for everyone was coloured pencil

Some people had brought Hellebores from their own gardens to paint, but in the end they all chose from our garden. You might already know that Hellebores are rather promiscuous and therefore breed more than rabbits do and aren’t too choosey about which variety they choose to mate with either! We have Niger ones, slate ones, pale ones, dark ones, spotty ones and a really lovely one we noticed today that was pink and green, with tips of lime green. Amazing.

People have been working hard and concentrating on what they were doing, except each time the pheasant appeared in the garden. He is quite beautiful with a white head and with wattles. I’m not exactly sure what type he is, but if anyone knows, please tell me.

Yesterday a lot of time went into planning the Hellebore picture. Although they probably wouldn’t finish the whole thing over the weekend, I felt it important to focus a little on composition so that when they added to the picture later,  the composition had been planned properly.

The colour was started yesterday, mostly around the stamens. Today they have been forging ahead and these were the results by about lunchtime today. Hopefully I will be able to show some finished results by end of play tomorrow.


Another piece of student work

I have a student who started using coloured pencils and botanical art, last summer. As far as I am aware she hasn’t done anything like this before.

Su became enthralled with botanical art and will do it at any time she has a spare minute – even if it’s only five minutes before going to work. Su’s botanical art work has improved so much over such a short time.

What do you think? By the way, it is incomplete, but already very impressive.

IMG_0741

Botanical art workshop report from Twigs and things.

We have just finished the botanical art workshop and I thought I would get the pictures resulting from it, onto the blog before I started marking London Art College assignments.

From my perspective we had a very enjoyable workshop. But then I would say that wouldn’t I? Hopefully someone will confirm or deny this when they read the blog!

When painting a serious botanical subject that has gnarled branches with lichen or moss growing on it, I feel that I can play with the painting of it – as long as I stay true to the form, growth habit and type of lichen etc. I wanted to convey this to the group as well as get them to see the multitude of colours within such a specimen. I had two days to do this. Half of the group worked with watercolour and half with coloured pencil. Therefore it was exciting demonstrating the same topic in each of the media.

On one occasion I showed the group how to paint the furry terminal bud of a Magnolia soulangeana, first in watercolour and then in coloured pencil. It was quite amusing to hear the comments and the competition in assessing which bud looked best and which medium best suited that topic.

I was very glad to see that there were quite a few different types of lovely specimens which excited the group in different ways. There were some lovely colours observed, hidden in nooks and crannies. Red, pink, blues, oranges etc. A touch of some of these fresh colours, lifted a picture without dominating it. Anyway, I hope that you enjoy the following pictures.

The next botanical art workshop is Floating Hellebores (exposed faces), 27 February to 1 March. We already have a lot of Hellebores flowering in the garden, from very pale to very dark. There are available places, so do get in touch and book.

The brave class
The brave class
A piece of bark with several lichen types growing on it. The main one is identified as Cladonia cornuta.
IMG_2089
At work
Gnarled birch branch with a variety of lichen forms. Watercolour.
A branch of Magnolia stellata in watercolour.
A variety of types of licjhen and moss on another branch from a Magnolia stellata tree. Coloured pencil.
Start of a very complicated piece of work in Coloured pencil. The difficulty of portraying Cladonia cornuta amongst the other lichen growing on the bark piece. Quite a challenge.
Rosehips in Watercolour
Both Birch twig and bark from a tree, with small amounts of lichen growing on it. Coloured pencil
Branch with lichen very happily in situ. Watercolour

The Pineapple and a new workshop

I was reminded today by a friend that I have been remiss in my blogging. I am sorry for that. Therefore to catch up-

Last Saturday Robin and I were at the Society of Floral Painters(SFP), AGM and lunch. It was a very good meeting and lunch finishing off with an interesting talk by Roy Lancaster. It is the first such meeting I have been to and I gained a lot from it – as well as meeting lots of other botanical and floral painters.

The SFP have their next exhibition in Chichester Oxmarket arts Centre 20 May – 7 June. Look at my website http://www.gaynorsflora.com for details.

But since Saturday I have been continuing with the Pineapple picture – when time has allowed. I am adding a few more pictures at the end of this blog.

Tomorrow I am having a new two-day workshop here in Bosham. The topic is ‘Twigs and things’. It will be very interesting to see what people bring with them. I hope to be able to post some pictures after the workshop.

The next workshop is Friday 27 February – Sunday 1 March and the topic is Hellebores – floating. This means one has the opportunity to paint the flowers face up, showing their beautiful and colourful detail. There are a very few vacant places, so do contact me or look at my website (details above) for more information.

The pineapple-

2015/01/img_0059.jpg

2015/01/img_0060.jpg

2015/01/img_0055.jpg

2015/01/img_0056.jpg

2015/01/img_0057.jpg

2015/01/img_0058.jpg