A student’s Iris in watercolour

I did ask this student if once she had finished her Iris picture started at the workshop a couple of weeks ago, if I could put it in the blog. Today she sent me a photo of the finished Iris – and some comments.

I am going to be a bit naughty and include some of her comments as it is so applicable to most of us as we go through various stages in learning. Luckily in botanical art, we never stop learning and there will always be the next hill to climb. However, having got to the brow of one of the hills, is a pleasing moment.

This is what she wrote:

Finished! (Well- I could go on!). I don’t know what it was about your last workshop, but something seemed to click, and I suddenly ‘got it’, if you can understand what I mean. I no longer feel a little stressed and nervous about putting paint down, but excited and much more confident. I think this is the best thing I’ve done so far. I would love some criticism.

This is the picture and I love it. It obviously helps to pull those poor plants to pieces occasionally! Well done!

Sibirica Iris in Watercolour

Stunning Irises workshop in Bosham

I haven’t been very good at keeping up with my blogging as there has been so much going on this month. We came back from our weekend away, back into the thick of things and preparation for the three-day workshop that has just happened.

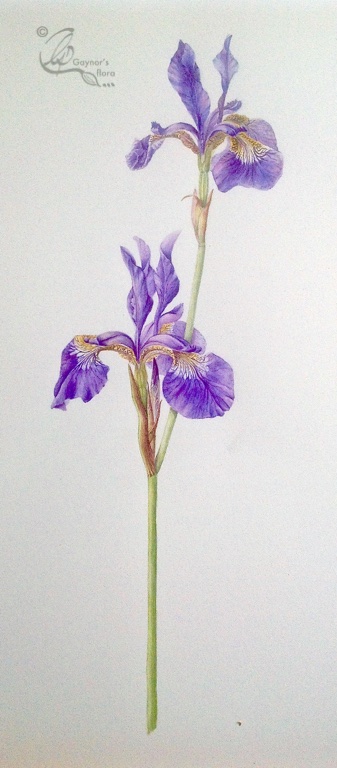
A few weeks ago I held a workshop for Fieldbreaks at Goodnestone Park in Kent. That was a great success (according to the students) and it was time to do the same thing here in Bosham. Irises is really the thing at the moment. Unfortunately they are so short lived. Stately and elegant in their glorious drapery; some with beards, some without; some very slim and sylph-like, others plump and very ‘Reuben-ish’. If you remember, he liked to paint women with something to them – buxom and a bit more.

We had something of everything here. The simplest in appearance were the ones you get in the supermarkets – we had a lot of them! Others brought beautiful bearded Irises and some, very beautiful slim yellow irises or blue irises with highly patterned falls (the name of one of the petals). Common for all was the way God has assembled them for us.

So that we would have a better idea of how an Iris really looks and how it is assembled, we actually took a few of them to pieces and there was a queue for the three microscopes. Initially, no-one on the workshop was interested in botanical illustration. After they had looked through the microscopes I actually saw some of them drawing what they had seen! It is exciting.

We were a little late in starting to paint the irises as a fair amount of time went into examining them and drawing them ready to paint. In fact unusually, no-one started painting until the next day. But it seems that the knowledge of what they were doing (i.e. careful observation of the plant), actually seemed to help them both in the drawing of their subjects and painting them.

The sun actually shone on the second day – but it did cast some strong shadows for some of these photos.

IMG_0916 IMG_0915


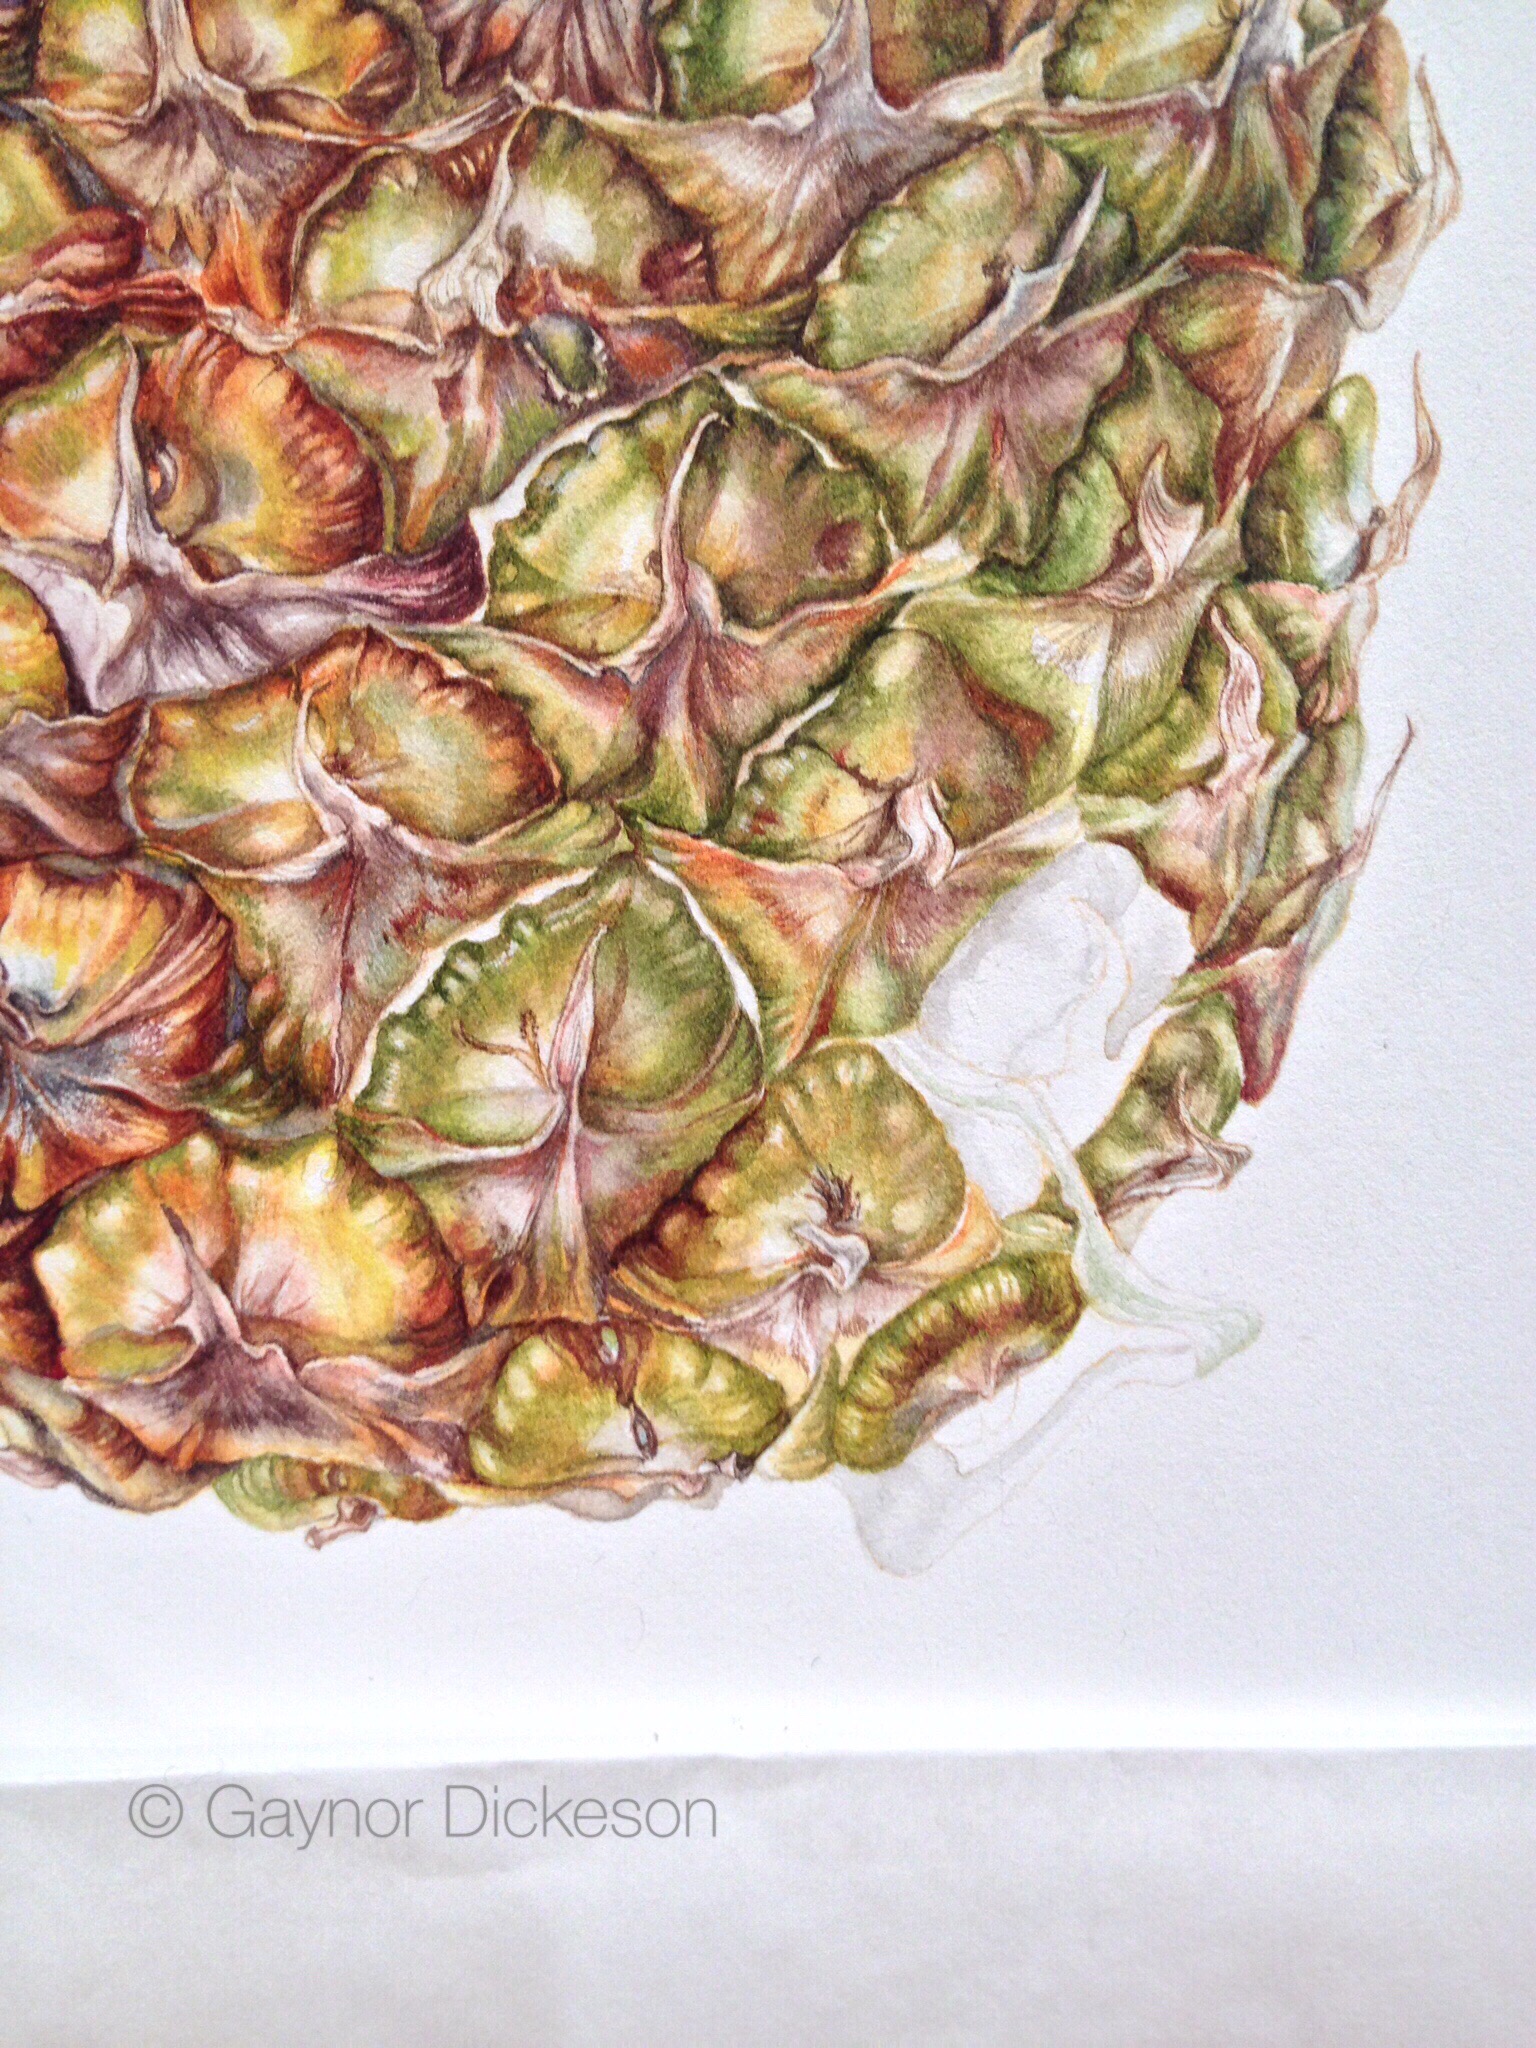
Work in Watercolour and Coloured pencil on the second day.

This slideshow requires JavaScript.

And the paintings at the end of the three days. All took Irises home with them to complete their work.

This slideshow requires JavaScript.

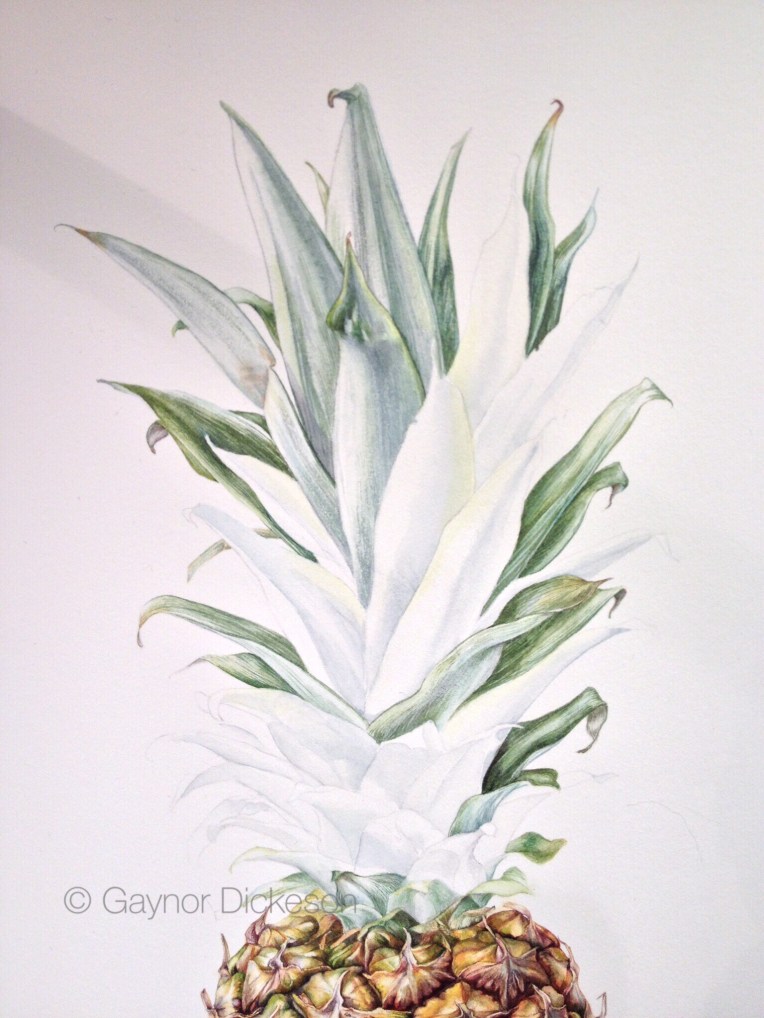
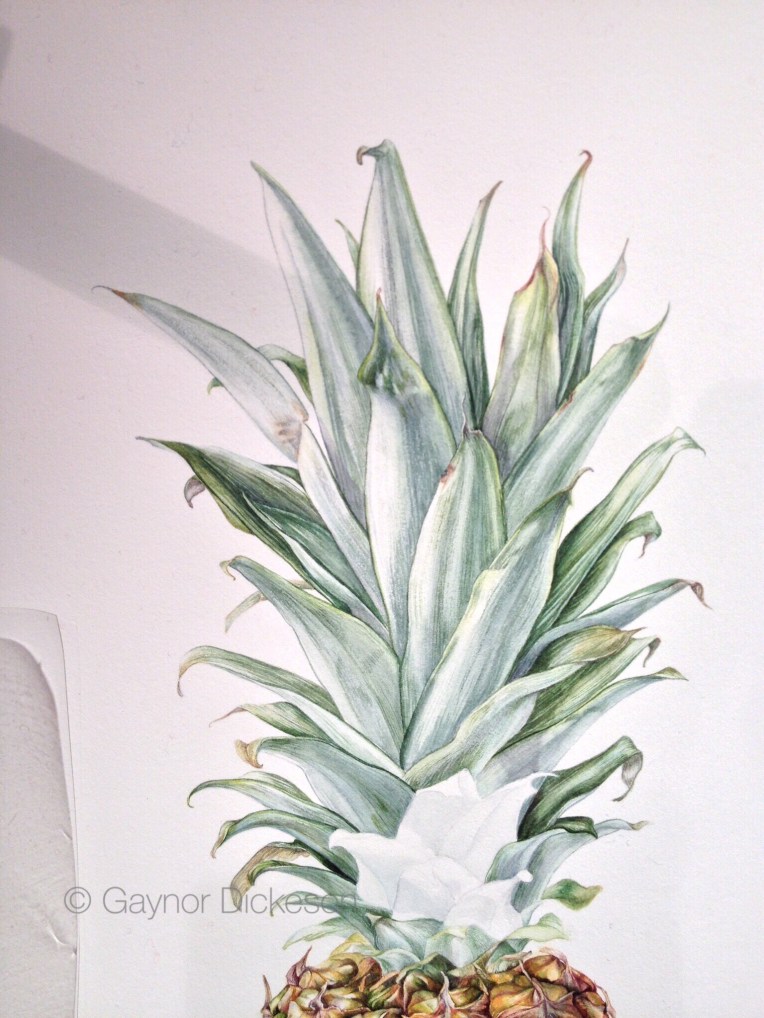
So what now? Tomorrow, all day,  I will be demonstrating Coloured pencil in botanical art at the Society of Floral Painters Exhibition at the Oxmarket in Chichester.  The exhibition is open until Sunday midday, when it will be taken down. Do try and take the opportunity to go there to have a look.

I will be having my penultimate botanical weekly art class for this school year, on Wednesday, and Thursday we will be setting up for the Stansted Garden Show due to happen from Friday until Sunday. There will be a lot to see there and I will be continuing my demonstration in coloured pencil. I understand that the weather is to improve for the occasion. I hope to see you.

First Iris workshop at Goodnestone Park

I don’t want to create any false impressions. The botanical art workshop on Irises was my first one on the subject this year. I will be having another one at the end of the month in Bosham.

As many people know there are several forms of Iris, a rough division can be bearded or non- bearded. The ones you can buy in the supermarket are frequently non-bearded, whereas bearded ( the fluffy bit at the top of the petals that hang down [describing non-botanically]), can often be bought in florists or seen in gardens at this time of year. The petals of the bearded iris often appear more papery than the other sort.

I took a few bunches of the Iris sanguinea with me to Goodnestone Park where the workshop was held. I used these to encourage the students to study the flower and pick it to pieces so that they had a better understanding of how it was formed. For those who hadn’t done botanical art before, they were a little disconcerted and afraid that I expected them to do botanical illustration. However, they soon found out that this was not my intention and by the end of the workshop understood why I had got them to study the flower so much to begin with.

Goodnestone Park has a lovely walled garden and we are given the opportunity to pick suitable specimens of flowers to paint. Several chose beautiful stately bearded irises, whilst others chose to paint from the ones I had brought with me.

As is usual in my workshops, I spend time helping the students to get a good drawing of their specimens, as the final picture will only be as good as the drawing used to start it. I am told that this was felt to be a useful exercise in itself. But firstly, here are some pictures of the workshop.

This slideshow requires JavaScript.

Now the results of the two day workshop. I think that having studied the flower so well in advance, the students were surprised at how good the results were, particularly with such a complicated flower.

This slideshow requires JavaScript.

Finally, tomorrow, Sunday, is the last day of the Chichester Open Studio trail. We have had many lovely visitors and we would like to say thank you to everyone who has been to see us. It was complicated going away or the last couple of days to take the workshop in Kent, but I enjoyed it. If you have the opportunity to come and see me at work in my shed tomorrow, please do come.

The other side of being an artist

This is the time of year for a botanical artist, in the UK,  when there are the most exhibitions and opportunities to promote ones work. You only need to see the list of dates and places on my ‘Exhibitions’ page to see all the occasions for which I need to prepare my work.

I love painting with watercolour and coloured pencil, or drawing with graphite or pen and ink. Many of my subjects are at their most beautiful at this time of year, but this doesn’t always mean that they are at their most interesting. People starting out in botanical art are often surprised to find that there is something of interest all year round.

I don’t love having to prepare my work for exhibitions! The reason for this is that it takes me away from doing what I do best and enjoy most – creating the actual artwork. But it has to be done.

For the last week I have not done any real painting as I have been preparing what I have done to exhibit. I try to keep on top of preparing each painting for printing as I finish that painting and rarely allow myself a backlog of more than two. This alone can take about two full days for each picture, where I use Photoshop to match the colours as closely as possible to the painting.

Luckily I haven’t had to do any colour matching on the pictures that I have been framing or mounting this week, as I had done it previously. But I do have some small pictures that will soon have to be done.

I got into the mounting and framing mode a week ago when my husband, Robin, needed to prepare some of his work for an exhibition. He did most of the work himself and I just helped him. After all, he does an awful lot in supporting me at my exhibitions and shows. So I just carried on from his framing to my framing.

The large table used for classes and workshops comes in very useful when mounting and framing artwork – but it’s never large enough!

The working table - at work
The working table – at work


You will hopefully recognise all but one of the pictures. The nightshade is one that I had intended to do as a series, but other subjects became very interesting!

'Young or old and still spiky'; Acanthus.
‘Young or old and still spiky’; Acanthus.
Daffodil; 51 shades of grey.
'Fatal attraction' ; Dipladenia and 'Solanum x dulcamara'; Bittersweet nightshade.
‘Fatal attraction’ ; Dipladenia and ‘Solanum x dulcamera’; Bittersweet nightshade.


Before I forget, the hanging of the pictures at the SBA exhibition at Westminster Central Hall in London, seems better this year. the exhibition continues until this coming Sunday, so I hope you get a chance to see it. Five of my six Crab apple paintings in coloured pencil from my exhibit at the RHS last year, are hanging there. Although not mentioned in the SBA catalogue, the series won a Silver Gilt medal.


Step by step Pineapple pictures and a graphite Daffodil!

So what does a series of Pineapple step by step pictures have to do with a graphite daffodil picture? Nothing, except that they were done by me.

I have at last got my act together and done a separate page where all of the photos that I took during the 160.5 hour marathon for the Pineapple picture, are in one place. Just click on the heading above and you will find them all. Additionally, if you haven’t seen the YouTube video I did whilst painting one of the segments, you will find that in a link on the Tutorial page above.

I discovered whilst painting and posting updates about the picture that many botanical artists are challenged into painting a pineapple. It isn’t simple to do although it is all in the planning – as with most things – but it isn’t that difficult either.  I noticed that several people had previously painted a pineapple, as I had done, or were in the process. Some started about the same time as me, but were finished long before me, and others started well afterwards. Pictures were done in watercolour, coloured pencil and I saw one really beautiful one in graphite. Most were done actual size and one or two over-size. They were very impressive, particularly if more detail had been included.

The differences in the results were as amazing as in the techniques. Even with watercolour, there was a clear distinction between those done mostly wet-in-wet, to the other end of the scale where more dry brush techniques were used.

I mentioned that I did a pineapple once before, about eight years ago. I was given to understand on several occasions that it wasn’t bad – although I felt it could have been improved upon no end. Putting the two side by side was quite an experience for me. One could clearly see that I had developed in that time. I just hope that I continue to develop positively. I just wish that I could work faster, not slower!

So the graphite daffodil. I had no additional pictures to show you with the pineapple, so I thought I would post my latest work. A couple of weeks ago I held a graphite workshop and just continued with my demonstration piece. I thoroughly enjoyed it and I hope you like it too.

©06.Graphite daffodil 8bit+sig

Tracing to art paper without indentation

I wrote a blog  called: tracing to Art paper from 25 March 2013. I thought it might be useful to refer to in conjunction with my new video on YouTube : 

http://youtu.be/VdDlTH7m5Os

Both on the blog and in the video I have used an instrument called a Decoupage tool. This was bought from FredAldous  online. It is very useful as it is smooth and small, but just large enough to spread the load placed on it when transferring an image onto art paper, without indenting the paper.

Why is it important not to indent the paper? Often, when transferring an image, no matter how careful you are, you will nearly always get some indentations. If painting in watercolour, the pigment is more likely to collect in the narrow grooves leaving a darker line. If using coloured pencil or graphite, pigment won’t go into the embossed lines so easily and white line are left. You don’t want either of these effects from outlining your image. 

The technique is simple and removes the risk of the embossed image during transfer.

Do give me feedback about the video, positive and negative, so that I can carry on improving ones in the future.

I will be having a graphite workshop on Friday and Saturday, following pressure to put on such a workshop. Watch this space for some pictures at the end.

Now The reason for following this blog – botanical pictures completed in the last few days. I haven’t done many of the artists trading cards as with my style of painting, each one takes about two days. The last one is the image used for the tracing and as Gorse is not easy, I am on my fourth attempt! I don’t give up that easily!

My first home-made video – the Pineapple of course

This is going to be a very short blog as my eyes are popping out of my head.

I finished off a long series of London Art College assignments this morning, intending to go back to the easel afterwards.  I was then asked to write a short article to go on the website for the Chichester Open Studios event in May. Naturally I decided to do something about the Pineapple, put it forward as a suggestion including the use of my first video tutorial.

I know that there is already a series of videos that you can find via the Tutorial page on this website, but those are professionally done. Back to this one video so far: I started filming and doing a series of ‘time-lapse’ pictures at the beginning of the pineapple painting.  This video comprises both elements covering the initial period and lasts about three minutes. I continued to film throughout the whole painting, so in due course I hope to release something that will show the whole pineapple develop before your eyes. But that is still in the cooking pot.

Following the query earlier today, I therefore logged onto Youtube and created a channel called Gaynor Dickeson. It contains just one video: ‘How to paint Pineapple segments with Gaynor Dickeson’ . Do enjoy and let me know what you think. This is the link: http://youtu.be/htu3A2mpFCo

IMG_0074

The Pineapple has gone for framing!

I believe that several people have wanted to see the finished pineapple. Today I took it for framing and very soon it will be out of my hands!

But, apart from teaching botanical art classes and workshops, I have started the small pictures that I will be giving to my nursing reunion friends in May. I don’t think that any of them follow this blog so I don’t have to worry that they will see the pictures in advance. They might not be particularly interested in botanical art, but hopefully I will be able to change their minds with the pictures. I’m just hoping that I haven’t bit off more than I can chew.  It is going slower than I wanted, but I still want the pictures to be done properly.

Whilst painting the pineapple, I had my camera on and hopefully in due course I will be able to post a video or two showing my technique. But that will definitely not be just yet.

In the meantime – the pineapple. I hope you approve.

1.Pineapple 2015 +sig crop

Last two ‘pineapple in progress’ pictures.

This is a very quick blog  – I hope.

The customer has seen the finished pineapple picture and is pleased with the results. Whew! It still has to be framed, but the recipient will not be getting it for a few more months. However, I have been given permission to release it.

Today I will just show the two remaing ‘in progress’ pictures and in the next few days I will post the final picture. I’m not sure which day as I have set aside the next two for concentrated painting – hopefully.

I and my set of 231 from the Queen Elisabeth School of Nursing, Birmingham, will be celebrating our 50th reunion in Bosham in May. As I am organising it, I thought I might do a series of small originals as presents for those coming.  By actually saying this, I suppose it will be documenting my intention. So watch this space and keep your fingers crossed that I can do 30 in that time. I am a terrible perfectionist and take a long time over each picture, so I will have to make a schedule, keep the pictures very small and keep to both intentions.