Foraging plants in the norwegian mountains – Judges Feedback

Beside my RHS exhibit the night of the preview.

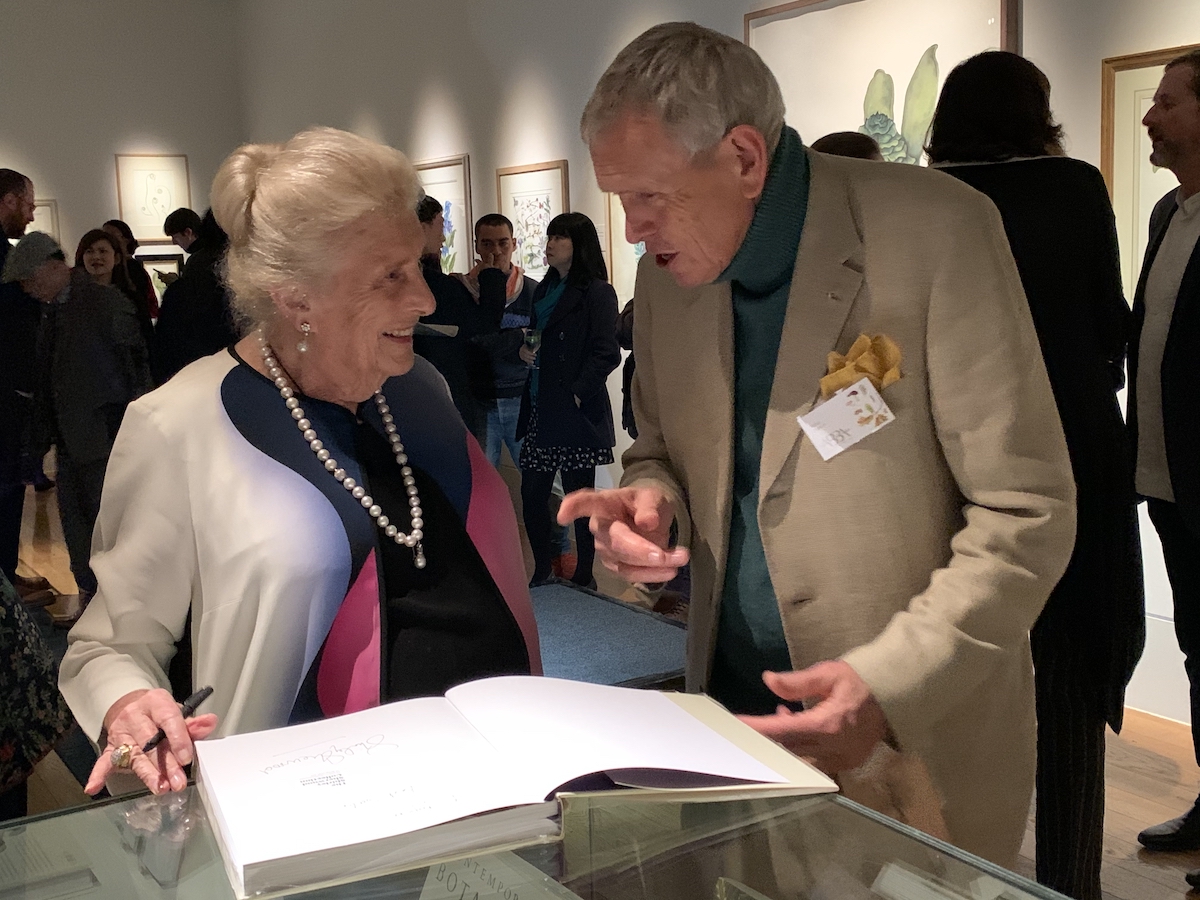
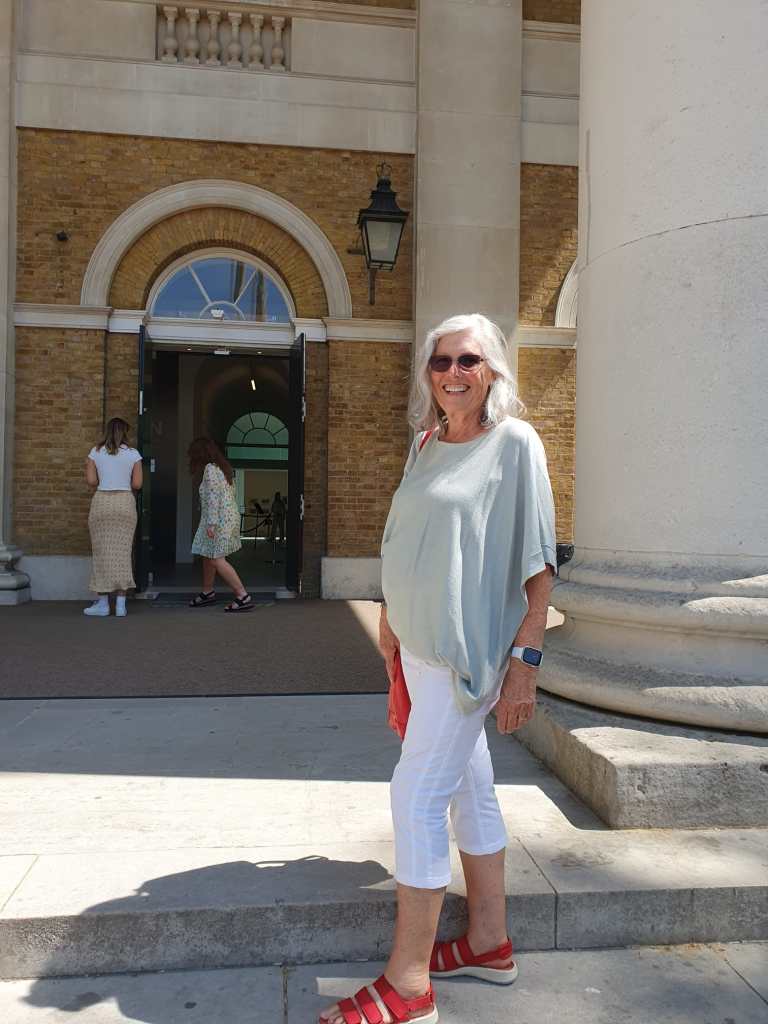
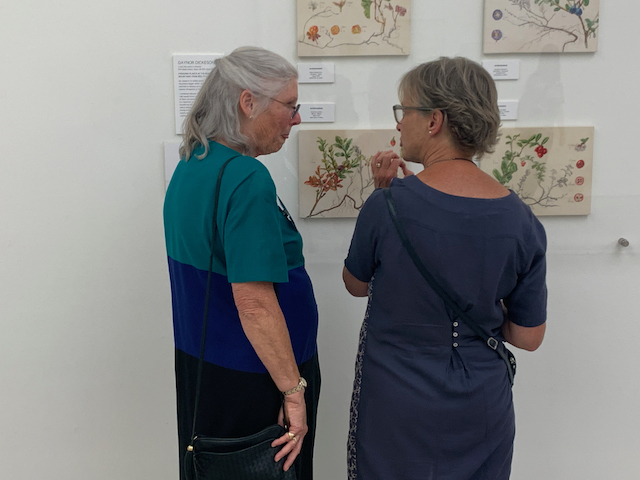
When the above picture was taken I had absorbed the judges feedback from a few hours earlier.

I had travelled from Norway the night before the exhibition and as soon as the plane landed I was able to access my emails. One of them was from the RHS telling me the results of the judging – a Silver Gilt award.

Before being invited to exhibit with the RHS one has to have ones work assessed by a panel of judges. The work, several pictures, needs to be of a consistent silver medal level.

If one is awarded a medal at the exhibition (this is not guaranteed), it is one of four in this order of merit:

  • Gold
  • Silver Gilt
  • Silver
  • Bronze

I, like everyone before me, hoped that my work was worthy of a Gold medal. It was not to be this time.

But having not got a Gold I can happily comment that this prestigious exhibition is international and the best artists from around the globe take part hoping to win this coveted award.

Arriving at the Saatchi Gallery on the morning of the preview.

I don’t have photos from the morning or afternoon sessions at the Saatchi gallery, but I was kindly and quickly nabbed as I arrived before lunch by someone who had taken the time to study my exhibit and wanted to understand my award. I was glad of this as it helped prepare me for my feedback due in the afternoon as the assumptions were correct.

Well what about the feedback?

Luckily I was well prepared.

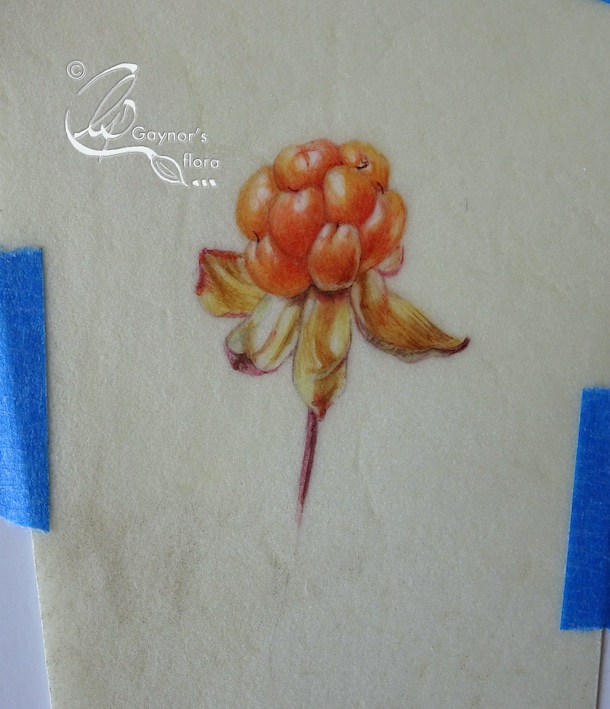
I was extremely lucky as I was afraid that the judge(s) might not know my subjects. This was not the case as the judge given the task of my feedback had studied one of the species and had ‘gorged’ on most of the others! Apparently, my paintings were so convincing as to want to pick and eat them!

Therefore, it wasn’t the technical skills or quality of painting that was an issue.

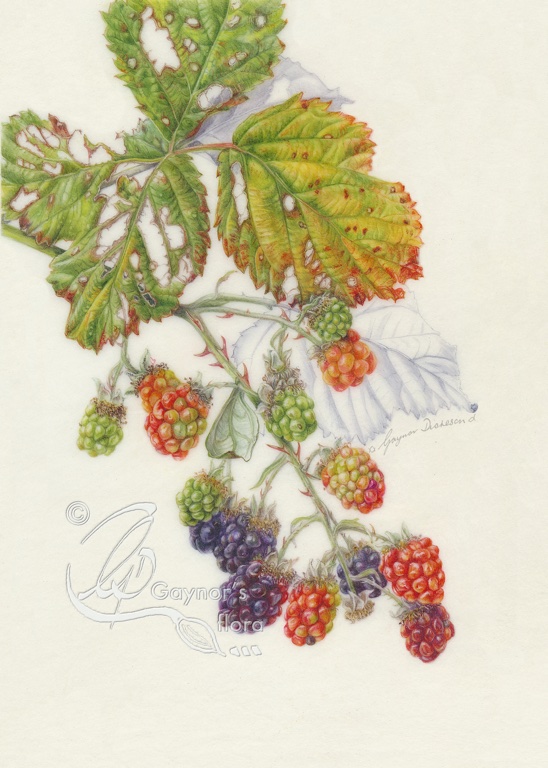
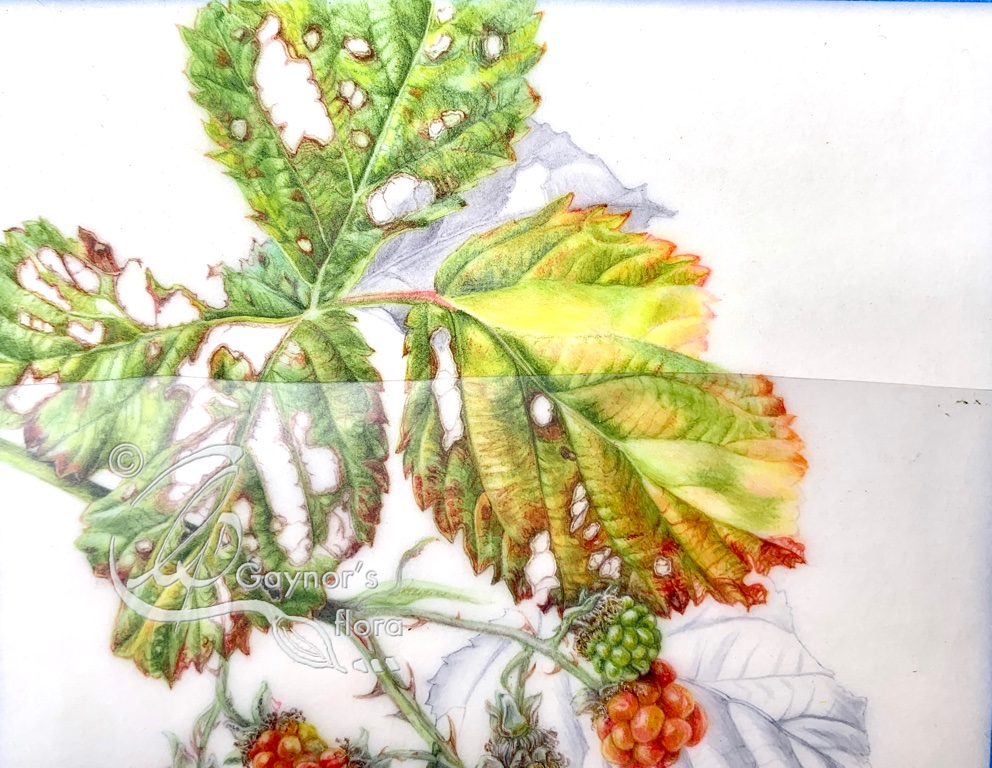
Botanically, I was told that there were no holes in this area and they liked my use of graphite.

Young bilberry leaf

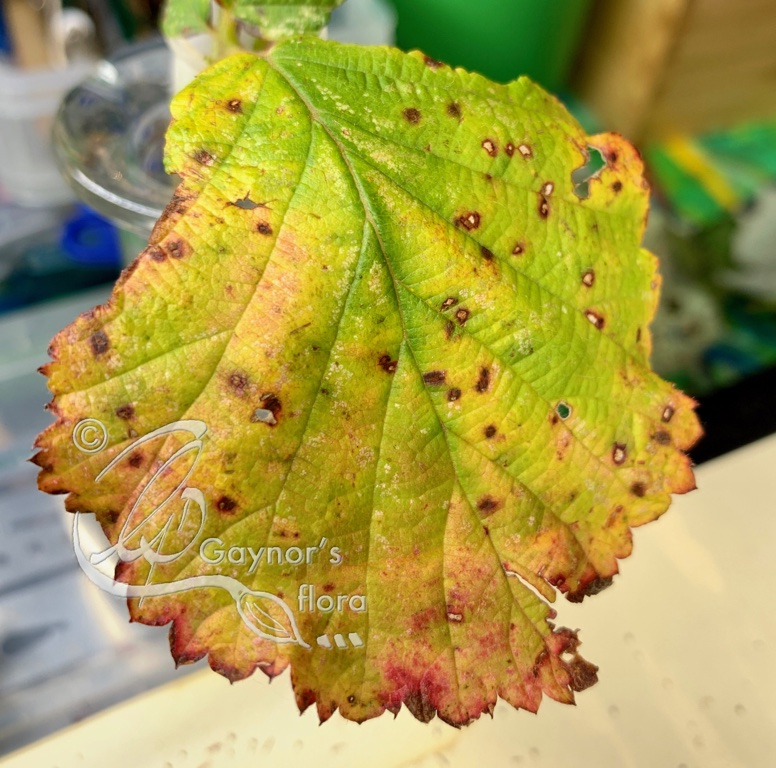
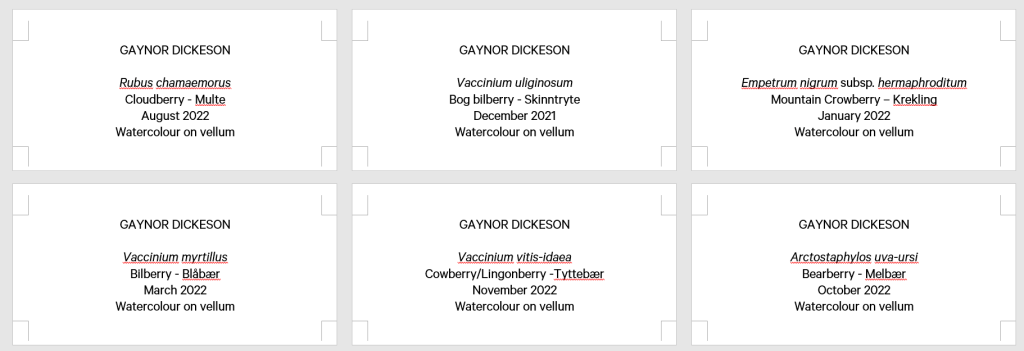
One of the judges had queried the nature of my Bilberry leaves as they thought them a little ‘wavy’. I commented that particularly young leaves are quite thin and often the edges were of a rather wavy nature.

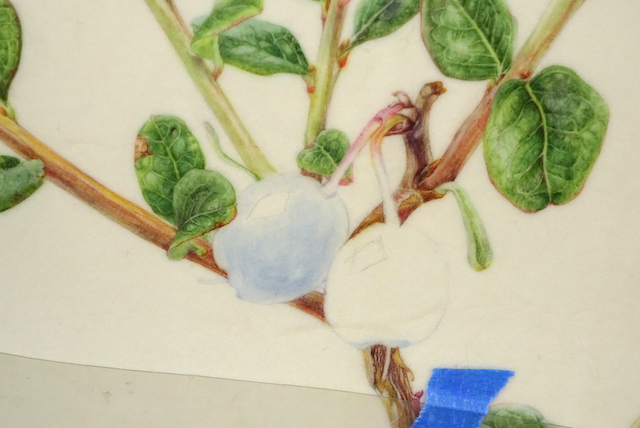
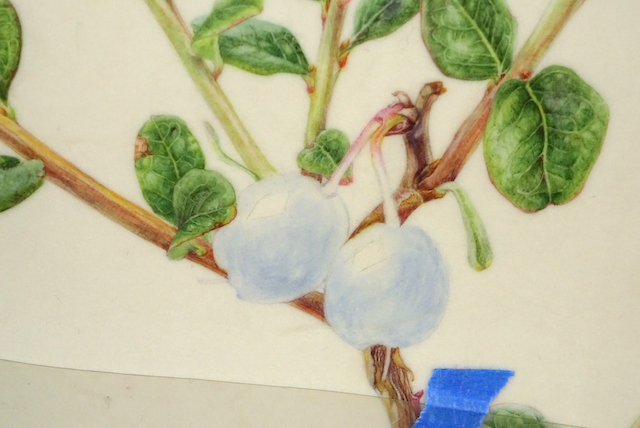
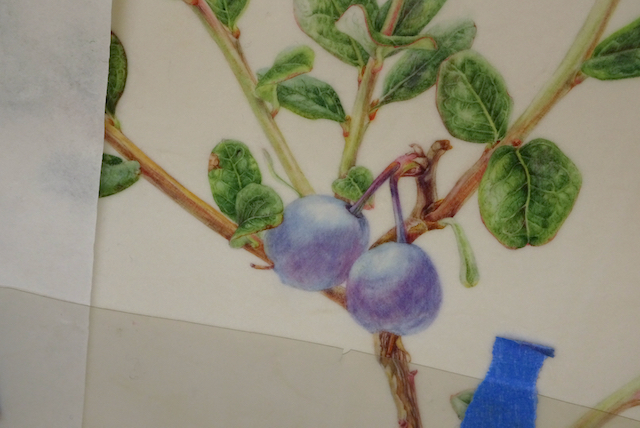
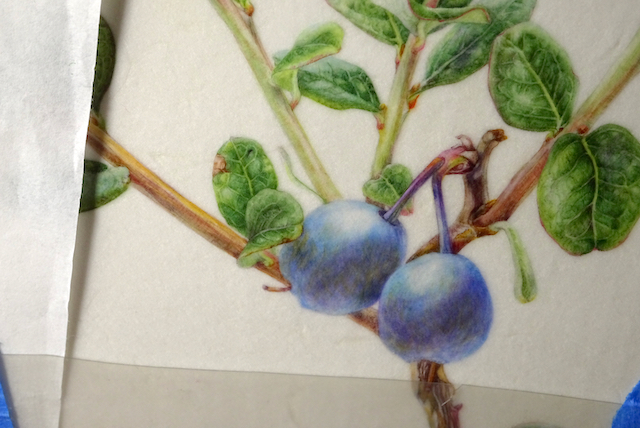
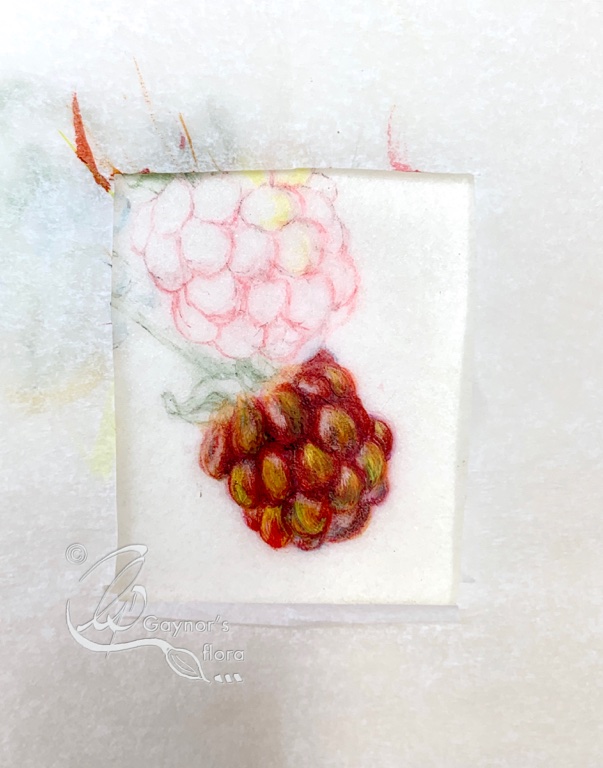
Another query had been why I had chosen to paint on vellum rather than paper. I was readily able to say that the colours of the tiny fruit in the mountains are so intense that the way colours are reflected off vellum truly justifies that choice of support.

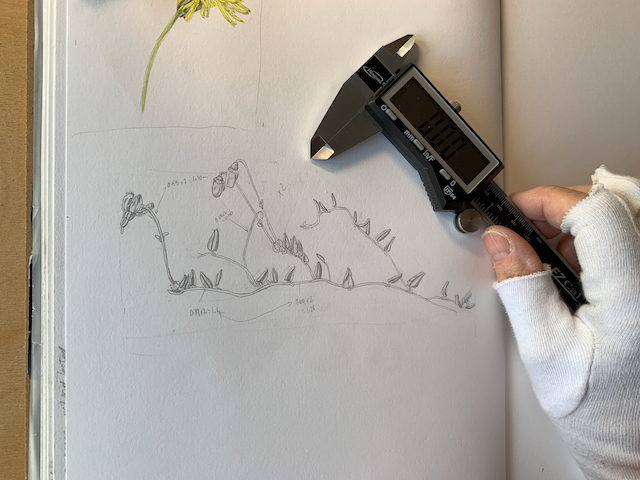
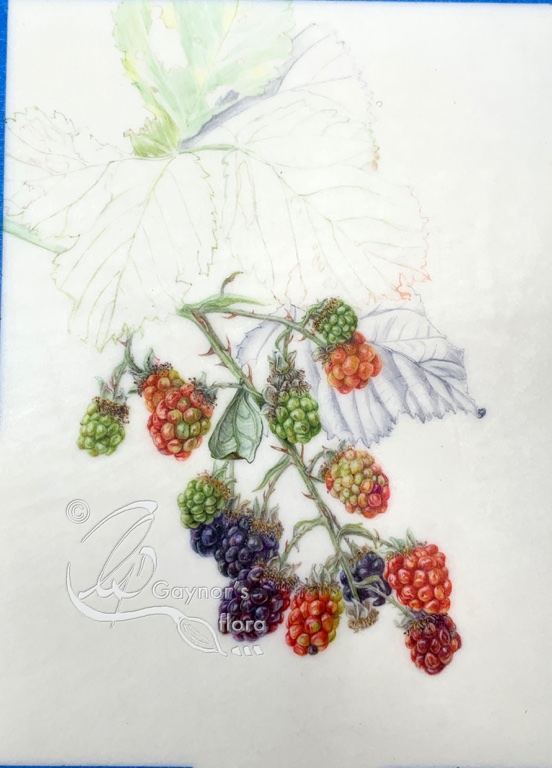
However, it seems that the issues the judges had with my pictures were my scale bars – again. It was my scale bars that were the issue in my last exhibit in 2014. But this time it was slightly different. Apparently, it was felt I had too many of them and that they had a tendency to dominate the picture making them intrusive.

I was told that the ‘judges decision was not unanimous and that there was gold in there’.

The judge who gave me the feedback felt that with the present exhibit format I was rather ‘hamstrung’. To explain that a little better, this was only in the way I had planned by exhibit without knowledge of the labelling restrictions now in place. I don’t know if I had missed some information sent out previously from the RHS, but as my exhibit took six years to prepare, plan and paint, things have changed as one would expect.

The way an exhibit is hung including the information given about each picture is the ultimate responsibility of the artist. This includes scientific names and common names used and their spelling. Previously, labelling included information about the species referring to parts on the picture. i.e. dissections were described in the legend and there might be additional information of interest. As such I wouldn’t have needed so many scale bars on each picture.

But now there was one overall description of the exhibit with the limitation of 100 words, plus an individual label giving the plant name.

Cloudberry in watercolour on vellum
Rubus chamaemorus – Cloudberry

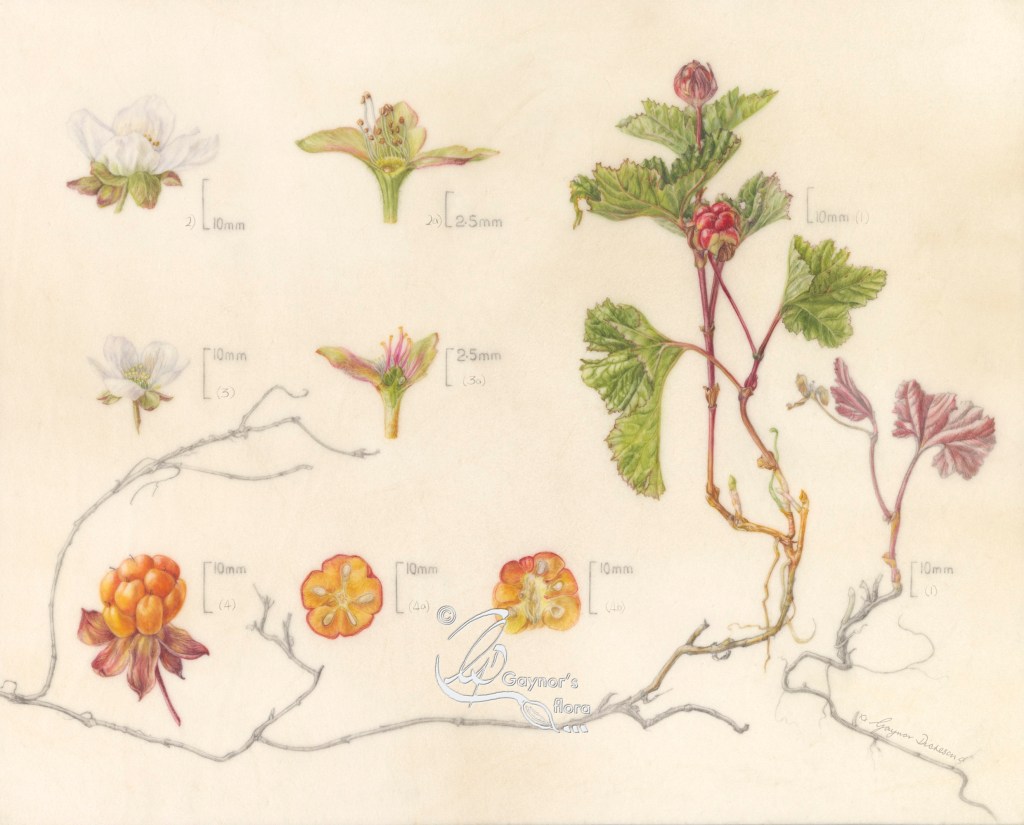
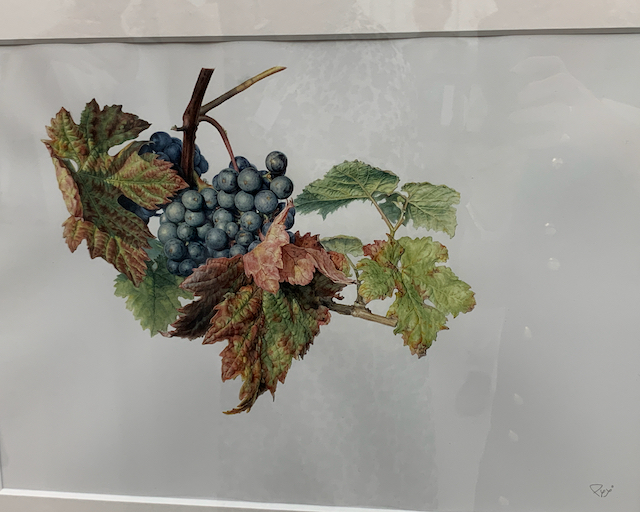
If one is looking at scale bars as a negative, this picture was probably the worst one!! I had three different sizes on the picture; the actual size of the plant to the right, the berry, dissection of the berry and whole flowers were the same enlargement and the dissections of the male and female flowers were enlarged further. Unless this distinction is made, no-one would actually understand that they were different sizes.

As it was, there was nowhere to inform that this fantastic species had separate male and female plants, therefore it also had separate male and female flowers! Furthermore, I was unable to show that the plant grew well in boggy areas.

The name of my exhibit included the phrase ‘ from bog to sand’. There was no indication in the exhibit that the six species grew in either sand or boggy areas and there was no room made to do so either.

Although my scale bars got in the way of the judging process, I was told that each of the pictures were valuable pieces of documentation.

How do I feel about this experience?

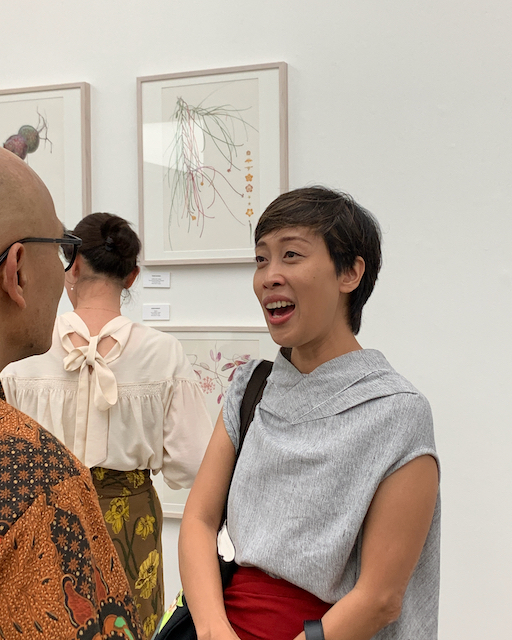
I have to say that overall it was fantastic. It wasn’t the same as previously where there was a special relationship between the exhibiting artists who put up their own exhibits – keeping their fingers and toes crossed that nothing would fall down. But it was different. We still developed good relationships as we were all in the same boat and just as unsure about ourselves and our work as we would ever be.

Thinking only of the exhibition and the run up to it, it seemed so well planned and disciplined. There was proper project management and information from the artists was needed in a timely fashion. We weren’t left in the dark about anything. What the RHS and the Saatchi Gallery wanted from us was clearly explained and they did their best to give us what we needed within the boundaries they had set. As an example, except for my pictures, all were on watercolour paper and needed to be framed with a mount. Right from the beginning I had asked for mine to be mounted behind perspex so that the whole vellum mounted block was visible. They did an absolutely beautiful job of this and for me this aspect of the exhibit was perfect.

The feedback from the judges was carried out in a sympathetic way. We were seated in front of our exhibit during this process and as far as I am aware no-one else was in the same gallery at the same time.

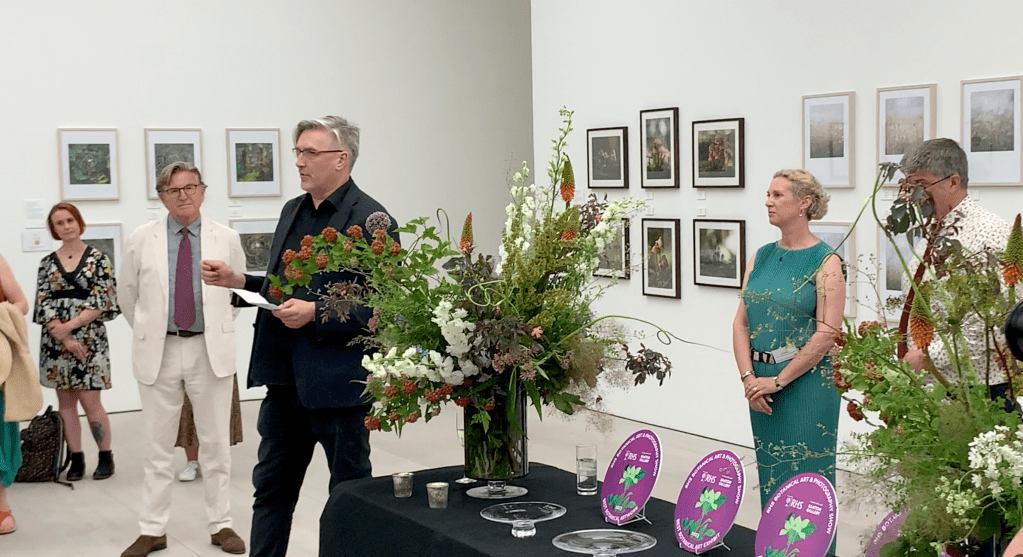
The preview was also done very well with speeches and the delivery of special awards.

Will I do this again?

Absolutely! But although I love tiny plants and dissections to discover the hidden life of the plant, I might actually keep it a little simpler next time!

If you have seen the exhibition, do let me know what you think of it. And, If you have any queries about my previous blogs on the series of paintings or about my experience, also get in touch. I look forward to hearing from you.

Foraging plants in the norwegian mountains – 18. Bog bilberry Pt.2

The lake about 100metres above the rented cottage.

I just can’t resist showing you how beautiful Norway is, with loads of clean water and little pollution. I hope that this will always be the case even though we feel global warming making its presence known here.

Planning The Vaccinium uliginosum artwork

The overall blue-ey nature of many bog bilberry plants

Obviously my knowledge of the Bog bilberry was one good reason to include it in this series of paintings on vellum, but its similarity to another plant in the series was another good reason. 

In the previous blog of the series, no. 17, I showed a picture of this species in a typical habitat with Bilberry, Mountain Crowberry and Cloudberry, one can see how different the Bilberry and Bog Bilberry is – at least in the autumn.

The picture here taken in August shows the overall blue-ey nature of the species when a lot of plants are together. By this time the red edge to the leaves has all but disappeared except for on new growth.

I started the sketch page in July 2017 although I had done the odd sketch before this. As with my other species I collected as much information as I could.

Researching the plant before actually drawing is important. I was able to get hold of a series of books called Norges Flora by Knut Fægri. The books are quite old but the description of habitat, scientific information and names still holds true. In fact these books gave me more information than I found anywhere else – unless I went into scholarly works!

The information in these books also told me what to look for – so much so that I really had to concentrate on the aim of the series rather than delving deeper. I have a tendency to want to do this and I am frequently at risk of doing too much: My vellum blocks would definitely not have been large enough. I just wish I had been able to own the books, but they were a loan from the library in Eggedal, a village on the way up to the cottage.

Once I felt I had enough sketches to work from I arranged the most important ones into a composition I was happy with. To the left is the Bog blueberry tracing on the Lightbox with the samples I had already done.

By the time I got to the artwork on vellum, I needed branches and fruit to paint from. Luckily enough we found an area about an hour from where we now live, therefore it wasn’t too bad to get there and back if I needed anything. But best of all, it was also a very good area for finding plenty of Lingonberries; Christmas dinner was now sorted!

The final painting on vellum was started  in September 2021 and except for the scalebars, was finished in December 2021.

Although I am attaching a slideshow of the final work process, I know that many have issues with the bloom on fruit. So here a few photos so that you can have time to study my process if you want to.

The native range of this species is Subarctic & Temp. Northern Hemisphere including both Great Britain and Norway. It is a subshrub or shrub and grows primarily in the subalpine or subarctic biome. 

Kew – Plants of the World Online o

Bog bilberry muffins Recipe

Makes 12

2 medium eggs
150 ml sugar
250 ml plain flour
1 tsp baking powder
2 tsp vanilla sugar
1 tsp cardamom seeds (from about 20 pods), ground
150 ml sour cream or plain yogurt
50 grams butter, melted & cooled
200-300 ml bog bilberries (or bilberries or blueberries)

Whisk eggs with sugar until pale and frothy.
Mix the dry ingredients. Add to the egg mixture together with sour cream and melted butter. Fold in the Bilberries.
Fill 12 hole muffin tray and bake at 225 C for 13-15 minutes, until muffins have risen and turned golden brown.

The next blog post about the Mountain crowberry will be published on 21st May 2023.

Foraging plants in the norwegian mountains – 16. Small cranberry Pt.2

The marshy area where the small cranberry was found.

Planning the artwork

Digital callipers shown in an earlier blog. I use gloves so that fat from my hand is not transferred to the vellum, making it more difficult for pigment to adhere to the surface.

I began sketching the Vaccinium oxycoccus subsp. microcarpum (Small cranberry) in August 2018. The measurements of the tiny details were done using my trusty and accurate digital callipers.

Everything about the plant is tiny – except for the fruit, which is about the same size as a bilberry 5-8 mm.

When I first saw the plant and fruit meandering through the top of the moss, I couldn’t believe that such a slender plant could actually bear the weight of its fruit. As it happens, it doesn’t as everywhere I looked the fruit was either lying on top of the moss or supported by other structures in the marsh. The stems are so tender they are smaller than a blade of grass.

As with each of the other pictures I chose which sketches I would utilise from my sketchbook and arranged them with the help of the computer. I made continual adjustments to all of the plans so that visually they would appear as one exhibit. 

Can you see some of the parts sketched in the final artwork?

Digital plan of the composition. It is nearly the same as the final piece of work.

Each picture in the series was to hang ranged according to habitat from boggy and wet to sandy and dry.

The small cranberry was intended to start off the boggy end. But as the series has taken so long in the making, the criteria for exhibition has changed and I am allowed no more than six pictures.

Unfortunately, although completed, this picture will not be in the exhibit at the Saatchi gallery in June this year, but is still part of this series and will be treated as such in these blogs. I intend to show you all seven of the completed pictures after the judging process.

As with most of the pictures I did small trials on unmounted vellum to make sure I was choosing the right colours.

If you have read all the blogs about this series so far, you will have seen the finished trial piece in section 7, the last part of the history of the project.

The next photo is of that trial piece being worked on. I painted it twice natural size, the same as on the final artwork; you can see the flower sprig used as my model, lying on the vellum. Perhaps now you will have a better understanding of how tiny the species is.

Trial piece on vellum – in progress.

The colours I used: 

  • Quin Magenta PV122
  • Quin red PR209
  • Perylene violet PV29
  • Quin Gold PO49 (I don’t think single pigment can still be obtained)
  • Winsor Blue Green PB15.
  • Lemon Yellow PY175

Most of the trial pieces were painted at the cottage we rented, where I could easily source my subjects. I took over the dining table, with windows and light coming from the left. The family had to accept eating meals either outside or from a low coffee table. I was happy though!

My ‘studio table’ in the mountain cottage.

One of the biggest challenges with this plant was the root system. I remember a comment a judge once made about a botanical art piece; where the roots were likened to something having been put under the tap!

The Cranberry roots lie in very boggy wet areas and the hair-like system seems to fall away from the main stem lying along the upper layer of moss. The hair-like roots do plunge vertically down giving the appearance of having been under a tap! The Cloudberry coming from a similar environment and often intertwined, is not like this.

During the annual stay at the cottage in the mountains, in addition to my sketchbook and painting materials I had also cut a piece of Perspex to the exact size of my vellum block. I used this to try out samples of my subject to see how they would flow naturally across the picture.

Here you see a thread-like piece of small cranberry plant together with a couple of line drawings from my sketchbook; one drawing is the enlarged section in the trial piece and the other is actual size.

Compare this both with the compositional plan above and the final artwork. The more ways one can look at composition whilst planning a picture, the better will be the result.

I started sketching the small cranberry in August 2018, started work on the final artwork July 2021 and except for scalebars, finished in January 2022. 

The native range of this species is Subarctic to Temp. Northern Hemisphere. It is a subshrub and grows primarily in the temperate biome. This includes Great Britain and Norway.

Kew – Plants of the World Online

Fruit of the Forest liqueur

From Randi and Arne Christian Halseth, Skoppum (thank you)

  • 500 ml Bilberry
  • 50 ml Bog bilberry
  • 150 ml Mountain Crowberry
  • 100 ml Lignonberry
  • 700ml 60% spirit
  • 500 ml sugar.
  1. Put well-ripened berries into a suitable glass and sprinkle with sugar. The berries don’t need to be meticulously cleaned of leaves and tiny stalks. 
  2. Top up with the alcohol. Shake well then refrigerate. 
  3. Turn the jars as often as possible for 4 – 6 weeks.
  4. Strain and pour into bottles. 
  5. Age for a few weeks.
  6. Enjoy

I will start the detail about the Bog bilberry plant in my next blog 14 May 2023

Foraging plants in the norwegian mountains – 12. My working practice

Bearded Iris in graphite
Accidents happen

In my last blog I showed you how careful I generally am to cover my artwork as I go along. But in this case I had finished the piece and had it propped up by my computer to scan and print it.

Unfortunately I ran out of pigment in the printer and needed to refill. Once this was done, I sat at the computer to check everything on the screen, looked up and saw this magenta splash across the artwork. I was shocked. How many hours had I used to no avail?

Be careful to keep artwork safe!

In my previous blog I wrote in general terms about the materials I use, including colour. My sketchbook contains notes of the colours used in the sketches, but these are only a guide for the final artwork.

The sketched colours are on white paper and the final artwork is on a warm vellum which can affect the overlaid transparent paint. If possible I try to match up the colours I used in the sketches if I don’t have enough live material to work from. For example, the leaves often change colour over a growing season and if I’m unlucky I might be painting young leaves in the autumn. This happened with the Bilberry leaves.

I try to limit the number of pigments I use in a picture but still have favourites that appear in most paintings. 

Watercolours used to paint the Small cranberry picture.

As an example, I used these colours in the small cranberry picture:

  • Quinacridone Magenta PV122
  • Quinacridone red PR209
  • Perylene violet PV29
  • Quinacridone Gold PO49 (I don’t think single pigment can still be obtained)
  • Winsor Blue Green PB15.

The last three are a must for me, but I might also use a brighter yellow or warmer blue. On this occasion I added a lemon yellow to lift the green in the leaves.

Introduction of graphite

Getting graphite on vellum is normally considered a negative. Graphite does not seem to work in the same way on vellum as it does on paper because of course it is slightly greasy and tends to slide around on the surface. 

I wanted sections of graphite in my pictures to try and give some relief to the colour. The compositions are quite small with a lot of detail. To separate details from each other I wanted to allow some of the picture to fall back and behind sections of colour to create focus.  I therefore decided that elements conveying habit would be either in graphite, or in graphite with a slight colour wash. But how was I going to get the graphite to go on reasonably evenly and to sit? 

I checked out how other botanical artists had handled using graphite on vellum, then tried out various ways of developing a technique on scraps of vellum.

Bilberry trials on vellum with colour and graphite

Luckily, as with graphite on paper, the use of water on top helps it to adhere to the surface. I also learnt that using a little mucky pigment/graphite water and allowing it to dry would also help to control use of the graphite on top. But, some of my details were much too tiny to make full use of this technique.

The way forward was to use a combination of graphite pencil for the finest detail and soluble-graphite. I generally used a graphite pencil first – possibly a 2H, then with a very small brush I either went over it with pure water or used the water mixable graphite. I found that the graphite worked much better where I had used a light watercolour wash first. 

Process for each picture

Once each composition was complete and transferred to the vellum mounted block, I started with the watercolour sections.

Except for the Cloudberry, the main branch which catches the eye, was enlarged to twice its normal size. I normally started with this so that I could determine how much other elements of the picture needed to come forward or fall back. After this I completed the flower and fruit sections.

Once the watercolour-only sections were complete, I worked on the graphite sections. As mentioned before, the use of graphite means that these sections fall a little into the background and give relief to the eye of the beholder. But the detail in those sections needs to be just as clear as for the remainder of the picture. Each part of the picture needs to give new information otherwise there is no reason to include it. In this case, the graphite sections were done life-size.

Last of all came the scale-bars. To work out the best placements for these, I scanned each picture onto my computer and digitally placed and sized the scale-bars, comparing them from picture to picture. This happened in January 2023 when preparing for professional scanning of the artwork.

Actually drawing the scalebars onto the final artwork caused most headaches. Applying the graphite in even lines on the vellum was more difficult than doing the line drawings, but I got there!

Now I will write about each species individually – starting with the next blog 30 April 2023.

Life-size small cranberry flower and stems. Water-soluble graphite being applied with Rafael 8408 size 1 brush over faint graphite pencil lines.

Foraging plants in the norwegian mountains – 3. History of the project

Rolls of hand-prepared calfskin vellum.

planning my choice of media

Deciding which plants to study and paint was only one of many decisions I needed to make. I also had to decide what material to paint on and with what!

I chose calfskin vellum.

I helped to scrape the skins clean of fur.

In November 2016 I met some friends at William Cowley’s and we were shown round the family business in Newport Pagnell. Cowley’s have produced parchment and vellum there since 1870. It is a smelly business, but they were able to assuage some of our concerns about using a material from animals. Apparently, no animal is killed to obtain the skin – it is a by-product from animals used for our food and milk.

The cattle, goat and sheep skins used for parchment are all obtained from farms where livestock has been reared for wool, milk or meat. No animals are bred to make parchment. 

William Cowley website

Cowley’s staff select the best skins available and transform them into beautiful pieces of parchment and vellum.

The transforming process of changing the skin into vellum and parchment used for artwork and legal documents, is hand-done and takes a long time. Cowley’s vellum is ‘worth its weight in gold’. I bought some fairly well matched skins so that I could get seven pieces from them each measuring 25 x 31 cm when mounted; Cowley’s also did the mounting for me. 

Vellum is a very special substrate and there are examples that go back hundreds of years. The Magna Carta was written on vellum 800 years ago. Today we have DNA testing and as vellum is skin, this can be a fantastic safeguard.

There are not many limitations as to what can be used on vellum with colour pigments in the form of watercolour paint, ink and gold foil well known. But graphite and waxy pencil can be a hindrance and not normally recommended because of their fatty nature and difficulty with adherence to the vellum. Whatever is used, lies on the surface and is not absorbed into the substrate as with paper. That is why the colours can appear more vibrant.

In botanical art it is customary to use watercolour on vellum, but I also wanted to introduce graphite which I knew could cause some difficulties. This was something else I needed to research.

Luckily, when I was teaching at the American Society of Botanical Artists (ASBA) conference in 2019, I watched two well known artists painting on vellum with watercolour and graphite graphite. I absorbed all the tips that they were able to give, and this helped enormously when adding the graphite sections to my pictures.

Composition contents

Golden section overlaid Vaccinium corymbosum leaves artwork. Note compositional use of ‘third’ lines and placement of main focal point.

Composition is a very difficult subject, and it is something many of my students struggle with. There are loads of ‘rules’, but the best design is by those who know the ‘rules’ and know how to break them; look at Rory McEwen’s work as an example.  When saying this, it sounds as though I have overcome the issue of composition – far from it. For every picture I paint, the result is my subjective view. For the person looking at the picture, their subjective view is likely to be slightly different. 

However, in modern times there is much research into the placement of the main focal point and some equipment can ‘see’ what the brain notices first when accessing a picture or view. As a baseline, the Golden section is not far out. Therefore, defining the placement of the focal point in a picture is important.

I have spoken to quite a few people about what they would like to see in my series of pictures. I had decided on the measurement of the mounted vellum piece, 31 x 25 cm, therefore I had limited space. 

I wanted to paint several elements of the plants, repeated across the series, demonstrating details of the plants not normally appreciated. I hoped that people taking their normal flora for granted would learn about these plants from my finished artwork.

As I was looking at edible fruits my main point of interest was the fruit. But, without overloading the composition I wanted to give information about the flower, its habit and habitat. I still hadn’t decided exactly which plants I would include, but I knew that they would normally live several meters over sea level, preferably in the mountains and probably have some sort of association with each other. 

Read on in the next blog due to be published 30 March 2023

An update: life and botanical art

Empetrum nigrum & tracing to vellum

I have been working on four of my six or seven pictures to go to an RHS exhibition in London. This has been a very long-going saga as the process has been interrupted several times since I decided to do it.

Mountain area – home to the plant series.

After the last time I took part in the RHS exhibition in 2014 I decided that I was going to do a series of plants called ‘Foraging in the Norwegian Mountains’. Anyone who has read my blog, which more recently has been rather sporadic, will have heard me talk about the series on numerous occasions.

Whilst living on the South coast of England I travelled to Norway for two weeks each year to sketch the plants I had chosen. This was the only time I had them accessible although I had some similar plants in my garden in Bosham. I have to say that they didn’t flourish there – too warm.

But then other things got in the way;

Invitation to the England part of the Botanical Art Worldwide exhibition

2016-2018, I started up the Association of British Botanical Artists (ABBA) and managed the England entry to the Worldwide Exhibition in 2018.

2018. As founder and president, changed ABBA to a membership organisation

Support from Dr Shirley Sherwood who became the ABBA Patron
ABBA logo from 2019
ABBA logo 2016-2018

2019. By the middle of this year ABBA was well on its way as a recognised botanical art organisation and Elaine Allison took over managing the ABBA project completely. I thought, at last I would have time to paint. I had done some, but not as much as I would have liked and working on the Norwegian plants project had been limited to two weeks each year.

December 2019, Covid hit us all.

Before – Bosham in May – South coast England

Mid 2020. My daughter, living in Norway, expressed her anxiety for us if anything happened. What she actually said was that we were too old to live in England by ourselves and that it was about time we moved back to Norway. Robin, who had never lived in Norway, promised to learn the language and his son (who had just moved back to England) gave his blessing. The rest of 2020 became filled with house selling, packing, moving, home searching and buying – my daughter even coped with us living with her!!

After – Skoppum in May – Eastern Norway

Robin started to learn the language, but all the legal stuff in relation to officialdom and applying for residency in an EEC country, plus details in relation to house buying, fell to me. I managed to paint the Fly agaric – Amanita muscaria and a couple of sketches in my perpetual diary (painting cup half-full), plus continued to advise and mark assignments for my Botanical art online course students.

Long shadows at midday, a month after the sun turned.

January 2021 – we moved into our new home with a view of the Oslo fjord in the distance. The year was used to make the house into our home, although we had a lot to learn about what works here and what doesn’t. The garden is mostly rock, so planting is very much an ongoing trial as we battle with little earth and a temperatures that vary between -20˚C to +35˚C (warming climate). Botanical art is not as well thought of as in the UK, but once the lock-downs are over I already have quite a list of people wanting to do a botanical art workshop.

Icy walking is only safe with studs – but the kitten doesn’t care as long as there are laces!

Now I have to plan my botanical art work a little differently living in Norway. We have had snow since November last year but it hasn’t been quite as cold as last winter, although that can change. With recent thaws during the day and minus degrees at night, the snow turns to thick ice. This means I don’t have access to my plants during the winter so I had to change my working process.

‘Foraging in the Norwegian Mountains’ botanical art series on vellum.

NB; I won’t be showing you the finished compositions until they are shown at the RHS exhibition – probably 2023, but will show parts of them.

After all these time delays for the series, all I had was sketches and colour samples in my sketch book, plus some small studies on the vellum I would be using. I had heard the phrase ‘productive procrastination’ and thought I now knew what it meant!

Cloudberry – Multe- Rubus chamaemorus sample on vellum
Sketchbook drawing Crowberry – Krekling – Empetrum nigrum

I had worked out the composition of all of my pictures and how they would be hung as a group at the exhibition. Each picture will be on mounted vellum and shows the plants both enlarged in colour and actual size in graphite. Last summer I painted the colour part of four pictures so that I would have the actual plants and could match colour at the same time. I planned to do the graphite on those four paintings during this winter and so far have completed three of them – except for scale bars.

Graphite on vellum is not easy and depends upon the vellum, which, as a living material can change from one part to another. In some areas I have been able to use pencils, but in others a brush. My last two paintings have very tiny leaves and the last one, Empetrum nigrum which I will show part of here, has been a bit of headache!

Graphite drawing on vellum

With Empetrum nigrum the leaves actual size are about 2mm long and the unripe fruit is about 4mm. I have had to vary the hardness of the pencil used so that I get clean lines, rather than gritty ones. It doesn’t seem to matter if I use my most expensive pencils or not as it is the surface of the vellum that decides. Sometimes I use the pencil first, if too pale I paint a layer of water-soluble graphite on top, then finish off with another layer of pencil, finally lifting off loose graphite and ’fixing’ it with water. It certainly is not as straight forward as using graphite on paper.

This winter, only one more vellum picture to finish off with the graphite drawing. Spring is on its way, although the sun is still low on the horizon; plants will wake up after their winter rest; trips into the mountains to look forward to and planning for the colour part of the final three pictures.

The Shirley Sherwood Collection preview – and more

© Charles Francis

The above picture was taken last night by Charles Francis and the book was apparently meant to be a surprise Christmas present from Robin. Dr. Shirley Sherwood is in the process of signing her latest edition and I am told more was written, but I am not allowed to see this until Christmas Day.

Robin and I were invited to the preview of the latest exhibition at the Royal Botanic Gardens, Kew, in the Shirley Sherwood Gallery. Many people may know that this is the only purpose built botanical art gallery in the world. It introduces people to plants in a completely new way, encouraging people to look at and appreciate them with different eyes.

Dr Sherwood has over a 1000 botanical art pictures in her collection and as she said yesterday, this exhibition and the accompanying book is a retrospective of her collecting. She says that she had a huge problem in deciding which pictures should be included in the exhibition as of course she didn’t have room in the gallery to show them all.

It was a really lovely evening where we met artists from around the world. It was a really good time to catch up with old friends, make new acquaintances, but above all, study the artwork. There is some amazing work there which if possible you need to see with your own eyes. I know this isn’t possible for everyone and that is why the book is a good additional opportunity to see the pictures. Elaine Allison will be reviewing the book on the ABBA website in due course.

When we arrived at the gallery, we immediately saw Charles Francis and his daughter who were both there to represent Mally who had painted one of Dr Sherwood’s last acquisitions; Babbington’s Leek. It was so good to see them again as the last time I saw Mally and Charles was the day the picture was bought.


Now to the ‘more’ as promised above.

This weekend I will be taking part in the Bosham Christmas Craft Trail. We call it a craft trail because although we are all serious artists, the majority of those taking part are makers rather than fine artists. The only two fine artists on the trail are Tamsin Saunders and myself. Our styles are completely different ranging from my tight botanical art style, to her much looser more abstract style of painting. Tamsin is joining me at:
Saltings, Windmill Field, Bosham, West Sussex, PO 18 8LH.

Do come and join us and enjoy mince pies and mulled wine whilst you browse.

You will get to see my latest piece of work:

Three Blueberry Leaves painted on natural calfskin vellum.

The Blackberry on Vellum ‘take-outs’

The finished ‘Autumn Blackberry Branch

This blog is about all the mistakes I made whilst painting the Autumn Blackberry Branch on vellum. Above is the finished piece.

Since I started working on vellum I realised that there is a huge difference when working on the different types. This applies both to painting on the vellum and the ability to take things out.

From watching some artists who paint on vellum, they always seemed to use pumice to prepare the vellum. But each time I used this and however gently, I found it more difficult to paint on the surface afterwards and therefore to get a nice smooth result. Even when cleaning up after a mistake, I found it very difficult, but thought this was me!

Early in the year I did a workshop with Denise Walser-Kolar and the first thing she said was that vellum bought from Cowley’s in the UK, is so well prepared that it doesn’t need any preparation; i.e. no need to go over it with pumice.

The biggest difficulty is conveying grease from your hands if you handle it too much. But think about it; one doesn’t handle art paper either if one wants a good result, so why would one need to handle the vellum any more?

Just this little bit of advice has made all the difference to me. Not only do I try to avoid mistakes(!!), but if I do make one I am as gentle as possible with moving the offending pigment.

I will be painting on natural vellum when I do my RHS series and it is definitely more difficult to remove some pigments from this, than to remove from Kelmscott vellum. The blackberry is on Kelmscott vellum and I had absolutely no problems lifting any of the pigments from this. But I had to be very careful and not use more water than necessary. Even being careful, I could still ‘feel’ a slight difference when re-painting these areas.

I found that the mistakes I made were in relation to overdoing it or painting with too thick a layer because I wanted to darken something. In each instance, when I got to the stage I felt I had overdone, I took out the offending part with dampened cottonwool buds. I then painted the whole section again being very mindful of why I was doing so. All the time I said to myself, ‘gently does it’ and ‘the more thin layers, the better’.

These are the before and after sections. With some, you may think there is no or little difference, however a photo may not always show what I can see with the naked eye (and glasses!).

Hopefully this will be useful and an encouragement to those starting out on vellum.

Before

After


Before

After


Before (1st attempt)

After (Third attempt)


Right side of leaf before.

Right side of leaf with two upper sections removed and the first section re-done.

The offending sections are redone.

6th part of the Blackberry on vellum story.


Painting the leaves

I am told that often people hate painting leaves. But the leaves on the Blackberry are really exciting to paint.

The original set-up for this picture had green leaves, although partly eaten up by various bugs. As it has been a few weeks since I started this picture, I needed to find some replacement leaves, which I found from the same plant; they were really beautiful. This picture is one of the new leaflets showing the colouration I introduced into the leaf set I had already drawn. The other two leaflets remained predominantly green.

When painting on vellum, one of the things I was taught was to keep the first layers of colour as pure as possible. The reason for this is somehow obvious, although I often forget in my haste; it is easy to dull colours, but it is not easy to restore them to their original brilliance.

But it’s not just about colour; for best results the brush needs to be as dry as possible so that the pigment is laid finely with the very tip of the brush.

The technique for painting on vellum is similar to the purely dry technique (as opposed to wet-on-wet or dry-on-wet) used when painting watercolour on paper.  Even better, the paint is laid using a cross-hatch stroke in many layers when painting on vellum. This is a necessity if wanting to achieve a depth of colour (particularly dark colours) without getting a thick layer of paint that is visible when viewing the picture at different angles.

By the way, I use a brush with plenty of body to hold the pigment and an exceptionally good point; normally a Rafael 8408 size 4. But Rosemary brushes series 8 also work well, this time no smaller than a size 2 even for the finest detail.

Below you can see the steps I took when painting the leaves.

Next time, I intend to show you the mistakes and take-outs I made. Making mistakes is where one learns. Learning to deal with them is as important as realising you have made them. The ideal is of course not to make them in the first place; but that comes with time!

This slideshow requires JavaScript.

My next workshop in Bosham is ‘Hedgerow Colour’ 27-28 September. Get in touch via the contact form below quickly if you would like to join us. If you would like to follow my blogs, put your email address in the ‘Follow’ section on the right hand side of this page.

Go back

Your message has been sent

Warning
Warning
Warning
Warning

Warning.