Botanical art in graphite – workshop

Today was the second and final day of the botanical art workshop using graphite. It was a lovely small group of artists and I believe that we learnt a lot from each other. 

I think this aspect of a workshop is important, whereby we all learn something from each other – even the tutor. 

I may have mentioned this before, but personally, I don’t think I would have got so much enjoyment from teaching if I hadn’t learnt a lot from the students I was teaching. I always think that a question that one person asks, sets in motion a whole thought process which makes me think about how and why, so that I can answer appropriately. From this I can develop a process, simplifying as much as possible, and cutting out anything unnecessary on the way.

Example, why do I draw my subject onto sketch paper and then trace it via a lengthy process onto my art paper? Those of you who follow my blog (https://gaynorsflora.com/2015/03/19/tracing-to-art-paper-without-indentation/)will know that once I have actually drawn my design, I trace over it  once, then again on the reverse side before transferring it to my art paper – and without leaving indented lines in the paper. The whole process seems long and drawn out, when all I want to do is paint a good picture! But I know that my final picture will be no better than the amount of preparation I put into it.

So having thought all this through, what are the benefits?

  1. Freedom to change the design as many times as I want to before the tracing process.
  2. Less waste of paper.
  3. Potential for a better composition on my art paper as I can move the tracing around the paper before tracing it over ( that was a student comment today).
  4. Pristine art paper at the start of the painting – leading to a better result.
  5. The same tracing can be used several times without additional graphite.

I expect that you can add other benefits to the above.

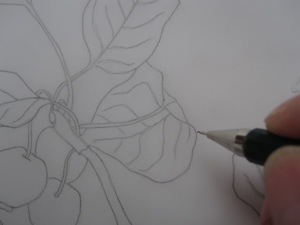
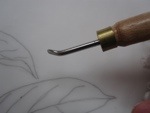
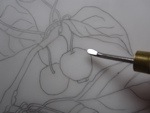
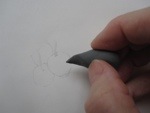
The gorse tracing that I made for my last blog has been used seven times since I did it, without adding more graphite to the tracing. I have just laid it on fresh paper whilst demonstrating the technique at this workshop, and rubbed gently over it with a decoupage tool as previously described.

I used the same technique when doing a new drawing during this workshop. But I used Bristol board and when I took away the removable tape I had used, it removed the surface of the paper. The same happened to one of the students. She was not fazed, and neither was I. We simply quickly repeated the process on the other side of the paper. Tip: don’t do that with Fabriano HP watercolour paper as it has a right and wrong side.

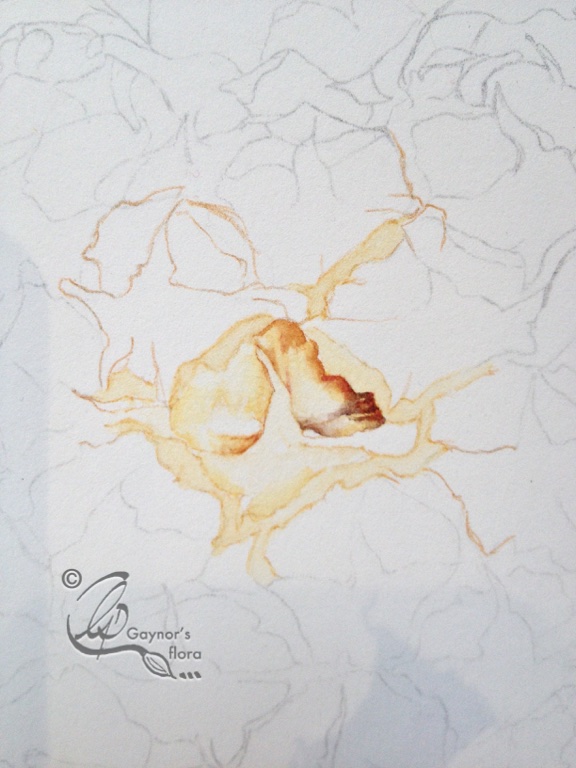
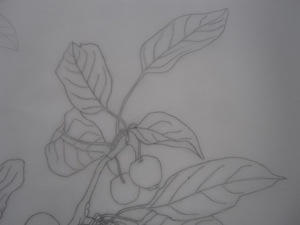
Rather than me wittering on, you will be more interested In the resulting work from the last two days. I have put a copyright on each of the pictures as they are posted on my blog, but the copyright is with each of the students.


Another Pineapple in watercolour

It is now several years since I painted my last pineapple and I have been asked to paint another one. I started the drawing before I went to Norway and today have got back to it having caught up (sort of) with other outstanding tasks that accumulated whilst I was away.

The trouble is, we had to eat the last pineapple before we went away! So what do I do? It was delicious by the way.

When you buy a pineapple, it has been cut and removed from the parent plant. This of course is obvious, but what is less understood is that it will not become riper after it has been cut. As far as I understand the pineapples are cut at their ripest. Some buyers prefer to buy them green and if the golden yellow colour is wanted they are sprayed about a week prior to harvest with a plant growth regulator. If you want to check this up read http://en.wikipedia.org/wiki/Pineapple.

The pineapples that I have bought are mainly from Costa Rica and I think are the cultivar “smooth cayenne”.

I normally take pictures of my subject first so that I have an idea of what it originally looked like, so that when it dies or rots too much, I can replace it with a fresher specimen. In this instance my original drawing and placing of segments will be different to any other pineapple I get. But, I can use segments in the new pineapple, making sure that they are in a similar position and lit in a similar way to the original specimen. Thus I can continue to paint from life – which for a botanical artist is far the best thing to do.

My initial work:

Initial pineapple drawing.

Note the tramlines in a Fibonacci spiral. I observe the lines, draw the crossing tramlines and at each intersection place a segment. Once a tracing has been made, I do a very rough shading on the original sketch to indicate the form of the fruit.

The tracing of the original drawing.

I traced over onto a Fabriano Classico HP 640gsm paper in a manner that I have previously described in one of my blogs. This leaves no indentations from the pencil and is easily removed before painting.

03.IMG_1985


I used a watercolour pencil to lightly outline my segments in an area of the pineapple I can manage initially. When I begin to paint, this colour will be absorbed into the painting avoiding lines. I don’t do too many at once in case I really need to change any of the segments in a later pineapple.


Tracing to art paper

I have done some art tutorials with ArtTutor.com and they are now live via my website. Look at the page on tutorials and follow the links to download the E-book showing you how to paint a Crab apple picture with coloured pencils. You can also link into one of the tutorials as a taster.

I have had some very positive feedback and essentially this blog is in response to one of these which asked how I transferred my image onto the final art paper.

An image can be transferred in so many ways depending upon how refined you need the transfer to be. The more you rub out on your art paper, the more you damage it’s surface no matter how careful you are. You can use tracing paper, a light-box, your window as a light box, or this way:

I compose a picture using various thumbnails. This leads to a general rough design which forms the basis of the final line drawing.

This is part of the line drawing of the picture I am in the process of doing now:

20130325-222407.jpg

I trace the line drawing onto tracing paper, using a 0.3 clutch pencil.

20130325-222552.jpg

I turn the tracing paper over and draw the line again on the reverse side, being very careful to trace accurately.

20130325-222744.jpg

I then place the traced image right side up, on my art paper ( normally Fabriano HP) and, using a Decoupage tool, I rub across the lines. This transfers the graphite from the back side of the tracing paper to the art paper.

20130325-223611.jpg

20130325-223624.jpg

The image left on the paper can then easily be lightened with a putty rubber, without leaving any indentations on the paper.

20130325-223914.jpg

20130325-223923.jpg

I hope this helps those who wonder how best to transfer an image without damaging the art paper or leaving any indentations to get in the way.