Capturing Nature: Birds and Botany in Winter

On a walk exactly four years after moving into our Norwegian home.

The above walk was with my children and husband. We went a little further south along the coast from where we live. It was on the edge of a beech wood, very cold and plenty of snow. However, the temperatures were not as low as the day we moved into our new home. On that day, it was minus 15 degrees Celsius!

I have had botanical art students from just as cold climates. They have asked what they should paint when there isn’t too much growing. For my course, I always suggested they might buy indoor plants to complete the course. Once they had finished the course, they could choose their favourite subjects.

A fair amount is still available in the countryside. This can be seen in the picture above, showing the edge of a Beech forest. My garden also contains rose-hips, beech, oak, Rowan, pine, hazel, all of which is accessible above the snow. It also has a lot of wild-life.

Bramling – Fringilla montifringilla – Bjørkefink in a Beech tree.
Single female Roe deer – probably first winter alone.

Many years ago, during my first 25 years in Norway, I focused on painting birds. At that time, I relied on photos taken with my SLR attached to my telescope. For additional detail I used skins from the museum. Since then, the equipment available to me has changed. It is more affordable now. I can get much better photographs from my trusty little camera than I did from my film reliant SLR.

Gradually we have moved the bird feeders nearer to the house. This allows me to get quite good photos. Feeding the birds in the garden also provides a plentiful supply of nuts and seeds generally. This attracts other animals during the winter when the supply of food is short. Deer are also welcome visitors and mop up after the birds. But we do have to try and protect our fruit trees a little!!

So what do I paint? I decided to combine my love of painting birds, with my love of botanical art?

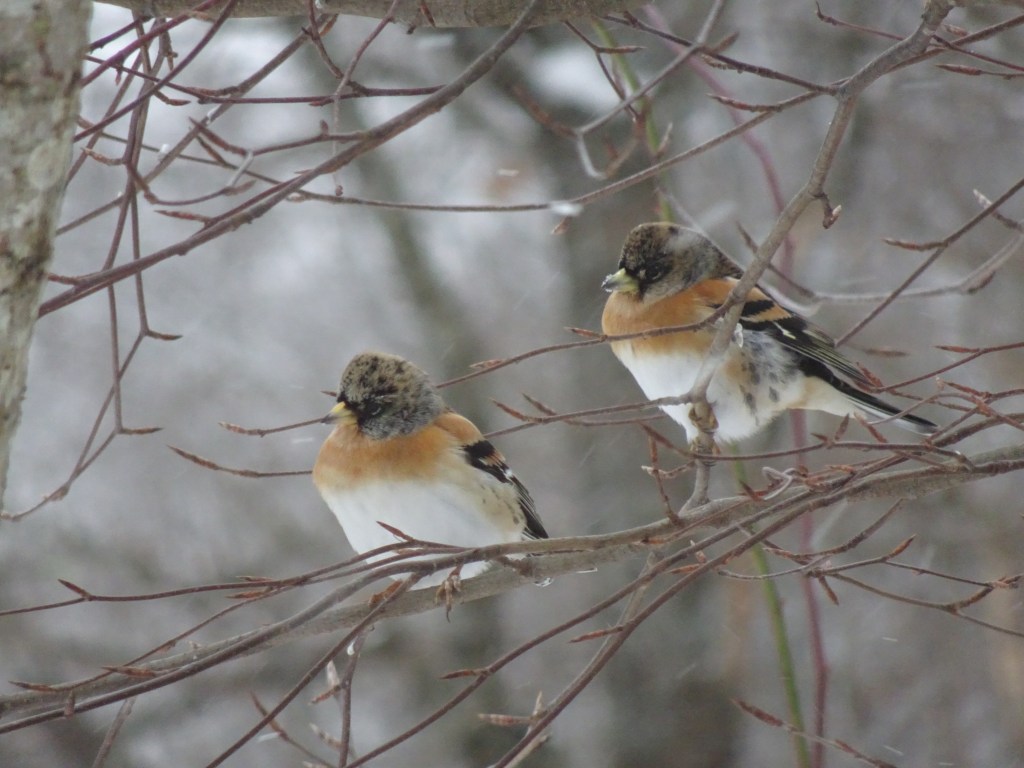
Many of the bird species move from the mountains to lower lands searching for food during the winter. This includes the Bramling, Yellowhammer, Siskin, Bullfinch and Hawfinch. At the beginning of the winter, their colours can be a little drabber. As spring approaches, they get new plumage. and become very colourful.

Now I spend quite a bit of time photographing these beautiful birds from the comfort of my own lounge. The two pictures above are good examples.

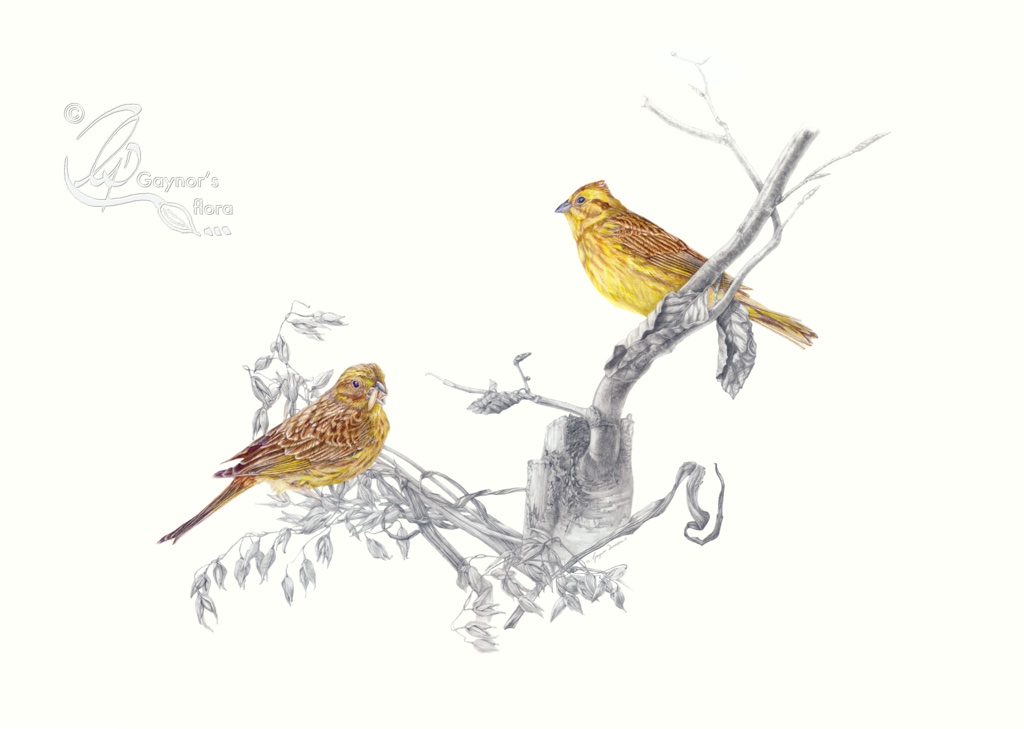
So where has this led me? It is traditional in Norway to put out sheafs of corn for the birds for Christmas. The Yellowhammers seems to be very interested in this food source and flock to the sheafs. This year, we have the corn hanging in a Beech tree, so I had both botanical subjects with the birds. Additionally, I always loved the use of graphite and didn’t start using colour in my artwork until my mid-twenties. So this picture is a combination of glowing colour for the birds and graphite for the botanical detail.

To confirm which is which in this Yellowhammer pair, the female is the more motley colour on the left. I do enjoy painting her more. The Male in striking yellow is on the right. He is very gentlemanly and making sure she is feeding un-molested. All is painted actual size. The finished painting is 52 x 37 cm. Enjoy!

Why a black background?

I had the following query from  Antonina Shesteryakova, following my blog and posting of the Pineapple step-by-step; Why did you use black background? Why it isn’t white as usually? Thanks, Gaynor! I liked your “step by step” very much!

That is a very interesting point and I am really glad that Antonina asked me this question. I have thought several times to write a blog on it as it comes up in every workshop I do.

This is the picture Antonina commented on.

©Pineapple01.DSC00726


But you might find this of interest too. It is a picture of Gorse. Quite a complicated plant, but with the dark background you can also see the hairs on the Sepals that protect the flower in bud.

DSCN0150


So why do I take my preliminary photographs with a black background? Note, I don’t use these pictures to paint from but I do use them as reference. I always take a lot of photos to start with as I know I take a long time on each picture I do – even the small ones.

I take a picture of my setup, i.e. the plant as I am looking at it whilst I paint. Therefore, once my subject dies I can replace it with something similar and in a similar angle to my original. I used about 5 pineapples for my painting, but I had to bear in mind what my original pineapple looked like. If you see the segments, some have what looks like a double base and some use a single base. Some are more at an angle than others, not forgetting the difference in colour change over the pineapple. When I bought new pineapples I had to bear this in mind and then change the direction of the new pineapples for each segment I painted so that it more or less fitted my original drawing.

But as well as taking a picture of the plant in situ as I plan to paint it, I also take quite a lot of detail photographs in case there is any specific detail that I need from the original subject. With a flower, this is more interesting as you see with the Gorse. I took a lot of pictures of the flowers, but also of the thorny leaves, stem and connections. I’m afraid that I don’t have pictures of the gorse or pineapple with light backgrounds, but I do of an orchid. In fact, it was in taking pictures of this orchid that I realised how difficult it was to take  good detail photos with a white background.

IMG_3049 IMG_3022 IMG_3042 IMG_3015


I am not a photographer and don’t intend to become expert in that area, so with my little automatic camera and simple reasoning skills, I realised that the camera automatically adjusts the white balance in relation to the lightness in the picture.  As you want to paint in good light, you will generally find that the background is very light and if you use a white sheet behind your subject, the light reflection is intensified. The subject, in a worst case scenario, can turn out as a silhouette .

IMG_1491IMG_1490 - Version 2


I took some photos of small courgettes from the garden last year, specifically to show the difference between taking pictures against a black or white background. Apart from the fact that the one against the black background isn’t in focus, I think that you can see what I mean.

So what background do I use when I paint from the subject? This is a different kettle of fish.

If I have a very pale or white flower, I obviously want to see what the edge looks like against a white background, so it is natural for me to paint from the subject in front of a white sheet of paper. For the pineapple I used both white and black. I wanted to see as much detail as I could going round the front of the pineapple – therefore left the black background, but when doing the light side and the side with the reflected light (shadow side), I needed to paint it as I saw it against the white background!

I hope that this very complicated subject is now a little bit clearer.