Foraging plants in the norwegian mountains – 22. Bilberry Pt. 2

My sketchbooks can be messy in comparison to many!

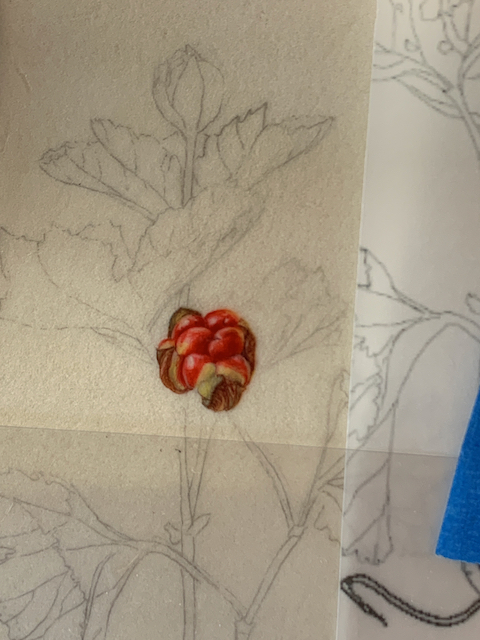
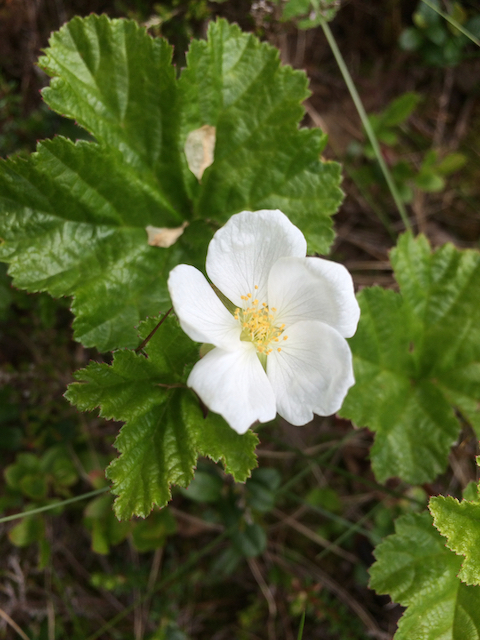
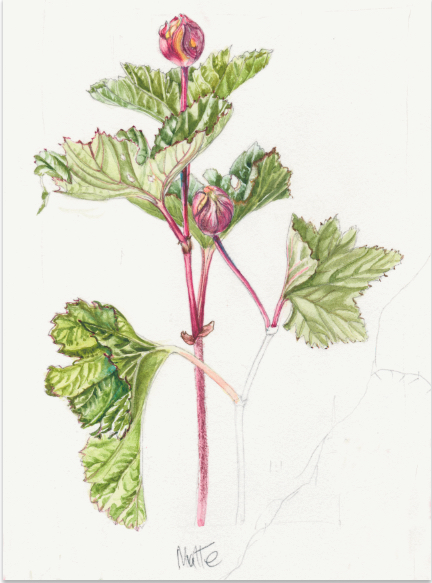
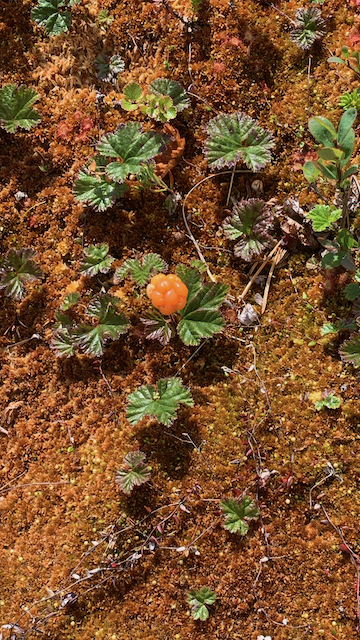
This is the main double page for my sketches done on the Bilberry plant. I try to keep as much information as possible together so that when I do my final work I don’t have to search too much in the sketchbook. I try to find a hole on the relevant page to add things, either more sketches or research I might have done. I often find that when I am researching on the internet, the gaps are usually left along the bottom edge of the page, so I frequently use this area to write any notes.

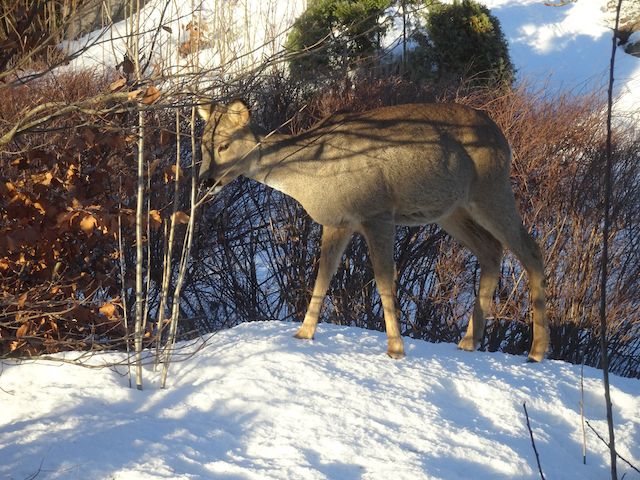
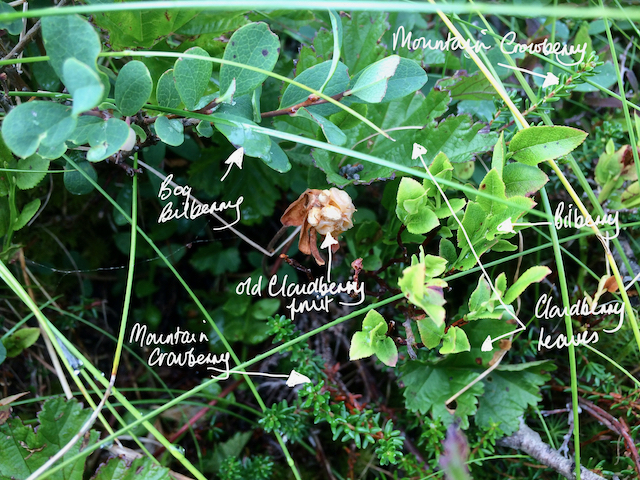
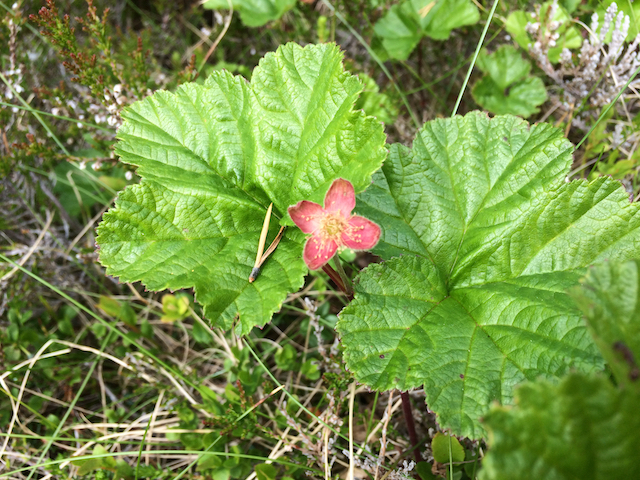
As I have already mentioned in the previous blog, there is a similarity in the fruit of the Bilberry and the Bog bilberry, but the stems are very different for starters. The Bilberry stems are very angular and last year’s branches remain green over winter and into the next season. The deer seem to like them and paw away the snow eating the shoots. The Bog bilberry stems are brown and woody; I talked more about this plant in the blogs published 14th and 18th May.

Serious times – the pandemic!
And additional serious times – moving!

By the middle of 2020 I felt that I had enough sketches for most of my final pictures  and had already decided to stop the extended period of ‘productive procrastination’. We were in the middle of the pandemic and for most people, the world had turned upside down. My daughter, living in Norway, felt we were too old to live on our own any longer and she was too far away should anything happen to us. 

The decision to move back to Norway was thought about and made quite quickly. I think we started talking about it mid June and sold our home with the large beautiful garden and the ‘shed’ – my studio, quite quickly.

The actual move came in August 2020. I had planned all my compositions before leaving the UK and when we arrived in Norway I was all set to start painting the final artwork. 

I won’t talk about all the problems moving during a pandemic caused – we were lucky to be completely healthy. But some of the benefits from moving back to the country I loved included being much nearer to the plants in my series. There were lots of others, but I leave that to your imagination.

Goodbye shed at the bottom of the garden.

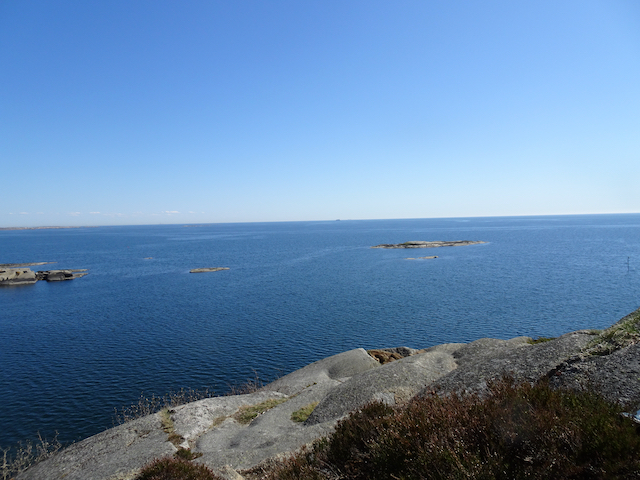
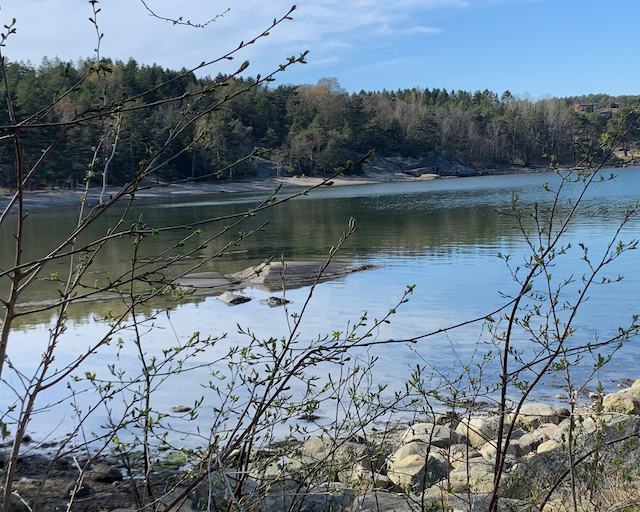
In between looking for a new home and sorting out all the official stuff and additional problems caused by Brexit, I started working towards doing the first picture. Of course, it had to be the Bilberry. This plant also grows at sea level and was easy to access now.

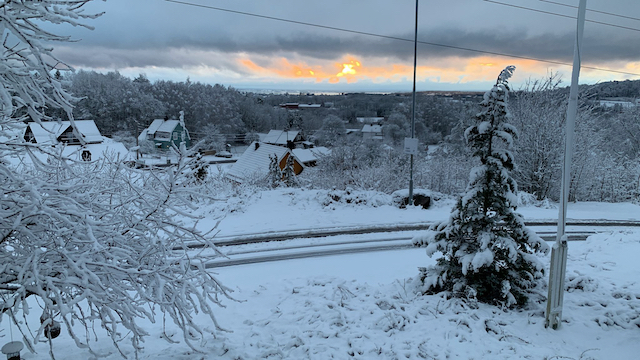
I only had to walk up into the woods behind my daughters house where we stayed until we finally moved. There were lots of native plants along the tracks, including loads of Bilberry. In our new home, to which we moved in January 2021 when the area was ensconced in snow, we eventually found it contained a lot of Bilberry plants. Heaven or what!?

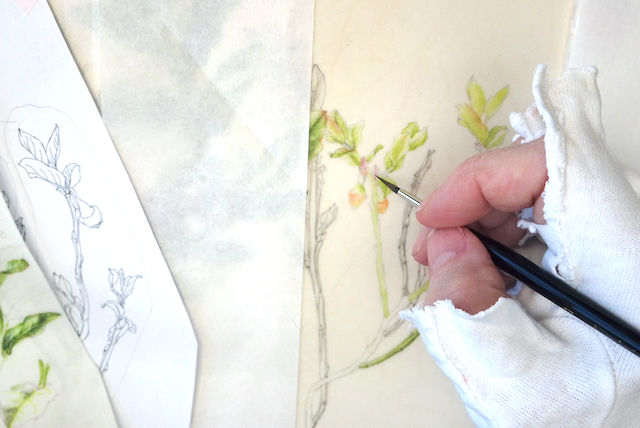
I started with a trial piece of Bilberry parts on vellum and began the final artwork in June 2021, finishing March 2022. 

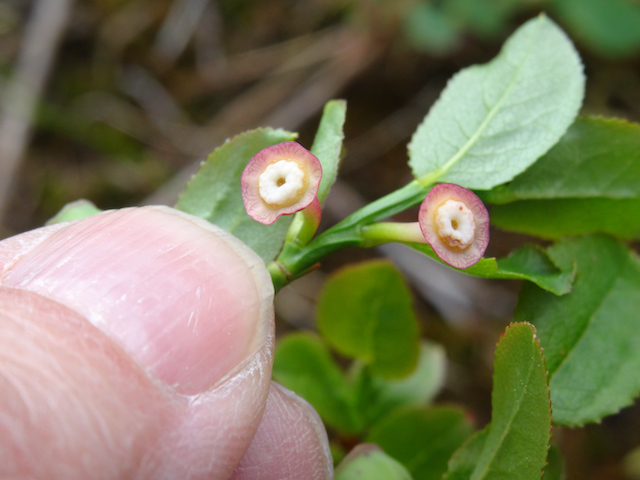
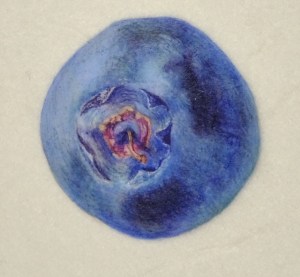
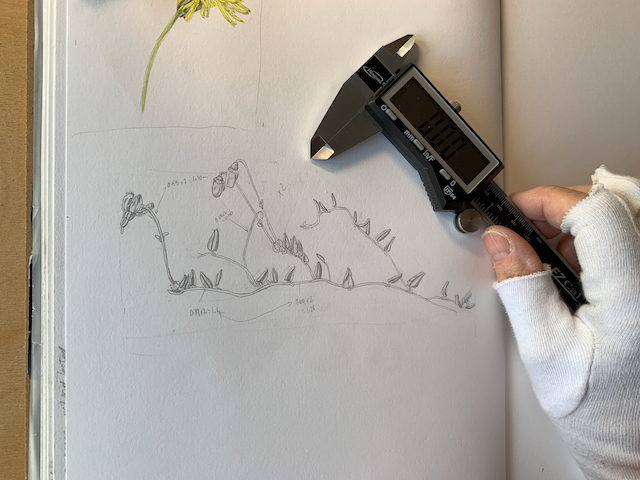
You can see my work station in our new home below. As is perhaps obvious, I continued to procrastinate a little longer as I just had to do more sketches. Working on the vellum off-cut was extremely useful as I also tried out various methods of introducing graphite. Getting the colours right for the bloom of the nearly black fruit whilst I had them was also important. Painting this on paper had been a completely different kettle of fish!

Hello new ‘shed’. This is one of the bedrooms on the top floor, but now my working area consists of two bedrooms turned into one large room – with a view!
Bilberry trial piece on vellum off-cut.

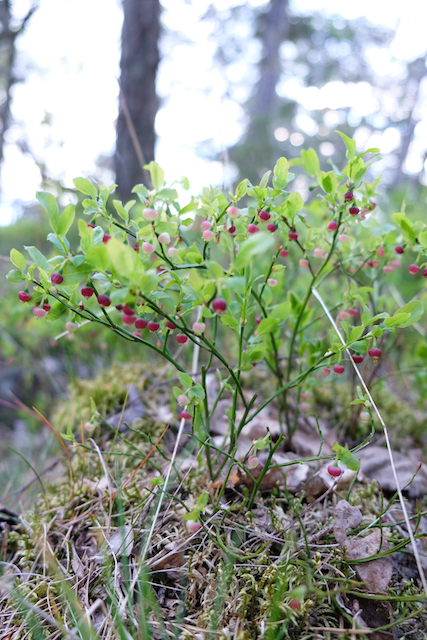
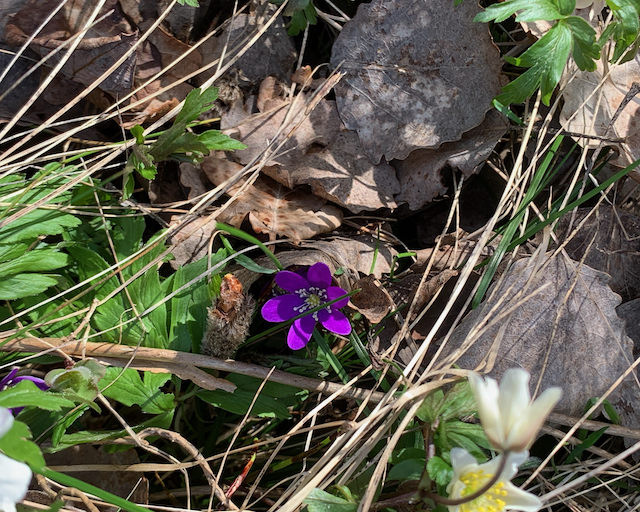
Making sure that I had samples from all the plants in the series at the right time of year was like putting together a puzzle. The flower sections had to be done in the spring and the fruit at various times over the autumn. Leaves also changed through the seasons. 

But basically, I knew that I had roughly six months of the year to paint the deciduous plants (Bilberry, Bog Bilberry, Cloudberry) and those I didn’t have access to under the snow such as the Cranberry. For the remaining plants I would be able to get leaves throughout the year as long as they weren’t hidden too deeply under the snow. It became a matter of planning and making sure I knew where relevant plants were over the winter. 

The native range of this Vaccinium myrtillus is Greenland, Temp. Eurasia, W. Canada to NW. & W. Central U.S.A. It is a subshrub and grows primarily in the temperate biome. Including both Norway and the UK.

Source: Kew Plants of the World Online
Working on the final artwork – graphite and wash section

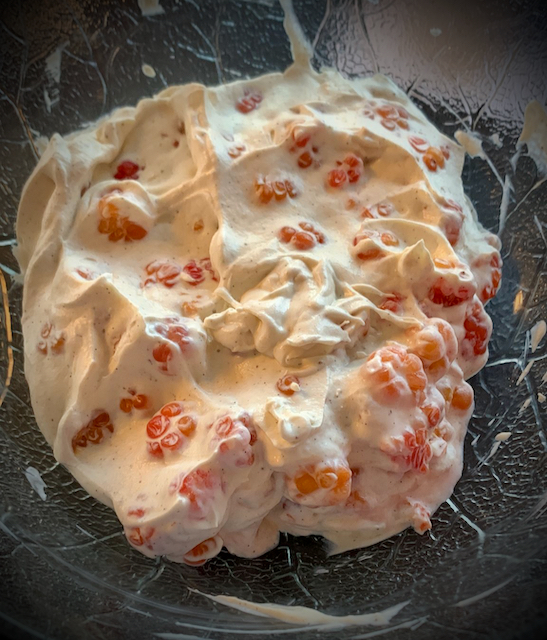
Mor Astrid’s (my lovely grandmother-in-law) Raw Bilberry squash

3 l Bilberries 

2.5 l water

75 gm Cream of Tartar

4.5 kg sugar

  1. Rinse through the berries to clean of soil. They don’t need to be thoroughly cleaned of leaves and small stalks.
  2. Bruise/crush berries in a plastic bucket and leave for 24 hrs.
  3. Mix the Cream of Tartar into the water and add to the berries. Stir thoroughly.
  4. Let the mixture stand for 24 hrs.
  5. Strain through a muslin.
  6. Add the sugar to the strained fluid.
  7. Stir thoroughly until the sugar has melted in.
  8. Pour into bottles.

The resulting squash can be mixed with water. It is DELICIOUS.

Keep out of easy reach of children or it will be finished off in no time!!

A suggestion from Polly o’Leary after the Bilberry part 1 blog. Thank you Polly.

In this part of Wales theyre called Whinberries. We used to make them into whinberry and apple pie, or whinberry jam. Or both. Depending on how many we found. No recipes, except the usual – plain shortcrust pastry, not too much sugar, because they’re lovely and tart.
Same with the jam. Never really thought about a recipe, just made it the usual way as they were such a treat.

This came from Jane Hogan following the Bilberry part 1 blog. Thank you Jane

We used to pick bilberries on the North Yorkshire moors when visiting my grandmother. She used to line a pie dish with pastry, pile in the bilberries with sugar and top with another layer of pastry. Served with custard or cream and eaten hot. There wasn’t usually any left to have cold! It used to take ages to pick the bilberries. (A quick look online suggests a pound of bilberries and four ounces of sugar)

On 4 June 2023 I will publish the first part of the Lingonberry blog.

Foraging plants in the norwegian mountains – 21. Bilberry Pt. 1

Bilberry painted on vellum

Vaccinium myrtillus -bilberry – blåbær

It is considered to be one of the healthiest berries and has one of the richest natural sources of anthocyanin giving the bilberry its blue/black colour. The bilberry, with a high antioxidant content, is believed to be responsible for the many health benefits, more so than many other berry fruits. In traditional European medicine, bilberry has been used for over a 1000 years.

Stained hands from picking

I remember seeing the effect of picking and eating bilberries in western Norway in June 1967. I was being shown how beautiful Norway is and we were on a hill overlooking the Stavanger fjord. A future nephew was picking and eating the berries as he walked along and he turned to me laughing. His face and hands were covered with the juice and his tongue was completely black. It didn’t take me long to realise my face was in a similar state! The blue colour is the anthocyanin that make these berries so good for you. No wonder Bilberry has also been used for dying clothes and food.

I have a lovely picture of my daughter’s grinning face and tongue almost black – but I don’t think she would forgive me if I posted it here!

English bilberry flowers.

Whilst living and hiking in the UK, we often found Bilberry plants in areas on the edge of heathland as it doesn’t seem to do too well in very open areas. The New Forest was a good source an hour away from where we lived at the time. 

Bilberries and Lingonberries packed and ready to go in the freezer in Norway

In Norway the plants are everywhere in the woods and also grows well in acidic soils on heaths and marshes.

It is easy to forage and stock up each year!

Picking bilberry and lignonberry

Our Norwegian garden is rocky and on the edge of woods. We have Bilberries growing in the garden and unlike my neighbours wouldn’t dream of getting rid of them to replace with other plants. I love being able to pick them  for a delicious dessert whenever I feel like it during the season. But even more exciting for this project, was being able to pick them and paint from them in the comfort of my own home. 

Roe deer baby nibbling the tips of the Beech in our garden.

As well as nourishment for us, the plants help to provide nourishment for the Roe Deer that visit us regularly during the winter months. I am happy to let them graze and nibble the tips of the branches as they were here long before people lived in this area. Luckily, they don’t seem to do it all the year round. This is a baby from a family of mother and three small ones that we have had the pleasure of seeing develop.

The Bilberry is not to be confused with Blueberries bought in the fruit department of your local shop. Those are Vaccinium corymbosum and a ‘high bush’’ variant. One can clearly see the difference as the High bush type have pale flesh showing they do not contain the same amount of anthocyanin – the good for you factor.

Researching Vaccinium myrtillus was just as exciting as researching all the plants in the series, even though I thought I knew it the best. I am really glad I did so before beginning to sketch as I could easily have been less observant in relation to the number of flowers and resultant fruit on a branch. Unless equally familiar with the Bilberry and Bog bilberry, these two can easily be confused. But in reality there are considerable differences. For starters, the Bilberry only has one flower in a leaf axil, whereas the Bog bilberry has two!

The next blog showing more of how I painted the Bilberry picture, is scheduled for 1 June 2023. We are rapidly approaching the RHS exhibition at the Saatchi Gallery opening to the public16 June.

Foraging plants in the norwegian mountains – 17. Bog bilberry Pt.1

Walking over a mountain top on the other side of the valley from our rented cottage.

The English common name for Vaccinium uliginosum is bog bilberry and one of the Norwegian names is skinntryte.

All the Vacciniums are heathers and in fact all in the series except for the Cloudberry, are in the Ericaceae family

I feel that both the Bog Bilberry and the Bilberry are plants I have always known, although I didn’t meet them until I was 20 years old on my first visit to Norway. Norwegians refer to Bilberries as Blueberries (direct translation is blue berry); Very confusing when these days it is very common to be able to buy Blueberries in the shops; which they actually call blueberries. But they are yet another Vaccinium species!!

Are you still with me!

The scrub on the edge of the marsh containing a mix of some of the species chosen for the series.

The Bilberry and Bog Bilberry cross over onto each others preferred growing patches, and the berries look similar at first glance, although it is fairly easy to pick over a full bucket from a foraging session if needed.

The Bog bilberry seems to grow better amongst the scrubby flora seen across a marshy landscape, but smaller examples also seem to survive on rocky mountain tops where there is a sparsity of nourishment; I’m not sure that they produce much fruit though.

It is easy to see the difference in the growing habit between a Bog bilberry and a Bilberry. For the former, the stem is woody whereas it is green and angular for the Bilberry.

The Bog bilberry fruit at 8-12mm is larger than the Bilberry and does not have the strong ‘good for you’ Anthocyanin content that Bilberries have. The flesh of the fruit is pale and the skin is blue with a bloom.

Size of a bog bilberry.

But don’t worry if you have the opportunity to pick both fruits where you are, both are just as edible.

I will be publishing the blog about the Bilberry on 25th May, so be sure to compare the fruit in these blogs and the full painting at the end of the series.

As well as the fruit appearing bluer than Bilberries, the leaves of the Bog bilberry have a slightly different shape and colour. Look at the picture above where you can see both bog bilberry and bilberry leaves side by side and further down where you also see a mix of different species.

Bog bilberry leaves are seen as blue-green, the shape is long and oval, they are slightly thicker than the bilberry with a very visible network of veins . New leaves tend to have a red edge which gradually changes to an overall bluey-green as the season progresses. But constant sun can keep the leaves fairly red towards the tip.

Autumn bog blueberry plants with fruit together with the changing colours of the dwarf birch.
The twin flowers at the end of a shoot.

The flower is typical for the heather family and can be recognised as such almost immediately. But whereas the Bilberry flower is solitary in its leaf axile, the Bog bilberry flowers appear in pairs. I have seen it described on several occasions as looking like a set of testicles!

Getting on to painting this species, I spent a while on researching and drawing sketches of this plant – which I will talk about in my next blog.

But I did at least a couple of trial pieces on vellum where the first one felt very much like a botch job – but I learnt from it. The second one was very useful and helped me to decide what to do – and of course what not to do.

I used this original set-up to to paint the final picture, but as I have described earlier, I can use a sketch and paint from different leaves and branches in front of me. This is exactly what I did for this section of the painting. The final painting is a little different with a focus on the berries rather than the flowers.

The continuing blog on the Bog bilberry is planned for 18th May – the day after the Norwegian national day!

Foraging plants in the norwegian mountains – 16. Small cranberry Pt.2

The marshy area where the small cranberry was found.

Planning the artwork

Digital callipers shown in an earlier blog. I use gloves so that fat from my hand is not transferred to the vellum, making it more difficult for pigment to adhere to the surface.

I began sketching the Vaccinium oxycoccus subsp. microcarpum (Small cranberry) in August 2018. The measurements of the tiny details were done using my trusty and accurate digital callipers.

Everything about the plant is tiny – except for the fruit, which is about the same size as a bilberry 5-8 mm.

When I first saw the plant and fruit meandering through the top of the moss, I couldn’t believe that such a slender plant could actually bear the weight of its fruit. As it happens, it doesn’t as everywhere I looked the fruit was either lying on top of the moss or supported by other structures in the marsh. The stems are so tender they are smaller than a blade of grass.

As with each of the other pictures I chose which sketches I would utilise from my sketchbook and arranged them with the help of the computer. I made continual adjustments to all of the plans so that visually they would appear as one exhibit. 

Can you see some of the parts sketched in the final artwork?

Digital plan of the composition. It is nearly the same as the final piece of work.

Each picture in the series was to hang ranged according to habitat from boggy and wet to sandy and dry.

The small cranberry was intended to start off the boggy end. But as the series has taken so long in the making, the criteria for exhibition has changed and I am allowed no more than six pictures.

Unfortunately, although completed, this picture will not be in the exhibit at the Saatchi gallery in June this year, but is still part of this series and will be treated as such in these blogs. I intend to show you all seven of the completed pictures after the judging process.

As with most of the pictures I did small trials on unmounted vellum to make sure I was choosing the right colours.

If you have read all the blogs about this series so far, you will have seen the finished trial piece in section 7, the last part of the history of the project.

The next photo is of that trial piece being worked on. I painted it twice natural size, the same as on the final artwork; you can see the flower sprig used as my model, lying on the vellum. Perhaps now you will have a better understanding of how tiny the species is.

Trial piece on vellum – in progress.

The colours I used: 

  • Quin Magenta PV122
  • Quin red PR209
  • Perylene violet PV29
  • Quin Gold PO49 (I don’t think single pigment can still be obtained)
  • Winsor Blue Green PB15.
  • Lemon Yellow PY175

Most of the trial pieces were painted at the cottage we rented, where I could easily source my subjects. I took over the dining table, with windows and light coming from the left. The family had to accept eating meals either outside or from a low coffee table. I was happy though!

My ‘studio table’ in the mountain cottage.

One of the biggest challenges with this plant was the root system. I remember a comment a judge once made about a botanical art piece; where the roots were likened to something having been put under the tap!

The Cranberry roots lie in very boggy wet areas and the hair-like system seems to fall away from the main stem lying along the upper layer of moss. The hair-like roots do plunge vertically down giving the appearance of having been under a tap! The Cloudberry coming from a similar environment and often intertwined, is not like this.

During the annual stay at the cottage in the mountains, in addition to my sketchbook and painting materials I had also cut a piece of Perspex to the exact size of my vellum block. I used this to try out samples of my subject to see how they would flow naturally across the picture.

Here you see a thread-like piece of small cranberry plant together with a couple of line drawings from my sketchbook; one drawing is the enlarged section in the trial piece and the other is actual size.

Compare this both with the compositional plan above and the final artwork. The more ways one can look at composition whilst planning a picture, the better will be the result.

I started sketching the small cranberry in August 2018, started work on the final artwork July 2021 and except for scalebars, finished in January 2022. 

The native range of this species is Subarctic to Temp. Northern Hemisphere. It is a subshrub and grows primarily in the temperate biome. This includes Great Britain and Norway.

Kew – Plants of the World Online

Fruit of the Forest liqueur

From Randi and Arne Christian Halseth, Skoppum (thank you)

  • 500 ml Bilberry
  • 50 ml Bog bilberry
  • 150 ml Mountain Crowberry
  • 100 ml Lignonberry
  • 700ml 60% spirit
  • 500 ml sugar.
  1. Put well-ripened berries into a suitable glass and sprinkle with sugar. The berries don’t need to be meticulously cleaned of leaves and tiny stalks. 
  2. Top up with the alcohol. Shake well then refrigerate. 
  3. Turn the jars as often as possible for 4 – 6 weeks.
  4. Strain and pour into bottles. 
  5. Age for a few weeks.
  6. Enjoy

I will start the detail about the Bog bilberry plant in my next blog 14 May 2023

Foraging plants in the norwegian mountains – 15. Small cranberry Pt.1

How rich in different flora a boggy marsh area can be!

When looking for an image suitable for highlighting the small cranberry I came across this one. You can see from the covering of sphagnum moss that this is a boggy area, and although few nutrients has a very rich flora. In fact this photo was taken in the area from which I found several of my chosen species to paint.

This picture was taken in July 2019. The new small cranberry flowers are out but I also found some shrivelled berries from the previous year. You can see clearly both the flowers and the tiny leaves all attached by a very thin stem meandering through the moss. The bog bilberry leaves have a lovely red edge at this time of year and the cloudberry plants show either the red sepals of the male plant or the immature fruit. In this instance the plant we see is obviously male. The mountain crowberry also does well in the same environment.

Vaccinium oxycoccus subsp. microcarpum 

Vaccinium oxycoccus subsp. microcarpum a tiny insignificant looking plant – but an even more exciting find.

In norwegian the plant is called Tranebær, which directly translated means Crane-berry – or as we call it in English – Cranberry. 

Firstly, why Crane-berry? This is a picture of the flower and perhaps you will get a better understanding of why. 

In the USA Cranberries are farmed in huge bogs and this is a significant industry. But the cranberry is slightly different to the one I have painted and is called Vaccinium oxycoccus subsp. macrocarpum. The difference between the two species is that subspecies microcarpum is very tiny and grows wild in the mountains, whereas the subspecies macrocarpum has a much larger berry and leaves. It is generally a larger plant altogether.

As a comparison I thought it might be interesting to show some of my photos from when I was in teaching botanical art in the USA in 2016. My husband and I visited a Cranberry farm south of Boston. It was intriguing, and I learnt quite a bit about the fruit and what happened to it. Note the size of the North American species of farmed berries at 9-14 mm against the small wild cranberry at 5-8 mm.

One of the questions regularly asked at the farm was why the fruit floats. The plants grow in bogs in America and when the fruit is ripe and the area flooded, the plants are shaken mechanically, releasing the loose fruit. The fruit each have four ovaries which are also air pockets, making the berries float to the surface of the water where they are collected. The small cranberry has a similar construction.

We weren’t actually looking for the wild small cranberry when we found it. We were in a very boggy area and tracing roots of a Cloudberrry plant when we found a small, obviously preceding year’s, fruit. We noticed that running through the Sphagnum moss was a tracery of fine hair-like stems with the tiniest of leaves. We started following this until we found a flower. I had no idea what it was so had to find out. 

In 2017 when we first found the plant, I had no idea how widespread it was or if it was a fruit that people foraged for. Since then I found out that very few seem to know of its existence and it is rarely picked to make jams etc – possibly because it is so small. Since then I also noticed I didn’t see either flower or fruit reliably every year. Sometimes we were unable to find any at all, although hunting in areas we had seen it previously. 2021 was just like this perhaps due to the lack of rain for the previous eight months.

In two of the pictures above you can see the previous year’s berry. It was these that alerted us to the plant and we went on to find the flowers.

It is a very boggy area but you can see some of the other plants in the series including bog bilberry flowers and leaves and the Mountain Crowberry. The other plants there in addition to the Sphagnum moss are heather, Andromeda polifolia or Bog rosemary, Vaccinium uliginosum (Bog bilberry), and Empetrum nigrum subsp. hermaphroditum (Mountain Crowberry). 

I painted the Bog Rosemary before I moved back to Norway and this is now in the Chelsea Physic Garden collection. The Bog bilberry and Crowberry are included in this series.

Although the wild small cranberry is not well known, it is certainly a plant with edible fruit and sometimes we found quite a few. It was amazing to see the marsh dotted with small bright red fruit, making it worthwhile to pick for a dessert or decorate a Norwegian cream cake. Uhmm!

The 2nd part about the Small cranberry will be posted 11th May 2023.

Foraging plants in the norwegian mountains – 14. Cloudberry part 2

Rubus chamaemorus – Cloudberry -Multe

Planning the artwork.

The piece of mounted vellum I had ready was 25 x 31 cm and I had seven mounted blocks all the same size. Finished, they needed to look like one series of pictures, but the Cloudberry was a plant so unlike the other ones. The element that linked was the habitat. As an example, I only found the Vaccinium microcarpum when following the rhizomes of the Cloudberry because the roots were completely intertwined.

Once I felt I had all the information I needed for each subject, I scanned the sections and manipulated them with editing software on my computer. I then compared them so that I knew each picture had similar information. The Cloudberry was the only one that was Dioecious. The series was about the fruit, so it was these that were prioritised, although I did include pictures of the flowers. 

Because each cloudberry plant was either male or female and had male or female flowers, I needed to show the differences. The male flower is generally slightly larger than the female and the centre of the flower is completely different. 

The male flower. Stamens in a ring at the base of the sepals. the centre is concave.
The female flower. A ring of false, white stamens around the centre with several pistils arising from the centre.

Both male and female flowers have the same number of sepals and petals, but the male flower has a ring of stamens round the base of the petals, with the very centre dipped and smooth. The female flower displays the gynoecium (female reproductive organs) with a ring of white, false stamens round the base of the petals. 

From a distance and once you know what to look for, it is easy to tell the difference between a lot of male or female plants.

This sketch page shows more cloudberry sketches (with additional ones from the small cranberry). You will find both the deep red male plant and the sketches of the small cranberry in their respective final pieces of artwork.

In 2018 when these sketches were done, the summer had been hot and tough for the plants. The Cloudberries ripened very early and by the time we arrived they were long gone. All that remained were some dry leaves and soggy berry remnants. But the sun had really worked well on leaves in the open, changing them from lush green to orange and fiery reds.

More sketches including the two berries we were given in 2018.

Once I had decided which elements were important for the picture, I did line drawings and moved them around digitally until I felt reasonably satisfied with the arrangement. Of course, in some instances adjustments were necessary and easily done on the computer. The line drawing composition above was almost the last one I made whilst well into the artwork.

In my final artwork I used several sketches as a basis. The sketches are used as a template whilst painting from an actual plant. Having the plant in front of me for the final artwork, enables me to paint its portrait as I see it, getting its botanical detail right at the same time as conveying texture and three-dimensionality. These are all things not easy to do from a photo.

I traced the whole composition to get the placing correct on my mounted vellum block, then each element was traced onto separate pieces of paper.

The vellum needed protection as I worked, and I used one of the old tracings that I had no use for, plus a clear acrylic sheet. All surfaces against the vellum are completely clean.  

Once the image is traced over to the vellum I lifted off much of the loose graphite from the transfer process. I generally start with a pale wash, allowing this to dry completely, then remove the remaining graphite. I continue painting with a dry technique being sure to lay this very lightly.  

Sketching was started in June 2014, the final artwork on vellum started July 2022 and finished in August 2022 except for the scalebars. 

Cloudberries are a circumpolar boreal plant, occurring naturally throughout the Northern Hemisphere including the UK and Norway, although there is little fruit produced in the UK.

Source: Kew – Plants of the World online

Cloudberry cream recipe

This recipe for ‘Mountain Gold’ is served on very special occasions including Christmas. It is served with cakes/biscuits often made in the period leading up to Christmas. Many of the recipes include almonds .

500ml whipping cream 
2 ss sugar
2 ts vanilla sugar (see recipe at end)
300ml Cloudberries

  1. Whip the cream together with the sugar until light and fluffy. 
  2. Stir in Cloudberries and sprinkle with vanilla sugar to taste.
  3. Place in the fridge until serving.

Serving:
Extra Cloudberries, Shortcake Biscuits

(from https://www.detsoteliv.no)

Vanilla sugar (vanilje sukker)

2 Vanilla beans

300gm sugar

  1. Split the vanilla beans in half lengthwise and scrape out the seeds. 
  2. Put the seeds into a blender with the sugar. 
  3. Blend with the blades until the sugar has become completely fine-grained and well mixed. 
  4. Put it into a glass with a lid and add to recipes as needed. 

The next blog post about the Small cranberry will be on the 7th May 2023.

Foraging plants in the norwegian mountains – 13. Cloudberry part 1

Rubus chamaemorus – Cloudberry -Multe

In Norway, Rubus chamaemorus is often referred to as ‘Mountain Gold’ because it doesn’t grow everywhere, it isn’t always easy to find and in some years is quite sparse. It is a delicacy and the one fruit that people would like to find and pick. If anyone finds an area which has a lot of ripe fruit, they normally keep it to themselves for fear of others picking the spot clean. Up until 2003 it was forbidden to pick the unripe fruit; this was changed as it was difficult to enforce. But in northern Norway where it has economic importance, the landowner can forbid picking.

Cloudberry  is considered to be an endangered species (red-listed), it has a long, up to 10 metres, creeping rhizomatous root system and enjoys life best in sphagnum moss bogs. The species is dioecious with each plant either male or female. Although one generally sees the Male plant flowering every year, sometimes the female flowers are very sparse. But in the two last years, there has been a lot, relatively speaking, and if you know where to look!

Unripe, a Cloudberry is red, but as it ripens it becomes gold and it has a very distinctive flavour. Cloudberry is in the same family as Blackberries, so you will know that each drupelet has pips; once accustomed to the taste, one doesn’t mind the pips.

My friends who lent me their cottage when I started the series, pointed out that there were lots of Cloudberry plants round the cottage, but they had never seen any fruit. I had a quick look at the flowers (the two photos) and was able to tell them that they only had male plants in the patch. But only a few metres away there were loads of female plants busily flowering and developing fruit. They were unaware that Cloudberries had distinct male and female plants, so I showed them how to tell the difference.

Obviously, the distinction between male and female plants was one of the things that I needed to show clearly in my final artwork. But in the meantime, I needed to do as many sketches as possible and of course take accurate measurements. In my pleasure at starting properly in 2017, I straightaway forgot the necessities and didn’t take measurements of my dissections. Unbeknown to me I wouldn’t be able to catch up for another five years in 2022! Luckily, this was the only plant where I seemed to chase my tail year after year.

The page of sketches, is a ‘Cloudberry’ poster showing a collection of drawings from my sketchbook.

I was particularly pleased with the plant sketch showing both leaves and very unripe fruit. But, apart from this initial sketch I didn’t see either unripe or ripe fruit until 2018 when I was given two fruit by passing pickers.

I did the trial on the vellum (at the top of the page) in 2021 when I at last found fruit to take back to the cottage. But I still needed flower measurements.

Cloudberry poster put together from several sketch pages.

The pictures below show the area in which we found quite a lot of fruit in 2022.

Actually we were very surprised because we hadn’t had any rain since early autumn 2021 and all the lakes and reservoirs were pretty low. As you can see to the right, the moss was quite burnt on the surface, although there was still water deeper down. The area in which we were able to walk without getting too wet was much larger than the previous year. Global warming!!

The second part about the Cloudberry will be posted 4th May 2023.

Foraging plants in the norwegian mountains – 12. My working practice

Bearded Iris in graphite
Accidents happen

In my last blog I showed you how careful I generally am to cover my artwork as I go along. But in this case I had finished the piece and had it propped up by my computer to scan and print it.

Unfortunately I ran out of pigment in the printer and needed to refill. Once this was done, I sat at the computer to check everything on the screen, looked up and saw this magenta splash across the artwork. I was shocked. How many hours had I used to no avail?

Be careful to keep artwork safe!

In my previous blog I wrote in general terms about the materials I use, including colour. My sketchbook contains notes of the colours used in the sketches, but these are only a guide for the final artwork.

The sketched colours are on white paper and the final artwork is on a warm vellum which can affect the overlaid transparent paint. If possible I try to match up the colours I used in the sketches if I don’t have enough live material to work from. For example, the leaves often change colour over a growing season and if I’m unlucky I might be painting young leaves in the autumn. This happened with the Bilberry leaves.

I try to limit the number of pigments I use in a picture but still have favourites that appear in most paintings. 

Watercolours used to paint the Small cranberry picture.

As an example, I used these colours in the small cranberry picture:

  • Quinacridone Magenta PV122
  • Quinacridone red PR209
  • Perylene violet PV29
  • Quinacridone Gold PO49 (I don’t think single pigment can still be obtained)
  • Winsor Blue Green PB15.

The last three are a must for me, but I might also use a brighter yellow or warmer blue. On this occasion I added a lemon yellow to lift the green in the leaves.

Introduction of graphite

Getting graphite on vellum is normally considered a negative. Graphite does not seem to work in the same way on vellum as it does on paper because of course it is slightly greasy and tends to slide around on the surface. 

I wanted sections of graphite in my pictures to try and give some relief to the colour. The compositions are quite small with a lot of detail. To separate details from each other I wanted to allow some of the picture to fall back and behind sections of colour to create focus.  I therefore decided that elements conveying habit would be either in graphite, or in graphite with a slight colour wash. But how was I going to get the graphite to go on reasonably evenly and to sit? 

I checked out how other botanical artists had handled using graphite on vellum, then tried out various ways of developing a technique on scraps of vellum.

Bilberry trials on vellum with colour and graphite

Luckily, as with graphite on paper, the use of water on top helps it to adhere to the surface. I also learnt that using a little mucky pigment/graphite water and allowing it to dry would also help to control use of the graphite on top. But, some of my details were much too tiny to make full use of this technique.

The way forward was to use a combination of graphite pencil for the finest detail and soluble-graphite. I generally used a graphite pencil first – possibly a 2H, then with a very small brush I either went over it with pure water or used the water mixable graphite. I found that the graphite worked much better where I had used a light watercolour wash first. 

Process for each picture

Once each composition was complete and transferred to the vellum mounted block, I started with the watercolour sections.

Except for the Cloudberry, the main branch which catches the eye, was enlarged to twice its normal size. I normally started with this so that I could determine how much other elements of the picture needed to come forward or fall back. After this I completed the flower and fruit sections.

Once the watercolour-only sections were complete, I worked on the graphite sections. As mentioned before, the use of graphite means that these sections fall a little into the background and give relief to the eye of the beholder. But the detail in those sections needs to be just as clear as for the remainder of the picture. Each part of the picture needs to give new information otherwise there is no reason to include it. In this case, the graphite sections were done life-size.

Last of all came the scale-bars. To work out the best placements for these, I scanned each picture onto my computer and digitally placed and sized the scale-bars, comparing them from picture to picture. This happened in January 2023 when preparing for professional scanning of the artwork.

Actually drawing the scalebars onto the final artwork caused most headaches. Applying the graphite in even lines on the vellum was more difficult than doing the line drawings, but I got there!

Now I will write about each species individually – starting with the next blog 30 April 2023.

Life-size small cranberry flower and stems. Water-soluble graphite being applied with Rafael 8408 size 1 brush over faint graphite pencil lines.

Spring was here!

Blåveis - Liverwort - Hepatica nobilis. Watercolour on hot pressed paper.
Three weeks ago – 29 March 2023
15 degrees, hike break – 22 April 2023
5 degrees, 24 April 2023

Last week it was getting warmer and warmer, the snow vanished completely the week before and buds started showing on the trees. We noticed that the weather forecast was not going to be quite so good this week and it also threatened slush tomorrow!

Chewed Bramley tree. The top buds are fine!

Last week I raked the rubbish off the front garden from the snow ploughs and saw that quite quickly the grass turned from brown to green. Flowers started poking their heads up from the grass and I am keeping my fingers crossed about the survival of some things we planted last year.

The deer made quite a feast of a few plants and last year was obviously a very good breeding year as we have had steady traffic from foraging young and old . The Bramley apple tree I managed to find and plant last year has had a thrashing, as have one or two of the fruit bushes. They love the green stems of the Bilberry and they are chopped back quite well! But they also love the tips of the tulips that they polish off in one foul swoop.

The badger is a regular visitor again and cleans up under our bird feeders.

Badger tracks to my daughter’s storage box.

My daughter has a storage box on her terrace, where she keeps the peanuts for her birds. It was very obvious when the badger woke up from hibernation as the track to and into the storage box started again. He/she gets into the box to eat in comfort!

I think everyone understands that I love this beautiful country, but the sun doesn’t shine all the time and I felt I owed some less than glamorous pictures😏.

But now, a few beautiful pictures from our 11k walk on Saturday, on a peninsula not too far away. We walked along tracks in the woods, climbed over rocks, sank into sand along the sea edge and climbed up to a viewpoint where apparently a lot of ships came unstuck.

My favourite flower is Hepatica nobilis, which has apparently changed Genus and is now called Anemone hepatica. That makes it easier to describe when comparing it to Anemone nemerosa.

The blue flower in Norwegian is called Blåveis (Liverwort in English) and the white one is called Hvitveis (Wood anemone in English). They often grow in similar areas although the Blåveis prefers chalk areas and deciduous woods. It is found in Eastern Norway where it is more likely to get a covering of snow during the winter. The Hvitveis is found in woody areas almost everywhere in Northern Europe, although not further north than Lofoten in Norway.

The first sign of the Liverwort is when the furry bud peeks up through the leaf litter. The liver-shaped leaves follow, although leaves remain on the plant throughout the winter. Note the different blues with the white stamens like star bursts.

The Wood Anemone leaves appear first with the flower bud on the stem. The backs of the petals can often be pinkish and the stamens are yellow.

We had an absolutely lovely walk and got back home tired and exhausted, but happy.

Now it’s pouring with rain; at least it isn’t snow, but I do have my woollies back on again. My picture for the RHS exhibition are packed and ready to go and the tape from the removals company came in very useful.

Blåveis - Liverwort - Hepatica nobilis. Watercolour on hot pressed paper.
Blåveis – Liverwort – Hepatica nobilis. Watercolour on hot pressed paper