Since moving back to Norway there have been two bumper years for Cloudberry fruit and this is why we have so much in the freezer now.
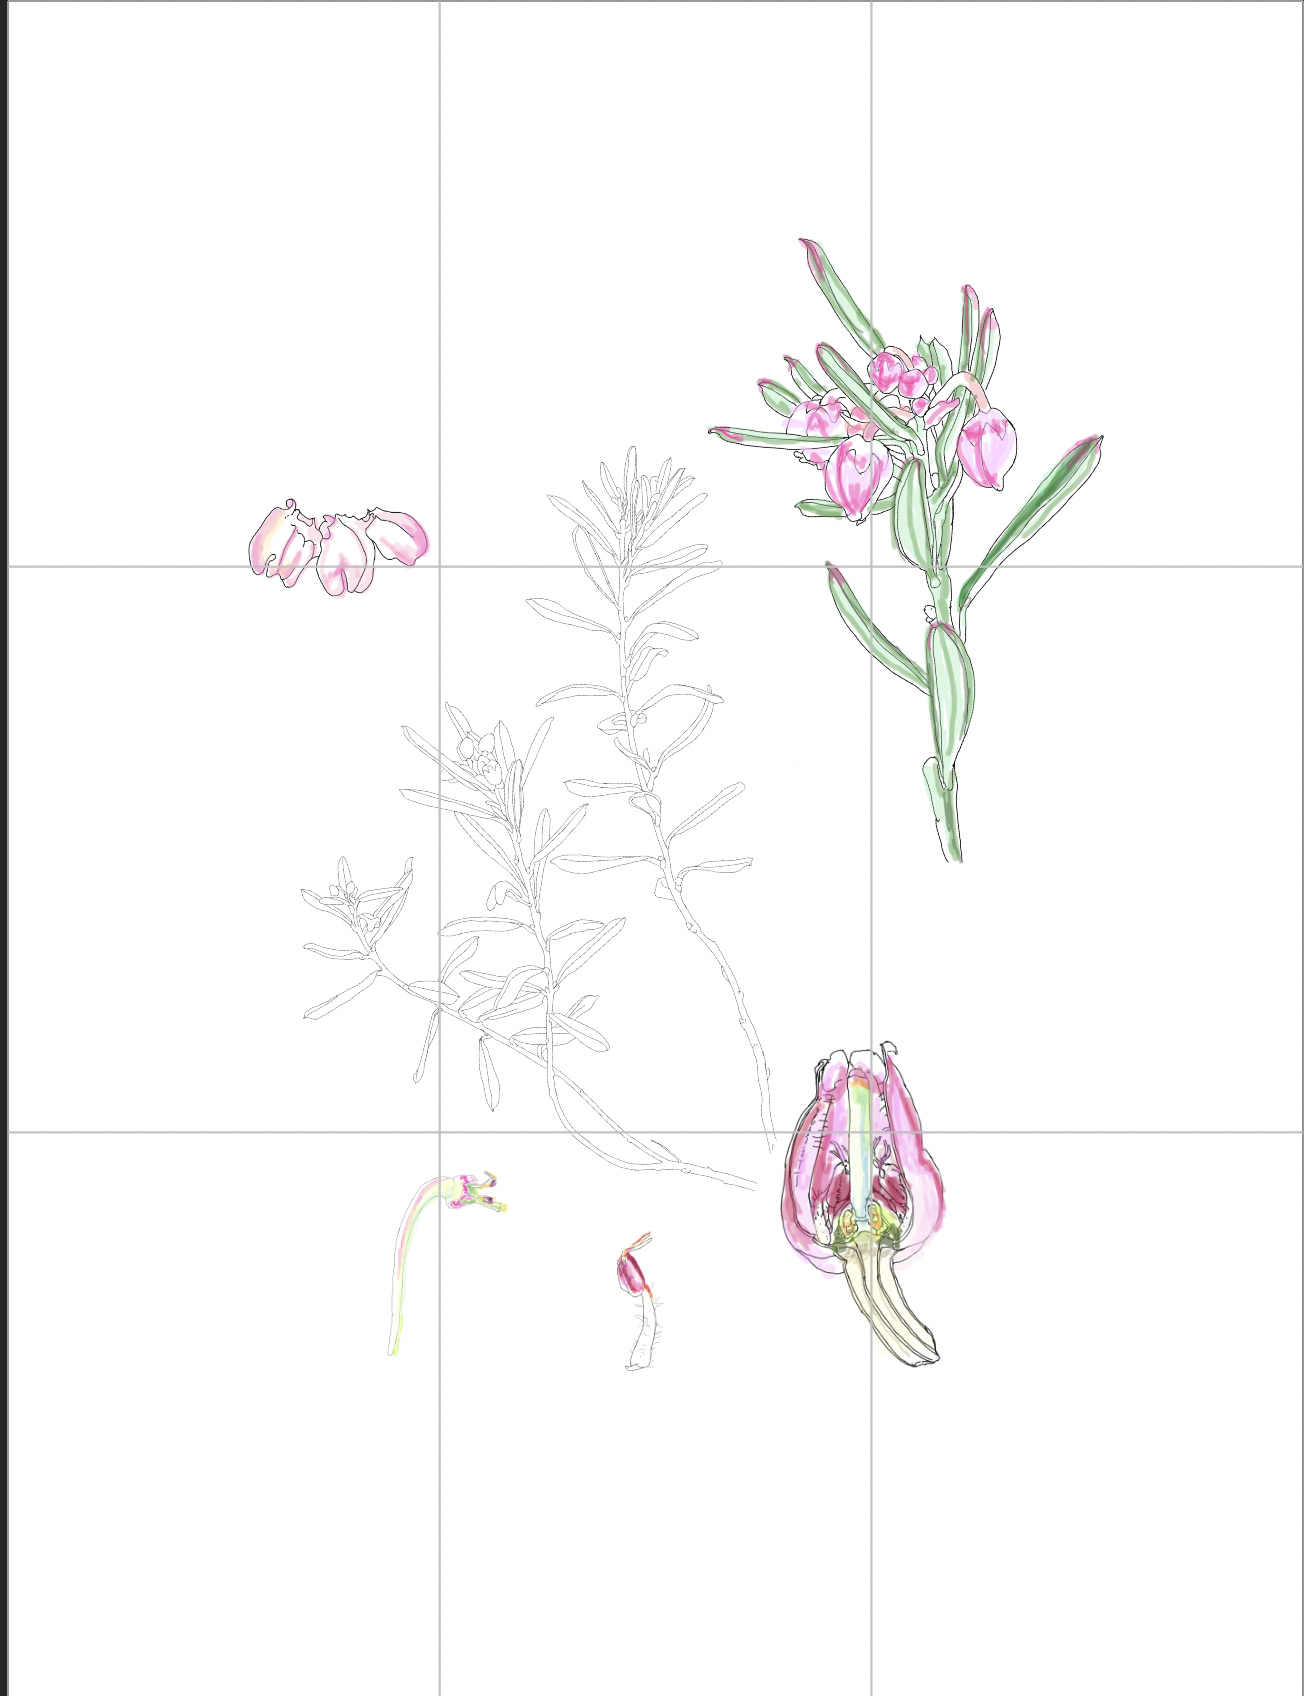
But back to my sketches that were incomplete right up until last summer (2022). This plant in particular is not easy to find if you don’t know exactly where to look, and even then you might miss the right period of time.
We took a couple of long day trips into the mountains to look, and we eventually found what was missing. As well as a lot of driving, I extended the workday when I got back home. The flowers don’t last long and whilst I had them, I needed to dissect and sketch with measurements before going to bed.
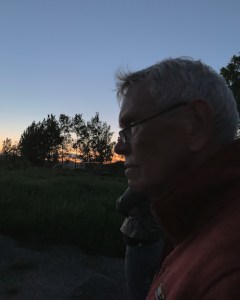
The typical demands to a botanical artist. But luckily during the summer months we have a lot of daylight hours in southern Norway – in fact around mid-summer the sky doesn’t really go dark. Birdwatching at midnight is different to say the least! The picture to the left is Robin birdwatching at 5 mins past midnight on the 12 June – still over a week to mid-summer!
The lesson learned? Make sure when sketching that you have the where-with-all to measure various aspects of your plant and to make accurate colour swatches.
Equipment for sketching outside
As you will see from the pictures at the top, sketching on location can have various problems, from ants still defending their old anthill, a very hard bottom rest and a helpful cat.
The anthills in the Norwegian forests can be huge, but so too can the ants. They have a large territory to look after and a lot of old wood to turn into something future generations of trees and ants can live off. But they do have a painful bite! One often finds several of the plant species I was considering, growing on them. One often finds lingonberry, bilberry and mountain crowberry, well established on them. It also suggests what some of the ants transport to their home.

When I am out sketching in nature I minimise the amount of equipment I have with me. I try to keep everything in the same sketchbook and for watercolour use a Stillman & Birn, Zeta series. It has stood up well to the battering it has had and takes the watercolour washes well.
Normally I use a bum-bag when walking not too far and it will contain this kit:
Of course I go nowhere in the mountains without my mobile phone, but these days they are much more than a phone or safety net. The Victsing 3-in-1 mobile phone camera lens was introduced to me many years ago by Sarah Morrish and I use this to get the details not normally seen very well. In particular it enabled me to get a picture and draw the growing tip with flowers of the Empetrum nigrum subsp. hermaphroditum (mountain crowberry) . I keep a small piece of mm paper with it to measure within the photos.
My palette is an old one with the original student colours removed and replaced with artist quality colours. I use transparent single pigment colours and normally have a couple of yellows and Quin Gold, Permanent Rose, Perylene Violet, Purple, A cold and warm blue and this time a single pigment green.
The pencils preferred are a 3B and HB as they are easy to lift if necessary, plus a single black fine liner pen. I only need to sharpen one of the pencils so have a sharpener to fit that. Otherwise travel brushes, ruler and erasers, magnifying glass, small water holder and kitchen towel.


If I take specimens with me, then I have a small plastic bag ready and can add some of my painting water. Sketching back in the cottage or at home means that I have all my equipment available.
I nearly forgot an important addition to the list above; Insect repellant because of the ticks, and sun screen, particularly here in Norway where the air is so clear.
The picture to the left is Robin’s leg last summer after a tick bite! We have a lot of dear and ticks, but doctors are very aware of the dangers and are quick to prescribe treatment.
A serious start on the series in 2017

By 2017 I still hadn’t decided which plants I was going to paint and this first year we borrowed a cottage from one of my oldest friends in Norway. The cottage was at about 850m over sea level.
Around the cottage we found Rubus chamaemorus (cloudberry), bilberry (Vaccinium myrtillus), cowberry (Vaccinium vitis-idaea), bog bilberry (Vaccinium uliginosum)and mountain crowberry (Empetrum nigrum subsp. hermaphroditum). This was a pretty good start.
Notice that three of them were Vacciniums – from the heather family. In fact the Blueberries you buy in the shops are yet another species (Vaccinium corymbosum) but they are farmed and not included in my choice.
Importantly I hadn’t found a bearberry (Arcostaphylos uva-ursi) which was partly the reason for choosing to do this series.
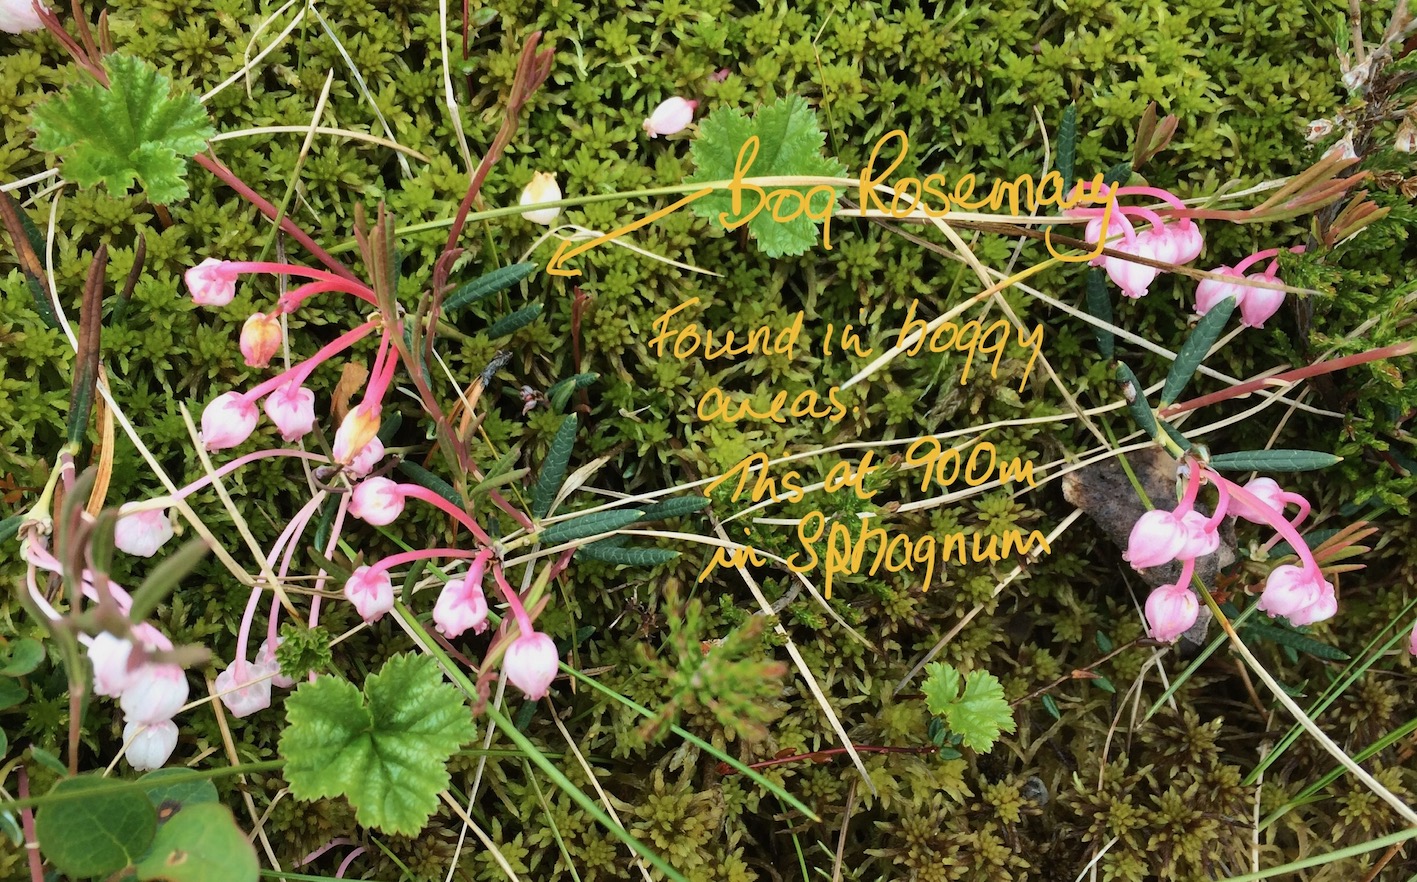
But there were loads of other lovely flowers such as Heath spotted orchids, geraniums and various insectivorous plants such as the Common butterwort. There was also plenty of Andromeda polifolia (bog rosemary) in the moss and amongst the new Cloudberry leaves. When seeing it growing at the Chelsea Physic Garden in London, I realised it was an opportunity to paint the species and the resulting picture resides in the Chelsea Physic Garden Florilegium collection.

This continues on 6 April 2023