Benton Iris Farewell 
Dying Rosa rugosa 
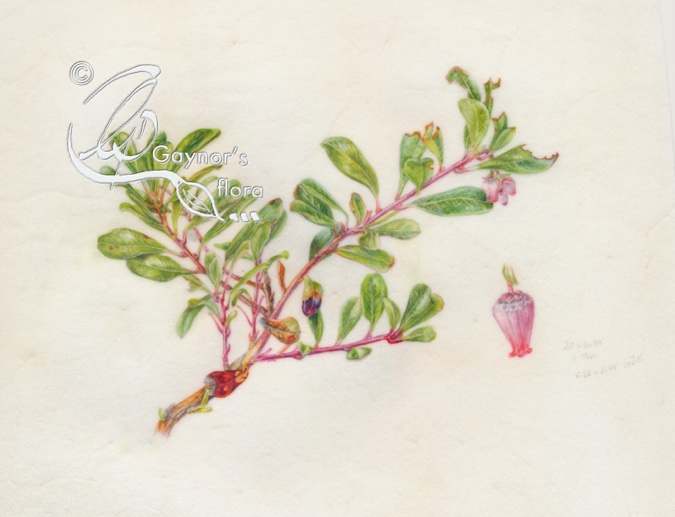
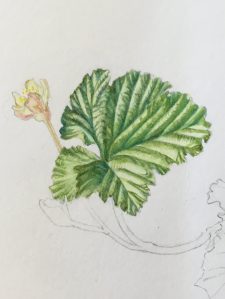
Rhododendron Impeditum
Composition
Do these three pictures have good compositions? It is not easy for you to judge from these as composition is the area within the mount edge – the image and background.
- Benton Iris ‘Farewell’ is Watercolour and graphite. The painting is part of the Cedric Morris Florilegium.
- Dying Rosa rugosa is in Watercolour. It was one of the first paintings I did after returning to Norway. The sprig was sticking up above the snow, so it shrivelled quite fast.
- Rhododendron impeditum is also watercolour and graphite. This picture is part of the Chelsea Physic Garden Florilegium.
Composition in botanical art is not necessarily very straightforward. As botanical art is ‘art’ it should have a main focal point that draws you into the picture. Once your eye is drawn into the picture, something needs to lead it around within that picture and prevent it from being lead off elsewhere.
On top of this, botanical art must be botanically correct.

Combining the art and botany for each picture is hugely difficult particularly when you have different sections telling a story about a plant. Having a series of plants in separate pictures that elaborate the story compounds the problem.
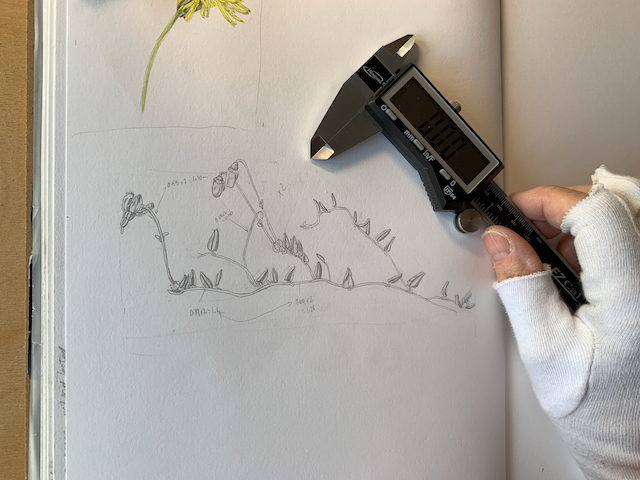
To try and reduce the problem a little I started to arrange the pictures digitally. I scanned some of my sketches and moved them around within a 31 x 25cm area. It gave me something to think about when deciding what to include in each picture and how many more sketches I would need to get all the information I needed.
Scanning and arranging digitally gave me the opportunity to do something similar with my other species and the ability to compare them against each other. This composition looks nothing like the final one, but I kept rearranging until I was satisfied.


I worked hard to compose my set of pictures so that they looked a series. This can be quite difficult when some are from different families
- Rubus chamaemorus – Rosaceae
- Vaccinium oxycoccus Subsp. microcarpum – Ericaceae
- Vaccinium uliginosum – Ericaceae
- Empetrum nigrum subsp. hermaphroditum- Ericaceae
- Vaccinium myrtillus – Ericaceae
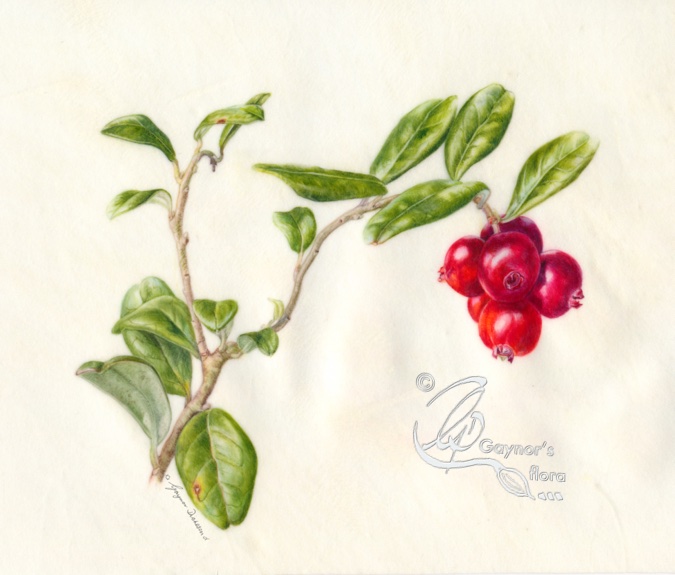
- Vaccinium vitis-idaea – Ericaceae
- Arctostaphylos uva-ursi – Ericaceae
The first word in each species is the Genus name from which the plant is derived. Four are Vacciniums from the same Genus. Six of the plants are from the Ericaceae (heather) Family and you can see this by the similarity of the flowers. One is from the Rosaceae(rose) family, and the stipules on the leaves (tags at the base of the leaves) is a clear indication of this.
Deciding the enlargement was relatively easy with the plants from the Ericaceae Family where the fruit is comparable. But as everything was larger on the Cloudberry picture, only the scale bars can give the size.
My aim with all the pictures was to let people see and understand the incredible flora and edible fruit available in the mountains. Many look at plants and think them pretty, or know where to pick certain fruits, but not so many study the plant and understand how intriguing it really is. This is an opportunity.
What to include in each composition.
I went through my sketchbook and made sure that I had enough information about each plant to fit on my vellum, mounted on blocks by William Cowley’s. I didn’t want to overcrowd each picture.
The focus was the plant and its fruit, but one can’t do this without highlighting its flowers. I decided to introduce a picture of the flowers and fruit but restrict dissections to the fruit only. That is until I got to the cloudberry which was going to be the most difficult to integrate into the series. But it isn’t called ‘Mountain Gold’ for nothing.
In the end, all but the cloudberry picture included a branch enlarged and branches actual size to indicate habit. Each had an enlarged flower, plus fruit with both longitudinal (LS) and transverse sections (TS). These are the finished longitudinal sections from each fruit; the largest being the Cloudberry.

Cloudberry/Multe 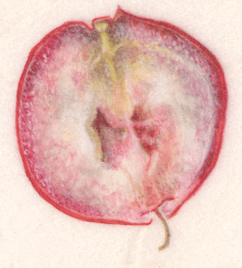
Small Cranberry/Små tranebær 
Bog bilberry/Skinntryte 
Mountain crowberry/Krekling 
Bilberry/Blåbær 
Lingonberry/Tyttebær 
Bearberry/Melbær
In the next blog I will be talking about my transfer process. This comes 23 April 2023.
Only Eight weeks until the RHS Exhibition at the Saatchi Gallery in London;
https://www.saatchigallery.com/exhibition/rhs_botanical_art___photography_show_2023